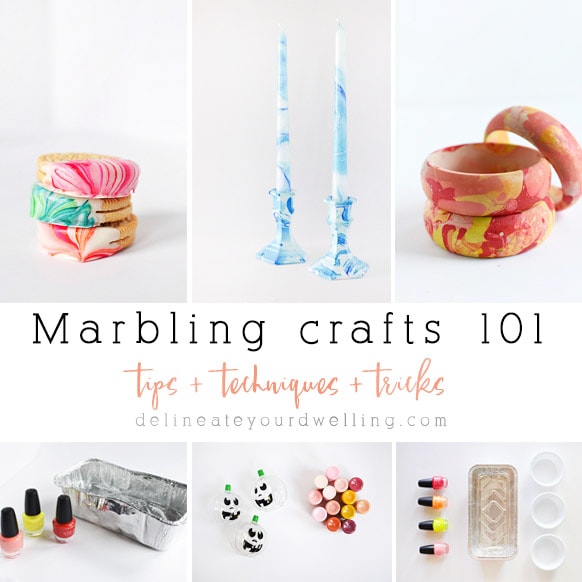
Marbling 101
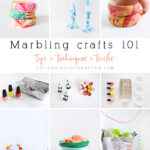
A complete 101 guide to Marbling craft techniques! Includes what are marbled crafts, what marbling DIY supplies you need, how to marble and what are the best items to marble!
This post contains affiliate links. See my full disclosure.
This post has been updated since it’s original publish date of May 2018.
What are Marbled Crafts?
Marbling has become such a popular crafting technique in the last few years and I fully support it! I have done over 20 different marbled projects using all different types of materials and supplies. There are so many different types of marbled craft techniques from using nail polish, shaving cream, clay, pour over paints and there is even marbling food – so there is really something for everyone! Today I will be sharing my Marbling 101 Tips, Marbling Techniques and Tricks.
I tried my first marble craft project in 2014 (a Marbled Room Diffuser) and over the years, I have learned a few new things. I figured out many new techniques that help make the marble crafting process go so much easier. PLUS, did you know I wrote a book that is completely dedicated to marbling crafts — Make your Own MARBLED Creations! Be sure to check it out.
You might also be interested reading about the process of writing a craft BOOK !
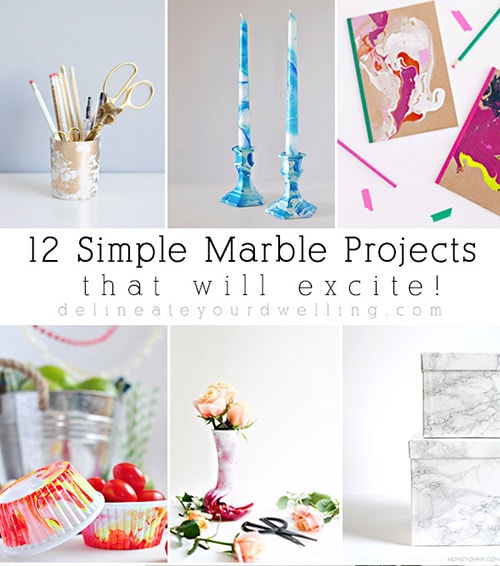
I also shared 12 of my favorite marbled projects that will excite from across the internet in a fun roundup post. That post has been very popular on my blog and also on Pinterest!
Ok, so by now you already know you like the look of marbled projects and crafts, but you probably have a few questions before diving in head first.
What is the history behind Marbling?
Marbling crafts is a creative technique that has really become a fun trend in recent years. The art of marbling and using marbled decorative objects has a long history dating back to Japan, as early as the 12th century.
The very first forms of marbling were practiced in a technique called ink floating. Ink floating is adding swirled patterns of ink or paint to the surface of water and then dipping paper or various objects into the water.
However, in the last few years DIY craft marbling has become a creative technique that anyone with any skill level can try and succeed at. Plus, I love that there is immediate gratification for marbling projects. Without much effort at all, you can almost always come up with a GORGEOUS end product!
What supplies do I need to make a Marbled project?
There are quite a few different marbling techniques available now a days. Based on which marble technique you choose to try, the supplies and materials may hugely differ. I personally have done nail polish marbling, shaving cream marbling, acrylic paint marbling and even food safe marbling.
Supplies needed will vary, but are as follows :
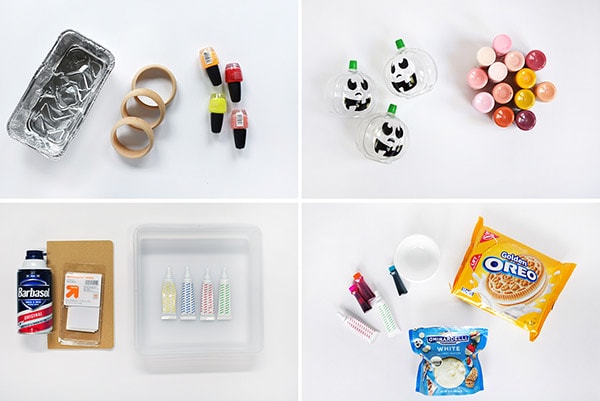
– Plastic Container or Aluminum / Metal tray
– Wooden Skewer for stirring
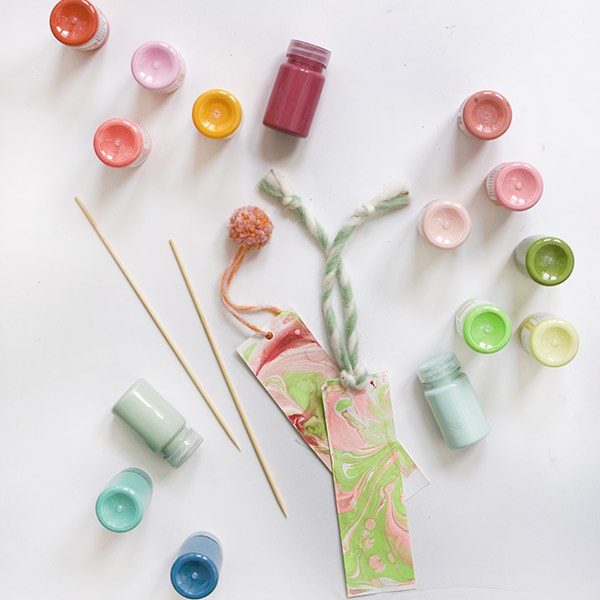
– Marbling Medium : Acrylic Paint, Nail Polish, Food Coloring
– Water or Shaving Cream
– Item to marble
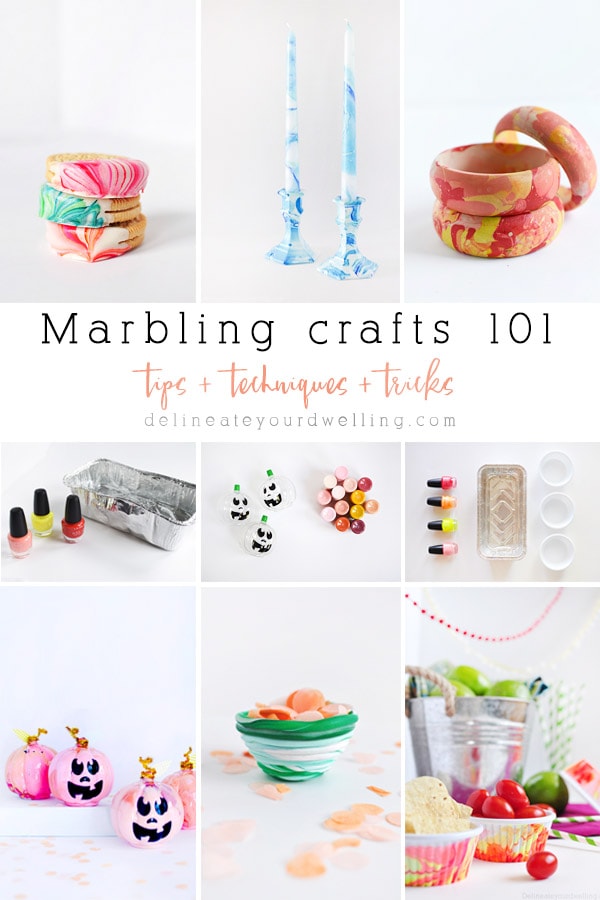
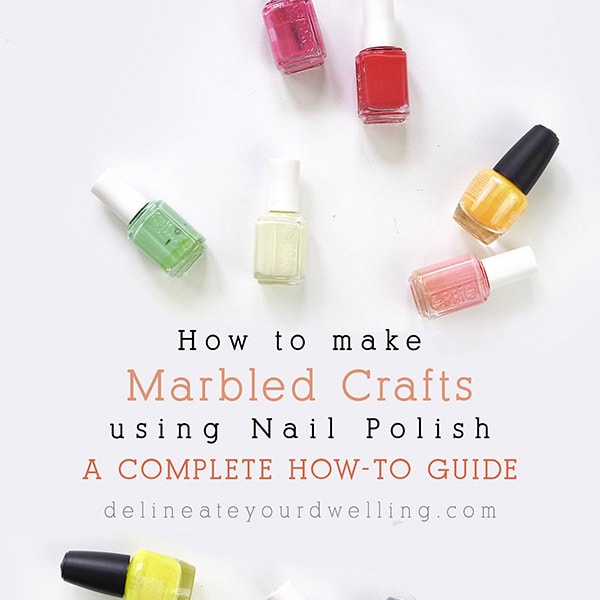
Marble using Nail Polish
You can make creative projects by marbling with nail polish. I think nail polish marbling is one of the most common marbling craft methods and definitely my favorite.
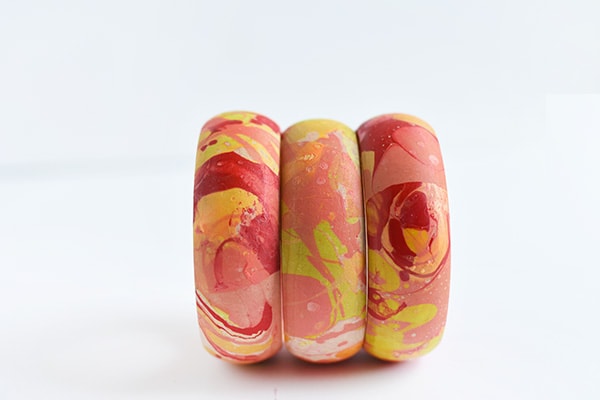
When doing marbled projects with nail polish the materials you will need are fairly simple. Grab a few of your favorite nail polish colors, a disposable tin or plastic tray, wooden skewers to mix the paints, water and your item to marble. I marbled these gorgeous wooden bangles using nail polish.
Although marbling with nail polish is smelly (be sure to work in a highly ventilated area), the supplies are very inexpensive and the end product looks absolutely stunning. I also like that the dry time for nail polish marbled projects is pretty fast compared to using acrylic or pour over paints.
How to marble using Nail Polish
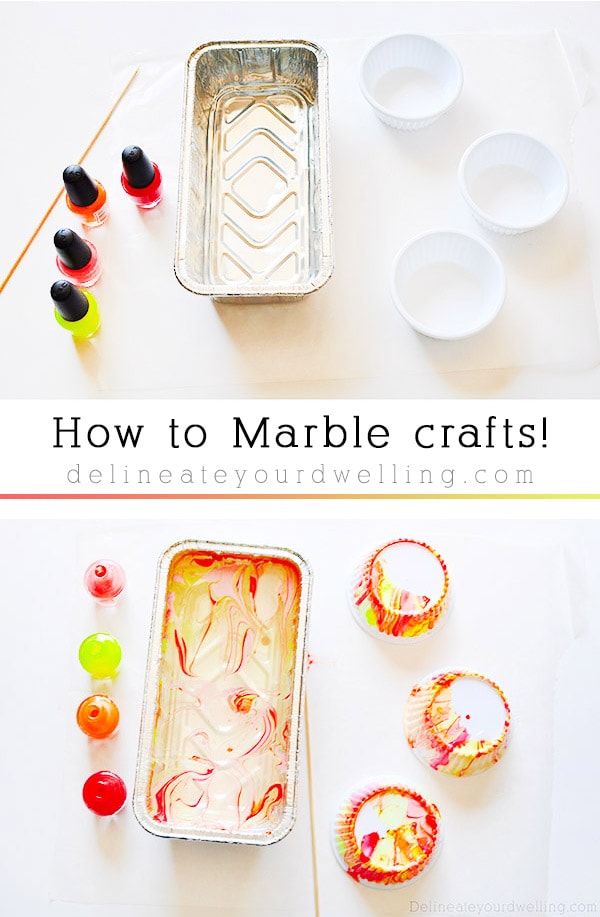
Marbling with nail polish is a quick and simple process. Be sure to lay out a protective sheet to keep your work surface safe. Next, fill a container with water and decide on your nail polish colors.
Once you have selected your colors, I always open all of the polish lids before I start. The nail polish can dry quickly, so after many project fails, I have learned this is an important step. After your lids are all open (prepare for the strong smell, always do this in a well ventilated area), pour the polish into your water. You can make lines, drops or whatever pattern you would like.
Using a toothpick or wooden skewer, quickly and lightly mix the paint and then immediately dip your object into the water/paint.
Set aside your project to fully dry and put the lids back on all your polishes.
Marble using Shaving Cream
You can also marble using shaving cream. The main supply for this technique is good old fashioned shaving cream. Be sure to look for the foam shaving cream, not a gel shaving cream as the gel will not work.
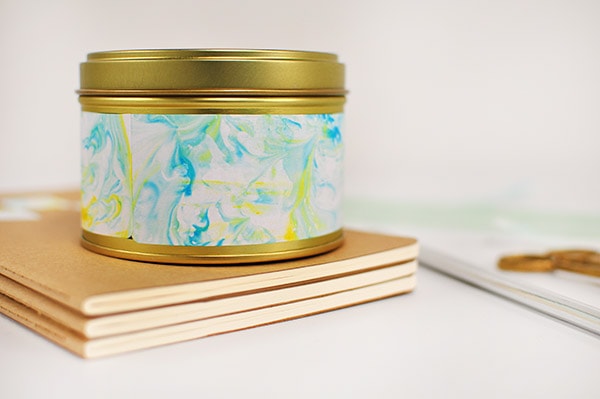
For shaving cream marbled projects, you also will need food coloring (I use simple liquid drops), a wooden skewer, a disposable tin or plastic try and your item to marble. I DIY marbled these canisters using shaving cream and many people loving dying Easter Eggs with shaving cream.
How to marble using Shaving Cream
Marbling with shaving cream is a FUN project and so easy even kids can have fun with this one. There is something about spraying an entire container with big fluffy white shaving cream that gets anyone in the mood to be creative.
To start this project, fill a large container or sheet pan with shaving cream. You want to make sure to have shaving cream cover all parts of your intended marbled object. Next, add in a few drops of food coloring. Always start with less because you can more if needed. Too much food coloring and it will get muddy looking.
Using a toothpick or wooden skewer, slightly mix your food coloring and shaving cream. Again, a lighter mix is best here. Take your item and dip it into the shaving cream, then slightly press until it’s submerged.
Remove your item and if it has a flat surface, lay it down and wipe the shaving cream off with an old credit card and even a paper towel. Be sure to remove the shaving cream sooner than later. When you wipe it off, you will see the gorgeous marbled effect immediately show through!
How to marble with the Pour Over Technique
You can also marble with a pour technique, which is becoming very popular! I still need to try this method out for myself, but there are tons of great resources on pour marbling.
How to marble with the Acrylic Paint
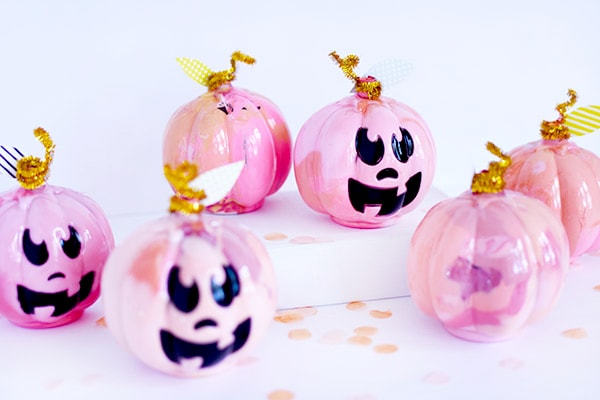
I have done a handful of projects on my blog marbling with acrylic paint. It can be a little bit trickier, but definitely can be done. I have done a few marbled jars and even these adorable pumpkins were marbled with acrylic paint.
But least you think marbling with acrylic paint is hard, my entire Marbling book I wrote was done using acrylic paint!! So not only can it be done, but I’ve got 8 great projects you can check out now.
How to do Food Marbling
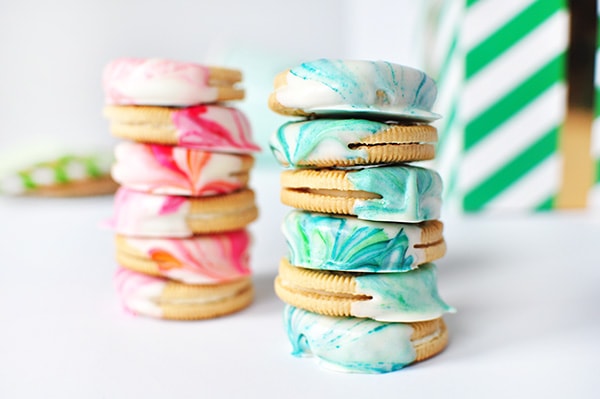
Get ready for this, you can even marble using food products! I have marbled oreos and marbled shortbread cookies – both were exceedingly delicious. Important Note : Make sure for all edible marbled items that you use EDIBLE materials, like food coloring or gels and white melting chocolates.
What are the best marbling craft ideas?
Seeing as how I have well over 20 marble projects well over 20 items, the real question is what can’t you marble? I would say just about everything can be marbled!
DIY Marbled Clay Keychain
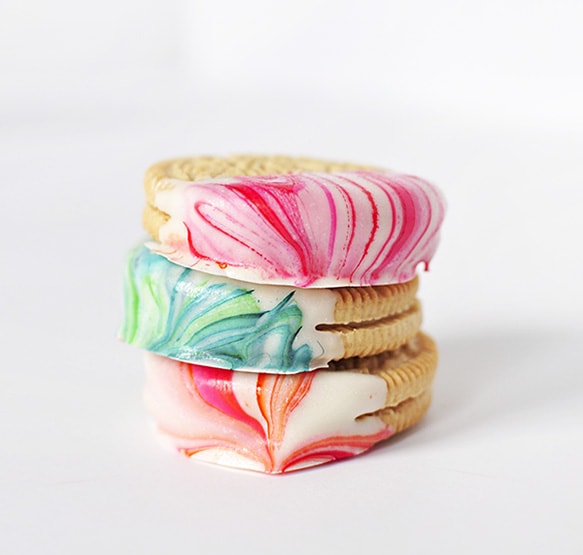
Marble Dipped Oreos

DIY Marbled Bracelets
How to marble with Acrylic Paint
How to Marble using Nail Polish
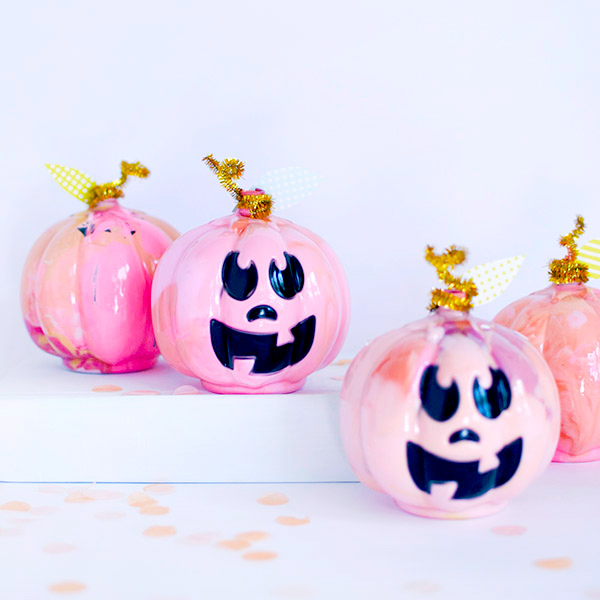
DIY Pink Marbled Pumpkins with Paint
What kind of items can you Marble?
WOOD:
I have marbled all kinds of wooden items, like wooden bracelets and wooden bangles. I have marbled wooden shadow boxes and even wooden clothespins.
PAPER:
You can marble paper like these marbled heart notebooks, marbled DIY canister and a marbled notebook that I marbled sticky labels and adhered them.
FABRIC:
You can marble on fabric, but in my case, I painted a marbled pattern on fabric!
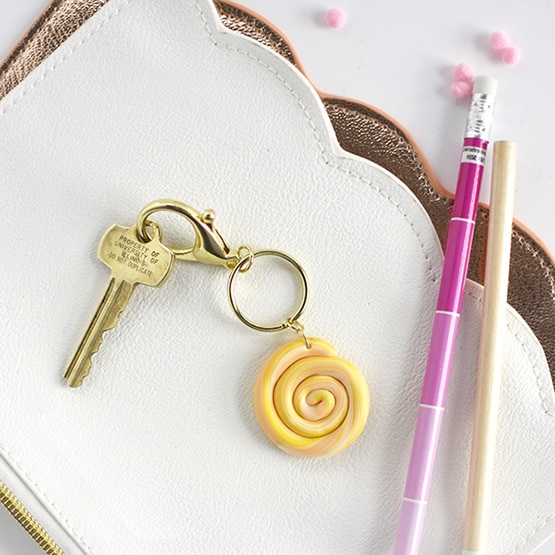
CLAY:
You can create the appearance of marbling on items like clay. I made these fun Clay Plant Holders, a Braided Clay Bracelet, a Mini Coiled Clay Bowl and even a marbled Clay Keychain.
FOOD:
And you can even marble food items! So far, I have marbled three different cookies… and as if cookies were not already a tasty treat, try dipping them in even more chocolate. I have marbled vanilla oreos, shortbread cookies and thin vanilla oreos!
How do I do Marbling crafts?
For a detailed tutorial on how to marble with nail polish, see my Marbled Party Cups or Colorful Marbled Bangels.
For a detailed tutorial on how to marble with shaving cream, see my DIY Marbled Notebook or Marbled Canisters.
For a detailed tutorial on how to marble food, see my Marble Dipped Oreos (yum).
What are some basic MARBLING TIPS?
After you have your idea and all your supplies are purchased, you can finally begin making! A few of my favorite technique tips include:
1. You will probably need more space to marble that you think. Unlike many other crafting projects, marbling requires an area to hold all your supplies, an area to actually do the marbling technique and then an area to allow your wet marbled item to dry.
2. Prior to starting a marbled project, lay down some plastic or cover your workspace with paper. You will be surprised how many rouge drips of paint, water, shaving cream, nail polish, etc… will be coming off between the dipping portion and the drying portion!
3. If you are doing the nail polish marbling technique, mistakes, errors and even small redo-s can happen with nail polish remover!
4. Do not be afraid to try marbling unique objects! Once I fell in love with marbling, I would just look around the room for additional items to marble. I’ve just grabbed a few pencils and dipped them just to see if they worked… any they did! Be brave, marble away!
I love the site and all the diys. However, more instructions on the liquid starch, do I use it all or just spray it in since I am putting it in a spray container. And when cutting the acrylic do I use liquid starch again?
You only need liquid starch when marbling with acrylic paint. This post goes into more detail about it, https://www.delineateyourdwelling.com/how-to-marble-with-acrylic-paint/. My favorite way to marble is with nail polish.
Your site is full of great projects. Lots of fun things to do, if you already know how to marble. You don’t really show how to do any project. A little more instruction would be nice
Hello Bonnie. I have tons of marbling projects on my site. You can find some of them here! Happy crafting. https://www.delineateyourdwelling.com/marbling-projects/
This post is SUCH a great resource!!! Also, I really wish we lived closer to each other, because it would be so fun to have a marbling craft night!! xoxo