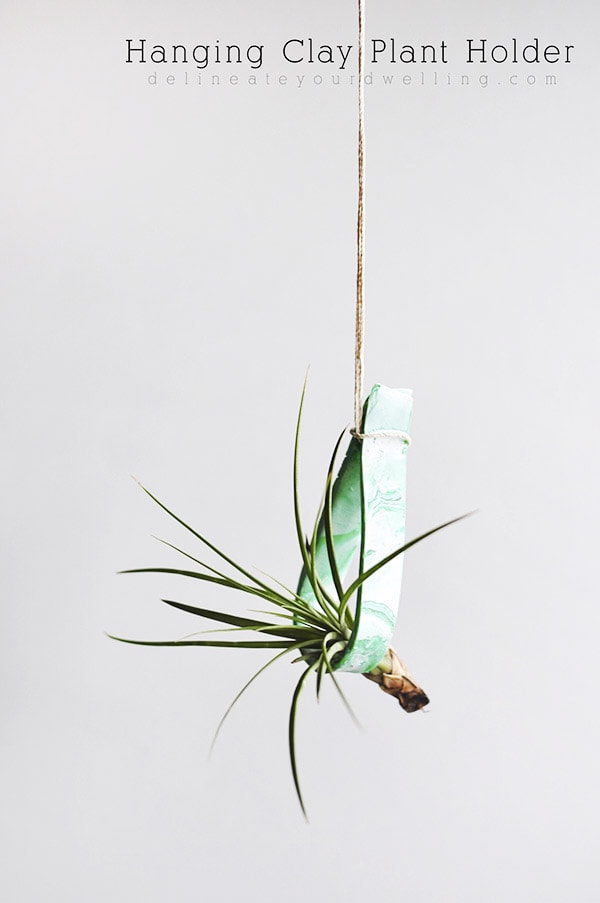
Clay Plant Holder
INSIDE : Learn how to make a simple Clay Plant Holder to hang in any room of your home. It is perfect for holding all your air plants.
This post may contain affiliate links. See full disclosure here.
This post has been updated since it’s original April 2016 publish date.
Yesterday I pulled out my Polymer Clay and went a little crazy making three really fun projects! The next two Friday’s I will share the other two.
Can I tell you how long I have had this clay sitting around waiting to be enjoyed… a long time. And once I just got it out and started playing with it, I didn’t want to stop. It’s so simple and fun to work with. Today, I am sharing how to create this simple and modern Hanging Clay Plant Holder.
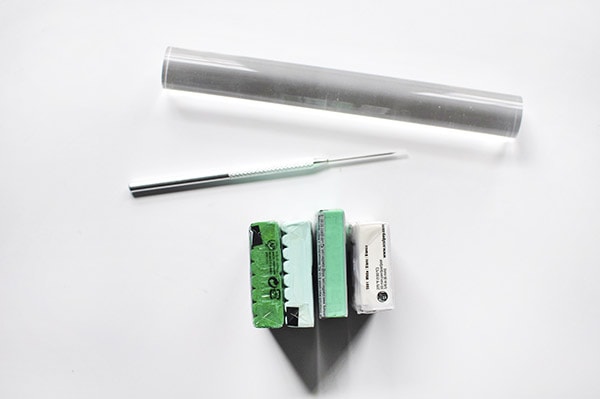
What supplies do I need to make a hanging Air Plant holder?
- Polymer Clay
- Sharp Clay working tool
- Clay Rolling Pin
- String
- Air Plant
How do I make a marbled effect with clay?
To create a gorgeous marbled effect, I used a small amount of four different colors of green and white polymer clay.
First, remove pieces from each color and start warming and kneading them together in your hand.

Once the clays are a bit more pliable, use the rolling pin to start flattening them out.
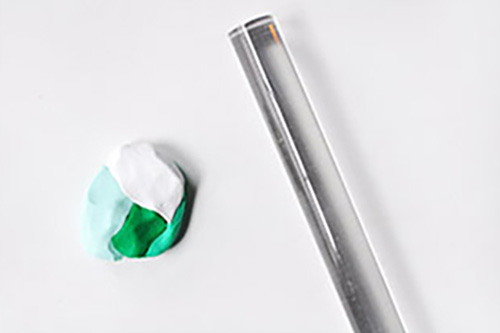
Once the clay is flat, fold it over a few time and flatten it again. This helps to create the marbling effect. I learned about this simple technique from Rachel at Lines Across.

Note, the more times you fold and flatten, the more of a marbled look it will have. However, be aware you can fold too many times and the colors will just blend together. So, just a handful of folding is enough.
If you are looking for more information about everything involving marbling, my Marbling 101 post might be just what you are looking for!
How do I make a Hanging Clay Plant Holder?
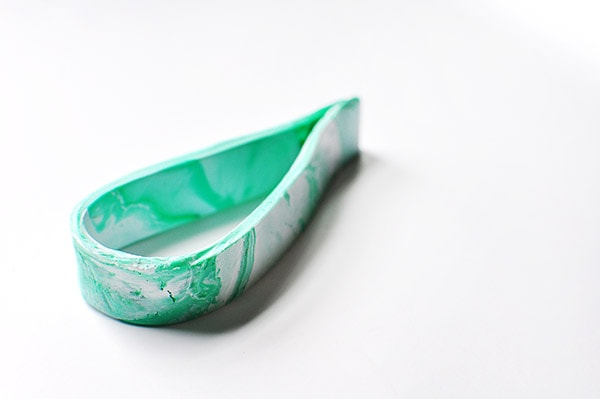
Once your clay is marbled, cut a thin strip of clay about 8″ long.
If your clay is not long enough, no worries. Simply cut two strip sections and piece them together to get the length you need. You can smooth out the joint and no one will ever know otherwise!

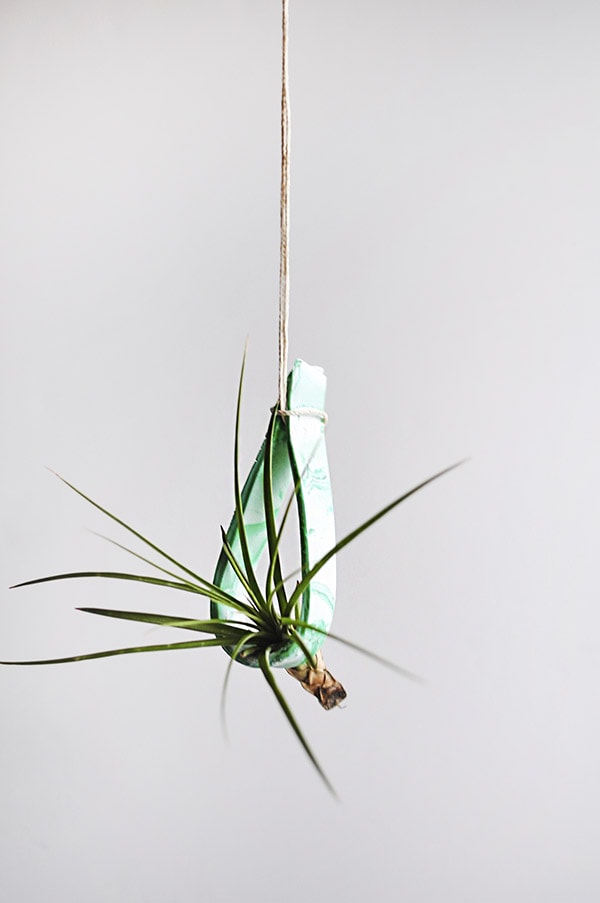
Then, it’s as simple as gently folding the clay into a tear drop shape and connecting the top of the clay strip together.
Follow the baking directions for your clay. I put mine in at 265F for about 35 minutes.
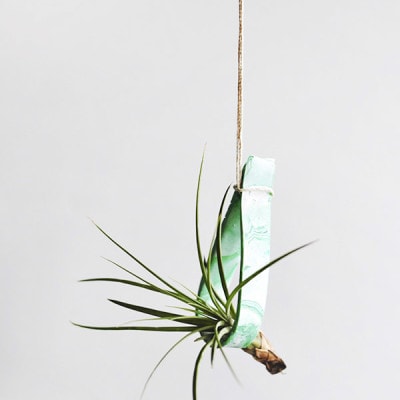
Tear Drop Clay
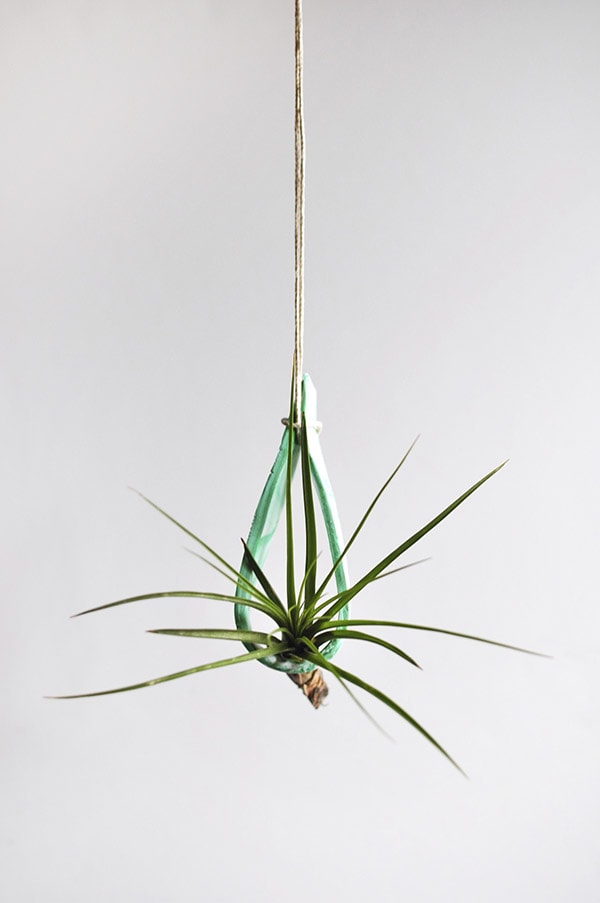
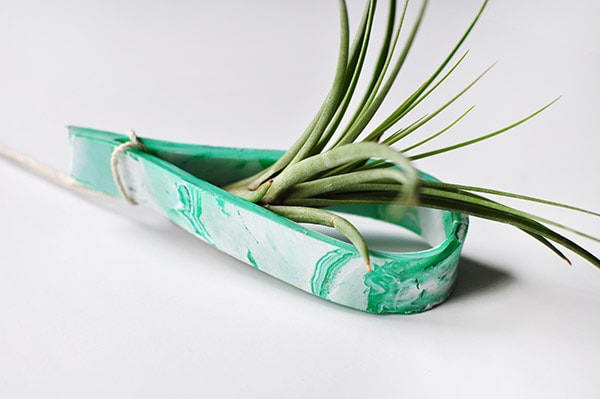
Once my clay had dried, I looped a piece of string around it and it was ready to hold my air plant!
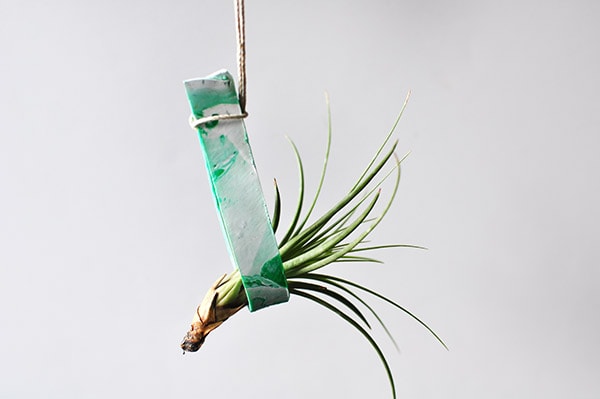
Modern DIY Air Plant Holder
I have so many air plants and never enough surfaces and containers for them all, so this is this modern air plant holder diy is the perfect solution.
Interested in some other polymer clay project ideas? Check these out.
I love the organic green marbling effect.
Are you a fan of Polymer Clay? What have you made using it?
Don’t forget to follow me on Pinterest so you don’t miss any great project ideas!
Looking for an easy checklist to help Keep Your Plants Alive? Sign up for my newsletter to get your FREE copy today and access to my how to care for plants ebook!
Interested in my other Polymer Clay projects?


What a cute idea! I love air plants, and that’s a great way to display them!
Thanks Vineta! It’s now proudly hanging in my kitchen!
Super cool! I haven’t played with clay in a couple of years, but now you’ve got my head going!
I had such fun! =)
What a pretty shape – perfect with the marbling too. Love it, Amy!
Thanks Alexis! =)
I’ve been wanting to use clay for so long now! Love this little guy!
I had such fun with it, Bre! You should definitely give it a try.