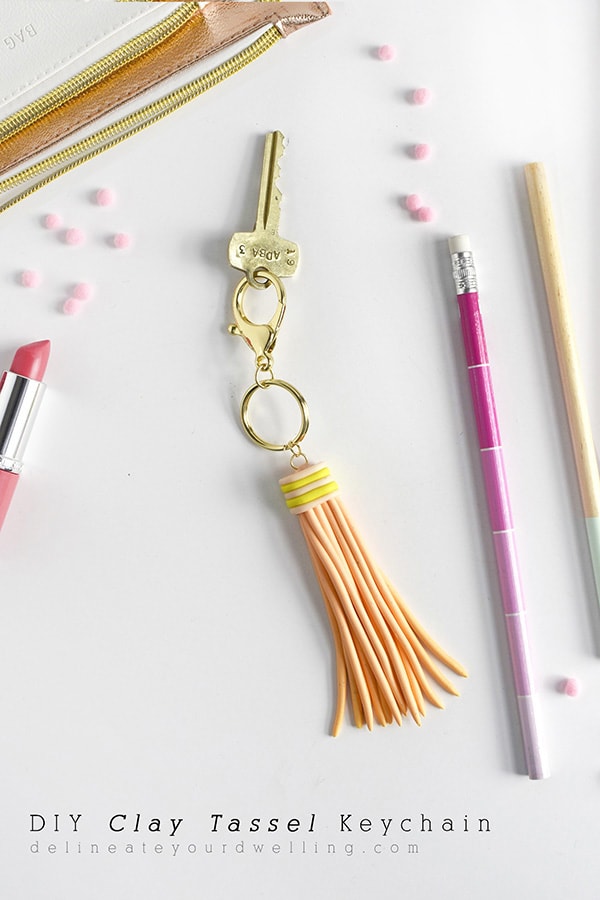
DIY Clay Tassel Keychain
INSIDE : Learn how to make a simple and fun DIY Clay Tassel Keychain! Polymer Clay can create the coolest things, be sure to give it a try.
This post contains affiliate links. See my full disclosure.
This post has been updated since it’s original February 2017 publish date.
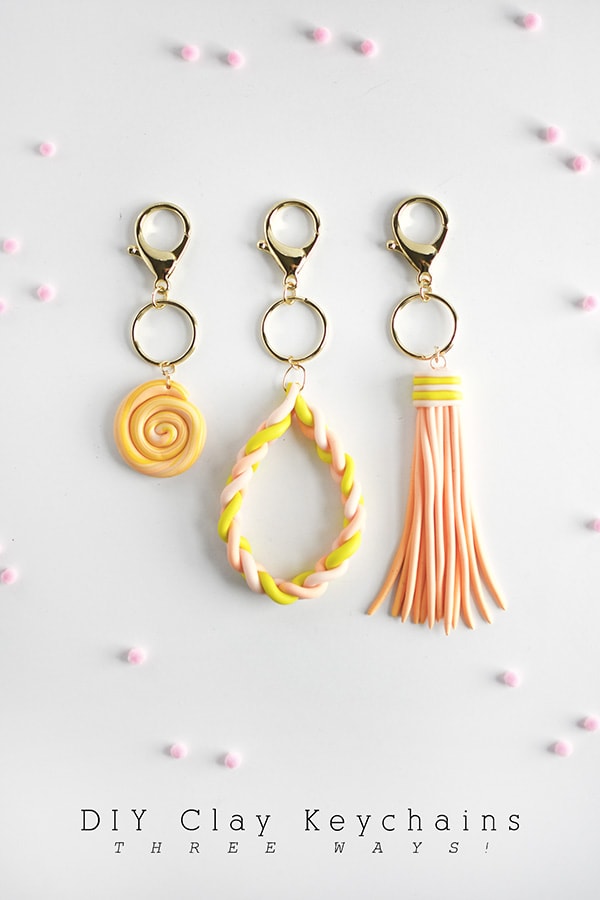
We did it! We made it to week three of my three week mini series. Starting two weeks ago, I shared my love of using one simple product in three very different ways. And that special product was polymer clay.
I showed you how to make a Marbled Clay Keychain, as well as a Braided Clay Keychain. I saved the best for last because if you thought the other were fun then watch out. Today’s post is how to create a DIY Clay Tassel Keychain!
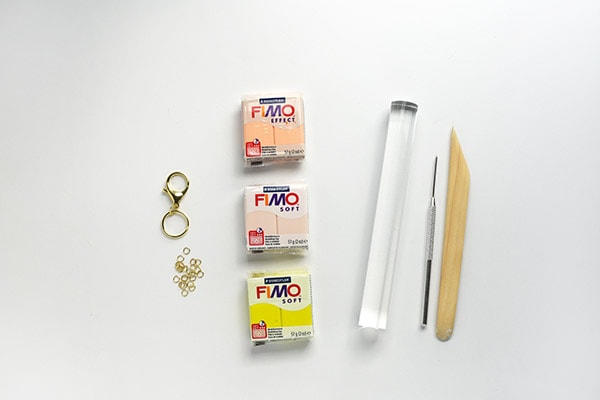
What supplies do I need to make a Clay Tassel Keychain?
How to make a clay tassel
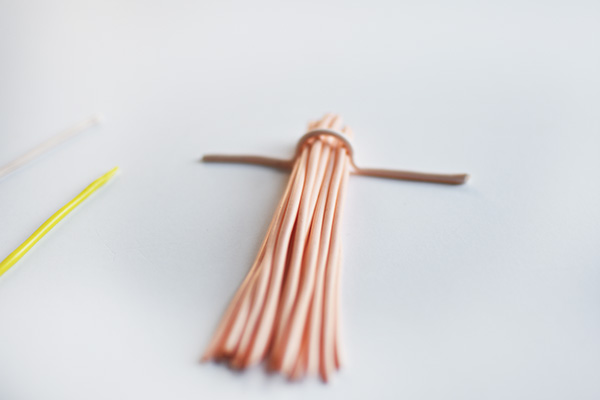
Start this clay tassel DIY by removing a small portion of the peach colored FIMO clay. Using your hands, roll the clay into thin snake like strands. I laid my clay out in about 3.5 to 4″ lengths.
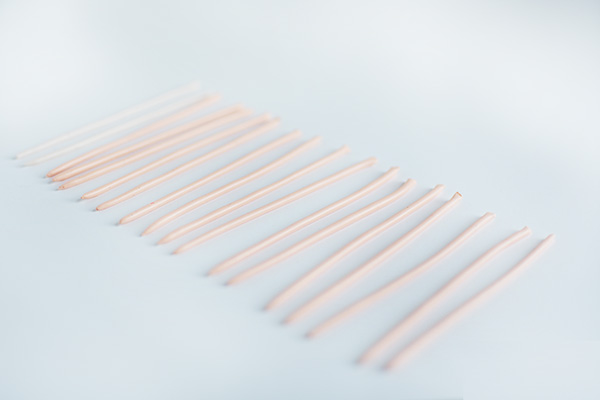
Once you have about 15+ strands of clay, you can start to create your “tassel” shape.
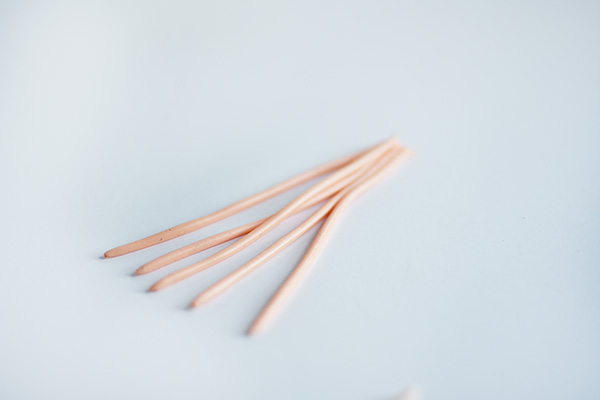
Note: I wanted my tassel to have a real look and not be all perfectly straight. So to create that effect, I slightly bent a few of the bottom strands outward.
This helps give the look like they are moving and flowing in the breeze! Do your best to not pinch the clay at the top, just gingerly set each piece atop each other.
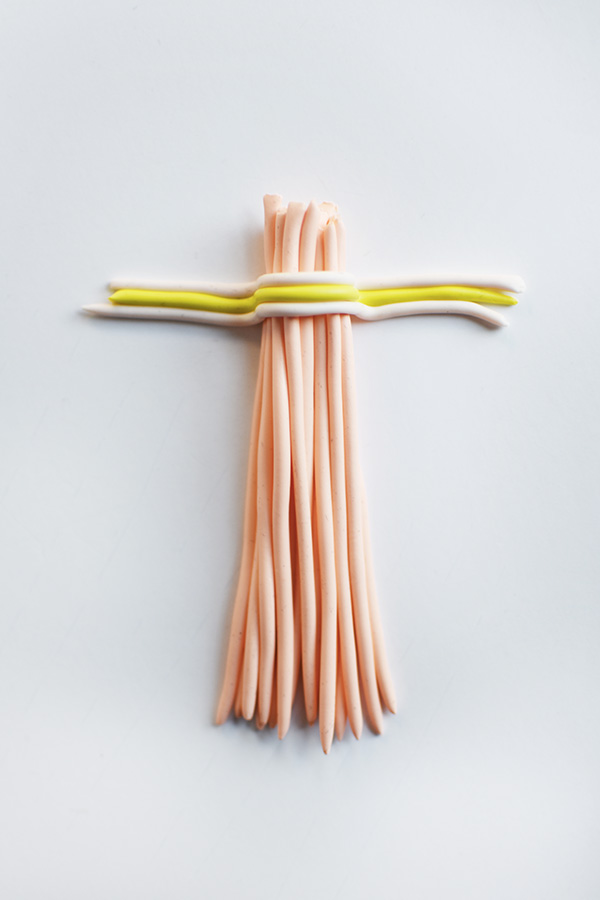
To create the band to keep everything together, or at least what appears to be a band, use two different colors and lay about five or so strips along the top.
Once all the strips have been added, gently lift the top portion and wrap around the tassel. You can cut the excess off now. Then, using a straight edge or clay tool, create a clean cut across the very top of your tassel.
Bake your Clay
Bake your clay per the directions on your specific clay. My FIMO clay requires baking at 230 F for 30 minutes. Then, I removed from the oven and allowed to cool.
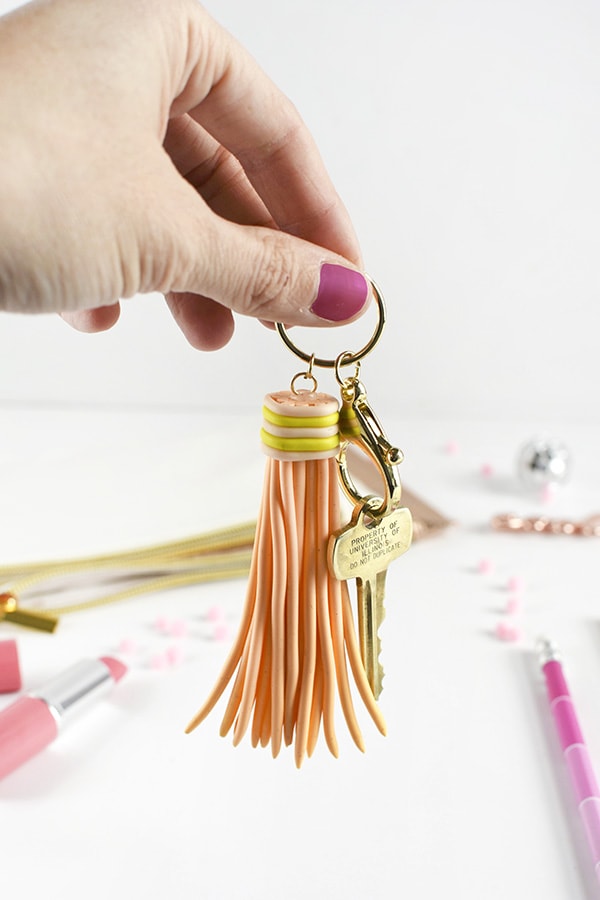
Secure your keychain
Next, all that is left is securing your jump ring and lobster keychain onto the clay! I used E6000 Craft Adhesive to make sure the jump ring is quite secure.

And once baked, this polymer clay has quite a bit of “give” to it. I’ve been more cautious to just throw this keychain in my purse with wild abandon simply because some of those tassels are sticking out a bit. But overall, it’s seemed to hold up to use rather well.
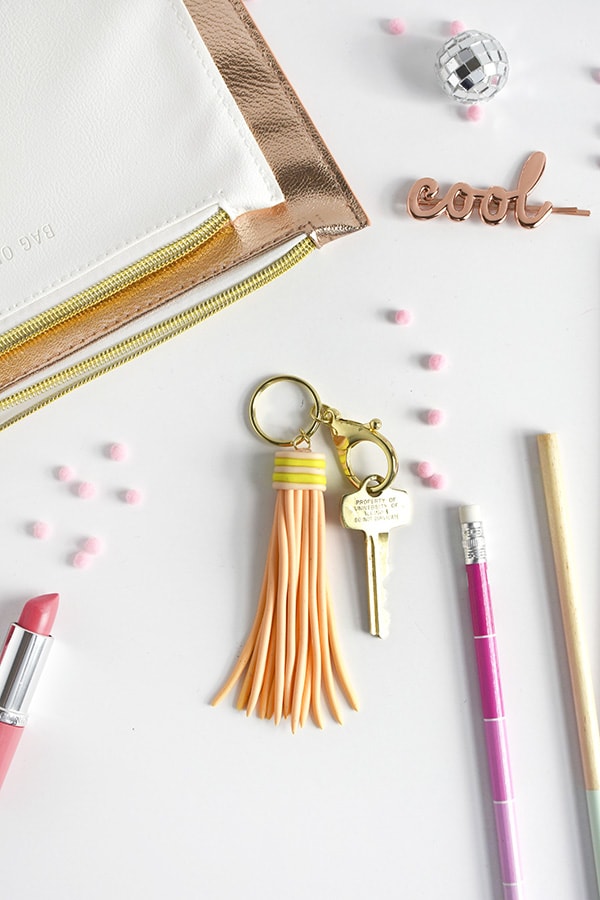
I just couldn’t not be more pleased with it’s final outcome.
Interested in some other polymer clay project ideas? Check these out.
- Clay Plant Holder
- DIY Braided Clay Bracelet
- Clay Ring Wall Art Hanging
- DIY Clay Tassel Keychain
- Braided Clay DIY Keychain

If you are interested in checking out my other two Clay Keychains, you can see them all together below!!
DIY Marbled Clay Keychain + Braided Clay DIY Keychain
Don’t forget to follow me on Pinterest so you don’t miss any great project ideas!
Interested in my other Clay project ideas?
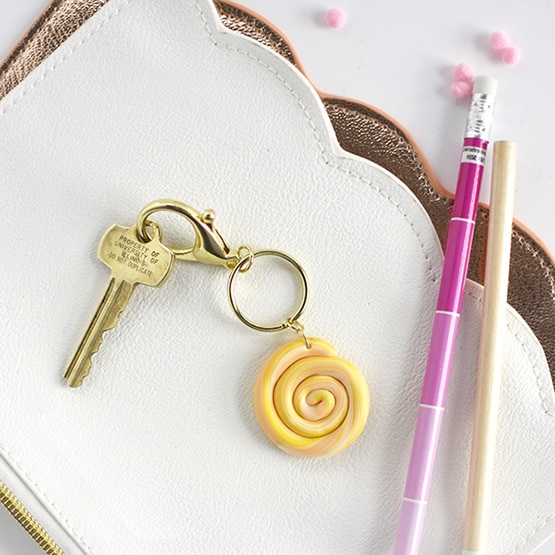
DIY Marbled Clay Keychain

Clay TDAY Banner

Fourth of July Tea Light Holders
8 ways to keep air dry clay from cracking

Best Air Dry Clay products

35 Air Dry Clay Projects that will instantly inspire you!
Very clever use of the polymer clay! Well done on all 3 keychains! Blessings, Janet
Thanks so much! They were fun to make.
I love this insanely fun take on the traditional yarn or string tassel. So fun!!!
Whaaaat? This is crazy, I didn’t know you could make something like this with polymer clay! It’s sooooo cute! I love the color combo you used too, all three of the keychains are so pretty!
Hee hee, thanks Marlene! I wasn’t sure if it would work out, but am pretty happy with the results!! Thanks for your sweet comments. xo