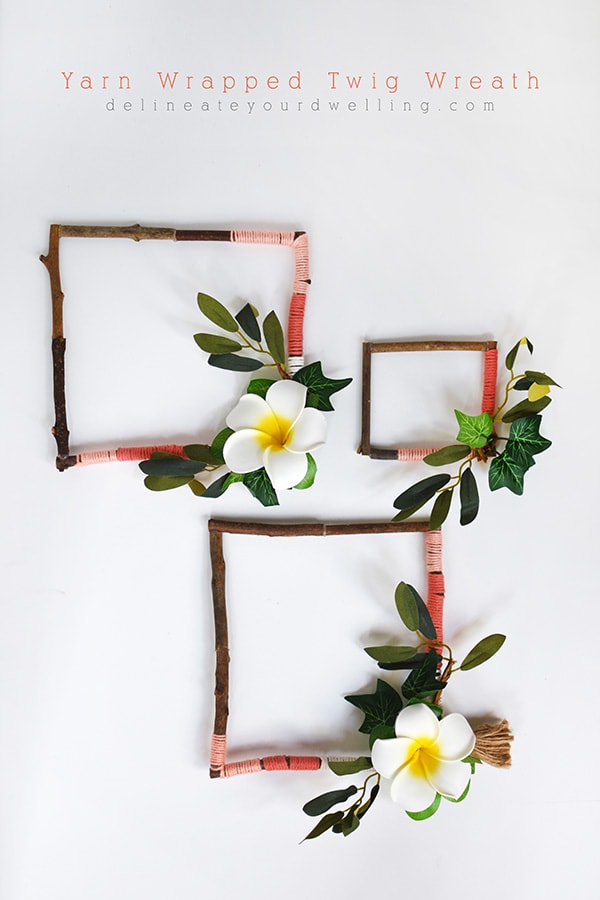
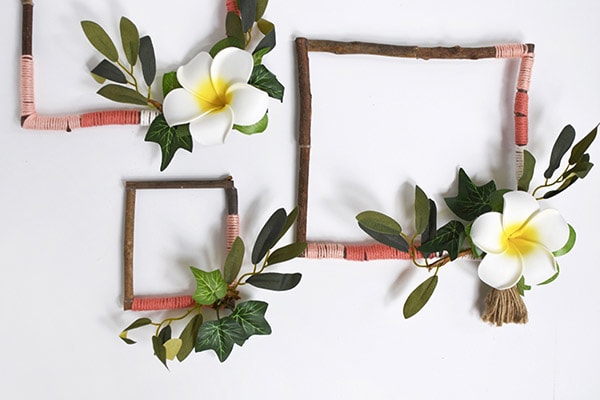
Yarn Wrapped Twig Wreath
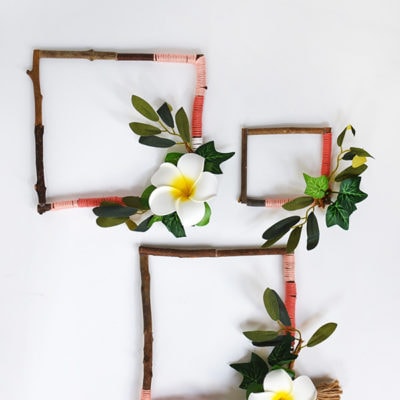
INSIDE : Learn how to create a fun colorful square wreath to hang in your home with yarn and twigs. Make a crafty Yarn Wrapped Twig Wreath in your favorite yarn colors.
This post may contain affiliate links. See my full disclosure.
This post has been updated since it’s original publish date of October 2017.
Natural materials with a twist of color makes for a perfect combination in my opinion! I found the most wonderfully sized twigs over at OTC and I knew I had to have them. Add in a little colorful yarn and I was in business!
Today I am sharing how you too can make an easy and fun Yarn Wrapped Twig Wreath and a fun roundup of other twig wreaths at the bottom of this post.
I love making season wreaths. They are such a fun way to bring your excact style to life. A few other fall wreaths I've made are a Fall Plate Wreath and a Green Beaded Wreath.
Supplies for Square Twig Wreaths
- Mini twigs
- Yarn (2 or 3 colors is fun)
- Faux greenery
- Hot Glue
How to create square wreath diy
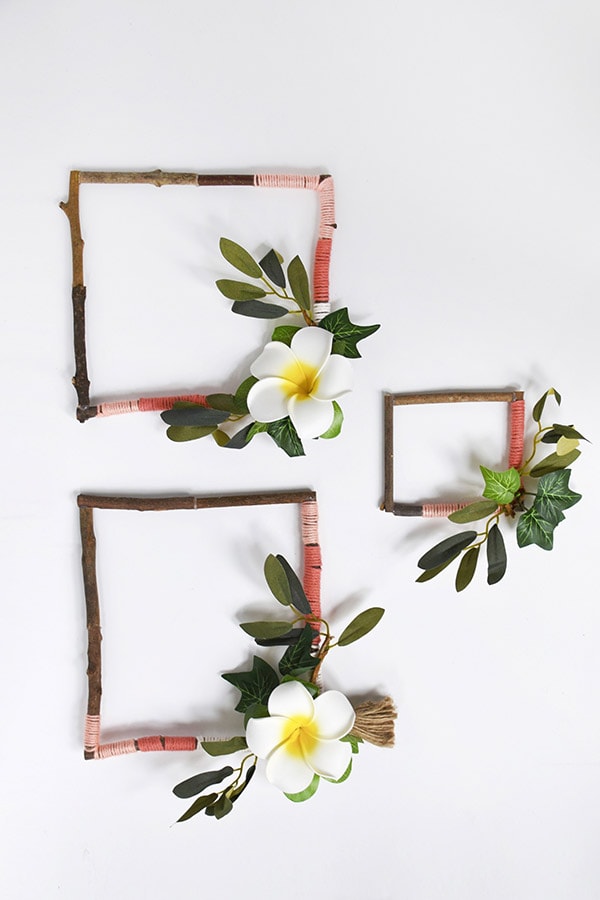
To make these adorable square wreaths, start by gathering your twigs. I used twigs that were roughly 6″ in length for the larger wreaths and 3″ in length for the smaller ones.
If you don’t have tree branches available to you, you can get 100 twigs a the box, so you can make them as big or as small as you would like.
Hot glue twigs
The secret to making a larger wreath is you can hot glue two twigs together to make a larger side. It works perfectly since the twigs aren’t heavy and hot glue is sufficient for holding the sides together.
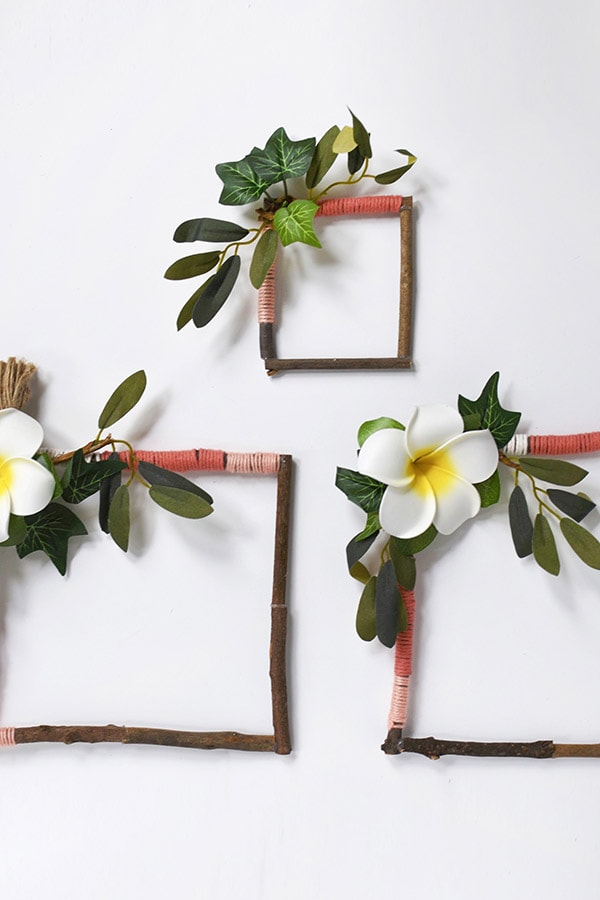
Once you have hot glued two twigs together for your larger sized wreath, slowly create a square shape and hot glue each corner until they feel strong and sturdy.
Wrap yarn
Once the basic shape of your wreath is made, you can start to wrap your yarn for a little more color and personality! I started at a corner and hot glued my yarn. Then wrap as many times around as you would like.
If you are doing multiple colors (which I think looks so fun) then add a dab of glue to finish off the yarn color and repeat with more glue on your next yarn.
I thought it looked cool to only do yarn on only a few sides, so the natural twig could show through – but you can go with your own designs here.
Plus, if you are like me… you have a tons of gorgeous yarn sitting around your home with no use in sight. And I always love finding uses for my yarn stash!
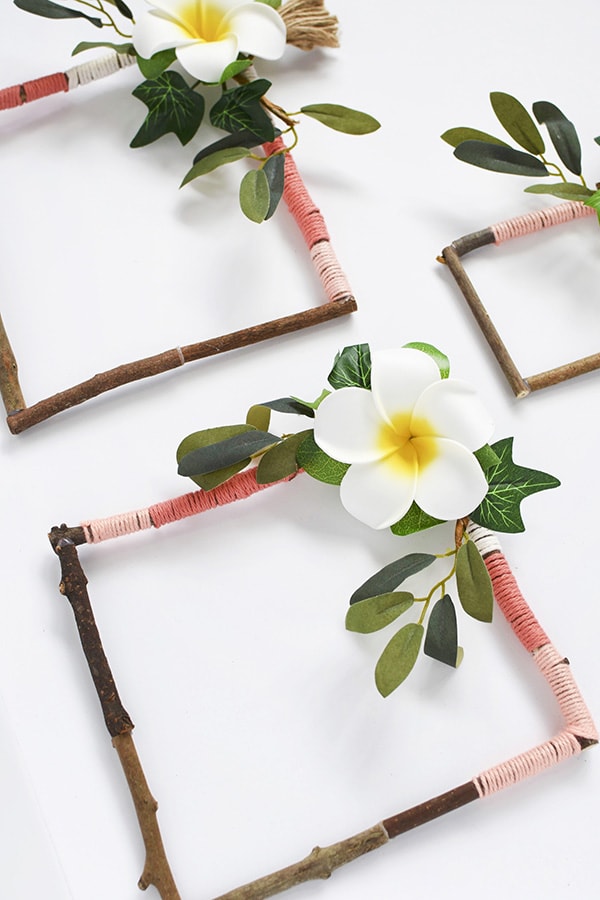
Adding greenery to wreath
After your yarn has been added to the wreaths, you can add the finishing touch of greenery! I used some various leaves and greenery and then a big fun flower.
I plan to hang these little beauties in my home but am just trying to find the best spot for them… maybe my front entry, maybe my dining room! I want to try and make even a larger one – wouldn’t that be dramatic.
If you are looking for more Easy DIY Artwork, you might want to check out these simple tutorials I put together for other paintings.
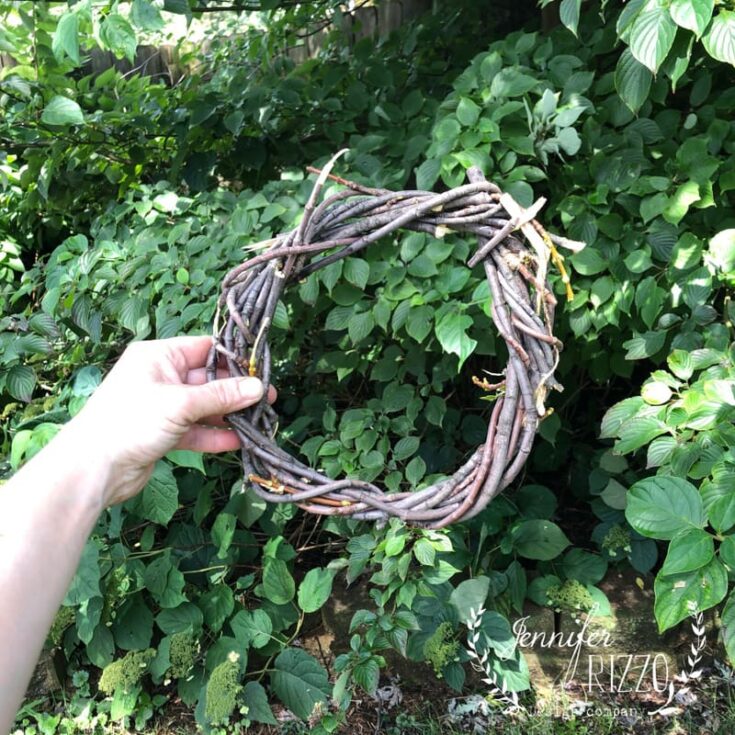
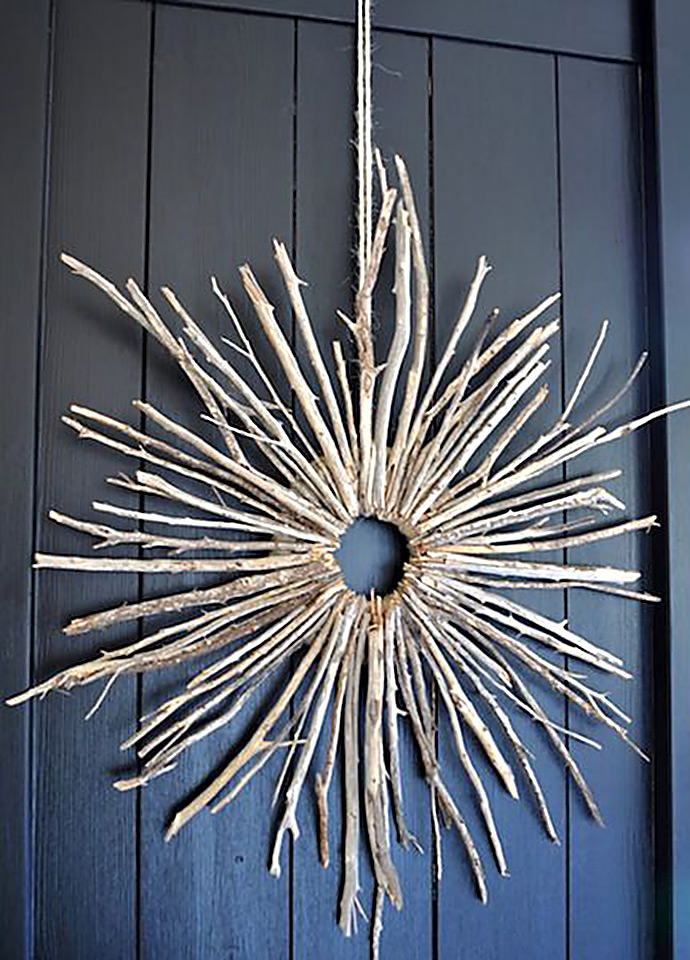
Creative Twig Wreaths
Check out this collection of fun wreaths to hang in your home with natural materials like twigs. Make a crafty Wreath in your favorite colors.
Maple Branch DIY Twig Wreath
Using maple branches from your own backyard to create a twig wreath is a fun afternoon project.

DIY Twig Triangle Wreaths
Add fuax flowers to these fun triangle wreaths!
Gather The Sticks for These DIYs
I love this organic shaped wreath made of sticks.
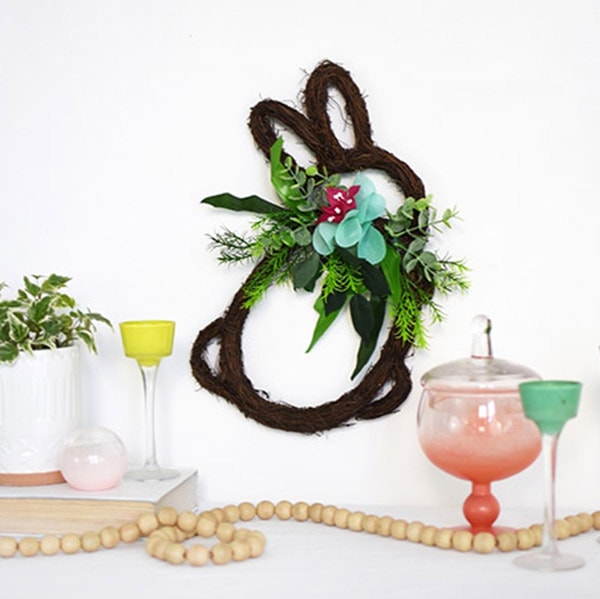
How to make a Grapevine Bunny Wreath
This fun Bunny wreath is made with twigs and grapevines, so perfect for spring!
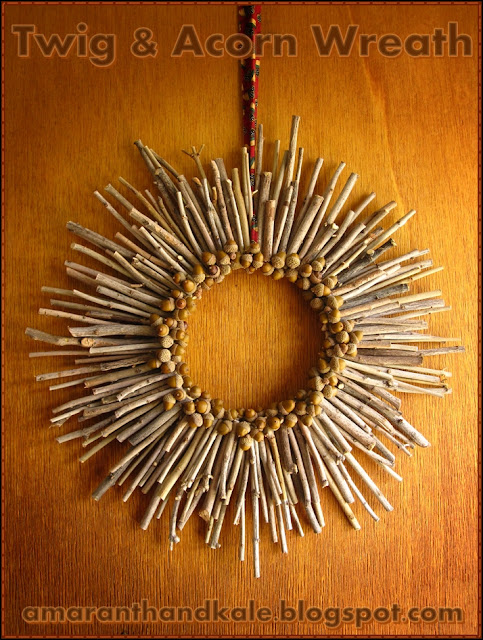
Twig & Acorn Wreath
The natural look of this twig and acorn wreath is perect!

Embroidery Hoop Wreaths for Spring
Adding a little twig or two for these ceramic birds to perch on is a fun wreath twist!

Simple Spring Grapevine Wreath
Adding gold foil to these twig wreaths is a fun twist.
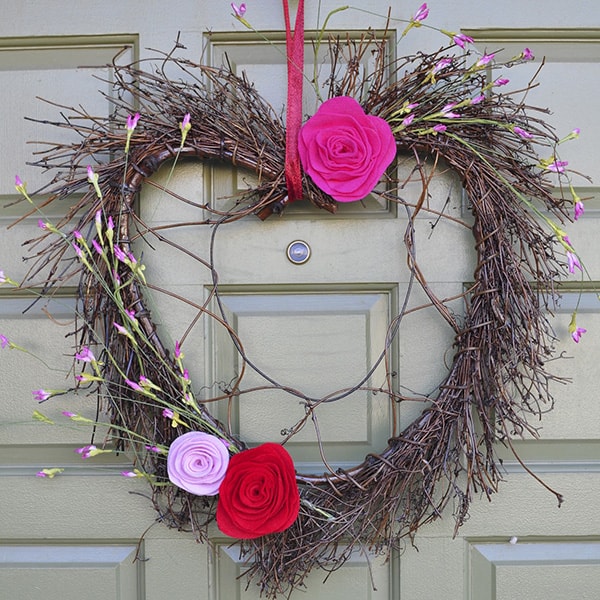
Valentine’s Day Wreath
Creating a twig heart wreath is fun for Valentine's Day!
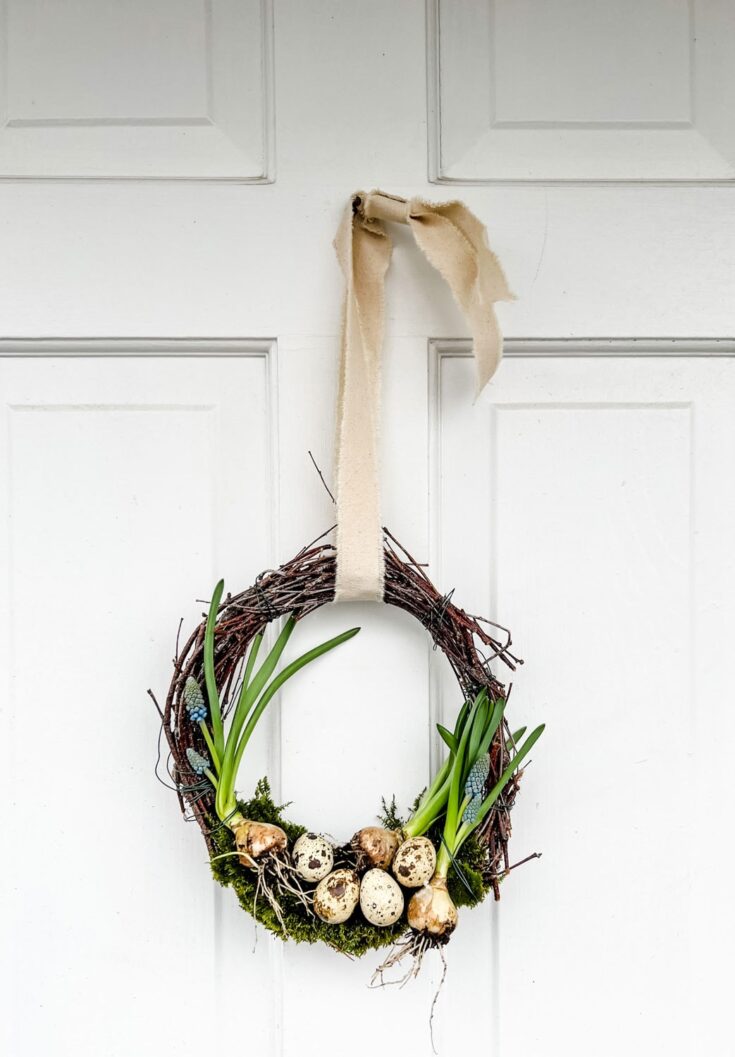
Easy Birch Twig Spring Wreath
I love these added Hycinthia bulbs added to this twig wreath.
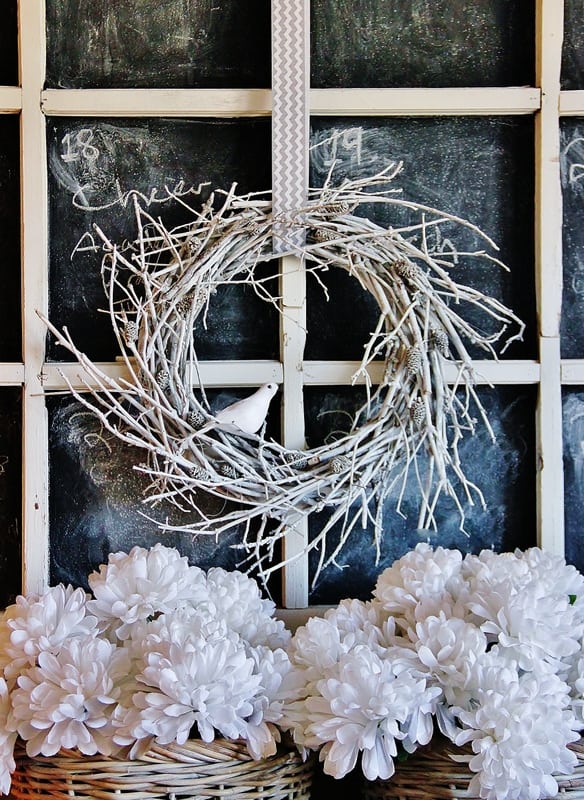
DIY Winter White Twig Wreath
Collect twigs from your yard and paint them white for this classic winter look!
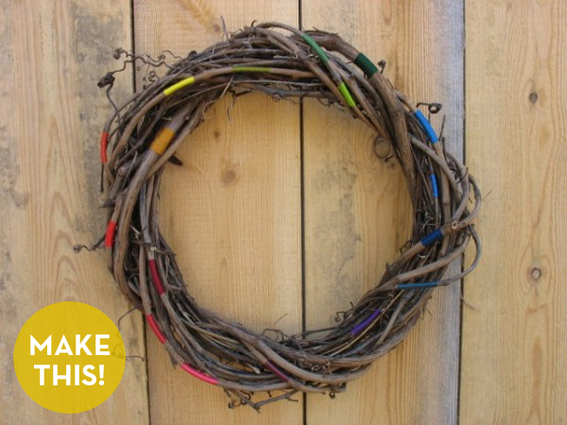
Make a Colorful String-Wrapped Branch Wreath
Add fun rainbow embroidery floss to this grapevine twig wreath to add a little more color.
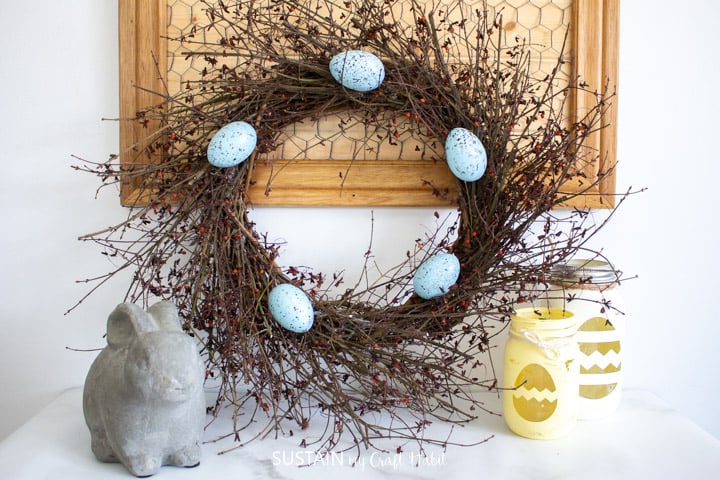
Rustic Birds Nest Twig Wreath
A fun rustic Easter twig wreath is a great choice for hanging in your home in the spring.
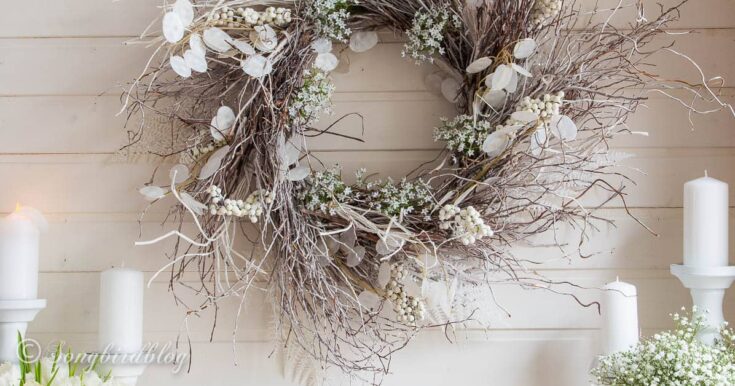
White winter twig wreath
How beautiful is this elegant white winter twig wreath?!
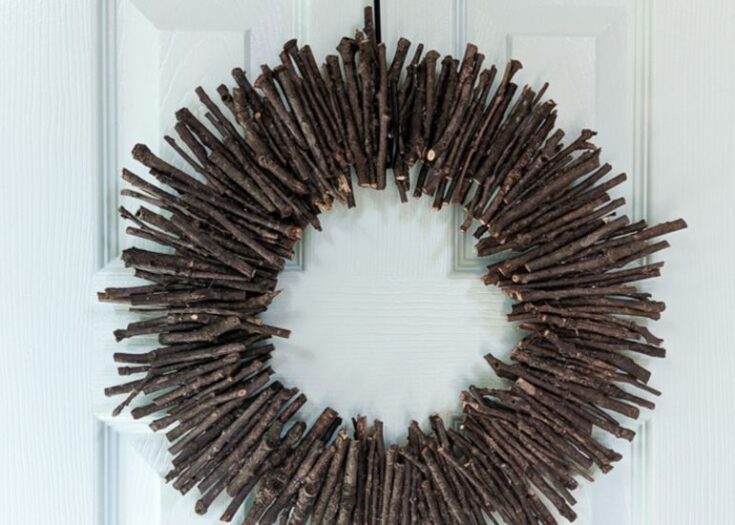
How to Make a Twig Wreath for Fall
This simple twig wreath is a great choice to a quick craft afternoon.

And if you’re curious to check out all my OTC projects, head over here!
If you’re looking for other wreaths, you might like these…
And if you want to check out a few other yarn crafts, look no further:
Ring Yarn Art
Yarn Wrapped Twig Wreaths
DIY Ombre Basket Yarn Handle
Printed Letter Tote Bag
Flower Wall Hanging with Yarn Tassle
Colorful HOME Sign
Pom Pom Throw Blanket
Lounge Tassel Pillow
These are really beautiful Amy, and so unique. I love them!