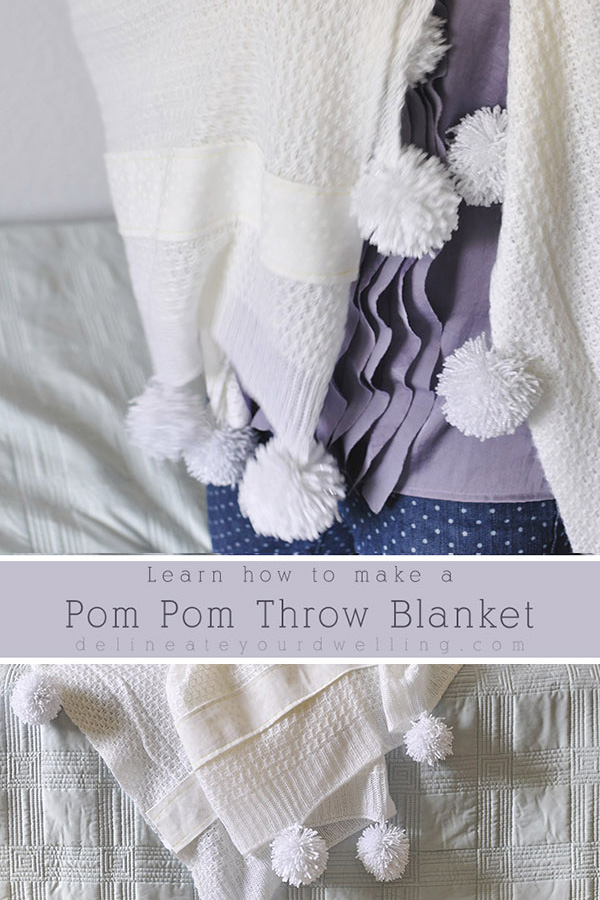
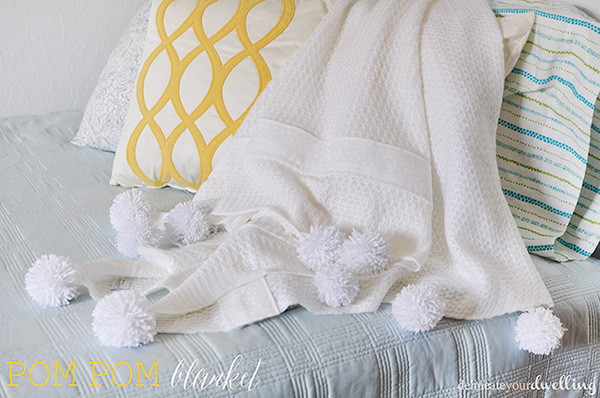
Pom Pom Throw Blanket
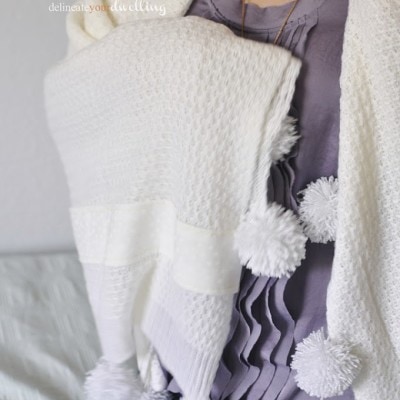
INSIDE : Learn how to make a yarn Pom Pom Throw Blanket by attaching pom poms to an existing throw. It’s the perfect beginner DIY tutorial for a cozy blanket full of texture and a simple design trend.
This post contains affiliate links. See my full disclosure.
This post has been updated from it’s original publish date.
Today I will be sharing my tutorial for a big Pom Pom Blanket. It is all in the details and this was a fun detail to work on! I also have a post about how to attach Pom Poms to an existing pillow!
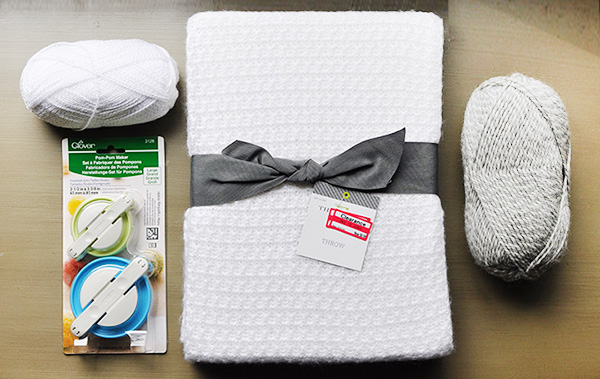
What supplies do I need to make a Giant Pom Pom Throw Blanket?
I’ve previously made giant pom poms by hand for one of the decor items on my Tiny Prints Garden Party. They turned out lovely, but they really took some effort and didn’t end up being as full or round as I would have liked. I knew there must be a better way.
How do I make an easy White Pom Pom Blanket?
For this fuzzy pom pom blanket, I decided to use an actual Large Pom pom maker. Let me just say, I fell in love with this pom pom technique in a huge way!
In a few very easy steps, I was whipping out nicely sized pom poms right and left! I made 16 poms in total and I would highly recommend this method to anyone looking to make quick and easy DIY pom poms of any size.
How to make a Giant Pom Pom with a Maker?
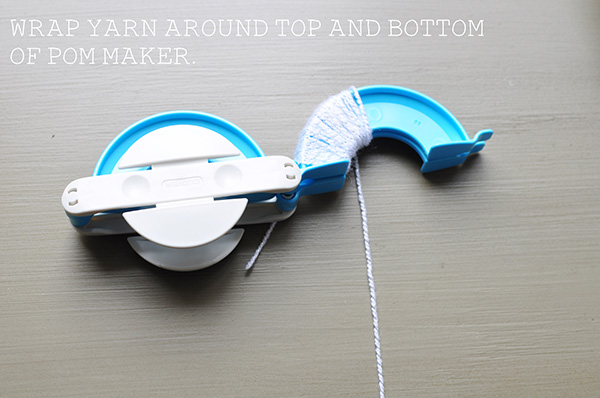
Start by opening up one side of your pom pom maker. Wrap your yarn around the top portion until it is nice and full. Then do the same thing for the bottom portion of the pom maker.
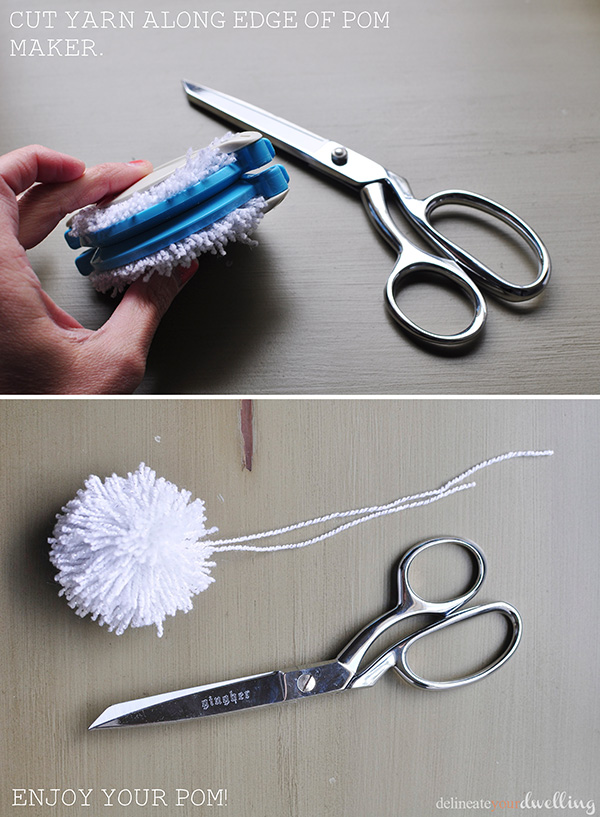
Next, while keeping your maker still closed, cut along the inside edge. I highly recommend using a nice pair of sewing scissors. You can certainly use non-sewing scissors, but sewing scissors are VERY sharp and make the cutting process so much easier!!!
Next take a nice long piece of yarn and cut it to create the string that secures and holds the pom pom together.
Take your long piece of yarn and insert it in the middle groove, where you just cut. I typically tie a knot, twist the yarn the other direction and tie off another knot. The stronger these knots are, the more secure your pom pom will be and not unravel at a later date.
Once you’ve made about 3-5 knots, it’s time to open the top and bottom of the pom pom maker and reveal your gorgeous pom pom! I often then stand over a trash bin and trim my pom pom cutting off all the stray pieces of yarn, to create the perfect circle. Easy peasy.
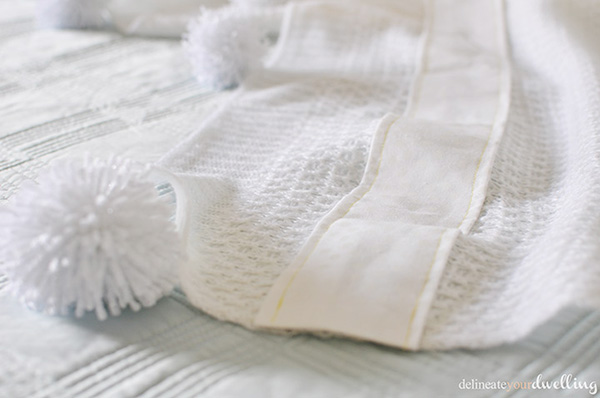
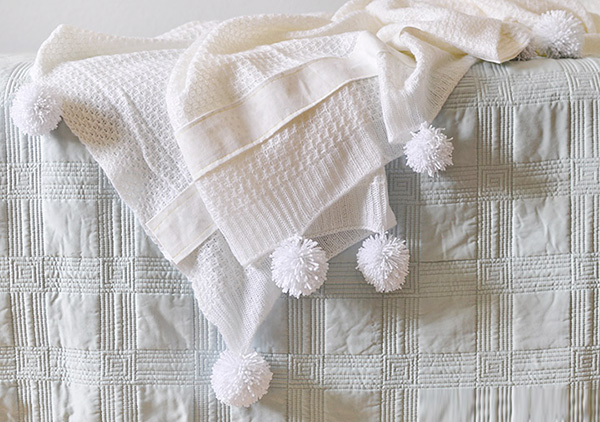
Adding white detail trim to a throw blanket
Once your pom poms are made, set aside momentarily.
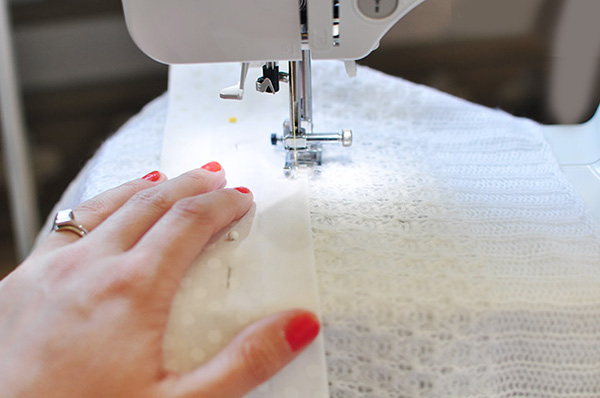
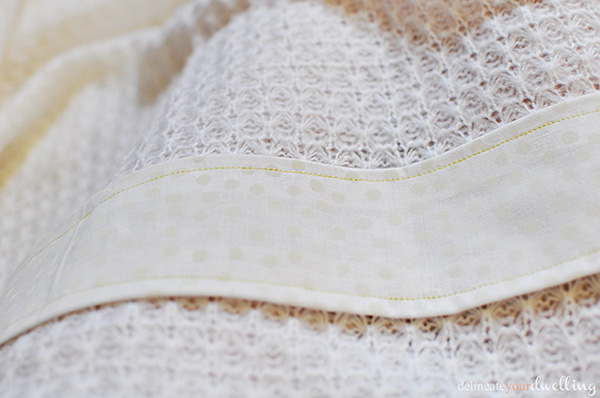
I found some some white polka dot fabric and decided to add just a bit of additional detail to my blanket. I measured the width of the blanket and cut my fabric to fit. Then I cut it 6 inches vertically. Using iron on hem tape I hemmed the top and bottom and then sewed it onto the blanket.
I really like the little extra something fun it gives the blanket. If your throw blanket is made of fabric and not yarn, like mine, you can simply iron the white trim on with hem tape also.
Adding Pom poms to a blanket
Once my fabric was sewn on, it was time to add my white poms!
I laid my blanket out flat on the floor and positioned each pom where I wanted them to go. I laid out poms at each corner, in the center of each side and then one on either side of those center poms = 16 total pom poms.
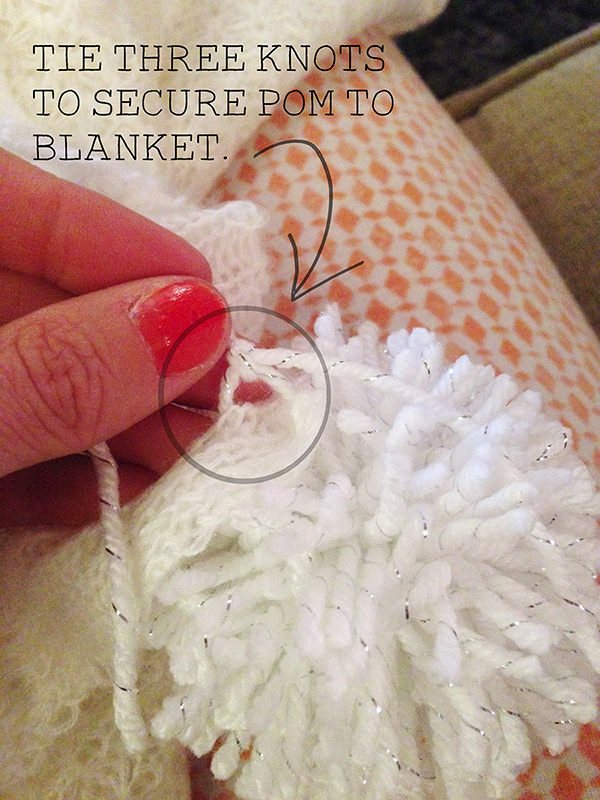
When making your yarn poms, leave one string long enough to attach to your blanket. The weave of my blanket is fairly loose, so I was able to thread the long pom string through the edge of my blanket and then tied three small knots to secure.
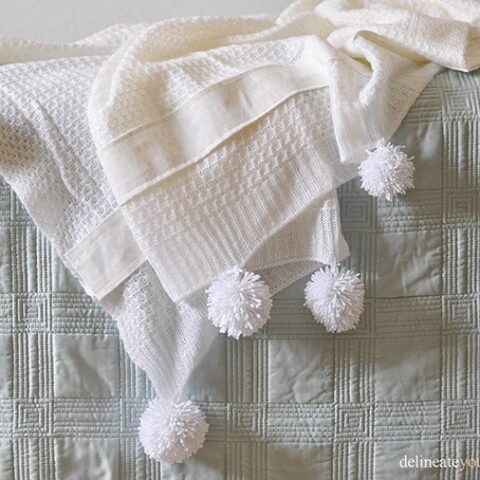
DIY White Throw Blanket
This blanket with is just so warm and snuggly!

It’s such a cozy and easy blanket update. It only took me an afternoon to complete.
Pom Pom Throw Blanket
Learn how to make a yarn Pom Pom and then attach them to a throw blanket. The perfect DIY tutorial for a cozy blanket full of texture and a high design trend.
Instructions
- To make the Pom Poms:
Wrap your yarn around the top of your pom pom maker until it is nice and full. Then do the same for the other portion of the maker. - Next, close the pom pom maker and cut along the interior edge. You will start to see the pom pom taking an oval/circular shape.
- Next, cut a long piece of yarn to create the string that secures and holds the pom pom together. Take your long piece of yarn and insert it, where you just cut.
- Tie a strong knot and twist the yarn the other direction and tie off another knot. The stronger these knots are, the more secure your pom pom will be and not unravel at a later date.
- Once you’ve made about 5-6 knots, it’s time to open the top and bottom of the pom pom maker and reveal your gorgeous pom pom!
- Standing over a trash bin, trim your pom pom cutting off all the stray pieces of yarn, to create the perfect circle.
- Be sure to leave your main securing string long, so as to attach to your blanket.
- To add the Fabric Strip on your blanket:
- Measure the width of your blanket and cut your fabric to that length. Then cut it 6 inches vertically.
- Using iron on hem tape, you can hem the top and bottom of your fabric strip and then sew it down to the blanket.
- To add your pom poms to the blanket:
Lay your blanket out flat on the floor and position each pom around the perimeter. I put poms at each corner, in the center of each side and then one on either side of those center poms = 16 total poms. - Based on the weave of your blanket, you might be able to thread the long pom pom string through the edge of your blanket. But, if you have a tighter weave, you simply thread it through your blanket and tie three small knots to secure.
Notes
- I highly recommend using a nice pair of sewing scissors when making pom poms. You can certainly use dull or non-sewing scissors, but it will make the cutting process so much easier!
I hope you all are ready to rush out and update your simple throw blankets now! And don’t worry, this won’t be the last time you see my pom maker!

And if you want to check out a few other yarn crafts, look no further:
Ring Yarn Art
Yarn Wrapped Twig Wreaths
DIY Ombre Basket Yarn Handle
Printed Letter Tote Bag
Flower Wall Hanging with Yarn Tassle
Colorful HOME Sign
Pom Pom Throw Blanket
Lounge Tassel Pillow
about how many pom poms can you get from one skein of yarn?
Well that is a great question. I believe I made ten pom poms from one skein of yarn and had a little bit of yarn leftover. So, I would guess maybe 12 pom poms total?