Painted Wood Slat Wall

INSIDE : Learn how to build a gorgeous Painted Wood Slat Wall to bring visual interest to any room in your home! This simple DIY project will be a show stopping to everyone who sees it.
This post may contain affiliate links. See my full disclosure.
This post has been updated since it’s original publish date of June 2021.
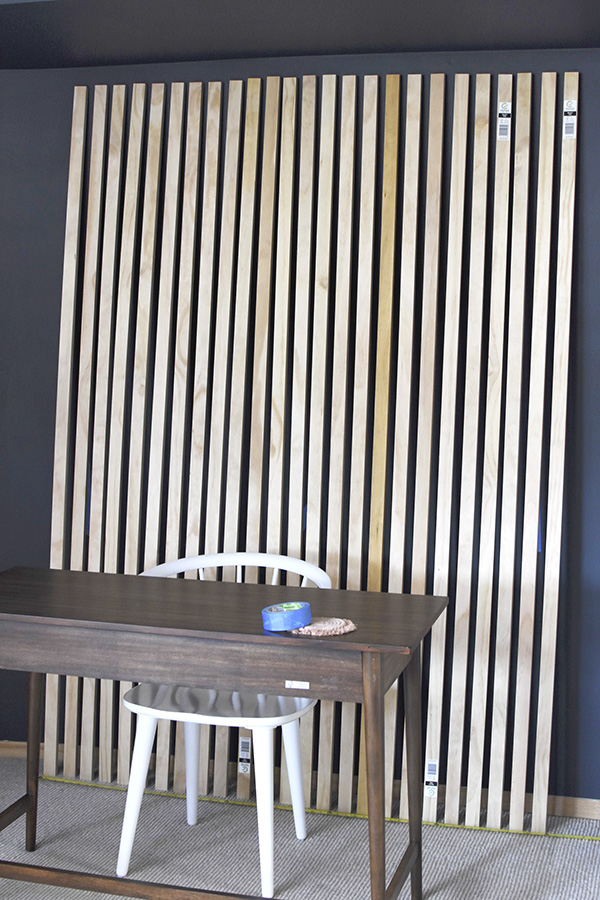
I love the dimension that adding a wood slat wall brings to a room. Even below in it’s still raw state, there is so much interest. Now, let’s get into how to build a slat wall and how to best paint it!
This project was also recently featured on HGTV’s social media as part of my Video Contributor work for them.

Today is week SEVEN of the Spring 2021 One Room Challenge, where I’m participating as a guest! Last week I made the COOLEST Woven Wooden Cabinet. I just love how it turned out!!

Each Thursday for 7 weeks, I have been sharing my weekly transformation of my office. Here is what I’ve accomplished so far:
Week 1 Office Plan
Week 2 Painting Office Moody Blue
Week 3 Adding Removable Wallpaper to a room
Week 4 Spackle DIY Art
Week 5 Slow going week
Week 6 Woven Wooden Cabinet
Week 7 Painted Wood Slat Wall
Week 8 Moody Office Reveal
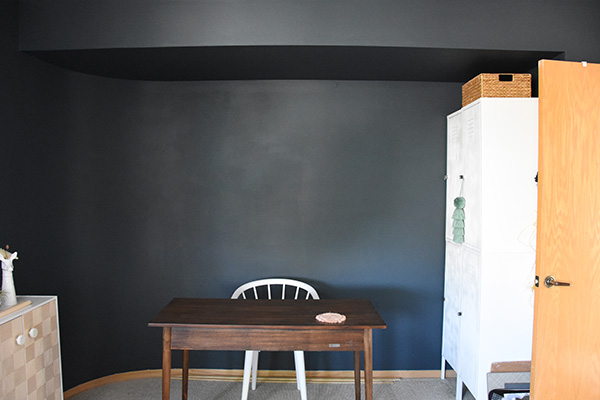
BEFORE WALL
My office has many interesting features to it. One being a small alcove like area that connects with a curved wall. At first I thought I would do wood slats along the entire thing, including the curved wall portion.
However after thinking on it a bit, I decided not only would it be challenging to secure flat wood to a curved wall. But, I also think it would play an optical illusion on your eyes and make the spacing look off.
Check out my Best Beginner DIY Tools post to see what you need to get started on your next project!
Building a Frame for your Wood Slat Wall
There are a few ways you can build a wood slat wall panel in your home. One way includes using Liquid Nails in addition to nails in your drywall. Liquid Nails is an awesome product if you plan on leaving your slats up FOREVER. However, almost nothing in my home is forever… so I was very hesitant to do something so permanent.
The other way to add slats to your home and the way I opted for, is to create a simple panel frame that is securely attached to the wall and then the slats get attached to the frame. This removes the need for liquid nails because the frame will be attached along all the studs, making it a very strong structure.
Painting the frame
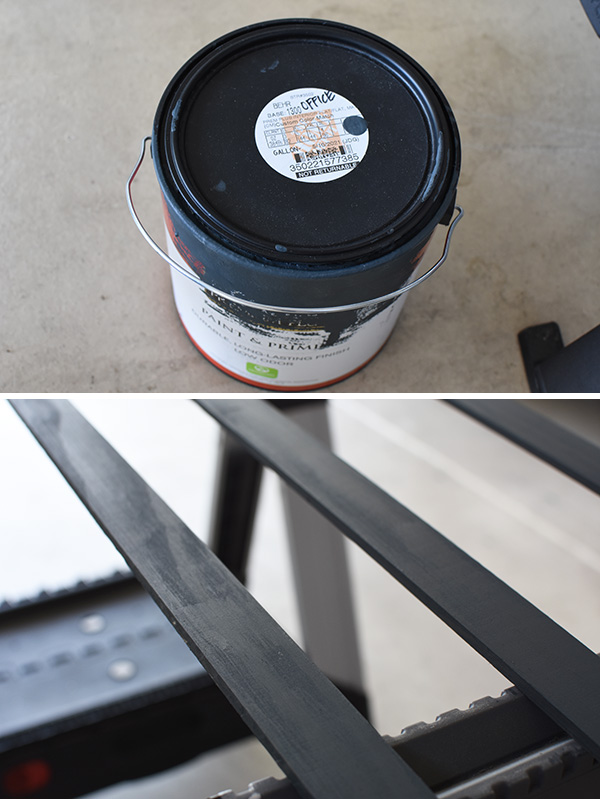
The first step to building your frame is painting the frame pieces the same color as the wall. I gave my three pieces a nice coat of my Behr premium paint and allowed to fully dry.
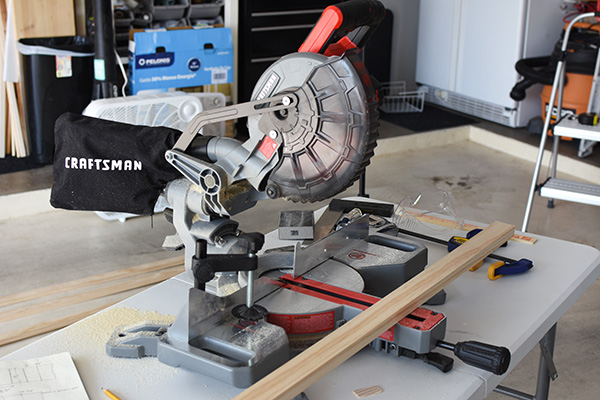
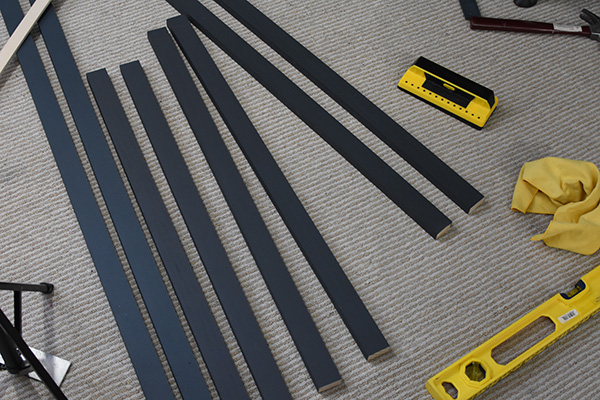
Cutting Wood Slats to Size
I measured from the top of my base board to the top of the soffit ceiling was 82-7/16″. I subtracted the width of a paint stick (to give my boards a little expansion wiggle room) and cut them all down using my Miter Saw.
Deciding on your Wood Slat Wall Spacing
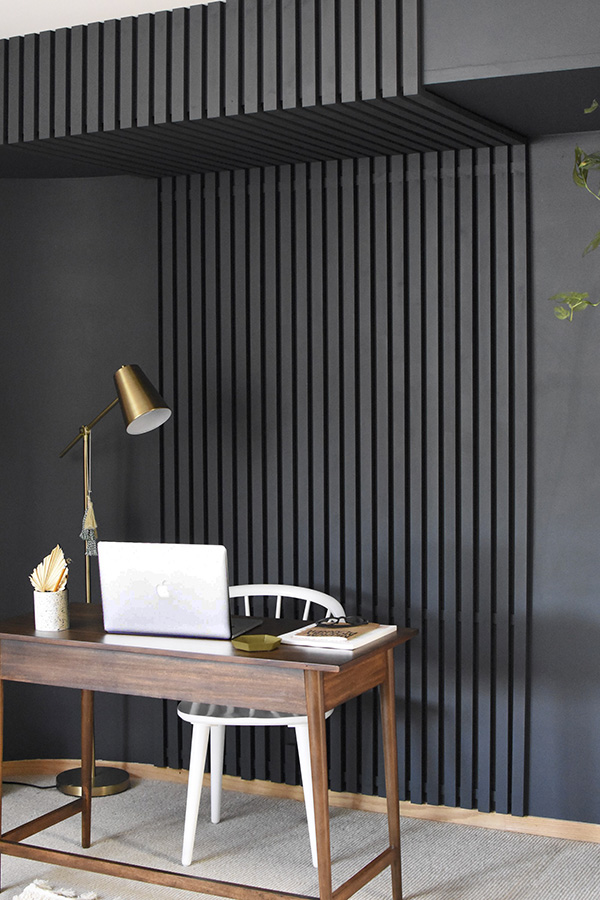
Since I am highlighting the area behind my desk with these slats, I measured the width of my desk and added about 6-1/2″ additional for each side. I then found the centerline of that space and marked it with a pencil.
I placed two boards equally on either side of the center-line mark and then began spacing the rest of the boards out. I rotated a spare board on it’s side to make the same distance between each board. That measured out to being 57-3/4″ wide in total.
Pre-made Slat Wood Panels
If you are by chance looking to buy pre-made slat wood panels, there are some really great options out there.
Not only will the panels look beautiful, but they also dampen the sound in the rooms they are installed. Here are a few of my favorites –

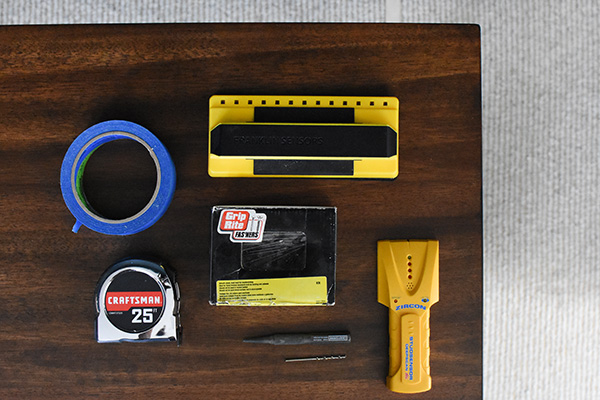
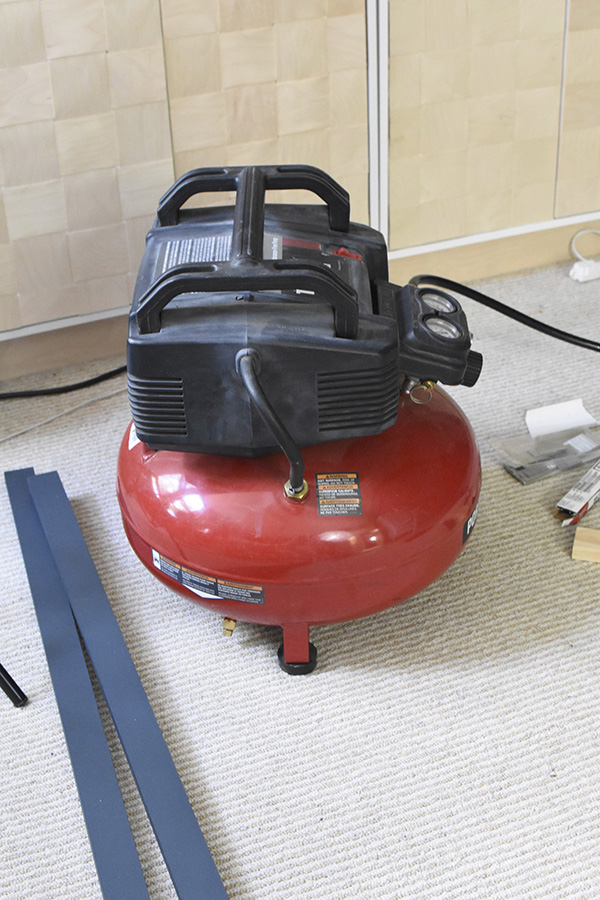
Supplies needed for a Wood Slat Wall
Painter’s Tape
Measuring Tape
Pencil
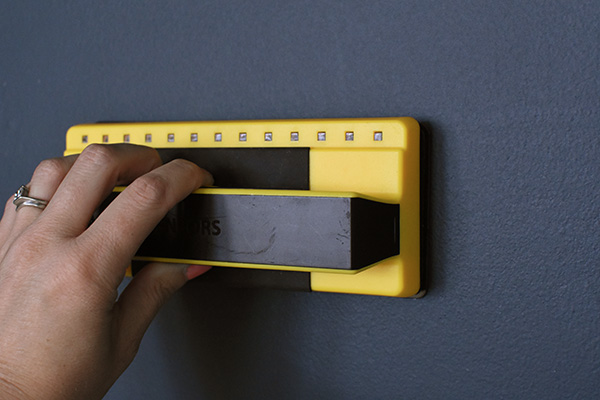
Stud Finder
Air Compressed Pneumatic Nail Gun
Nails
Nail Countersink
Spare slat piece to help with spacing
Level
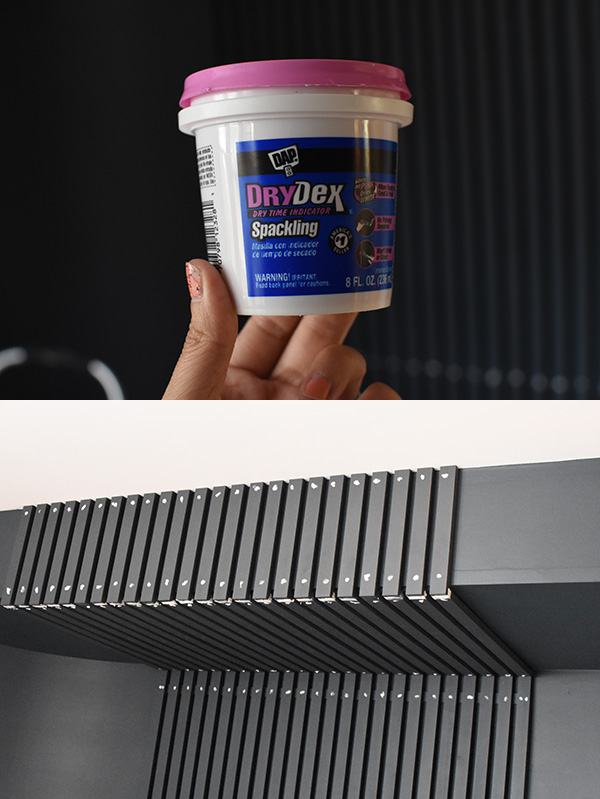
DAP Dry Dex Spackling
Paint Color – BEHR Interior Paint in Nocturne Blue HDC-CL-28
Saw + Chissel (optional)

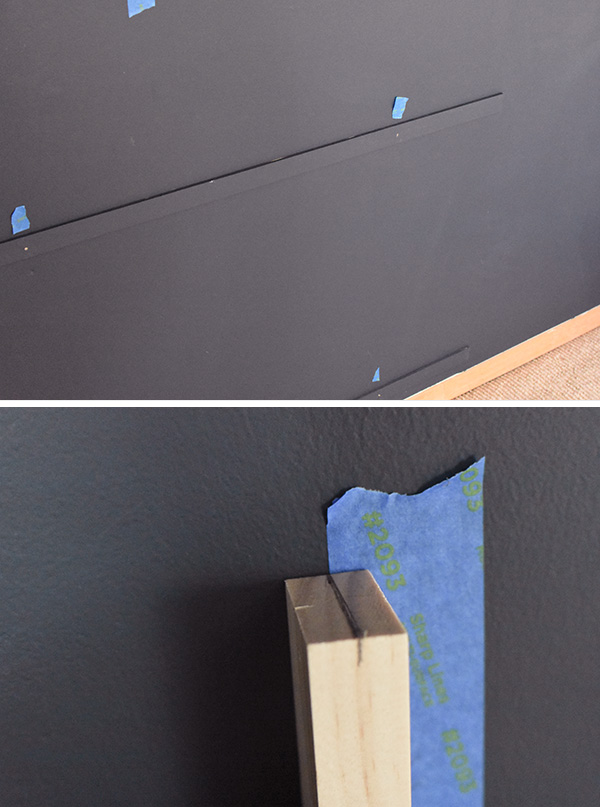
Installing a Wood Slat Frame
Since I know knew the width of my slat trim pieces were going to be 57-3/4″ wide, I cut down the painted frame pieces to match. My next steps were finding the studs in the walls.
I was sure to pre-drill holes into my much thinner frame pieces and then attached them along the top, middle and bottom of the wall. You can see the middle and bottom frame pieces here in the first picture below.
I then placed a wood slat on it’s side and marked the middle. I lined that mark up with the centerline I had drawn on the wall. This helped me locate exactly where the first two painted slats were to be installed on the wall.
I used our air compressor pneumatic nail gun to install this entire project on the wall.
How to install Wood Slats around electric outlets
Unfortunately, I ran into an electric outlet situation on the wall and had to come up with a solution to work around it. The way my spacing was, the outlet was going to be partially on two different slats.
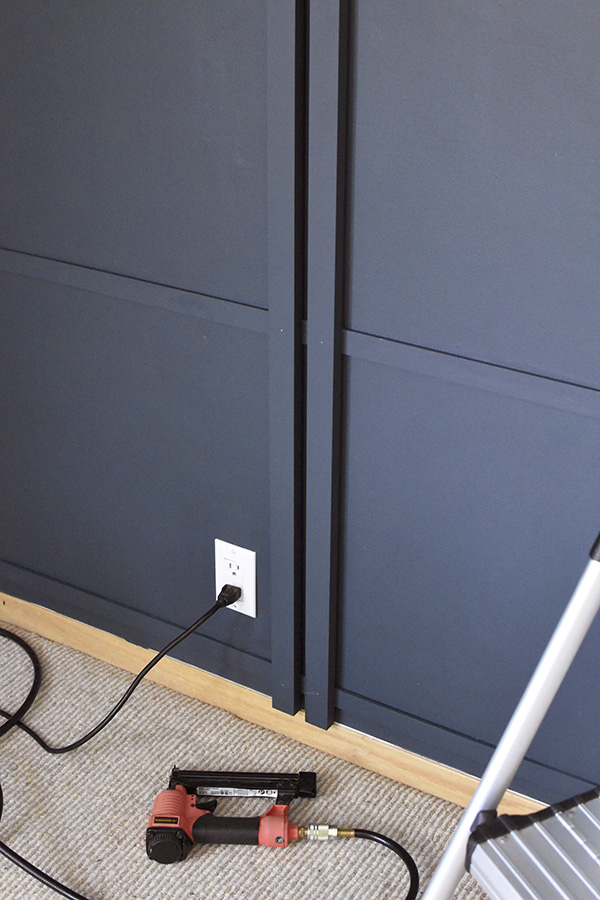
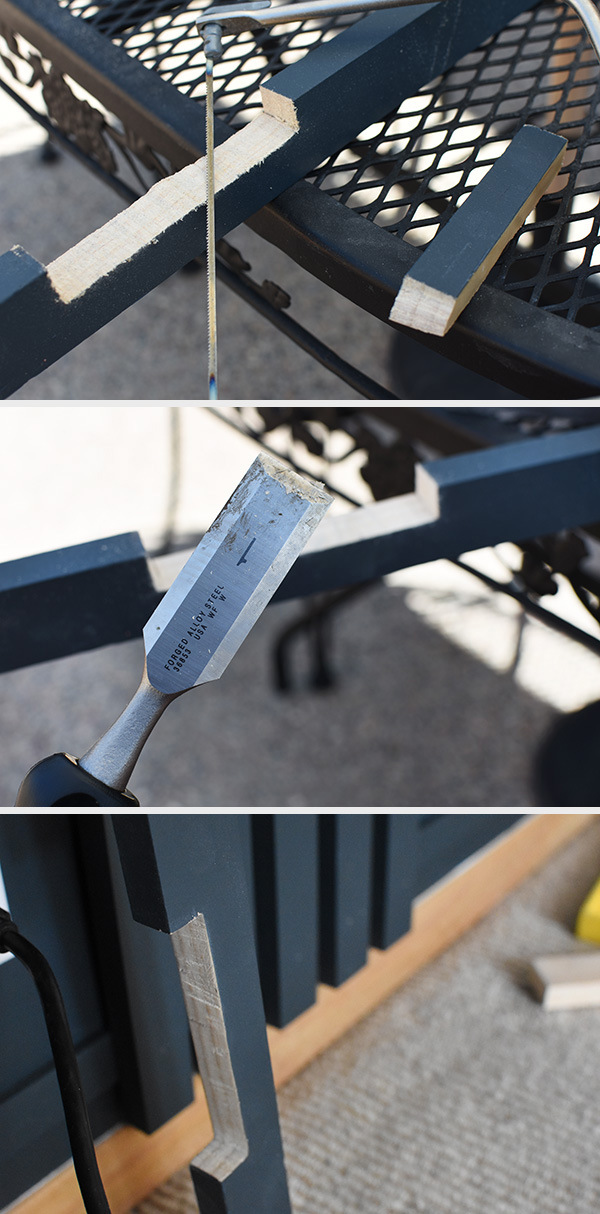
I held up the slat against the outlet and using a pencil drew my cut marks. I used a small saw to then cut out the notch where the outlet would sit. I also used a chisel and sanding block to help get that inner portion a bit more level and smooth. Once it was ready to go, I made to sure paint the interior portion so it would blend in more easily.
The other side of the outlet was so minimal, it wasn’t worth the effort of trying to cut a piece. For that board, I simply cut the slat in two and removed the middle portion. Plus, the desk helped hide this area.
Another tip to note is giving yourself some space at the ceiling. It’s hard to tell in the photo below, but I used a small leftover piece from my frame and slid it against the ceiling as I nailed in my slats. This helps will any moving the house may do and just provides a bit of give. Plus, I was planning to do a wrapped slat wall so this area will be covered up from seeing.
You can really start to see what the slat wall will look like. It was so fun seeing it slowly start to take shape!

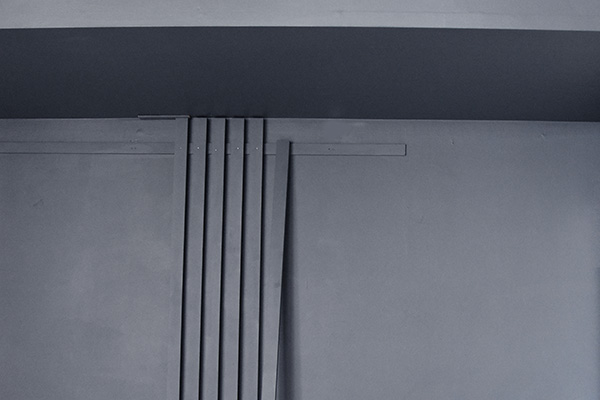
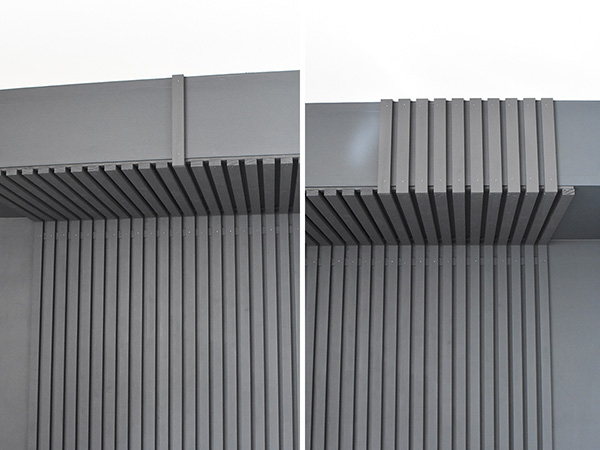
Adding Wood Slats to the ceiling
Once I had completed the vertical to the wall slats, it was time to start with my “wrapped” vision. I followed the same plan and installed two frame pieces on the ceiling. One was right up aginst the wall area and the other was out at the end of the “ceiling”, which really is just a soffit of some kind.
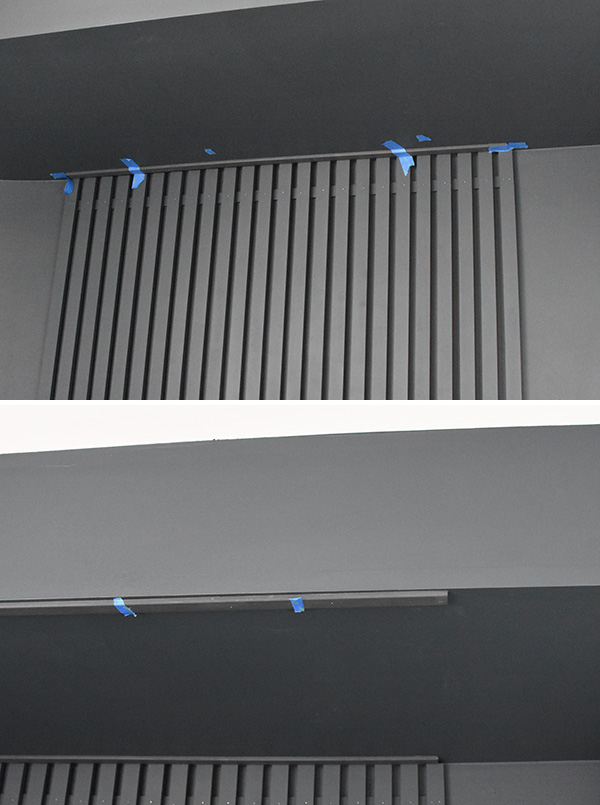
I measured from front of my “wall pieces” to the edge of the soffit ceiling edge and cut my 24 boards to length.
How to attach Wood Slats to Wall
Following again the same method, I slowly started nailing in the ceiling slats. I made sure that every board was lining up perfectly with the wall slats and used a spare piece to make sure th spacing was perfect each time.
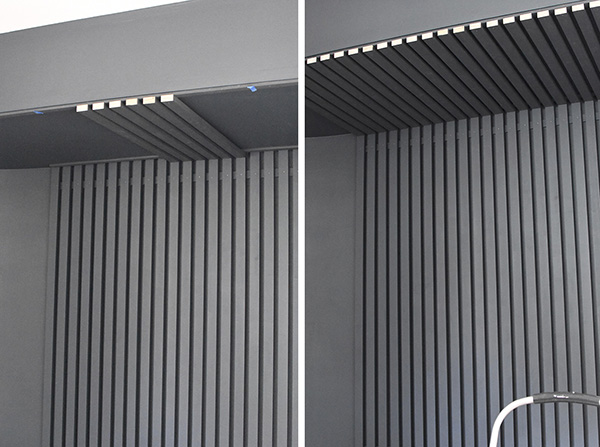
You can see how the edge of my ceiling slats juuuuuust barely is short of the front face of the soffit. I did this so that front face would easily just cover them up.
I measured once more from the TRUE ceiling to the BOTTOM of my “soffit ceiling” slats to get the final slat cuts.
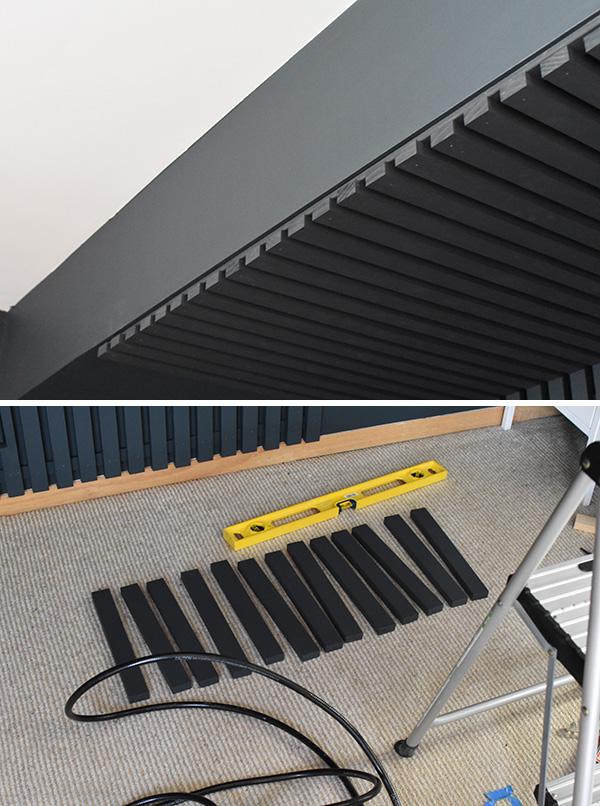
Slowly, following the same method I installed the final fronts to the wall. Since this area was much more narrow, I decided against doing a frame. I nailed at the top of the bottom of each slat.
Tips for covering nail holes:
Once my entire slat wall was installed, there were quite a few nail holes I needed to deal with. I used DAP Dry Dex Spackling. This is the pink stuff that dries white.
I simply used my finger and started at the bottom of the slat wall and filled in every single nail hole. Once the spackling turned white, I lightly sanded each hole with sand paper. Then, I went back and touched it all up with leftover paint.
Completed Wood Wall
I was so thrilled with how this wrapped wall looked! It is the perfect statement wall in my office.
Looking for an entire post about beautiful Accent Wall Ideas? Check it out now.

Here is what I still have left to finish in a week’s time.
- TO DO LIST over the 8 weeks –
Paint WallsHang WallpaperPaint IKEA storage lockers(I’m going to need to revisit this one later.)DIY cabinet hackDIY art above dresserInstall WoodSlat accent wall (Half crossed this item out because it’s about halfway complete.)- Hang Gallery Wall
- Style room with
new rug, floor cushion, bean bag chair,desk+ accessories
Here are a few items I have already picked up for my new office:
I absolutely love the idea of a painted wood slat wall! The color choices you presented really transform the space. I’m inspired to try this in my own home. Thanks for sharing such a detailed guide!
I love the way you transformed the space with the painted wood slat wall! The colors you chose really brighten up the room, and I appreciate the detailed steps you provided. I can’t wait to try this in my own home!
I absolutely love the look of the painted wood slat wall! It adds such a unique and modern touch to any space. Your step-by-step guide makes it seem so doable—I can’t wait to try this in my own home. Thanks for the inspiration!
I absolutely love the painted wood slat wall idea! It adds such a unique touch and warmth to the space. The color choices are beautiful too. Thanks for sharing these tips and inspiration!
I absolutely love how the painted wood slat wall adds so much character to the space! The choice of colors is fantastic and really makes a statement. Can’t wait to try this in my own home!
I absolutely love the idea of a painted wood slat wall! It adds such a unique and personalized touch to any space. The color choices you provided are inspiring, and I can’t wait to try this project in my own home. Thanks for sharing such great tips!
I absolutely love the painted wood slat wall idea! It adds such a beautiful texture and warmth to the space. The color choices you shared really inspire me to try something similar in my home. Thanks for the great tips!
I love this painted version of the wood slat wall! Also love the idea of attaching it to the frame first for more versatility. What color of paint did you use? I see you have a link to a specific paint, but that one looks a little different than the slat color.
Thank you, yes thank! It was a custom color and it changes colors depending on the lighting. So the Nocturnal color was the closest I could find. 😉
It looks amazing! What kind of wood did you use?
I used Select Pine boards!