Woven Wooden Cabinet


INSIDE : Learn how to create a stunning and inexpensive statement cabinet in your home. Using one simple material you can make a Woven Wooden Cabinet. Check out how to add a gorgeous wooden checkerboard pattern to any piece of furniture!
This post has been updated since it’s original May 2021 publish date.
This post may contain affiliate links. See my full disclosure.
Today marks week SIX of the Spring 2021 One Room Challenge, where I’m participating as a guest. Last week I made a super fun Spackle DIY art piece and officially decided I want to make spackle art forever. It was so so fun.

Every Thursday until June 24th, I am sharing my weekly transformation of my office.
Week 1 Office Plan
Week 2 Painting Office Moody Blue
Week 3 Adding Removable Wallpaper to a room
Week 4 Spackle DIY Art
Week 5 Slow going week
Week 6 Woven Wooden Cabinet
Week 7 Painted Wood Slat Wall
Week 8 Moody Office Reveal
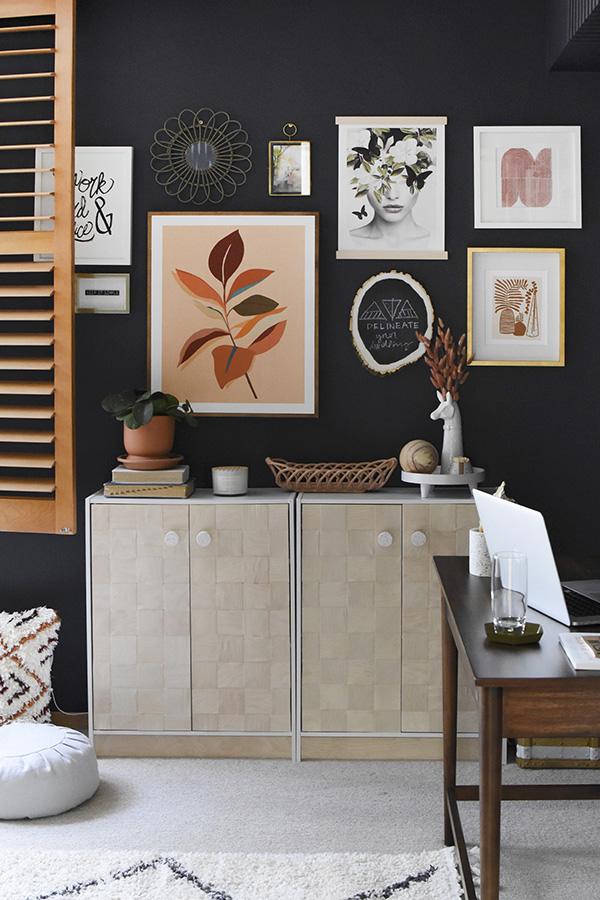
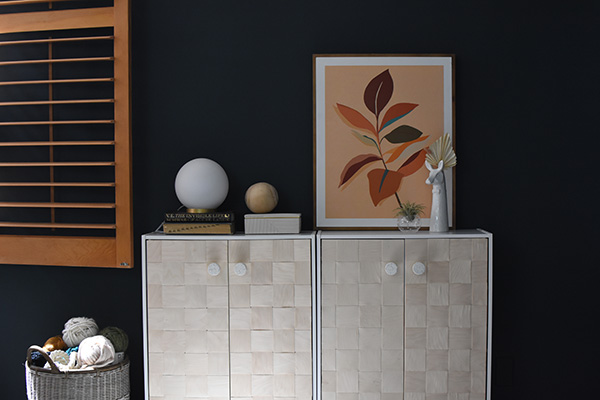
I’ll be honest, last week really felt discouraging. I ran out of supplies and a had a few setbacks, but week 6 felt so redemptive! I’m THRILLED how this woven checkerboard cabinet turned out!!
I hope you are as inspired by it, as I am.
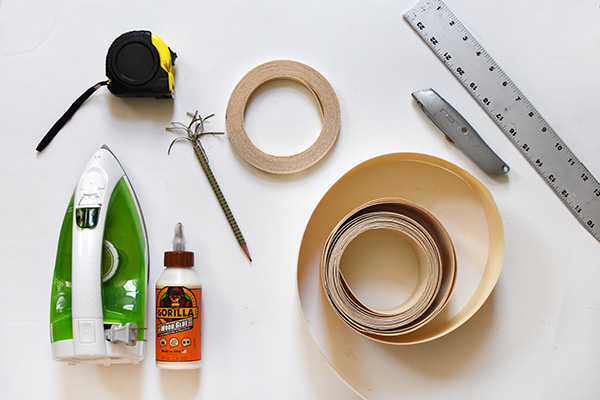
What supplies do I need to make a Woven Checkerboard Cabinet?
Two White Storage Cabinets
(4) 25′ X 3″ Birch Wood Veneer packs
4 Round Terrazzo Pulls (I found a handful of similar ones online – here, here, here)
Iron
Wood Glue
Straight Edge Ruler
Measuring Tape
Cutting Mat
Utility Knife
Pencil
Power Drill
11/16 Drill bit
Painter’s Tape
Sanding block
Clamp

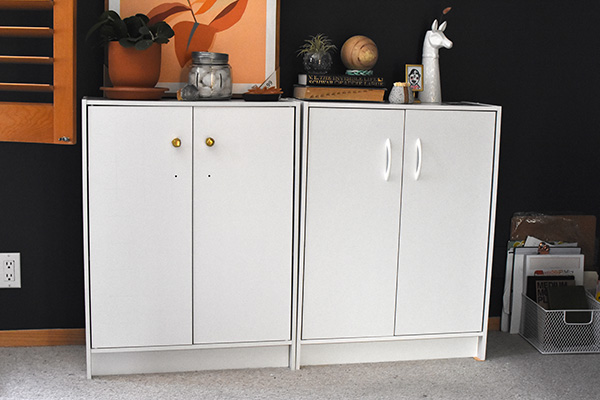
Boring White Storage Cabinet BEFORE
I have done what feels like nothing, but clean out and purge my office for months.
I have gotten rid of SO MUCH, but somehow there is still more.
I currently have a pair of IKEA lockers and a 6 drawer dresser, but it wasn’t quite enough to contain my craft and spray paints and miscellaneous blogging business supllies, ha.
I already had one of these simple white storage cabinets, see the gold knobs I had installed. So, for a whooping $37 I got another one. However, I knew I had big transformation plans for them!
Check out my Best Beginner DIY Tools post to see what you need to get started on your next project!
What material can be used to weave wood onto furniture?
This is a great question. I stood in the aisles of Home Depot for so long trying to figure this out. I had my sketchbook in one hand and various pieces of thin wood trim out. I kept trying to weave these 8′ long pieces of trim in the aisles and it was not working well.
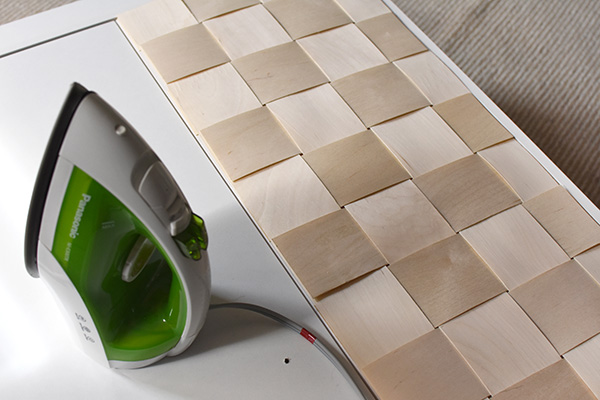
Suddenly, WOOD VENEER came to mind! It’s real wood just cut very very thinly. An added bonus is that the back of the kind I choose has glue already on it. With the heat of an iron, it adheres to what it’s touching. I searched around and found 3″ wide Birch veneer. I loved the color, I loved the thickness, it was perfect for this project!
Veneer cuts needed:
I took very detailed measurements of my white cabinets and drew out a plan to help me visualize it all.
To make a simple woven pattern, FOR EACH DOOR you will need :
(9) small pieces cut to 11-3/16″ for the horizontal slats
(4) long pieces cut to 27-1/8″ for the vertical slats
I also wanted veneer to cover the bottom kick plate, so that required :
(1) long piece cut to 31-1/2″
NOTE : Be sure to read that above in bold, these are the cuts needed for ONE door. In my case, I had two cabinets which equal four doors. This is why I ran out of supplies last week, I only bought enough for one door… not all four doors. Be sure to calculate how many doors and buy the supplies accordingly.
How do I create a woven checkerboard pattern with veneer?
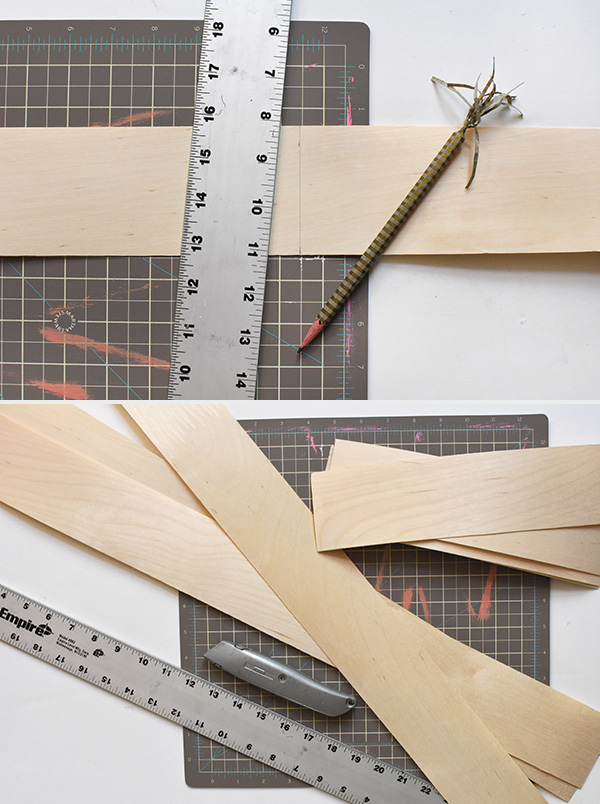
To create this gorgeous checkerboard pattern, lay out your veneer on a cutting mat and using a pencil, mark your cut line. Take a straight edge ruler and utlity knife to make your cuts. Repeat this process until you have all the cuts needed for each door.
Checkerboard Weaving Best Practices :
1. I found it best to first lay out the long vertical pieces, starting in the center of the cabinet (where the door opens). I wanted the main cabinet area to be a perfect woven grid. The far edge piece will get cut down slightly.
2. Once the long vertical pieces are in place, start with your shorter horizontal pieces and begin at the top. You want the top and center of the cabinet to be as perfect as possible. Those points will act like a ruler, keeping you straight and square.
3. Once you have the first door veneer woven, you will notice a slight overhang on both the outside edge and the bottom. Using your straight edge ruler and pencil, mark on your piece where you need to cut. Take just that piece off, trim with the utility knife and reinsert into the grid.
4. Get out your iron, set to high cotton heat and “iron” down your veneer. After a few passes over the entire door front, I found it helpful to set a few books ontop while it cools. This helps keep your wood laying flat.
5. For the kick plate piece, since my iron wouldn’t easily get in the tight corners, I added just a bit of wood glue to the corner- hard to reach spots.
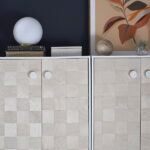
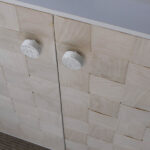
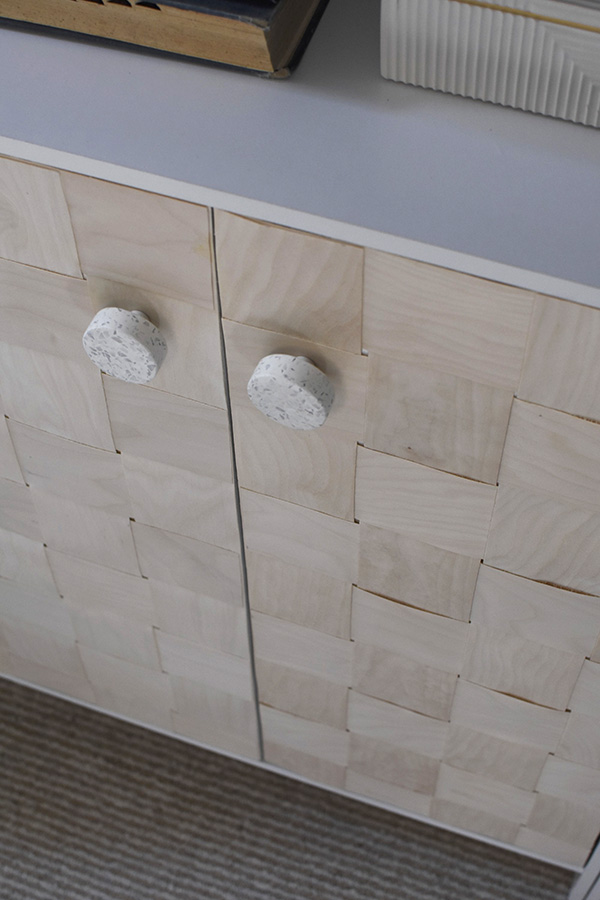
Adding terrazzo knobs
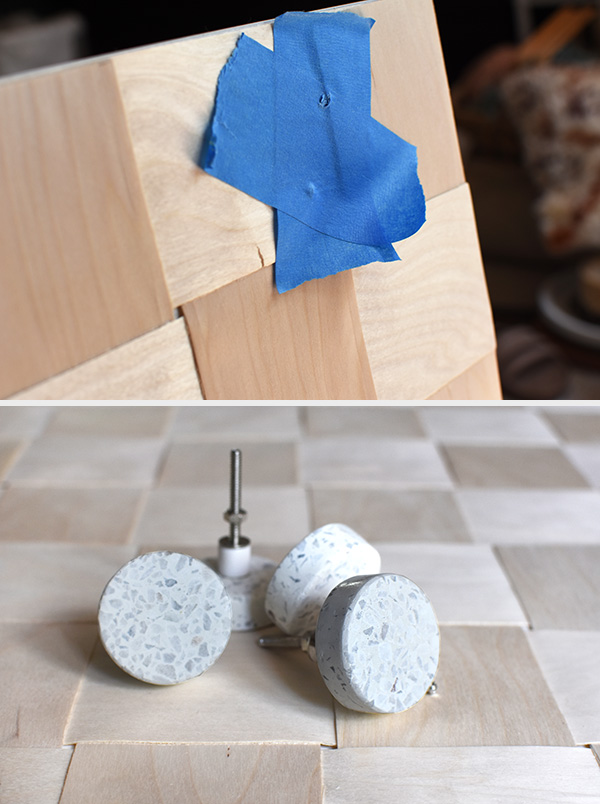
The last step is adding the beautiful terrazzo round knobs! I got mine at Hobby Lobby, but you can use any hardware you like. I used a 11/64 drill bit to drill through the back of the cabinet through the veneer layers using my power drill.

I used painter’s tape right where I was going to drill through to help with any wood splintering. Then I used a sanding block to clean up any slight splintering of wood.
I noticed just a few spots on the edges that the veneer glue didn’t adhere perfectly. I dabbed just a little wood glue and a clamp in those spots for a perfect fit. A light sanding on all the edges was my final step!
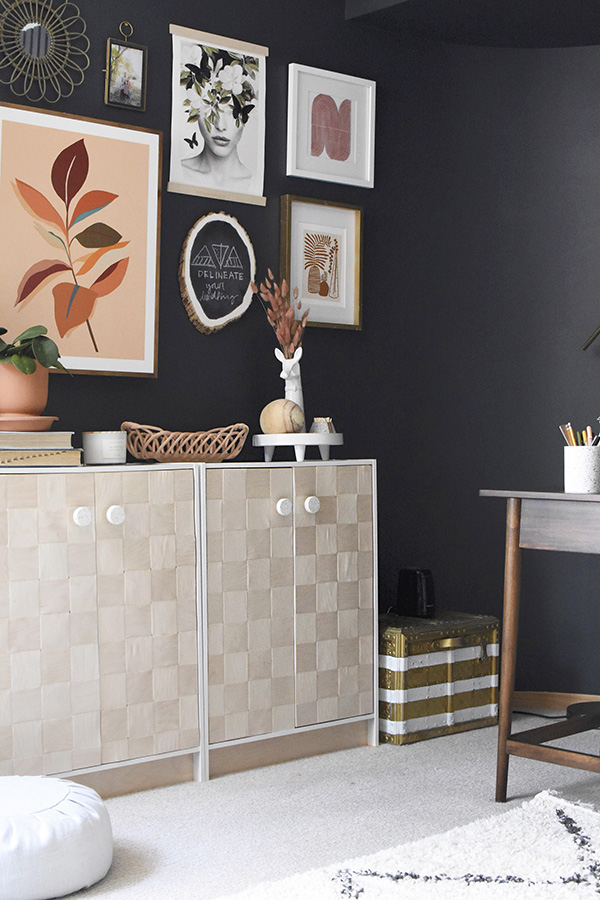
Alternate to Rattan or Cane cabinets
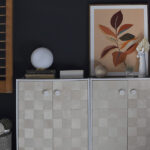
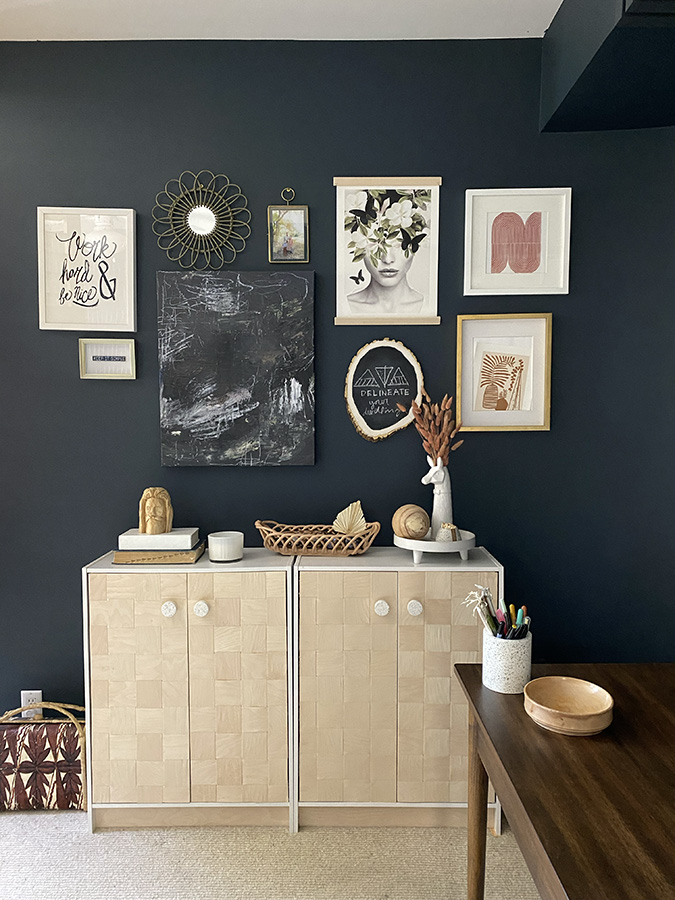
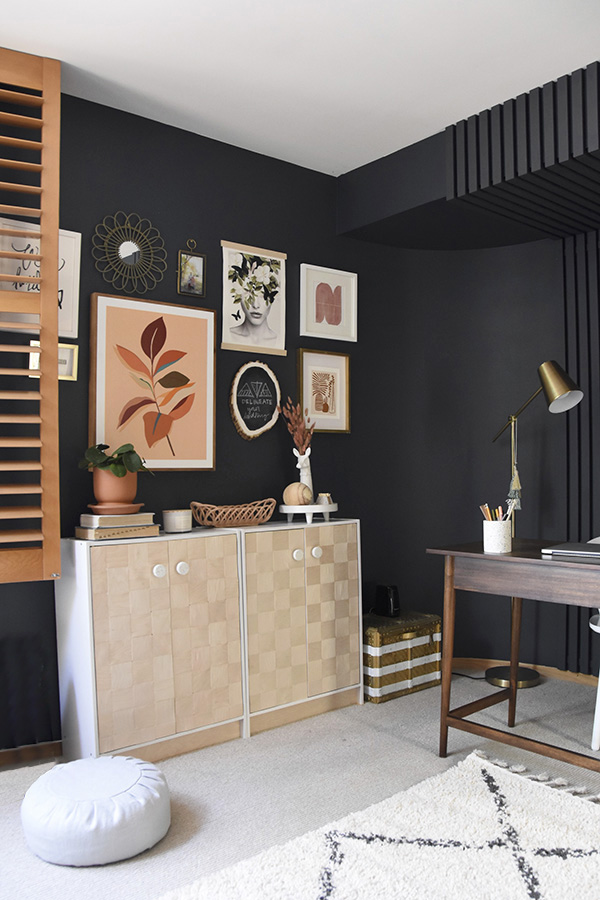
I really can not express how happy I am with the final product. It provides so much storage for my office and adding this woven look adds such a fun sophisticated look! I had thought about doing a cane or even rattan cabinet DIY hack, but I am so thrilled to have gone with a different look.
Ikea Cabinet Hack
And although I got my cabinets from Home Depot, this could totally be an IKEA Cabinet Hack too. They have a perfect white flat-front cabinet that would be amazing for this project.
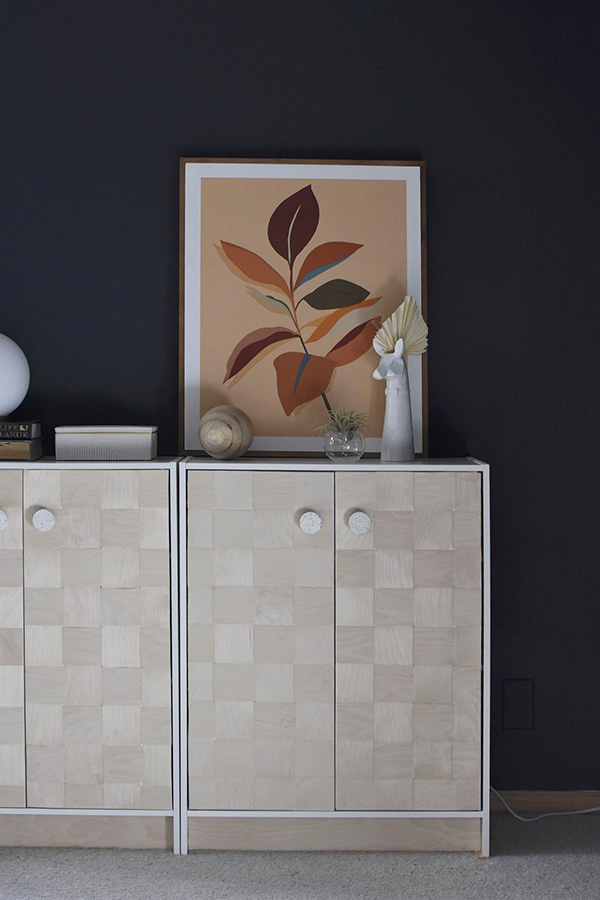
I may just sit and stare at these knobs for a while. I almost was going to DIY terrazzo knobs, but I am so glad I just bought them. Sometimes buying is just easier, ha.

I can’t wait to start putting up my art gallery and get everything set up. Week 8 is so close now!
DIY Woven Wooden Cabinet
Learn how to create a stunning and inexpensive statement cabinet in your home. Using one simple material you can make a Woven Wooden Cabinet. Check out how to add a gorgeous wooden checkerboard pattern to any piece of furniture!
Materials
- Two White Storage Cabinets
- (4) 25′ X 3″ Birch Wood Veneer packs
- 4 Round Terrazzo Pulls (I found a handful of similar ones online – here, here, here)
- Iron
- Wood Glue
- Straight Edge Ruler
- Measuring Tape
- Cutting Mat
- Utility Knife
- Pencil
- Power Drill
- 11/16 Drill bit
- Painter’s Tape
- Sanding block
- Clamp
Instructions
- To create this woven checkerboard pattern, lay out your veneer on a cutting mat and using a pencil, mark your cut line. Take a straight edge ruler and utlity knife to make your cuts. Repeat this process until you have all the cuts needed for each door.
- To make a simple woven pattern, FOR EACH DOOR you will need - (9) small pieces cut to 11-3/16″ for the horizontal slats - (4) long pieces cut to 27-1/8″ for the vertical slatsI also wanted veneer to cover the bottom kick plate, so that required - (1) long piece cut to 31-1/2″
- I wanted the main cabinet area to be a perfect woven grid, so begin by laying out the long vertical pieces and starting in the center of the cabinet (where the door opens). The far edge piece will get cut down slightly.
- Once the long vertical pieces are in place, start with your shorter horizontal pieces and begin at the top. You want the top and center of the cabinet to be as perfect as possible. Those points will act like a ruler, keeping you straight and square.
- Once you have the first door veneer woven, you will notice a slight overhang on both the outside edge and the bottom. Using your straight edge ruler and pencil, mark on your piece where you need to cut. Take just that piece off, trim with the utility knife and reinsert into the grid.
- Get out your iron, set to high cotton heat and “iron” down your veneer. After a few passes over the entire door front, I found it helpful to set a few books ontop while it cools. This helps keep your wood laying flat.
- For the kick plate piece, since my iron wouldn’t easily get in the tight corners, I added just a bit of wood glue to the corner- hard to reach spots.
- The last step is adding the beautiful terrazzo round knobs! I got mine at Hobby Lobby, but you can use any hardware you like. I used a 11/64 drill bit to drill through the back of the cabinet through the veneer layers using my power drill.
- I used painter’s tape right where I was going to drill through to help with any wood splintering. Then I used a sanding block to clean up any slight splintering of wood.
- I noticed just a few spots on the edges that the veneer glue didn’t adhere perfectly. I dabbed just a little wood glue and a clamp in those spots for a perfect fit. A light sanding on all the edges was my final step!
- Enjoy your new amazing checkerboard cabinet!
I love the natural wood cabinet look and this woven checkerboard pattern only adds to that beautiful light wood look.
Here is what I still have left to complete. I think I just might be able to pull it off!
- TO DO LIST over the 8 weeks –
Paint WallsHang WallpaperPaint IKEA storage lockers(I’m going to need to revisit this one later.)DIY cabinet hackDIY art above dresser- Install Wood Slat accent wall
- Hang Gallery Wall
- Style room with
new rug, floor cushion, bean bag chair,desk+ accessories
Here are a few items I have already picked up for my new office :
Check back next week for my gallery wall update!
Amy, Your new cabinets look really cool.
Oh thank you so much! 😉
Looks fantastic!
Oh thank you SO much!