Demo Kitchen Soffit and Ceiling

INSIDE : Big impact, small budget DIY – Learn how to easily Demo kitchen soffit and ceiling to give your room a new modern look.

This post may contain affiliate links. See full disclosure here.
If you have been following along, after five years with QUITE an outdated kitchen… we decided it was time to make some major improvements. Our first child was on the way and it was time to get our home a bit more in order before she arrived!
So far had made a Kitchen Renovation Plan, Demoed the Kitchen Cabinets and Built an Arch pass-through. Next on our to do list was to demo the soffit and ceiling. Let’s get to it then!
Our Plan
-For budgetary reasons, we decided to keep the main layout of the kitchen the same, but add a pantry cabinet.
-All appliances were updated, but stayed in their same location.
-Flooring would remain-We would do a demo of cabinets, soffit, ceiling ourselves
-Hire a professional to create an arched pass through
-Hire a professional to texturized walls
-Hire an electrical professional to add new lighting to replace the florescent light and in-ceiling speakers
-We decided to remove our cabinets due to their low quality and install flat packed new cabinets-Paint walls
-Install tile backsplash + grout
What is a soffit in a kitchen?
Kitchen soffits are bulky box-shaped walls that connect the cabinets and the ceiling. They are typically made of drywall or wood and are usually the same depth as the cabinets they are covering.
They can be used to conceal ductwork, pipes, wiring, and other unsightly features that run through the ceiling. This can make the kitchen look more finished and polished.
However, the negatives are Soffits can lower the ceiling height, which can make the kitchen feel cramped and claustrophobic. If you need to access the mechanical components behind the soffit, it can be difficult and time-consuming to remove and replace the drywall. And while soffits were once a popular design feature, they are now considered to be somewhat outdated by some people.
Why do kitchen soffits exist?
The main reason why kitchen soffits exist is to hide the unsightly elements that run through the ceiling. These elements include ductwork, pipes, and wiring.
In some cases, soffits can also be used to create a more streamlined look in a kitchen design. For example, if the cabinets are not tall enough to reach the ceiling, a soffit can be used to make the cabinets appear taller and more finished.
However, in most cases, soffits are used to hide things that are not aesthetically pleasing. This can make them a major eyesore in a kitchen design.
Interested in learning more about the Best Beginner DIY Tools? Check out this post!
How to remove a soffit
We did some investigating and our kitchen’s soffit (another name for it is a bulkhead) was empty, other than some basic air venting. We decided to remove it and gain an easy 12+” of space for more cabinet storage.
If the soffit is simply for appearance, it can be easily removed. However, if the soffit conceals important electrical and plumbing lines, you will need to relocate them into the ceiling or walls.
Also some soffits provide structural support to the ceiling. Removing them without proper reinforcement could compromise the integrity of your home. Make sure to check if it is load bearing before removal.
Once all those factors are considered, removing your soffit is as simple as cutting into the drywall, removing any supportive wood structures and subsequently repairing, patching and re-drywalling where the soffit once was.
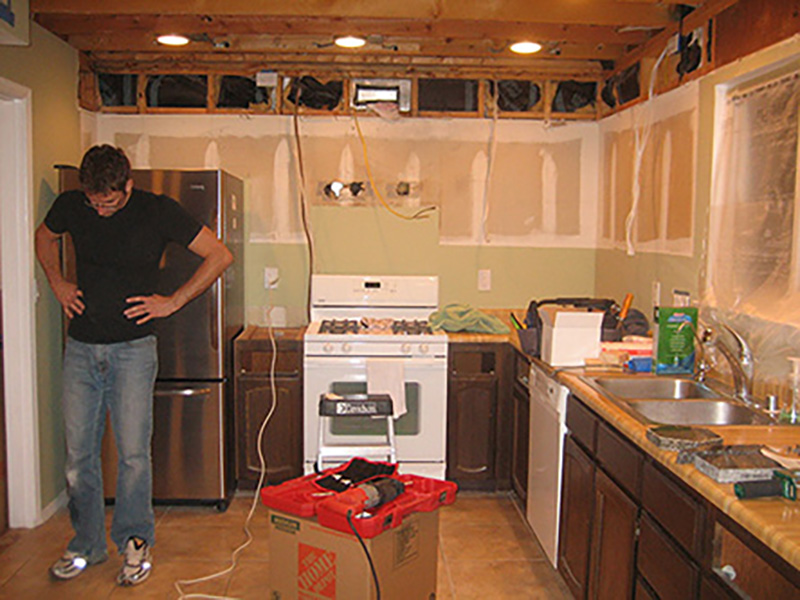
We however, were also removing our ceiling… so once our soffit was demolished, we moved to demo of the ceiling.
Kitchen Progress –
How to remove your kitchen ceiling
Be prepared for this to be a messy job. We put up plastic at all entrys into our kitchen to try and contain the dust and debris from removing the ceiling, however know your home will be dusty. Remove any and everything from the walls and move all items that can be moved into different areas of your home from the demo area.
Next, you will need to cut the seam between your ceiling and wall drywall. There will be some combination of drywall tape and joint compound, along with paint that will need to be scored and cut.
The ceiling drywall will be fastened to the home’s joists above. Get a stud finder and locate a joist. Mark the location with a marker or pencil. Then, move your stud finder either directly backward or to one side from the mark. Whichever direction continues to indicate a stud will let you know which way your joists are running.
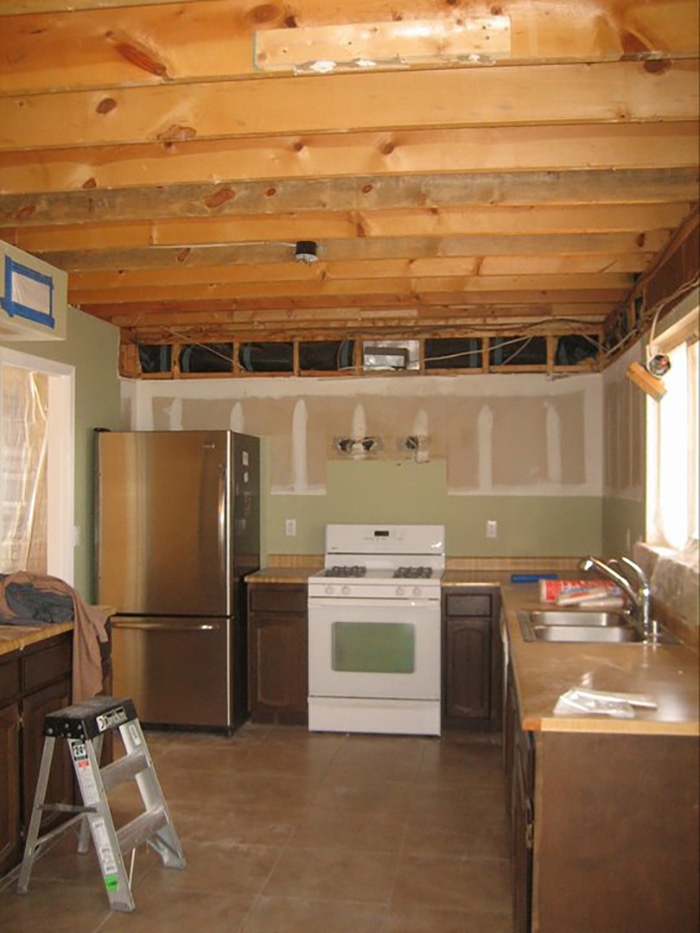
Now that you know which way your joists go, you can make a hole in your ceiling. Grab a hammer and gently break through a section of ceiling between joists. Do this step lightly, since you don’t completely know what is above you in your ceiling.
Wearing safety glasses, with the hole you created, begin tearing the ceiling drywall down. It will come in chunks as you pull with your hands.
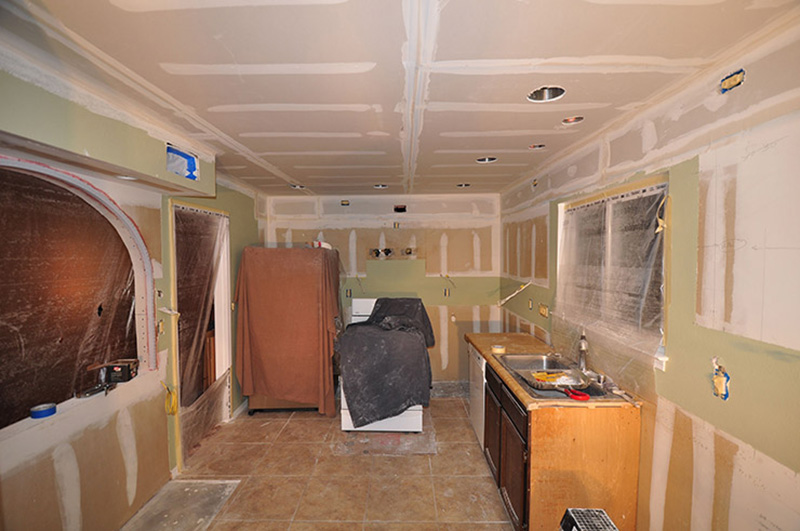
Remove any insulation and remaining nails, as well. Once the ceiling was fully removed, we did some major cleanup and were left with this scene below.
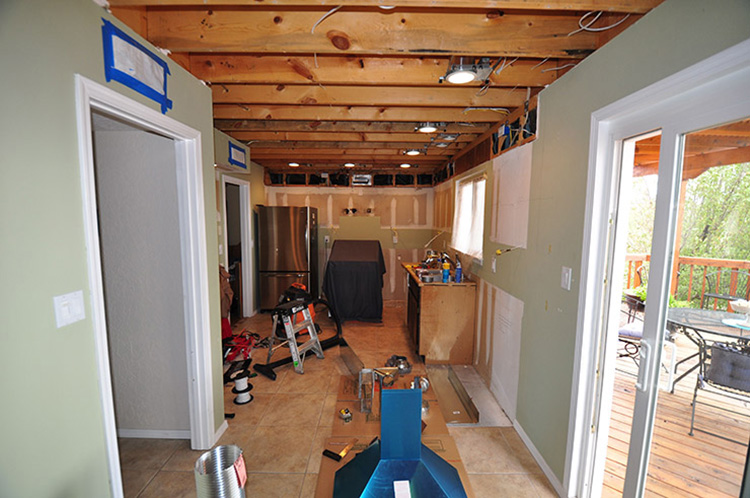
Adding recessed can lighting
We hired an electrician to add a few additional light sockets, remove our hallogen box light and rewire for recessed can lighting.
We also had him wire for 2-Way In-Ceiling Speakers.
After the electrician left, we were able to reinstall the drywall. It was so nice to have ceilings again!
Be sure to check out the next step in this project – How to Texturize Walls and see the final Updated Kitchen Reveal post!
Meanwhile, we slowly started the tedious, but easy (his words, not mine) task of putting the cabinets together. Check in next week, as I share How to texturize walls.
Looking for a few more fun DIY project ideas? Check these out…