Build an Arch Pass Through
INSIDE : How to build an Arch Pass through opening in your kitchen breakfast buffet or any other space. After reading this easy DIY tutorial, you will be ready to create your own archway!
This post may contain affiliate links. See full disclosure here.
If you have been following along with our kitchen renovation, we have been working hard to create a high end look on a low key budget. Check out all of our plans below.
The plan –
-For budgetary reasons, we decided to keep the main layout of the kitchen the same, but add a pantry cabinet.
-All appliances were updated, but stayed in their same location.
-Flooring will remain
–We would do a demo of cabinets, soffit, ceiling ourselves
–Hire a professional to create an arched pass through
-Hire a professional to texturized walls
-Hire an electrical professional to add new lighting to replace the florescent light and in-ceiling speakers
-We decided to remove our cabinets due to their low quality and install flat packed new cabinets
–Paint walls
-Install tile backsplash + grout
You can see the before photos in my Kitchen Plan post and how we demolished our kitchen cabinets here.
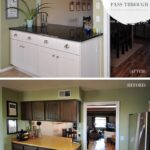
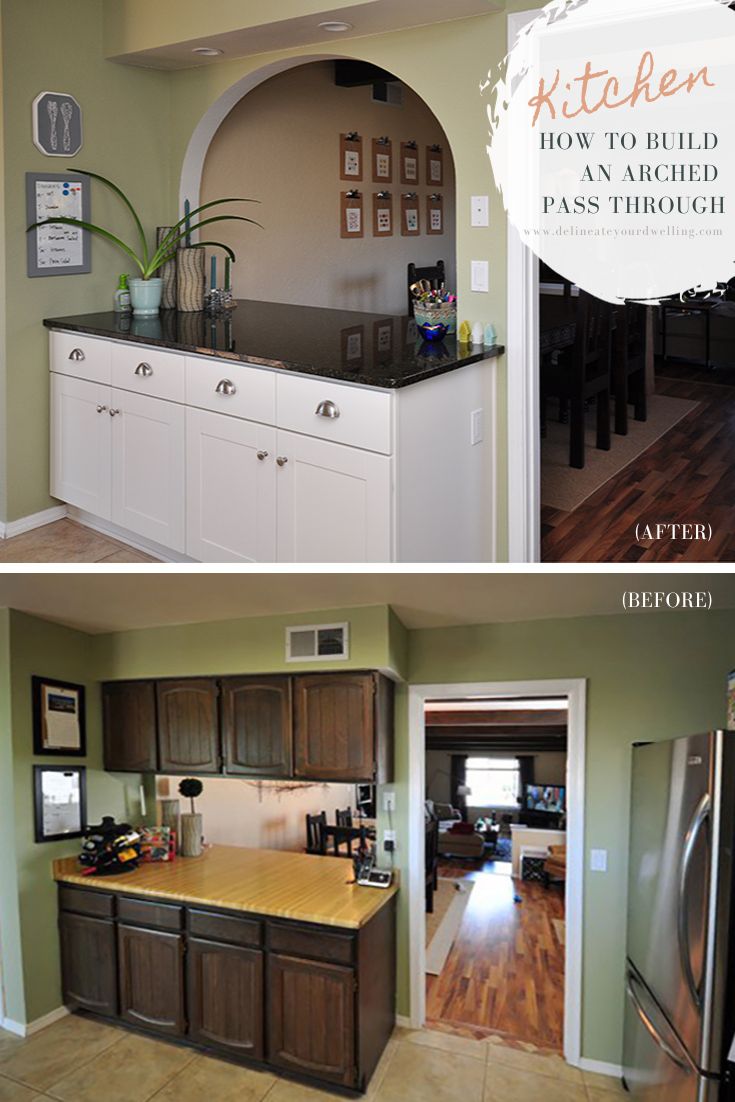
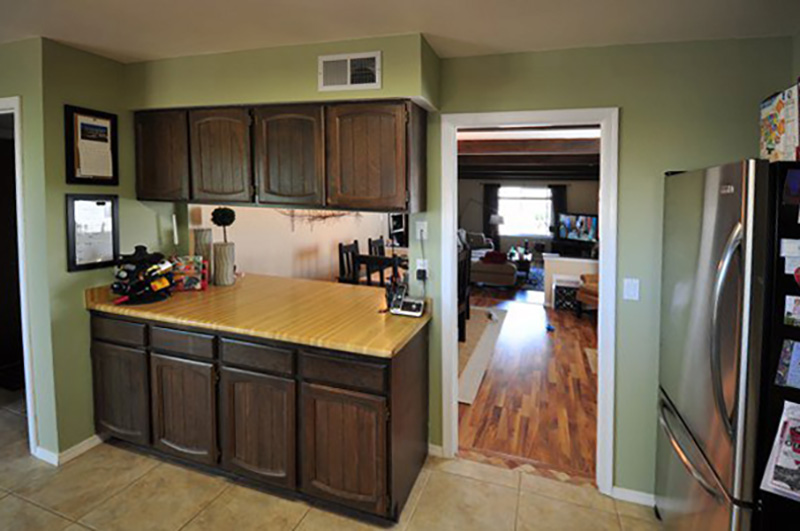
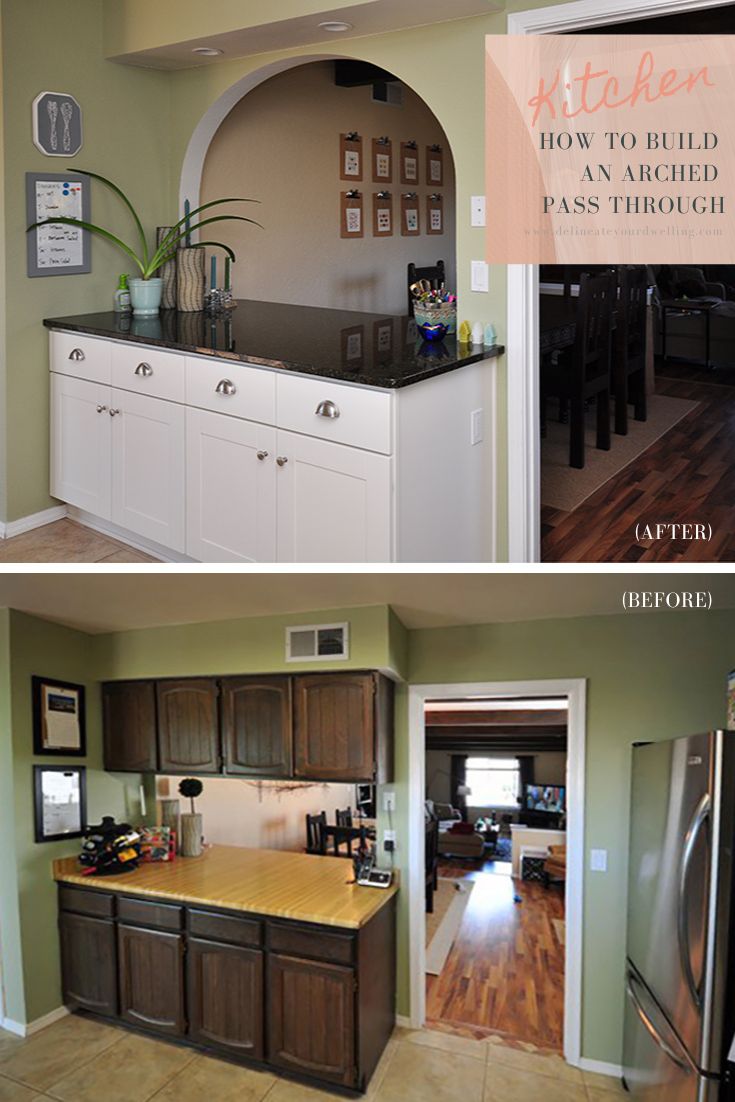
Kitchen Pass-Through before
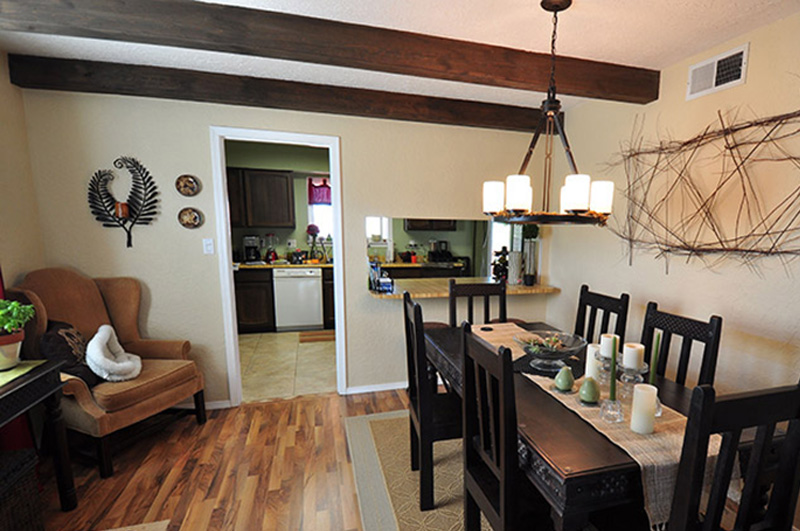
Today, I am sharing how we really opened the kitchen up to the rest of our home by adding an arch pass through opening into our dining room.
This is looking from our dining room into the kitchen.
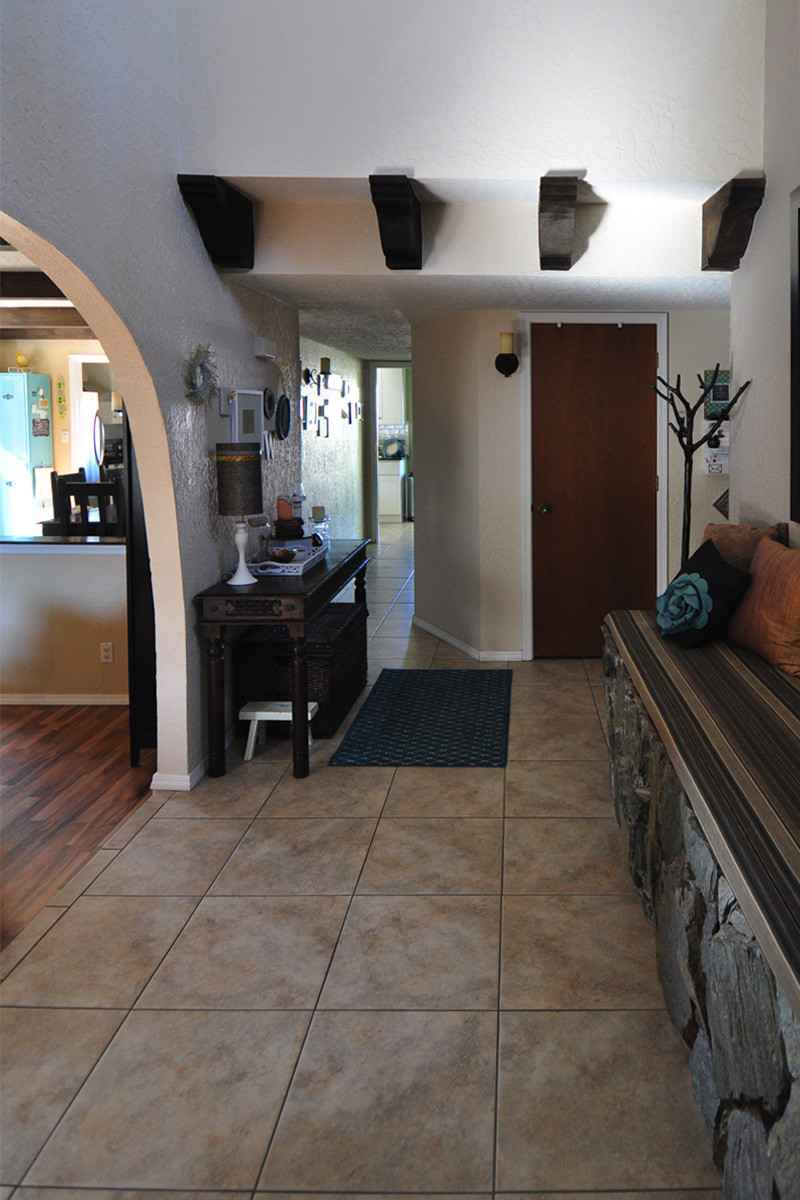
We always hated having to duck down to chat with anyone in the rest of our house from that tiny little breakfast bar nook. The idea with this arch was to mimic the large arched entryway from our foyer space to the living room, as shown below.
Our home is very Southwest if you can’t tell, however adding an arch to your home looks beautiful in any style of home.
Materials needed for creating an Arch
- 2″x4″x4’ board
- 3” wood screws
- Wood glue
- Drywall board
- Mesh tape and joint compound or thinset
- Drill
- Jigsaw
- Miter Saw
- Drywall saw
- Piece of string and pencil
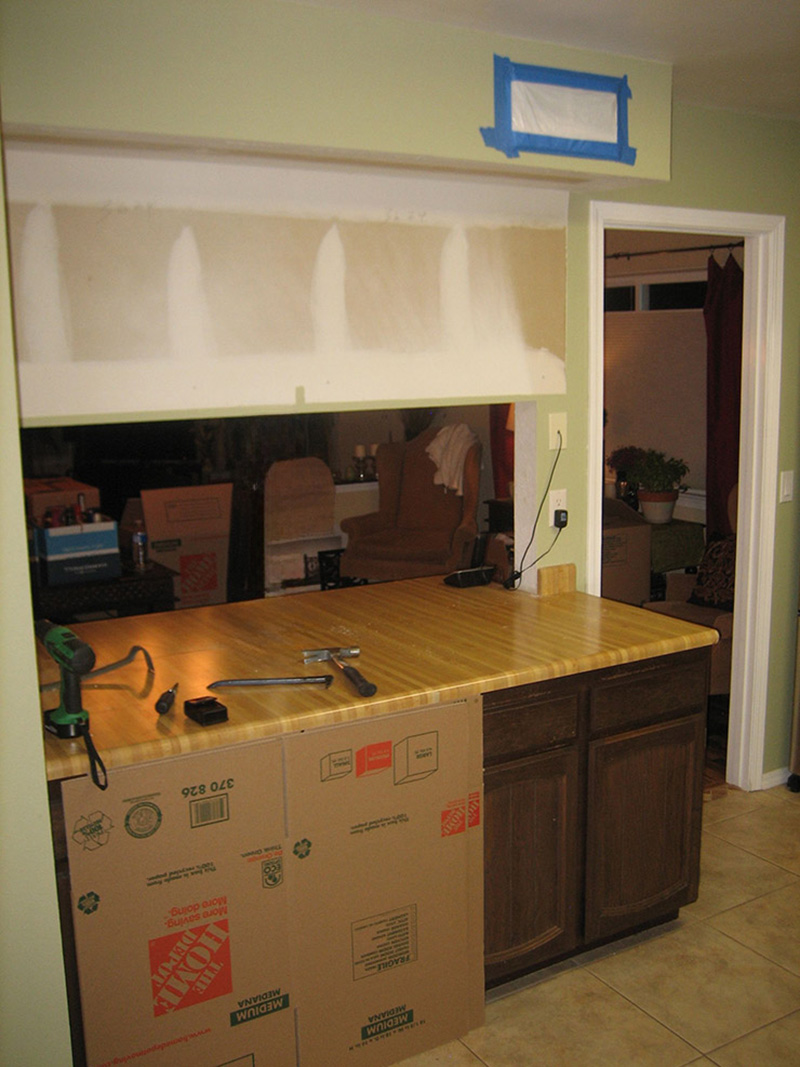
The first step to building an arch pass through in our kitchen was to demo our cabinets. You can read all about how we did that in my blog post. These four cabinets were taking up valuable space to give our kitchen a more open concept feel.
Step 1: Measure existing opening
To create a symmetrical arch, you first need to measure the existing space you have to work with.
Mark the halfway point of that distance on your wall.
Step 2 Draw out Arch
Next, secure a screw at your halfway mark and tie a piece of string to one end. The length of the string is the height of your arch (see my draw line in photo below).
Hold a pencil at the end of your string. Then, keeping the string taut and the pencil steady, slowly draw your half circle on the wall (see my white line in photo below).
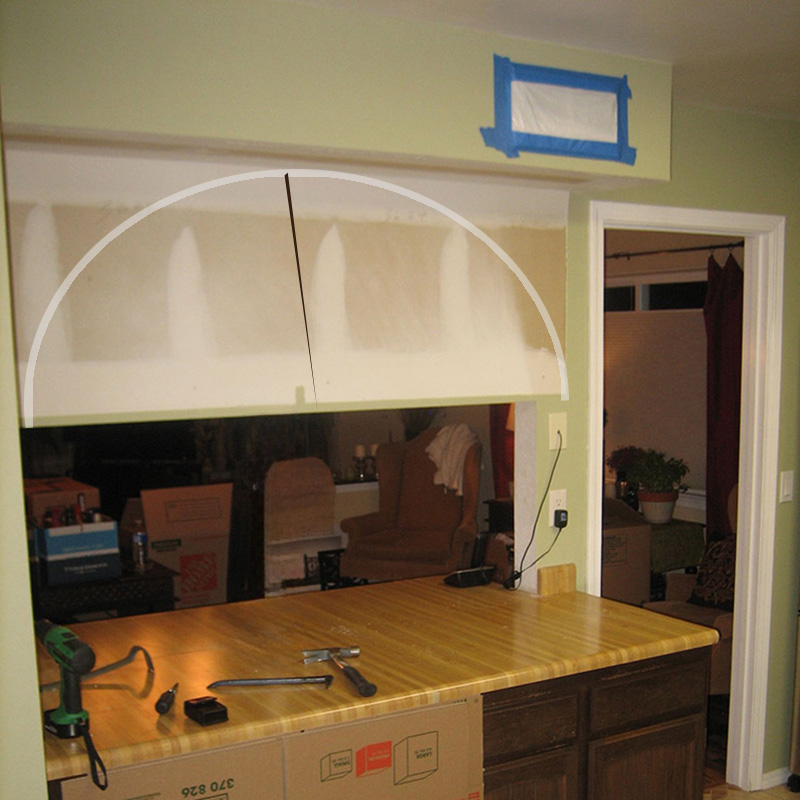
Step 3: Cut out arch
After the arch is drawn, cut along the curved line with a jigsaw or drywall saw. In our situation, we had to cut the kitchen side of the drywall and then cut the dining room side of the drywall.
Step 4: Cut 2×4 blocks and attach between drywall
Next, measure the width between your drywall. Typically interior walls are framed with 2x4s. This makes walls about 4½ inches thick (3½ inches of wood covered on both sides by ½-inch-thick drywall). That meant our 2×4 blocks had to be cut to 3.5″ to match the wall width (you can cut these using a miter saw).
Cut as many blocks as you are able to fit along the curve. We used about 12-14 blocks in total for our arch. You can see below how they fit together.
This was assembled using 2″ screws.
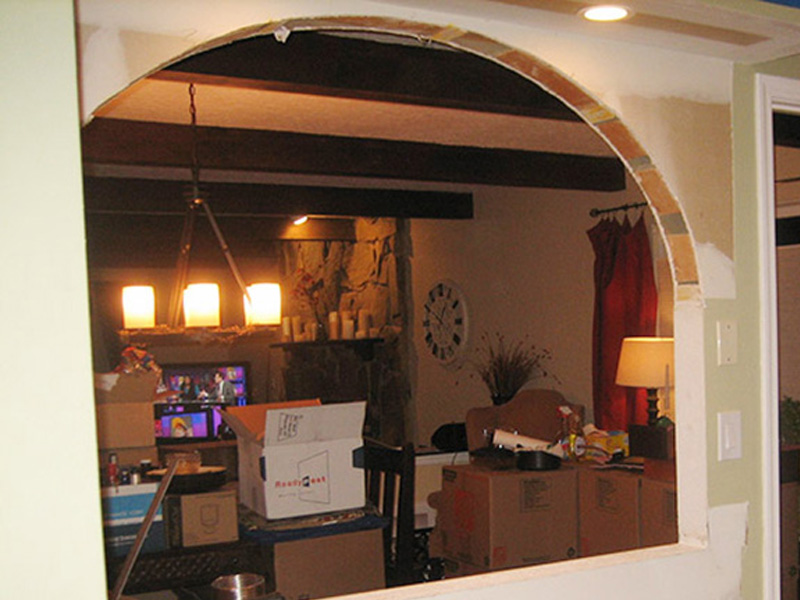
Step 5: Finish with drywall
To do this technique simply score along the back edge to help your narrow drywall strip bend.
Lastly, finish the seams with mesh tape and thinset to create that final finished look.
We left the inside of our arch white to be a transition from the green kitchen and the cream colored dining room.
Opening up this small area is one of the biggest changes to our kitchen. It adds light into the room and it makes the kitchen feel larger by giving you views in and out of the room!
Be sure to check out the next step in this project – Demo Kitchen Soffit and Ceiling and see the final Updated Kitchen Reveal post!