Kid’s Closet Makeover
INSIDE : Learn how to transform a dull and unorganized closet into a fun painted herringbone patterned Kid’s Closet. Such a huge improvement, check out this easy makeover.
This post may contain affiliate links. See full disclosure here.
This post has been updated since it’s original December 2013 publish date.
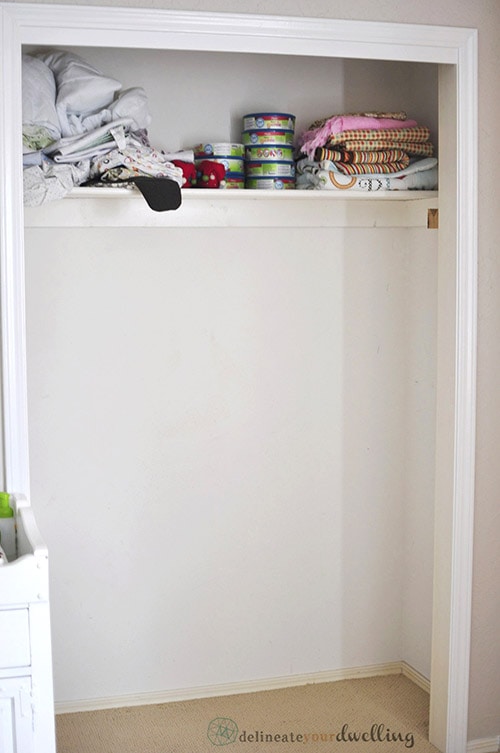
I shared in an earlier post about my kid’s entire bedroom makeover that I had decided to update my kid’s shared bedroom. It was time to organize and work on better space planning. I took some time, but has been so worth the effort.
My first task was their closet and today I am sharing their adorable herringbone Kid’s Closet Makeover!
Supplies needed for a Herringbone Closet
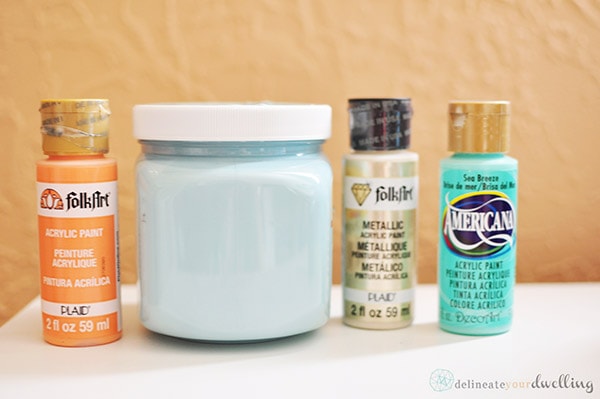
I decided to do some simple painting in the closet now that it was a more visible space. In keeping with the color scheme of their room, I bought a few small acrylic paints for the project.
- Tangerine, Soft Blue, Gold and Aqua acrylic paint
- Herringbone stencil (similar)
- Sponge roller brush
- Stencil brush
- Baby wipes
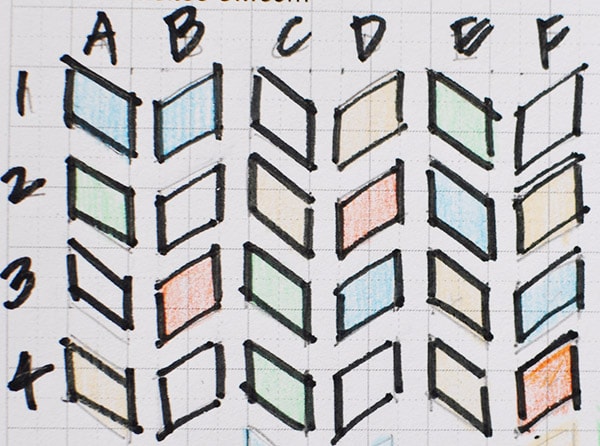
How to plan for a stenciled closet
Having a plan for stenciling on your wall is always a good idea. Especially if you plan on doing the stencil a little different than one single color.
I found a herringbone stencil that I fell in love with and then did a quick sketch of my basic color layout and which spaces I would leave blank.
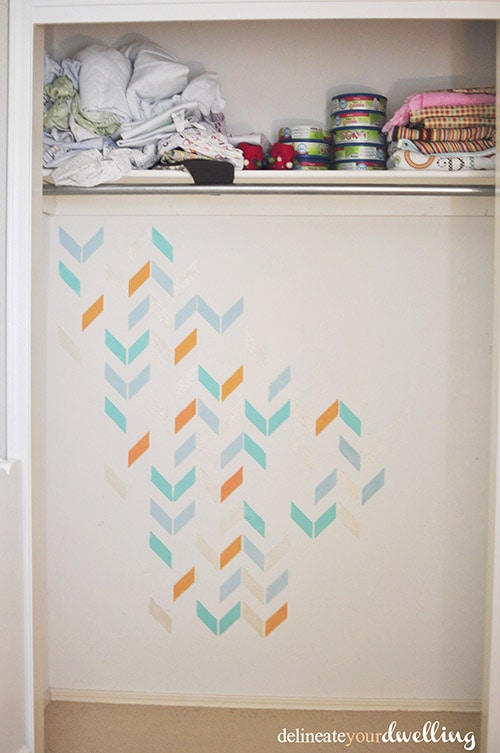
I didn’t want to completely cover the closet wall just add a bit of color.
Stenciling a herringbone pattern on the wall
Start by placing your stencil on the wall and use painter’s tape to secure. Make sure to mark with a pencil on the stencil’s register marks so that as you move the stencil down, you can keep the pattern aligned properly.
I used a combination of sponge roller and a stencil brush. The roller was good for the larger open edges and then I would use the more narrow stencil brush for areas that were close to other paint colors.
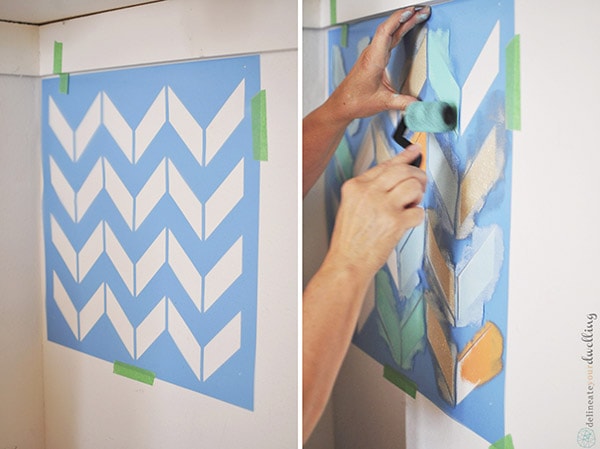
Once I had filled in each stencil pattern, it’s important to inspect your stencil. Using a baby wipe, clean up any areas that the paint may have bled through to the “wall side” of the stencil. Keeping a clean stencil is essential to having crisp clean lines.
Slowly the pattern started coming together and it was so exciting every time I’d take a step back to get a bigger picture of it all!
I love that the gold becomes more a shimmery color that you can see only at certain angles.
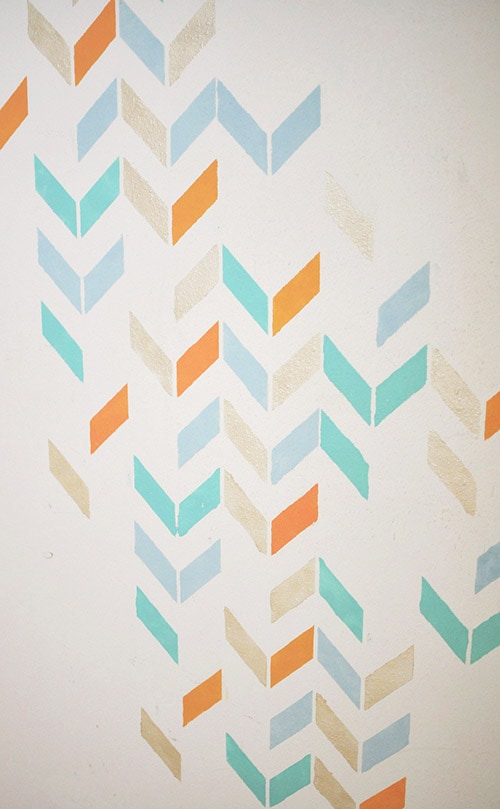
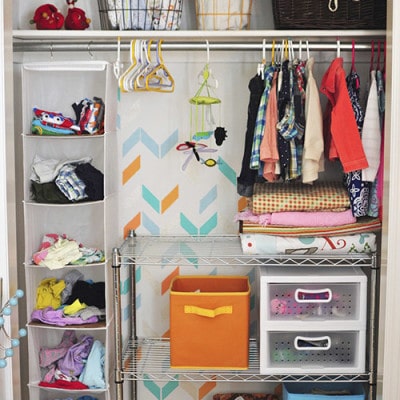
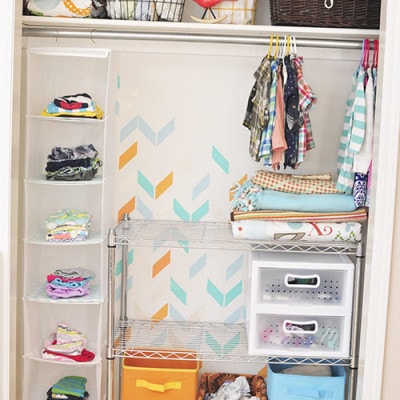
The completed pattern turned out exactly how I had envisioned it. I wanted just a portion of the closet to be stenciled so it had just a hint of color and pattern.
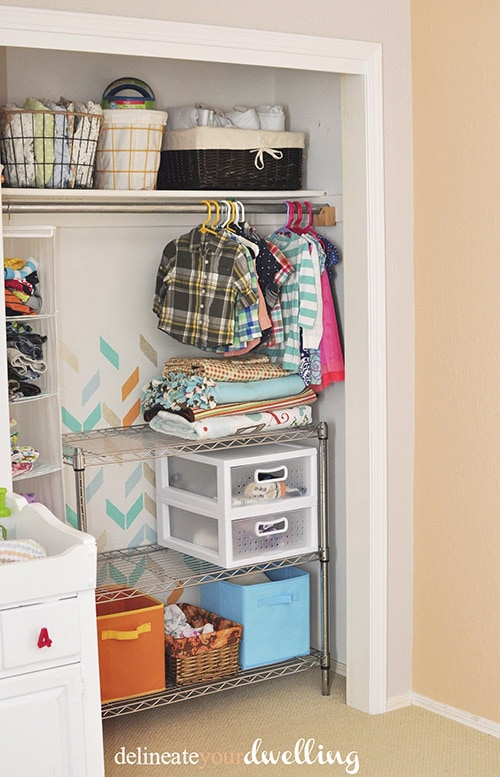
Organizing a shared kids closet
Next up for my kid’s closet was organizing.
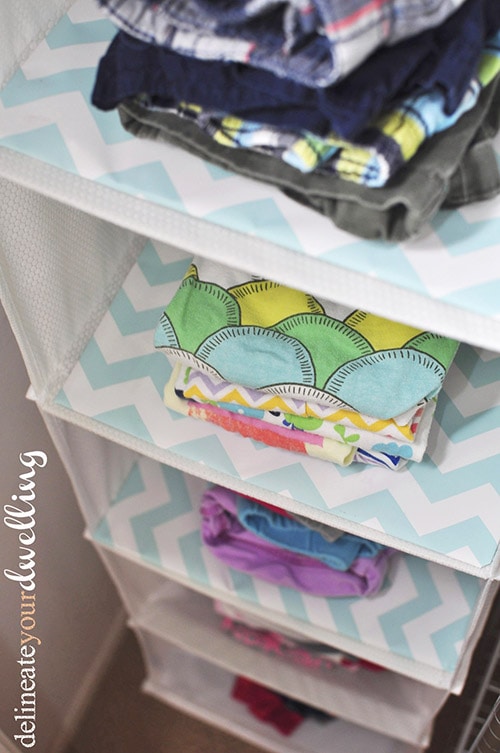
I hung the kid’s daily used clothes on hanging organizers. You can go with simple ones like I used, but these slightly more advanced hangers have drawers incorporated in them. SO COOL.
I cut up some cardboard and wrapped it with fun light blue and white chevron wrapping paper for extra support. It did the job perfectly and was a fun pop of color.
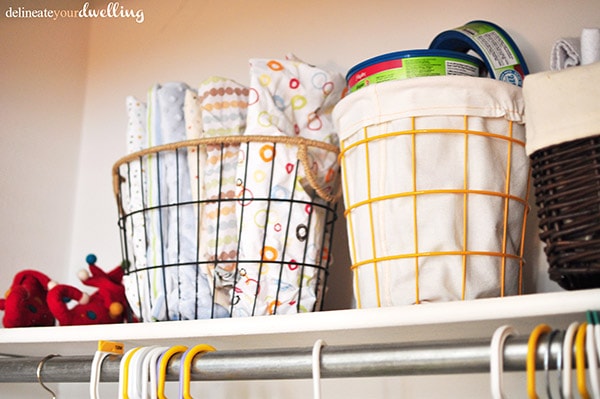
Wire baskets hold all their diaper changing covers, crib sheets and diaper genie refills.
I love rectangle, oval and these basket wire options!
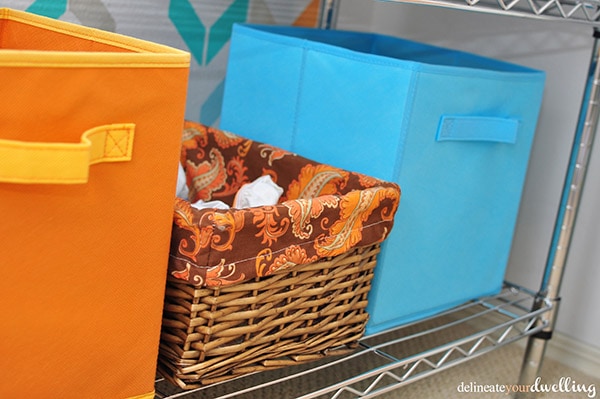
Baskets and colored cubes hold items down below that the kids have access to; bath time items (wash clothes, towels, etc), undies, and misc extra blankets.
Tidy updated Closet
What a tidy and updated transformation! The closet is organized, clean and so cheerful now. My kid’s have been helping put their clothes away since they can get to the closet!

Kid’s Shared Bedroom projects
Looking for more great organization projects? Check out some of these!