Kid’s Shared Room makeover
INSIDE : My children share a bedroom and without a little planning things can get out of hand quickly. Check out how I have created a beautiful kid’s shared room makeover.
This post may contain affiliate links. See full disclosure here.
This post has been updated since it’s original November 2013 publish date.
When my second kiddo made an appearance about 18 months ago, even though we have a spare bedroom I knew I wanted my two kids under two to share a room. This space is now colorful, tidy and so organized… but it wasn’t always like this.

Keeping the babies together made more sense since they’d both be in cribs, both be in diapers, etc… They are 15 months apart so we quickly just accumulated a lot of stuff.
However, with time as they continue to get older, I knew we need a little more room and a lot of organizing. Today I am sharing my Kid’s Shared Room Makeover!
The before was cute from first glance but behind doors it was not a good use of space at all. Everything felt crowded and I knew we could be better utilizing our floor space.
Two Babies Shared Room Plan
- New room layout
- Organize shared closet
- Create organization for toys
- Create dress-up space
- Remove unnecessary furniture
- Rearrange room
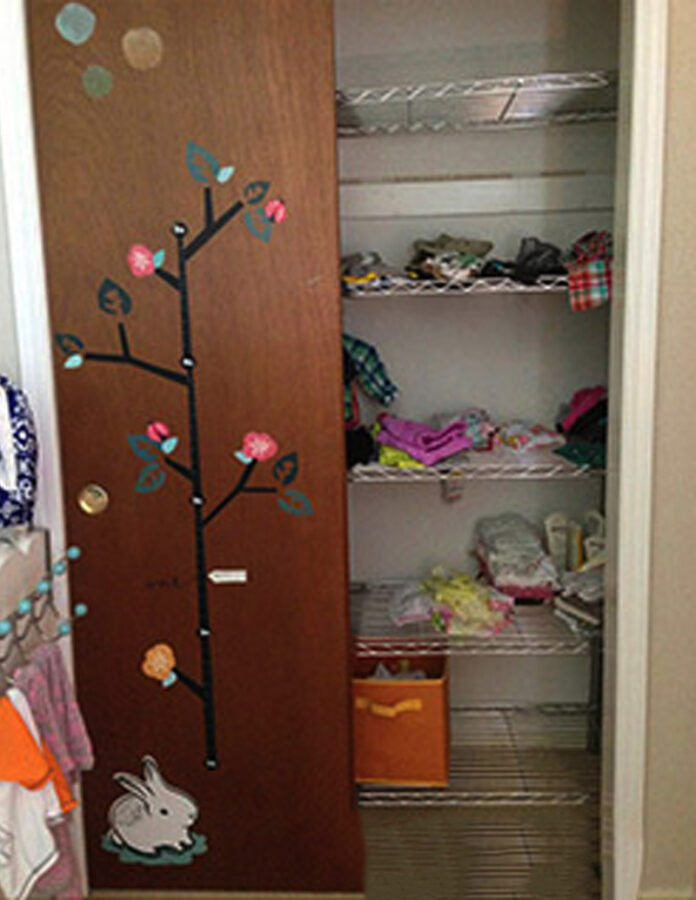
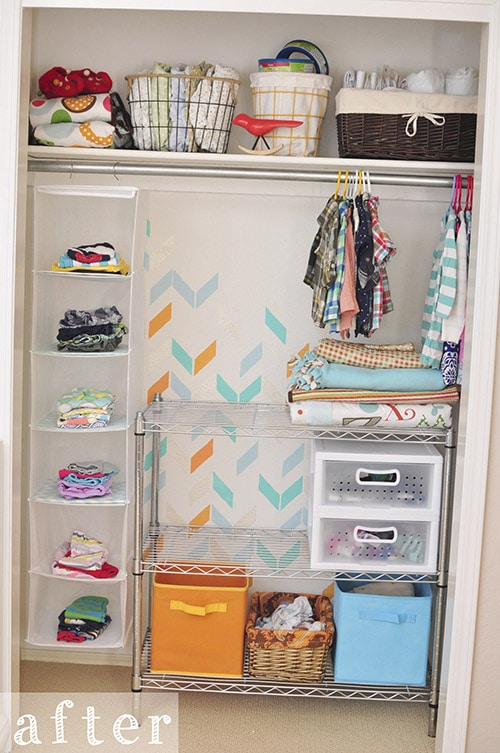
First on the shared room agenda was figuring out a better room layout. My mom came out to visit us for a long weekend and with her assisting (i.e., keeping the kiddo’s out) we removed the closet doors and I painted the inside.
You can check out how adorable their Shared Kid's Closet makeover turned out here!

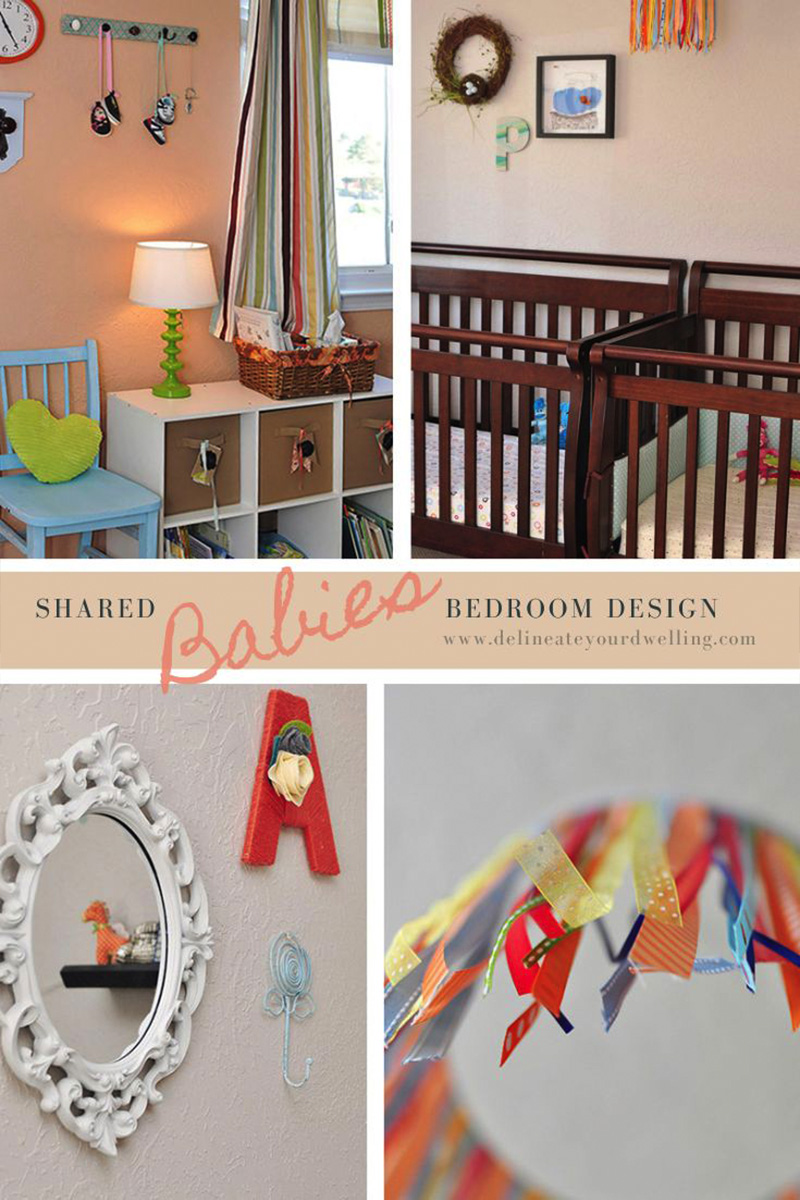
In the evening, I worked on creating fun toy storage box labels. And after she left, I was able to complete the room with a dress-up area behind the un-used space of their bedroom door and I made shadow boxes using their newborn onesies.
- Dress-up Burlap Bunting DIY
- Onesie Shadowbox DIY
As I mentioned, the “before” wasn’t awful… it was just a tight squeeze with a lot of stuff needed for a newborn and too many functions going on.
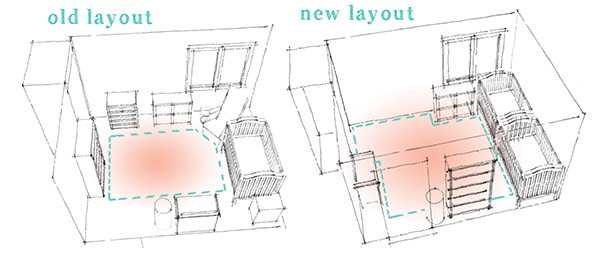
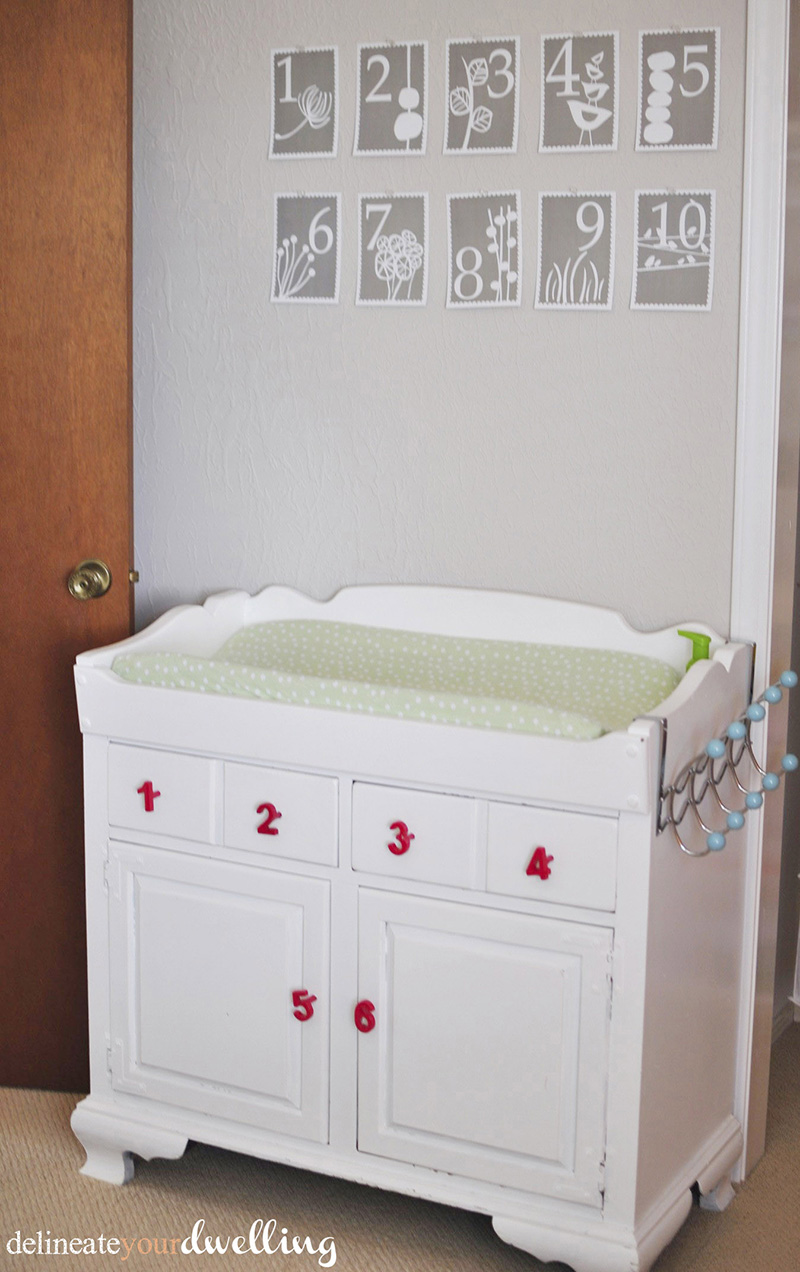
The old layout had a crib, a rocker, a small trashcan, a square shelf, a dresser, a tall shelf, a diaper genie, a changing table and a hamper… phew – it was a lot for a small room.
When our little guy came on the scene, I removed the dresser and inserted a second crib.
THERE IS WAY TOO MUCH STUFF IN THIS TINY ROOM.
Shared Baby Bedroom Update
Be sure to check below for all the projects in their room!
Kid’s Shared Bedroom projects
Remove unneeded furniture
I started by removing the rocking chair, the dresser and the hamper. Immediately the room feels so much more spacious! Why I didn’t think of it in the first place, I have no idea.
Rearrange the room
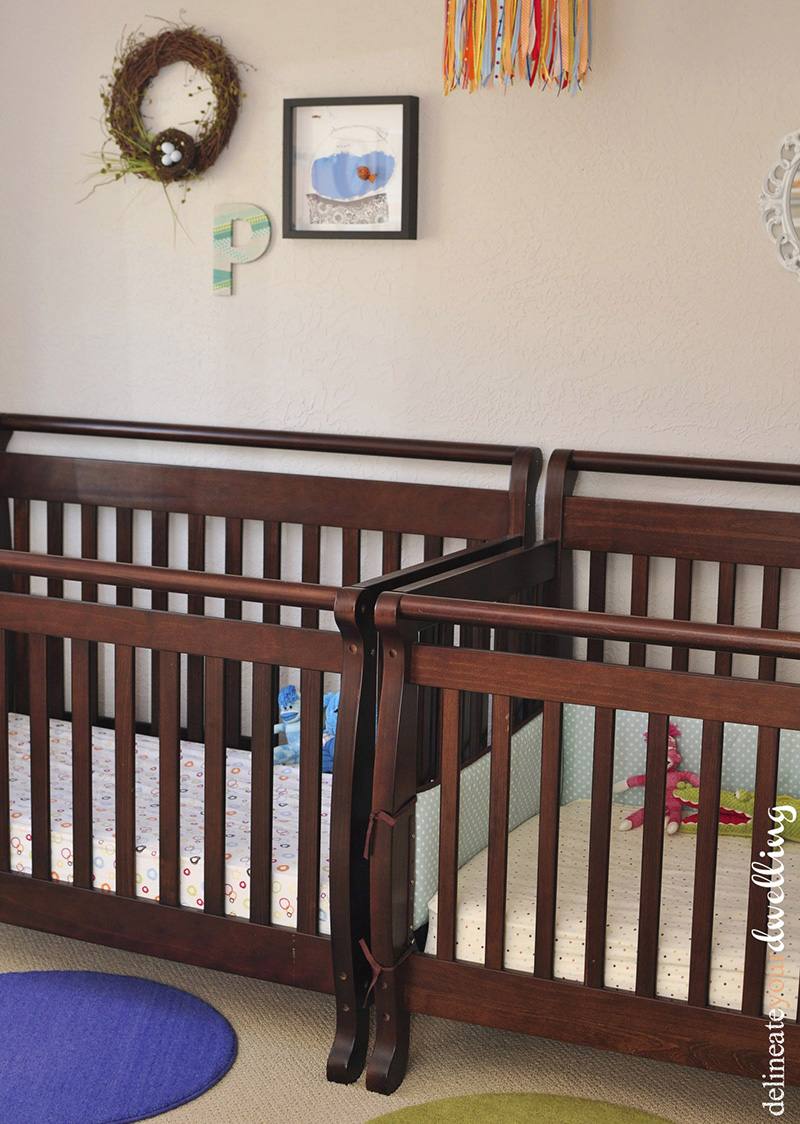
Once I had a little more room to play around with, I rearranged the cribs. I moved the cribs so they now shared a wall.
I thought maybe my kids would just sit and play with each other all night, but surprisingly they let each other alone. This change alone made a huge difference in the room layout!
Then I moved the tall shelf and changing table. It opened up the entire rest of the floor space to now have room to play.
Remove closet doors
Removing the doors to the kid’s closet was a major eye opener for how much space was going un-used in there. I now have tons of extra room in their closet and who EVER has spare closet room?!
So far, I’ve been able to keep their closet looking tidy and nice, but if it gets to the point of an unruly clothes dumping ground, I decided I could always add a sheer curtain to mask some of it. For now, it looks colorful, clean and fun.
Dress Up Area
The unused space behind their bedroom door was the perfect little corner to create a dress up area center!
Using command hooks, I hung the ballerina tutus, fairy wings and fireman outfits. Then for a little extra fun, above their outfits I crafted a burlap banner that says, Dress Up.
They love having a dedicated space for their play clothes and I’ve been surprised that they actually have kept it orderly back there!

Create a feature accent wall
Creating a focal accent wall is a fun way to draw attention to some of the highlight decor items you have in a room and I had a lot of fun with this wall.
I crafted the A + P pennants along with their newborn onesies in shadow boxes. They turned out really adorable.
I also pulled out from storage, both kiddo’s newborn shoes and hung them on hooks. I love the sentimental value of this wall… my sweet babies, growing up so quickly!
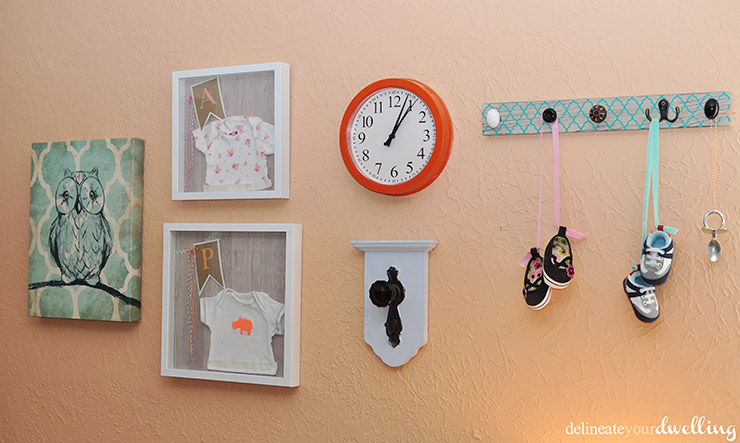
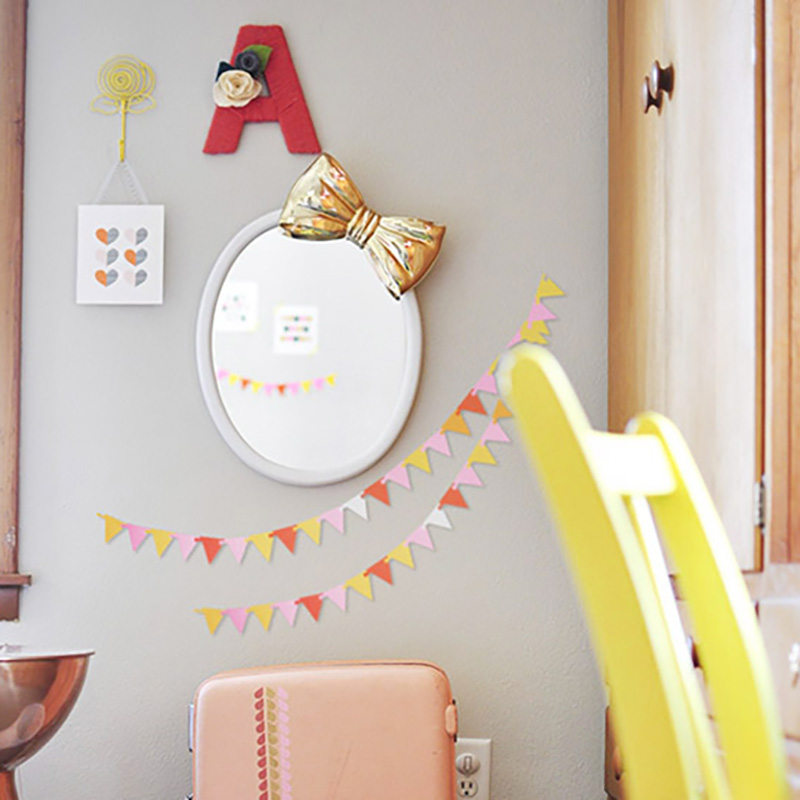
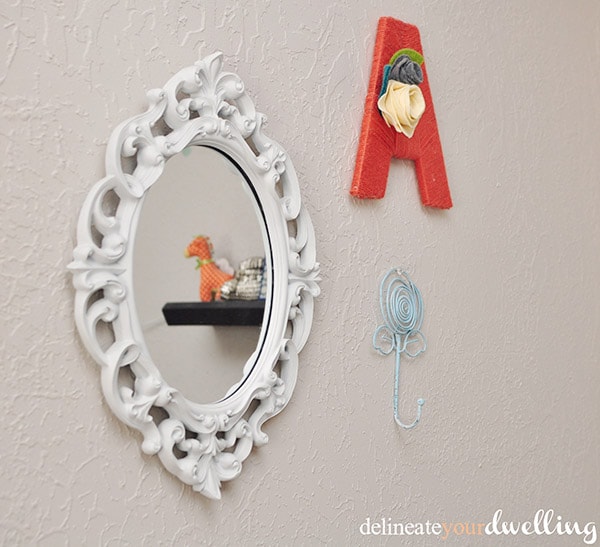
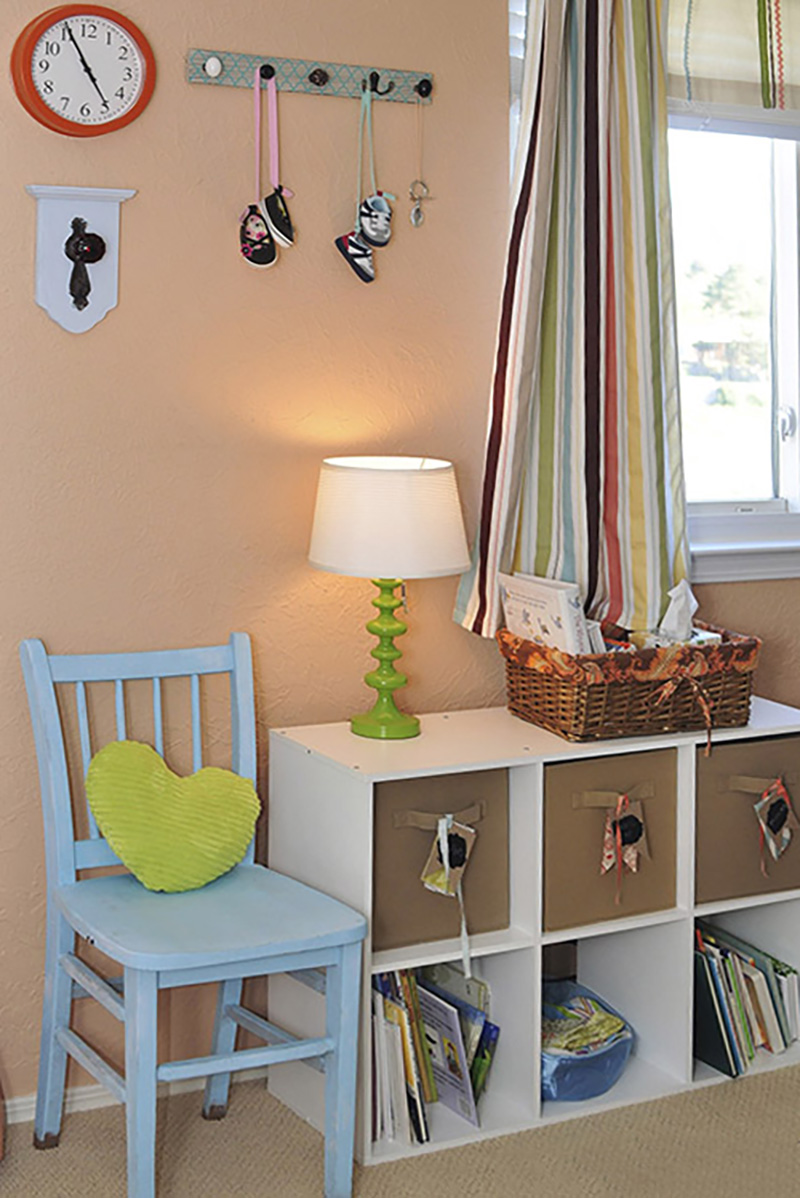
A few other cute items on the walls include a mirror, hook and this fun yarn wrapped A for my daughter.
And I created this fun Washi Tape letter P for my son.

A beautiful and simple ribbon mobile hanging in their room is another fun touch of color and whimsey!

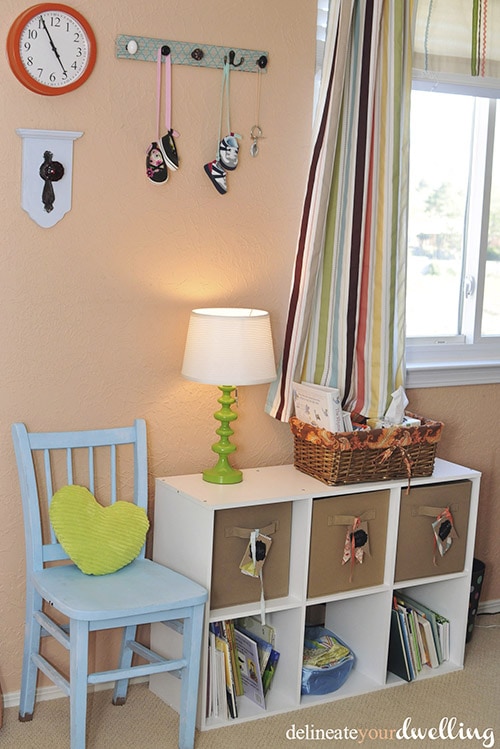
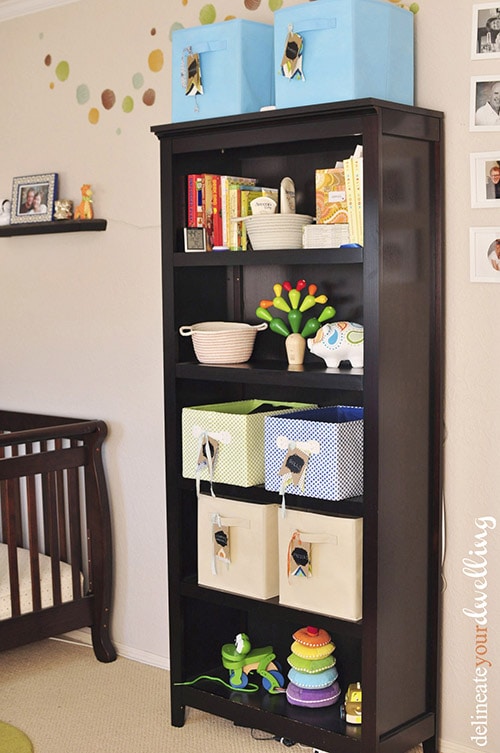
Toy Organization
The last big undertaking in the room was labeling all their toy boxes. Using chalkboard paint, card stock, numerous fabrics and ribbons I came up with a fun and colorful system for keeping everything in it’s place!
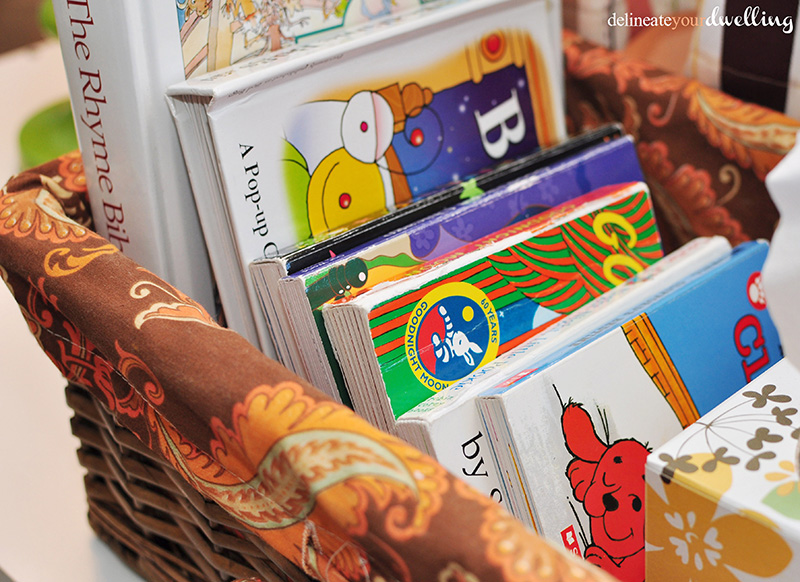
Using baskets help to contain things like books, toys or even clothes.
Using square cubbies the kids can easily reach helps to keep things contained, but also accessible to them as they play.
Are you as excited as me to check out some of the how-to’s for these simple but creative projects?
And here are a ton of other fun kid bedroom related crafts, projects and ideas!