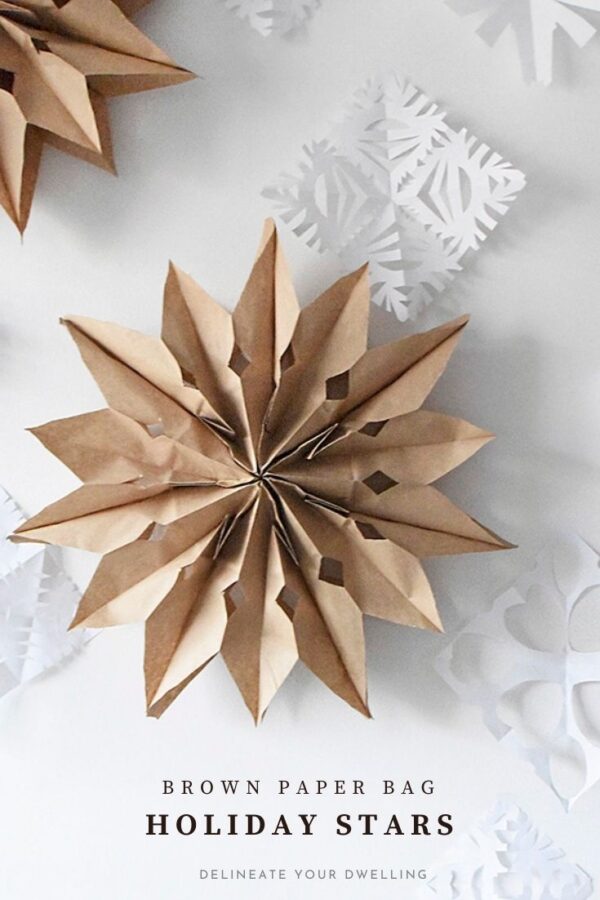
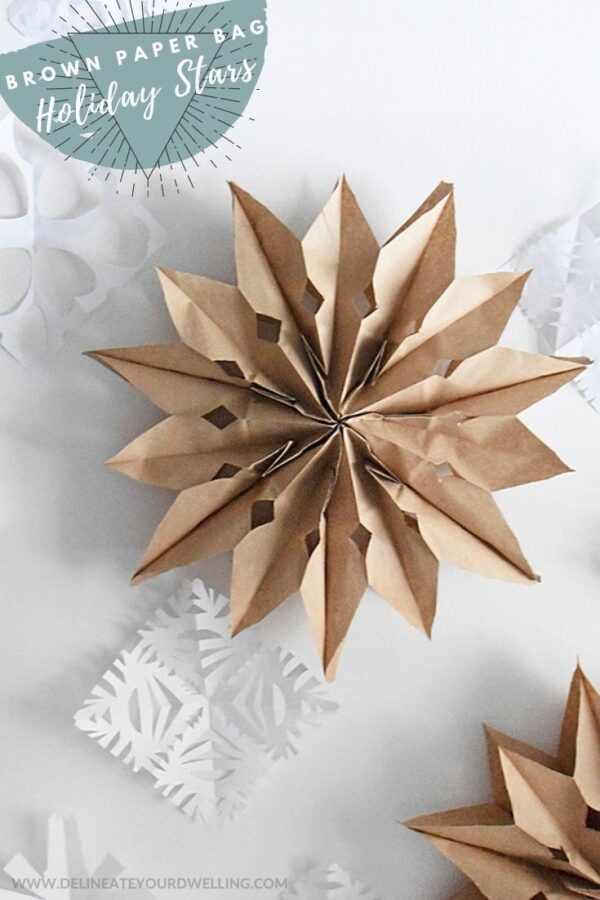
Paper Bag Stars


INSIDE : Learn how to create the most beautiful Paper Bag Stars to hang in your home this Holiday season. They add a festive Scandinavian look to your Christmas decor.
This post may contain affiliate links. See my full disclosure.
This post has been updated since it’s original publish date of November 2020.
There is something about simple holiday decor that is beautiful. And it doesn’t get more simple than using everyday brown paper bag stars. They are elegant and classic and this Christmas craft is so easy to make… I plan to make them every year from here on out!
Looking to create some more Advanced Paper Snowflake designs or craft Coffee Filter Holiday Stars? I've got you covered.
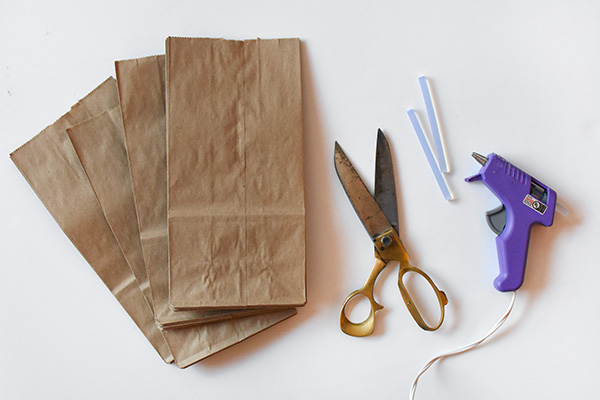
What supplies do I need to make Paper Bag Stars?
- Brown Paper Lunch Bags (7-9 per star)
- Hot Glue (You can also use Elmer’s glue or even glue sticks, although I think hot glue works best and fastest.)
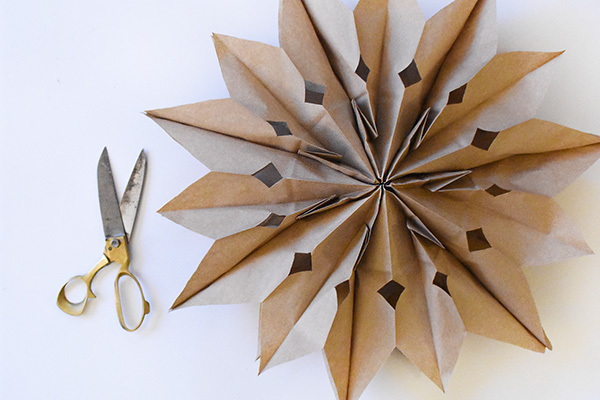
- Scissors
- String or Twine
- Command Hooks
- Pinking Shears (optional)
- Hole Punch (optional)
- Pencil (optional)
How to make a star out of Paper Bags?
Be sure to choose sturdy, medium-sized paper lunch bags that can hold their shape well.
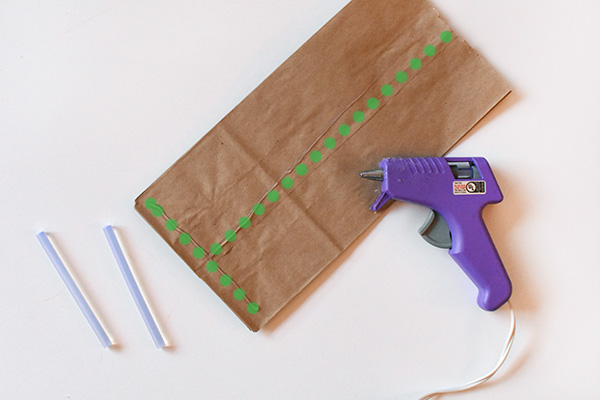
When making paper bag stars, start by placing your first paper bag with the flap facing down on a flat surface. Apply hot glue to your bag in a “T” pattern. See green dots on the below image.
Place your next paper bag on top with the flap facing down and repeat this “T” pattern until you have seven to nine bags glued together.
The exact number of bags used is a visual preference. 7 paper bags makes for a tighter holiday star and 9 bags gives a more full look. I used 7 bags on mine.
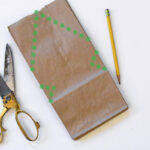
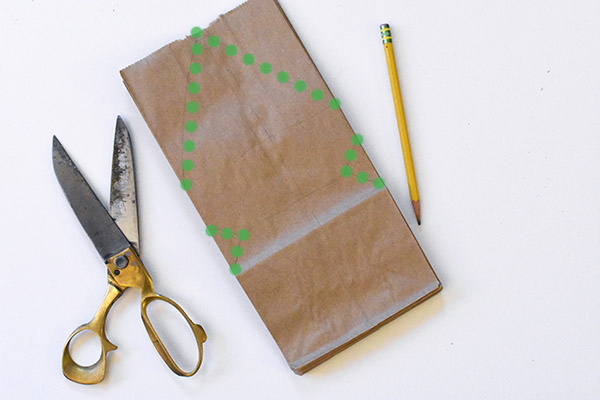
Using a pencil draw an arrow point at the opening side of your bags. Then draw on the sides of your bags, the embellishment cuts you want to make.
I did simple triangle cuts on the side, but you could make half circles, half hearts, squiggles, triangle shapes, etc… It’s reminiscent of a DIY snowflake, the more intricate your cuts, the more intricate when you open the bag stars up.
NOTE : After gluing all nine bags together, they can be hard to cut through. I found it helpful to make two stacks of glued bags and cut them as desired. Make sure the patterns match exactly and then glue the two cut stacks together.
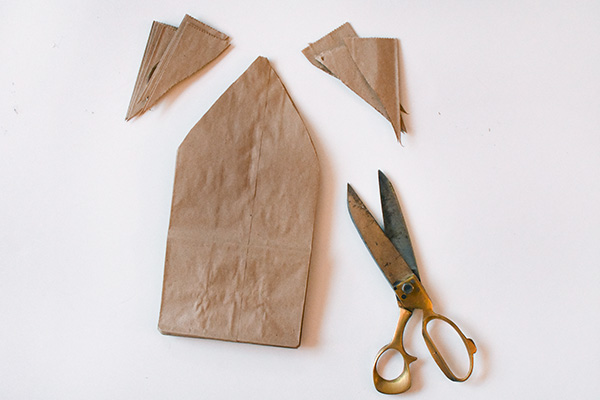
This is what it should look like with the top portion cut.
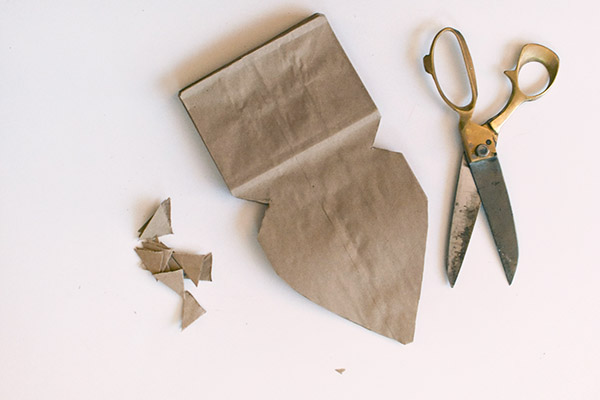
Here it is with my small triangle sides cut.
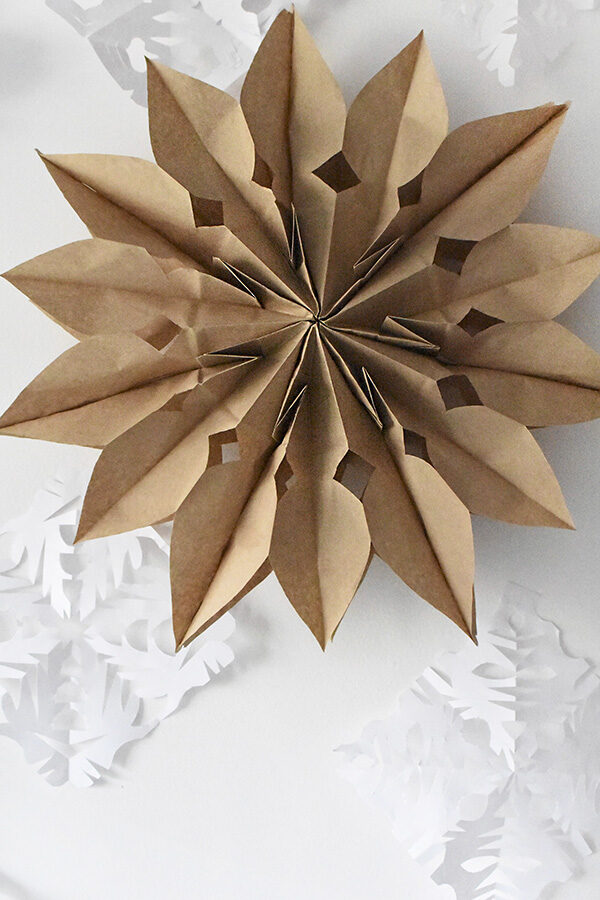
Brown Paper Bag Star
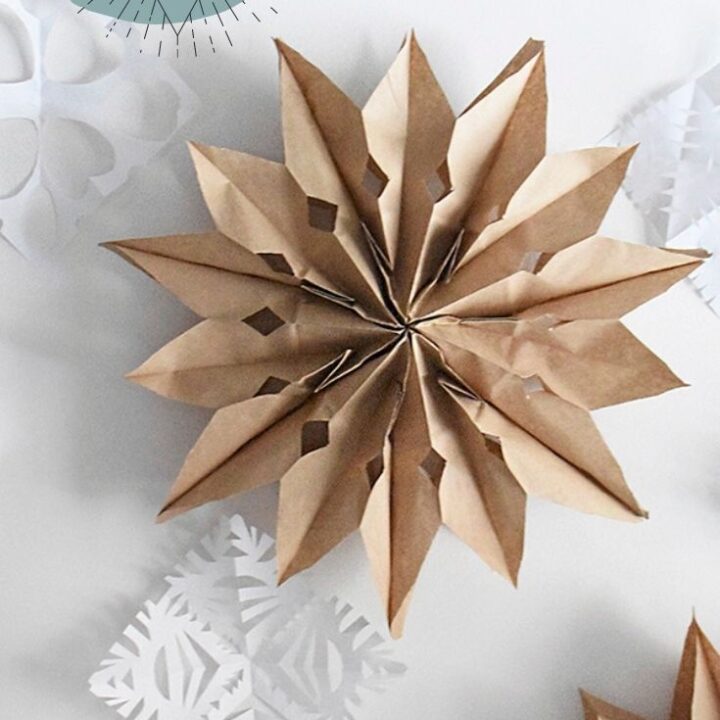
Once your cuts are made, open up the bags to create this beautiful star shape!
You will need to hot glue the two end bags together and then your star is complete.
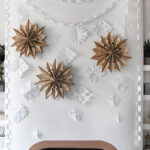
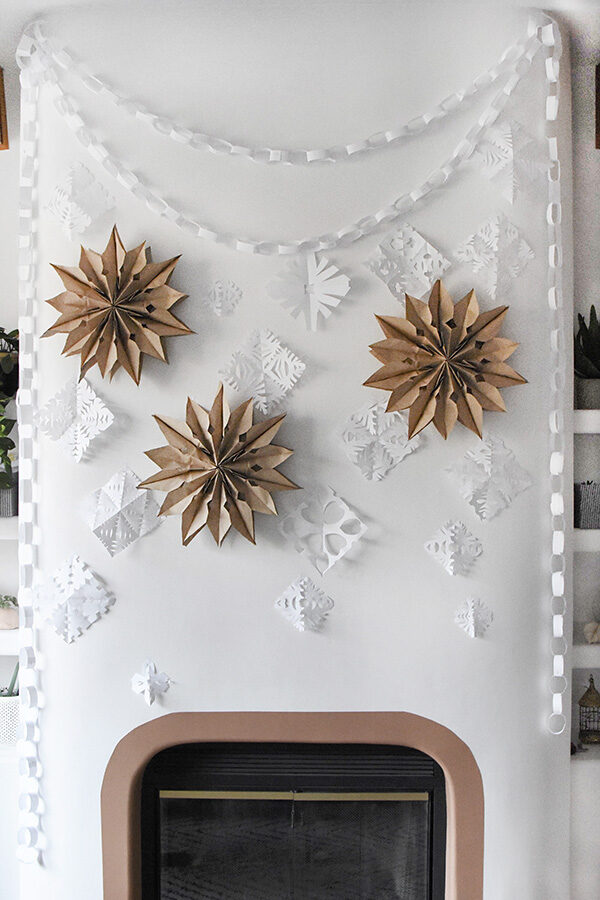
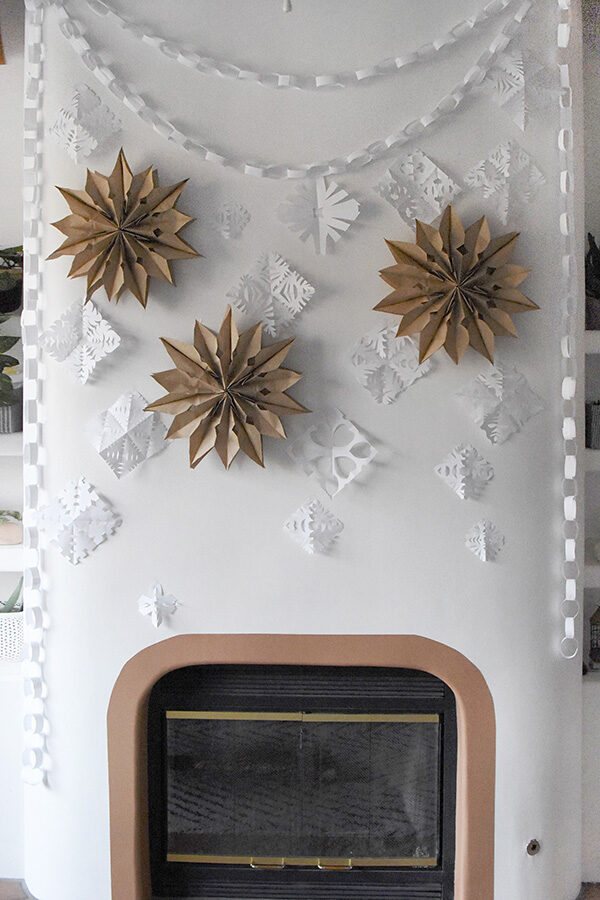
Paper Stars from Lunch Bags
I used simple scotch tape to hang our stars above our fireplace. We also made paper chains and paper snowflakes for a magical Scandinavian Christmas look.
Paper Bag Star Pattern Variations
I want to try a few more brown paper bag stars and try cutting out different shapes and patterns. The options are endless for what they could look like.
You can use simple polka dot paper bags, colored paper bags, add hole punches to your brown paper bag stars or even try hand dying Paper Bag Stars.
I shared these Advanced Snowflake Paper Bags and they add such beauty with the fun shapes they create!
The addition of using Pinking Shears to your paper bag edges adds a lovely zig zag feel.
And did you know you could create Coffee Filter Holiday Stars?! They turned out so wonderfully.
Looking for other simple Holiday crafts?
- How to Dry Orange Slices
- Foraged DIY Advent Wreath
- Gold Leaf Christmas Ornaments
- Snowflake Hot Cocoa
- DIY Clay Garland
- List of Holiday Self-Care Ideas
Holiday Paper Bag Stars
Learn how to create the most beautiful Paper Bag Stars to hang in your home this Holiday season. They add a festive Scandinavian look to your Christmas decor.
Materials
- Brown Paper Lunch Bags (7 per star)
- Hot Glue
- Scissors
- Pencil (optional)
Instructions
- Place the first paper bag with the flap facing down and apply hot glue to the bag in a “T” pattern along the top seam and down the center.
- Place your next paper bag on top and repeat this pattern until you have seven (7) bags glued together.
- Using a pencil draw a point at the "opening" end of the bags and then draw any other embellishment cuts you want to make on the side and/or middle of your bag.
- Simple cuts you could make on the side of your bags are : triangle cuts, half circles or half hearts. All are lovely when you open up your bags.
- Once the cuts are made, open up the bags to create a beautiful star shape!
- Be sure to hot glue the two ends together and the star is complete.
Notes
After gluing all nine bags together, they can be hard to cut through. I found it helpful to make two stacks of glued bags and cut them as desired. Make sure the patterns match exactly and then glue the two cut stacks together.
Be sure to check out some of my other holiday decor posts!
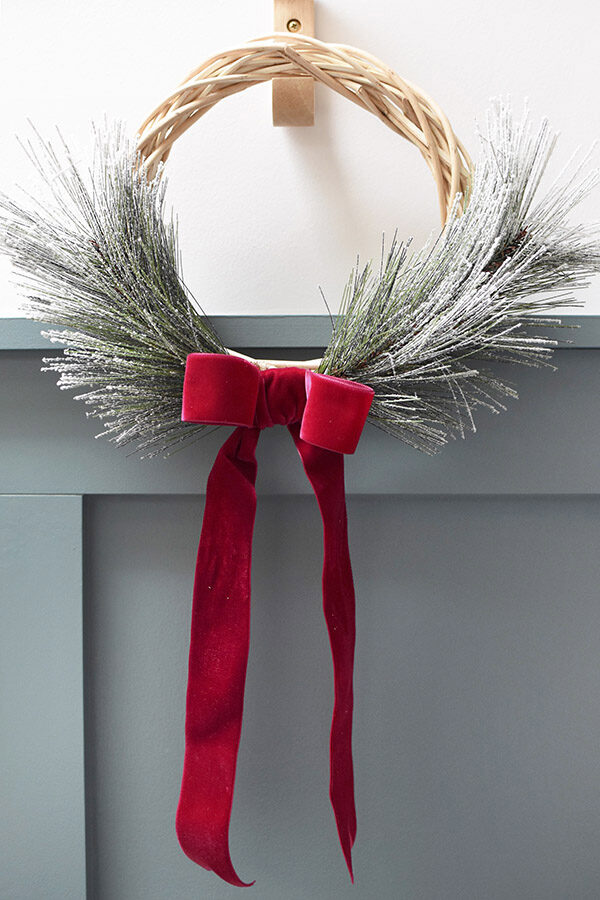
Simple Holiday Evergreen Wreath
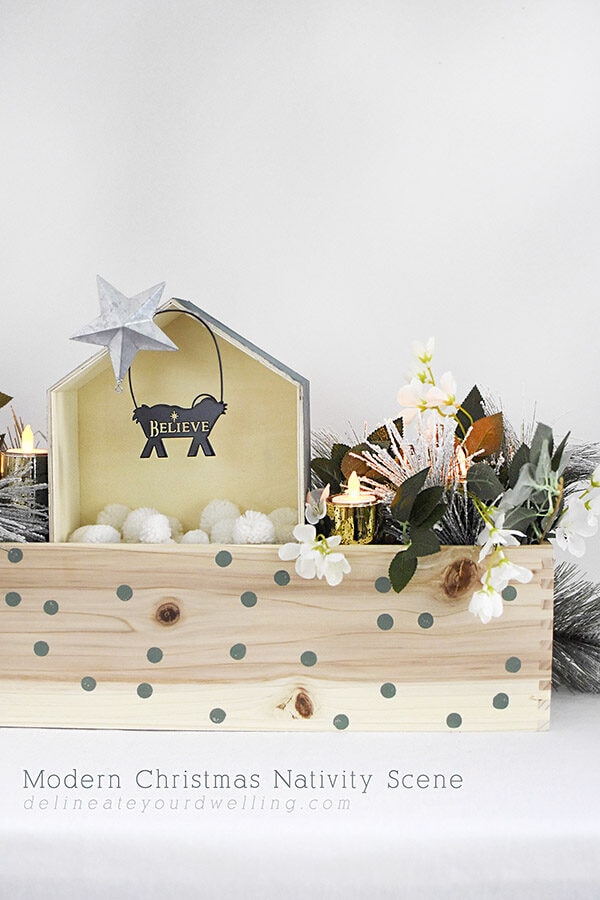
Modern Christmas Nativity Scene
My friend and I get together and make Christmas (winter) decorations. Yesterday we made snowflakes, a bal ornament made with folded circles, and a star ornament of two folded stars glued together to make one star. We go over all of the directions and just sit and make stuff. We made candles a couple weeks ago. I’d seen a different tutorial for these bag stars, but we didn’t have any bags (and honestly, we already had stuff to make right there. But the tutorial I had seen cut the bags *first*, then glue them together. I’ve got a different type of bag and am going to make them, but when I saw where you said that you had a hard time cutting through the bags after gluing them together, I thought maybe that little change might help you make them more easily. Just a thought! I’m going to do them that way since I am really in need of new scissors, and one bag at a time will be easier until I get a better pair. Thank you for all of the cool projects you have here, and that you’ve got stuff for beginner to expert level! There are a few that I’m going to show my friend for our next crafting projects, and I look forward to making these with my friend!! Thank you, Amy!!
Hi Diane: Glad that your Thanksgiving was happy.
I made the lunch bag star. Think I will give it to a friend who has a really old log cabin and a theme that will fit. Very cute idea! I love the stars placed with the white snowflakes and chain garland.
these are the cutest! we will enjoy making the flakes to hang. thanks for sharing and also making ALL your instructions easy to follow..♡
So glad it was helpful! Be sure to tag me when you make them, I’d love to see how they turn out. 😉