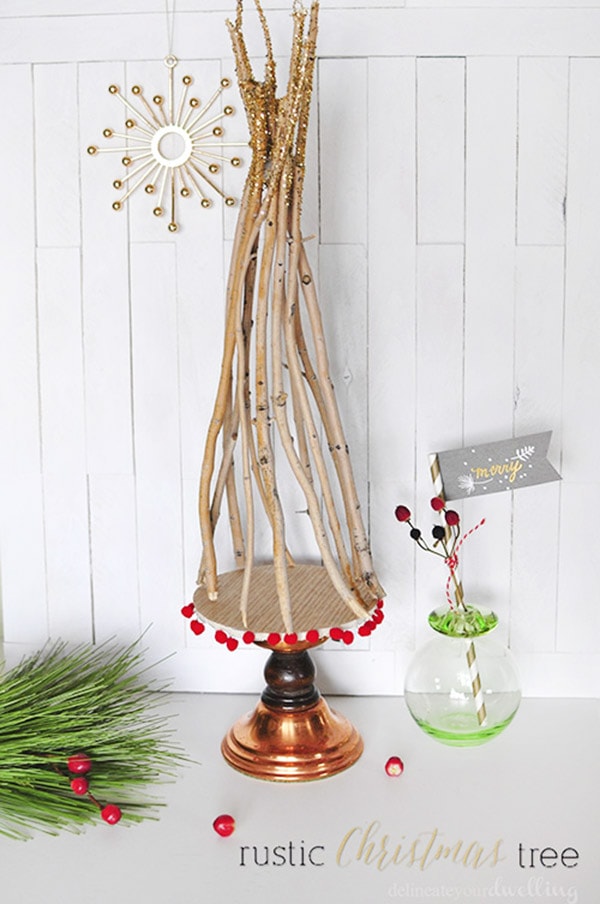
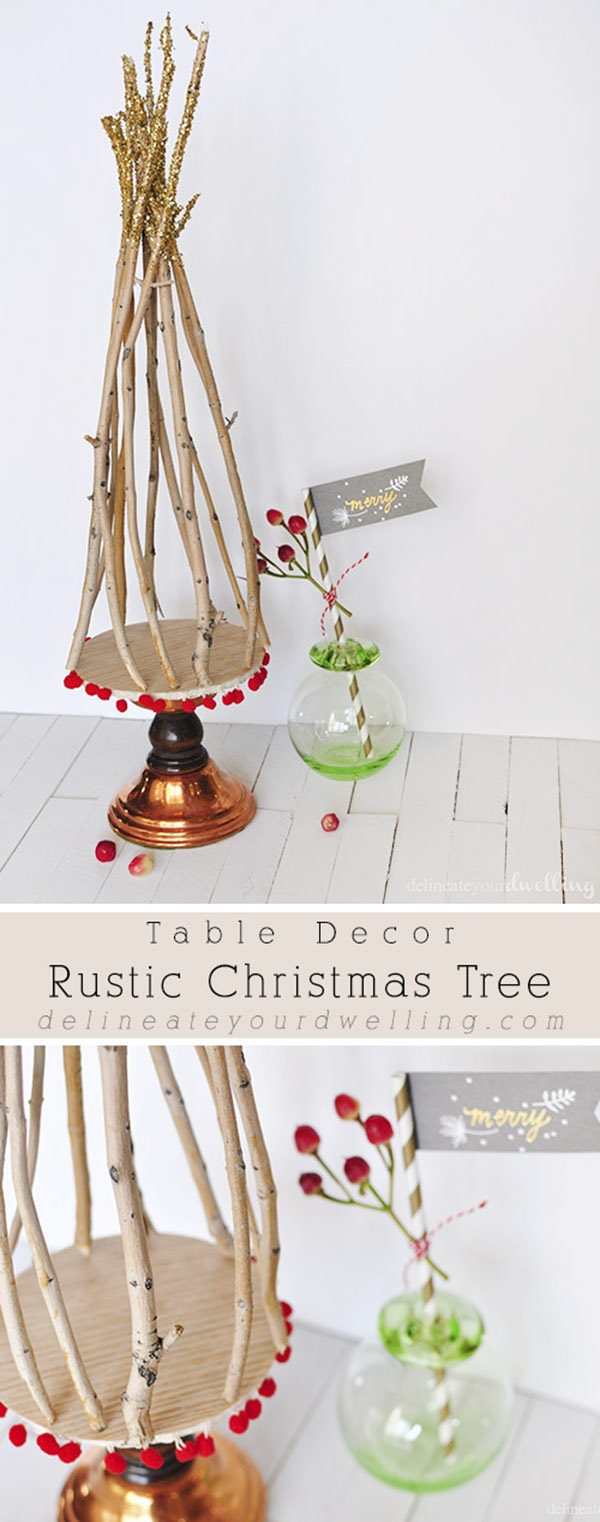
Rustic Christmas Tree

INSIDE : Learn how to make a Rustic Christmas Tree from upcycled and recycled materials. A lovely holiday decor item to set on display in your home.
This post may contain affiliate links. See full disclosure here.
This post has been updated since it’s original November 2014 publish date.
I am so excited about today’s project! Alice from Thoughts From Alice asked me to participate in a fun Thrift Store Holiday challenge along with 24 other super talented ladies.
We were asked to head to our local thrift store, find an item under $25 and transform it into something lovely used in our Christmas decorating. So, today I am sharing my new Rustic Christmas Tree with you!
Check out my Modern, Colorful Christmas tree if you are looking more tree inspiration.

Thrifted Candle Holder
I went to my one of my favorite local thrift stores and found this awesome candle holder. This thrifted candle holder for a steal at $3.99 and became the basis of my entire design.
I loved it’s copper base and the shape of it’s spindle. I knew I could create some holiday magic with it!

What supplies do you need for a Rustic Christmas Tree?
- Thrifted Candle Holder
- Styrofoam Cone Piece
- Collected Twigs
- Wood Veneer Sheets
- Mini Red Pom Poms
- Small piece of cardboard
- Gold Glitter
- Spray Adhesive Glue
- Hot Glue
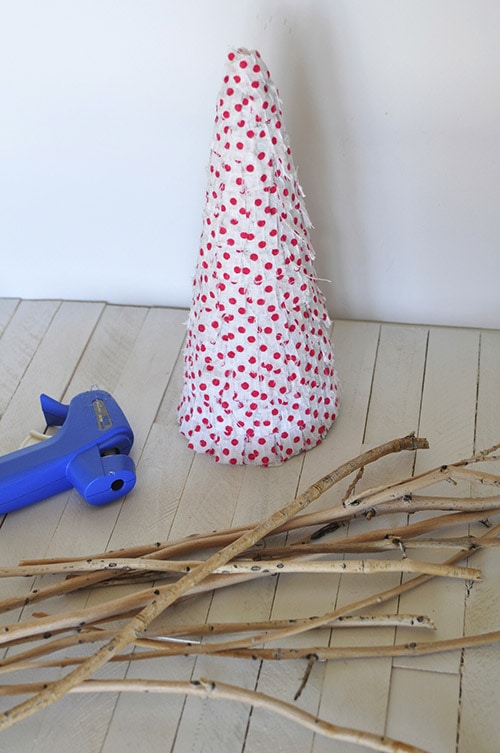
The styrofoam cone I pulled from an old Valentine’s Day project. You only need this to help create the shape of your rustic twig tree, so you can disregard the red polka dot fabric covering mine.
I found these Wood Veneer Sheets and knew at once they would make an excellent new base for my rustic twig tree. They are thin, but not so thin that they wouldn’t hold a tiny bit of weight. There are so many potential uses for them and they were a perfect fit for this project!
How do I make a Rustic Christmas Tree home decor item?
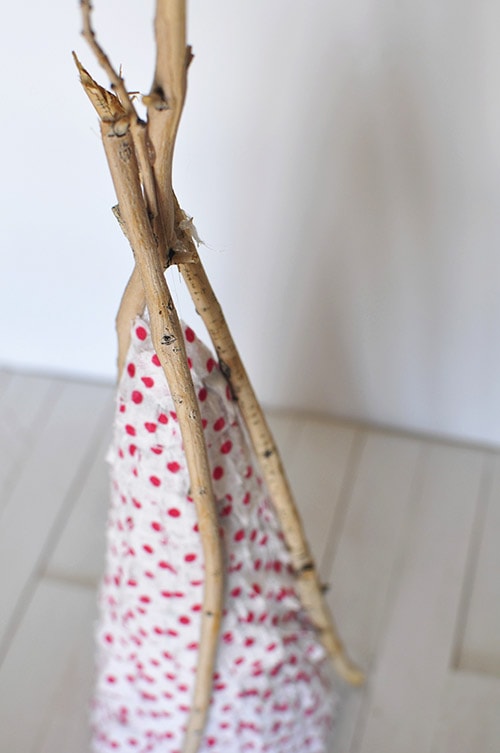
To make your Rustic Christmas Tree, start by using hot glue to secure the tops of the twigs together. The cone form helped me keep the nice circular shape.
I used three of my straightest twigs to create the main structure. Then, I continued to add in and glue the other twigs to fill in those gaps.
Rustic Tree Wood Veneer Base
Next I cut a piece of cardboard down as the base for my tree to rest on. I used a wood veneer sheet to cover the cardboard circle. I then secured the cardboard base to the candle base using hot glue.
Then, I added some small red pom poms to the underside.

Rustic Tree Decor
Lastly, I used spray adhesive glue on the top 3″ of the twig tree and added gold glitter. It gives a subtle nod to a “shining star” on top of a Christmas tree.

Looking for more holiday decor ideas?
– Foraged DIY Advent Wreath
– Holiday Shopping List and Festive Christmas Prints
– Advanced Paper Snowflakes
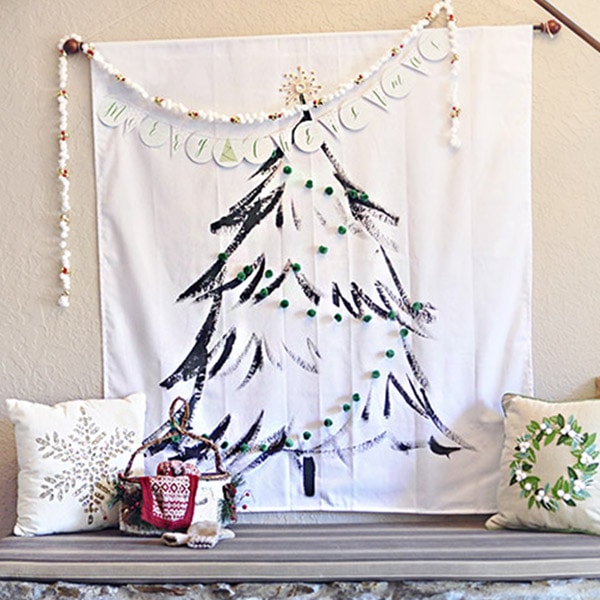
– DIY Christmas Tree wall hanging (Perfect for Small Spaces!)
DIY Rustic Christmas Tree
Paired with a few festive decor items and my DIY Rustic Christmas Tree is ready for the holidays!
Be sure to hop around and check out the other AMAZING ladies who participated in this Thrift Store challenge!

Glam Christmas Throw Pillows by Thoughts from Alice
A Deer Thrift Store Makeover by Ciburbanity
Ugly Ducklings (Thrifted Sweater Stockings) by Maison de Pax
A Deerly Beloved Thrift Store Vignette by Have a Daily Cup of Mrs. Olson
Holiday Thrift Store Challenge: Deer Mount Advent Calendar by Primitive & Proper
{Vintage Cookie Tin} Cake Centerpieces by Little Farmstead
DIY Embroidery Hoop Wall Hanging: Holiday Thrift Store Challenge by Simple Stylings
DIY Christmas Decorations from Thrifted Books by T-Shirt & Jeans
Christmas Cloche by Craftberry Bush
A Vintage Mantel for Winter by Finding Silver Pennies
Holiday Thrift Store Challenge – Christmas Chalkboard Globe by Heart Rocks in My Pocket
Thrifty DIY Part One: Faux Fur Throw Rug by Creating Vintage Charm
DIY Holiday Walling Hanging by House of Hipsters
Holiday Thrift Store Challenge: Modern Christmas Village by Number Fifty-Three
Christmas Decor from Thrifty Find by Town and Country Living
The Trellis Tree by Cozy Little House
Holiday Thrift Store Challenge Blog Hop by Shabby Love
DIY Centerpiece Tray by Cherished Bliss
Holiday Thrift Store Challenge – Vintage Sock Stretcher Stocking by Alex Inspired
A Merry Thriftmas Challenge: Re-purposed Holiday Tablescape by Home Remedies
Light Fixture Update – a Thrift Store Challenge by Nest of Posies
Holiday Thrift Store Challenge: Simple Christmas Decorations by Two Purple Couches
Rustic Christmas Tree by Delineate Your Dwelling
Oh Deer, It’s a Holiday Thrift Shop Challenge by My Sweet Savannah
Simple Elegant Winter Vignette | Holiday Thrift Store Challenge by Cloth and Patina
DIY Shabby Chic Picture Frame 365 Days of Crafts
DIY 3D Christmas Star Wreath – Holiday Thrift Store Challenge by The Chronicles of Home
DIY Crocks by So Much Better With Age
Simple Holiday Vignette | A Thrift Store Challenge by Restoration House Interiors
Thrift Store Christmas Decor Challenge by BrocanteuseRose
Looking for even more holiday decor ideas? Check these out…