DIY Christmas Beaded Candle Cuff

INSIDE : Learn to create a DIY Christmas Beaded Candle Cuff! If you’re looking for a simple, stunning way to elevate your holiday decor, these elegant candle rings are the perfect project. These custom-made cuffs add the perfect sparkle to your mantle or dinner table and make wonderful, personalized Christmas gifts. Get ready to dive into this fun and easy beading craft!

This post may contain affiliate links. See full disclosure here.
I recently saw the most beautiful candle cuffs from Terrain and just about died of love. I especially loved their Star Cluster and Green Holly Beaded ones. I knew I could never make something quite as lovely, but it did spark a creative idea for me.
What if I took different gauged wire and wrapped it somehow around a taper candle and did my own spin of adding beads to a candle?? Would it be lovely? How would I make that candle cuff stay together?
I participated recently in a Craftmas collaboration on Instagram with some fellow creatives and decided THIS would be my project.
Let’s see how I was able to make my version of a beautiful beaded candle cuff!
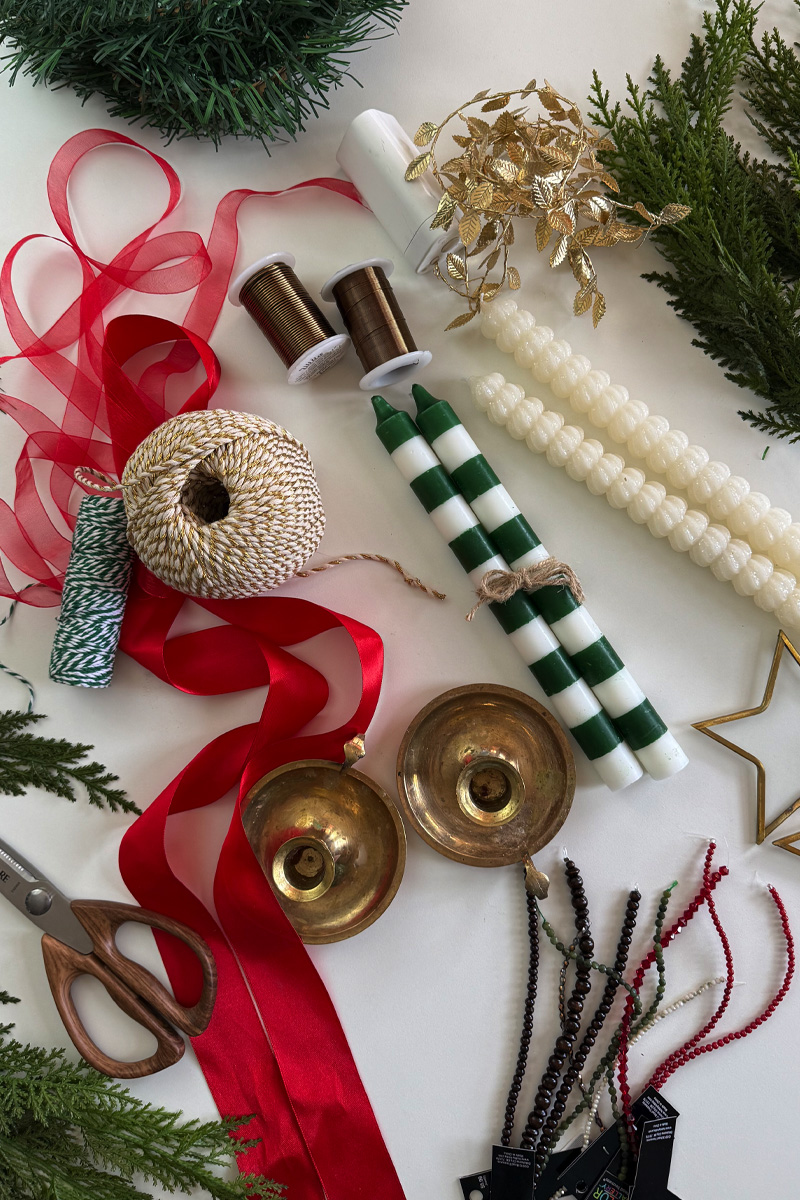
What supplies do I need to make a beaded candle cuff?
- 16 gauge wire (thicker)
- 24 gauge wire (thinner)
- Wire Cutters
- Beautiful beads (similar and similar)
- Taper Candles
How to braid wire?
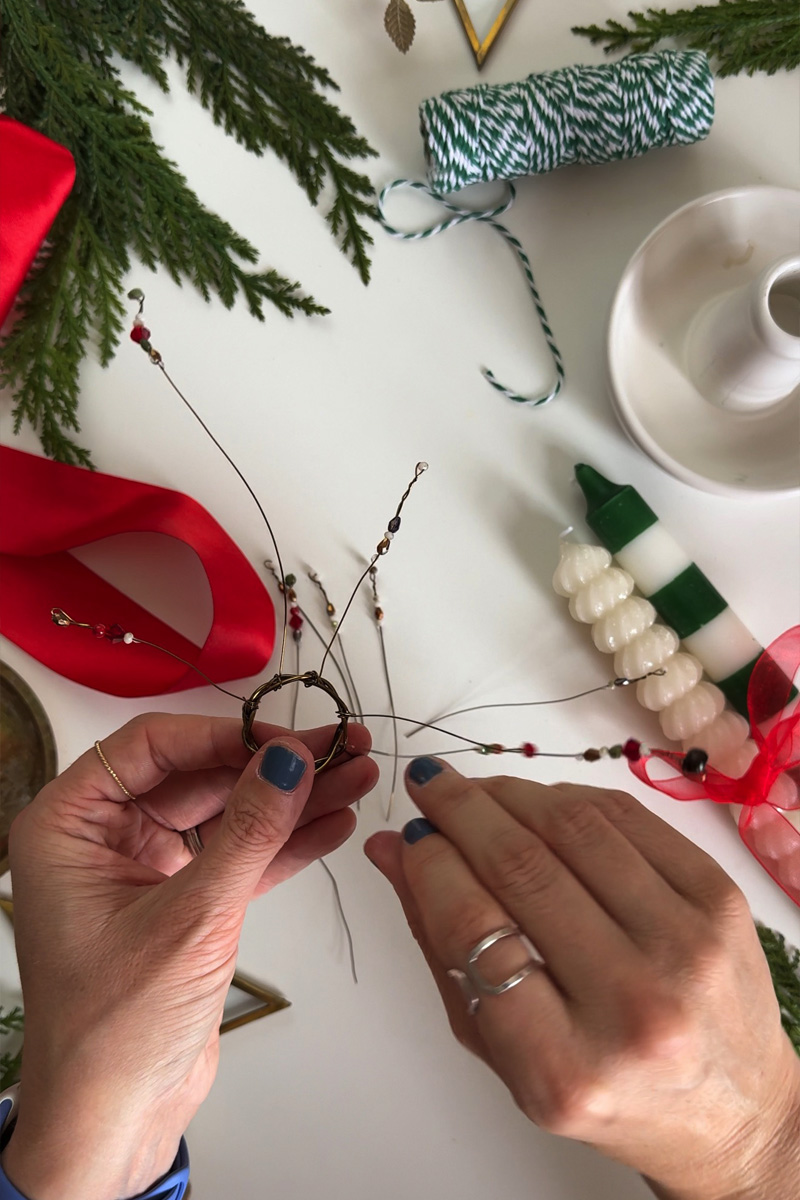
The first step in this project was to create the base that all my delicate beads would be secured to. I decided to try using my thicker wire and cut three pieces about 10″ long.
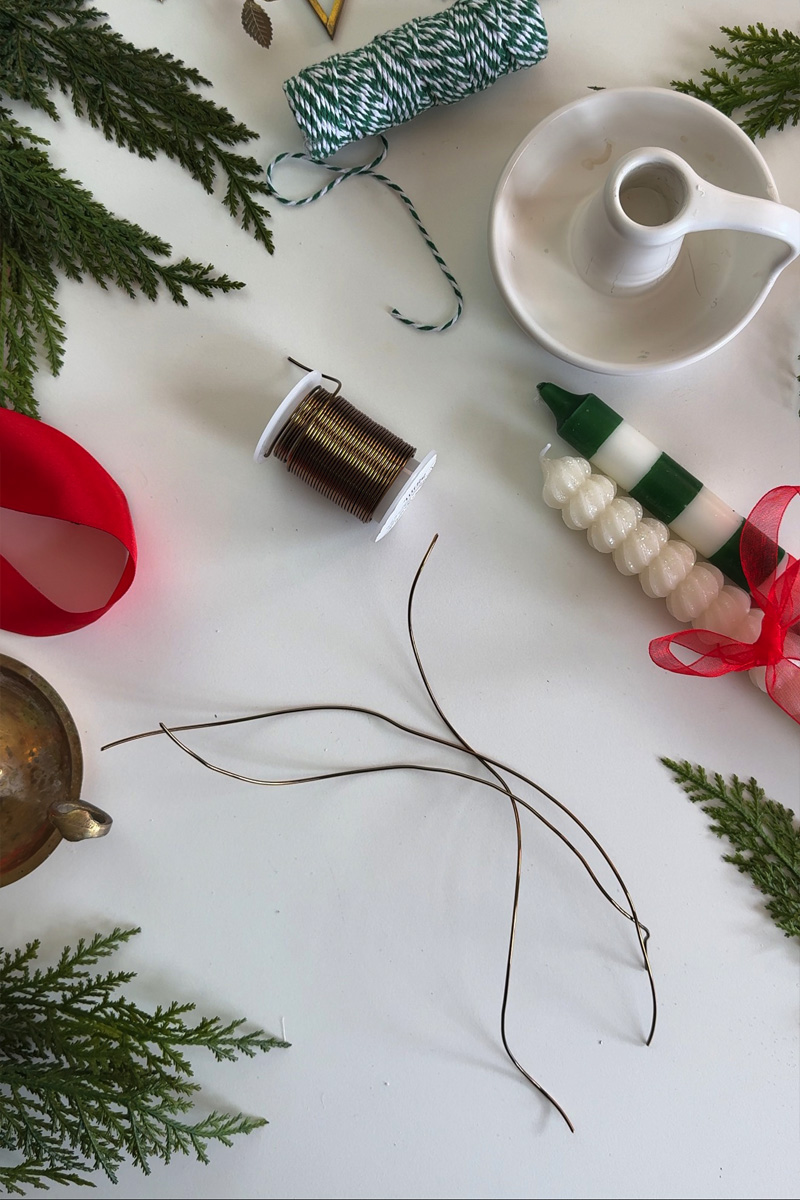
You can do any length here, but I was going to use three taper candles so I did a longer section.
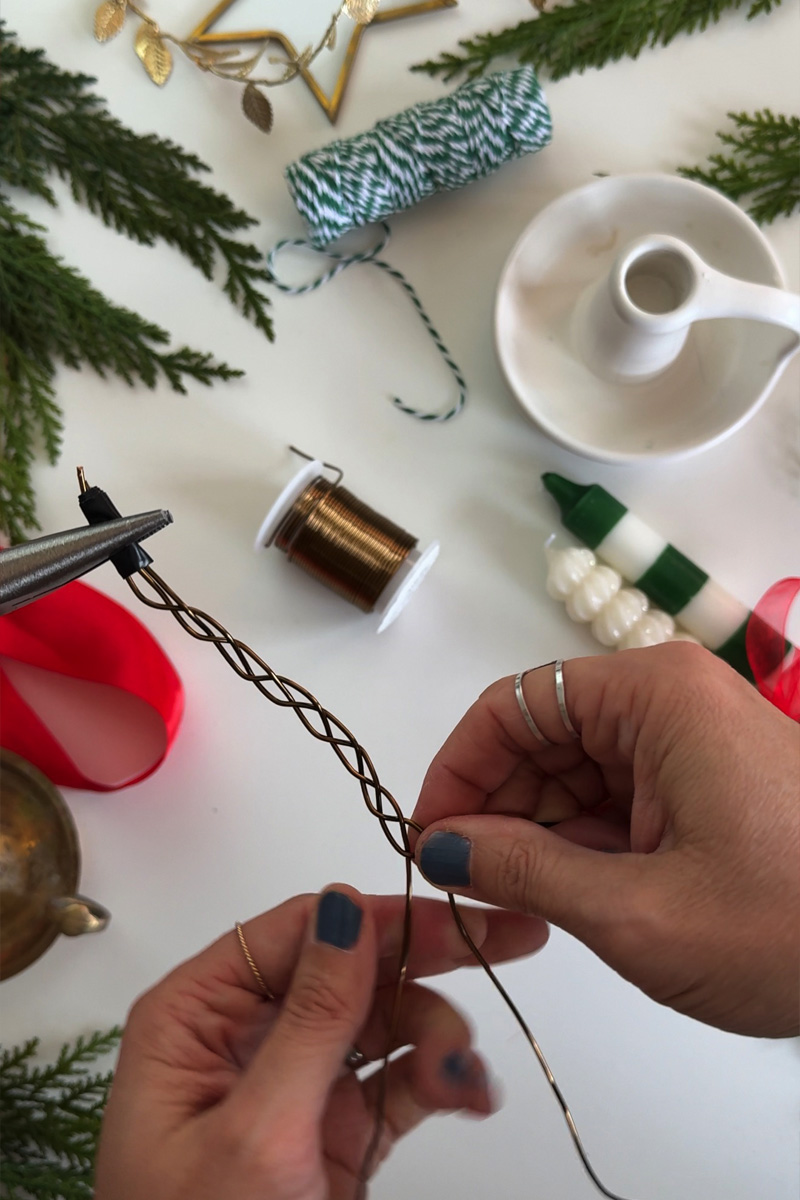
After your wire is cut, hold the ends secure with pliers. (My son held the pliers for me.) Then it was really simple to simple do a loose braid.
How to create a wire ring?
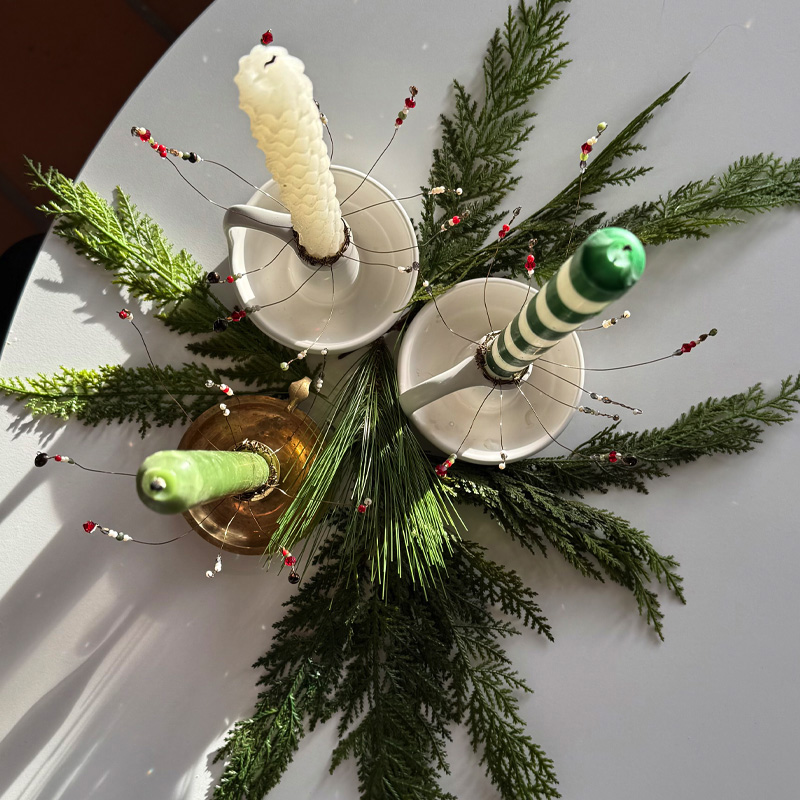
Once I had my braided 10″ section of wires, I laid it flat on a table surface and placed one of my taper candles on top.
Slowly rolling the candle, I wrapped the wire around my candle and then gently pulled off the wire once it was shaped to a circle.
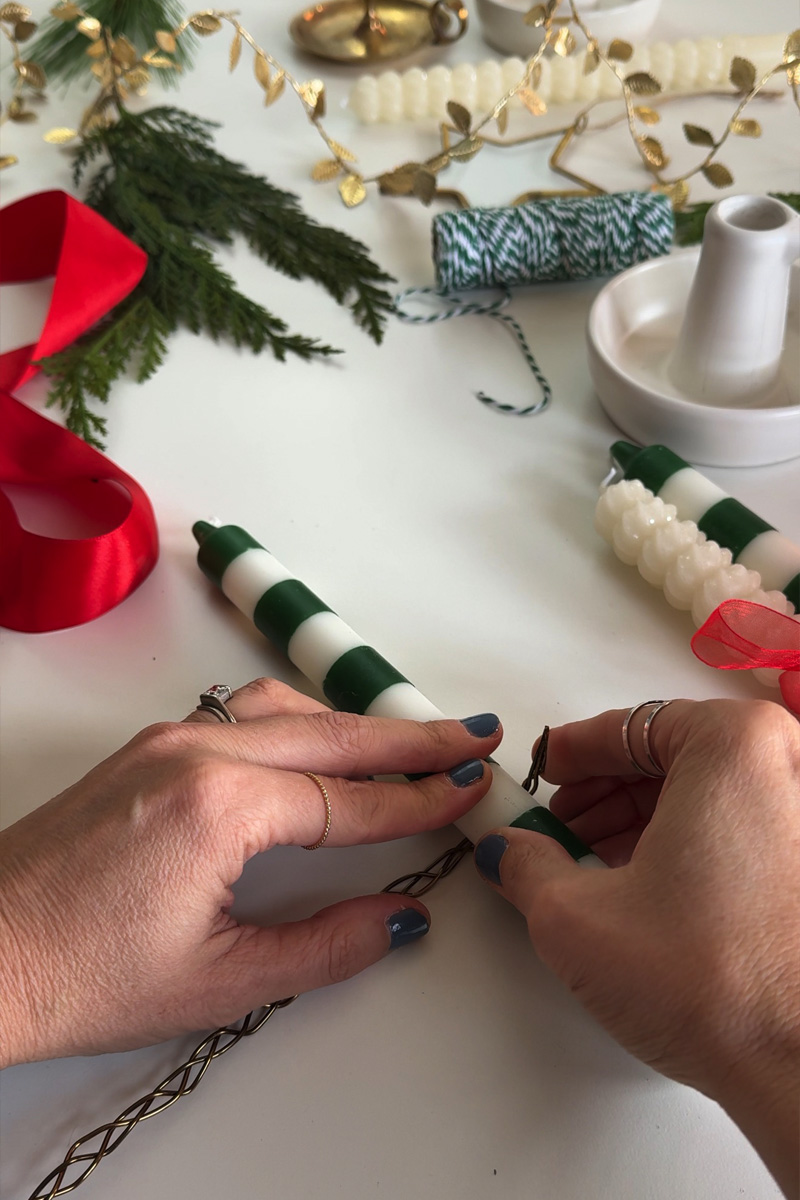
Using wire cutters, I simply cut the braided wire and had an open, but circular ring.

Then, I grabbed a section of my thinner wire and wrapped it around the opening to create a closed and secured ring!
How to bead wire
Next was adding the shimmer and shine with beads!

I cut numerous 5″ sections of my thinner wire and began to add a handful of beads to the end of each one.
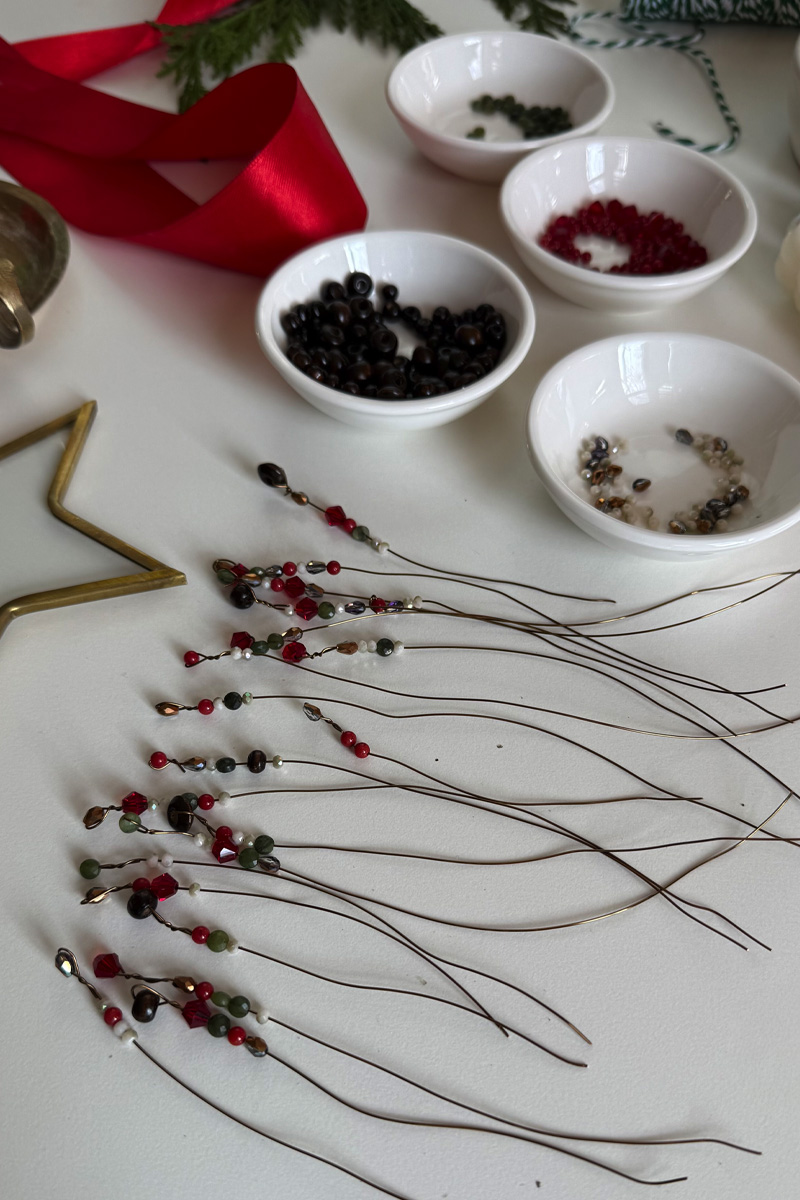
To stop the beads from falling off the end of the wire, I would add the first bead through the wire and then bend the wire over and sort of around that bead. Then all the other beads stayed put.
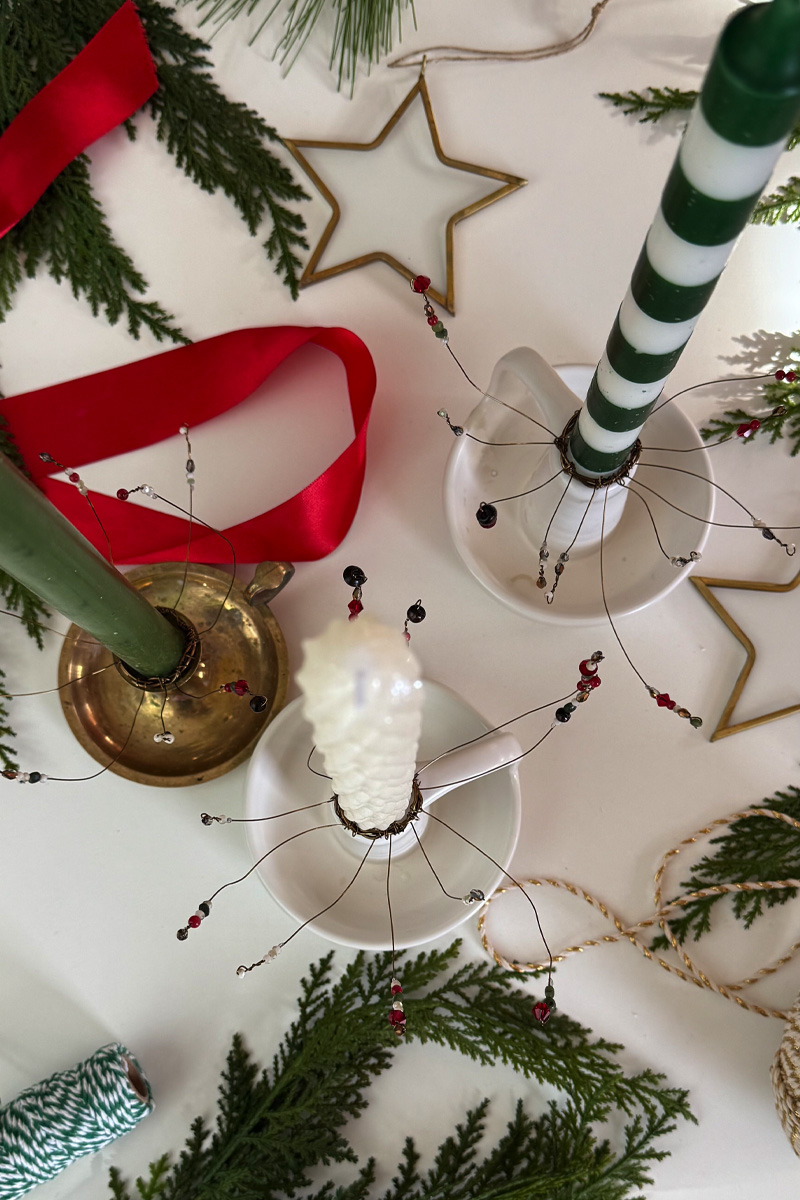
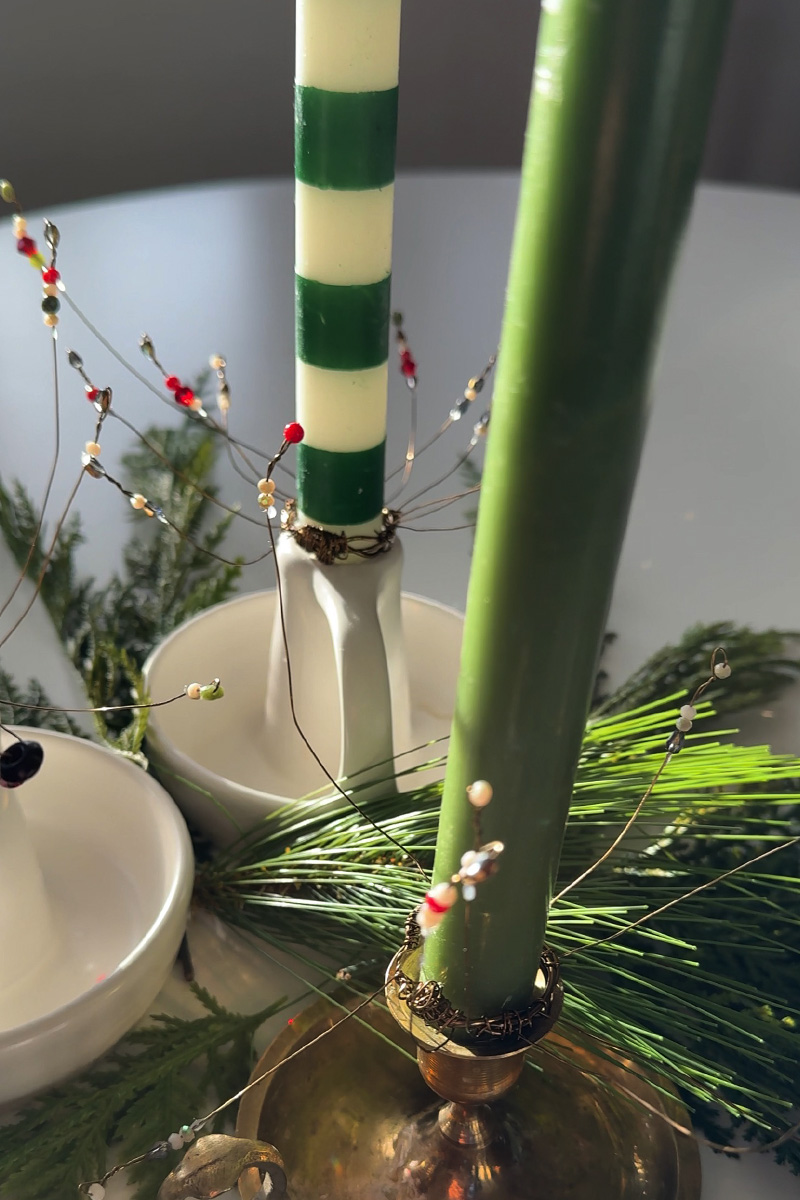
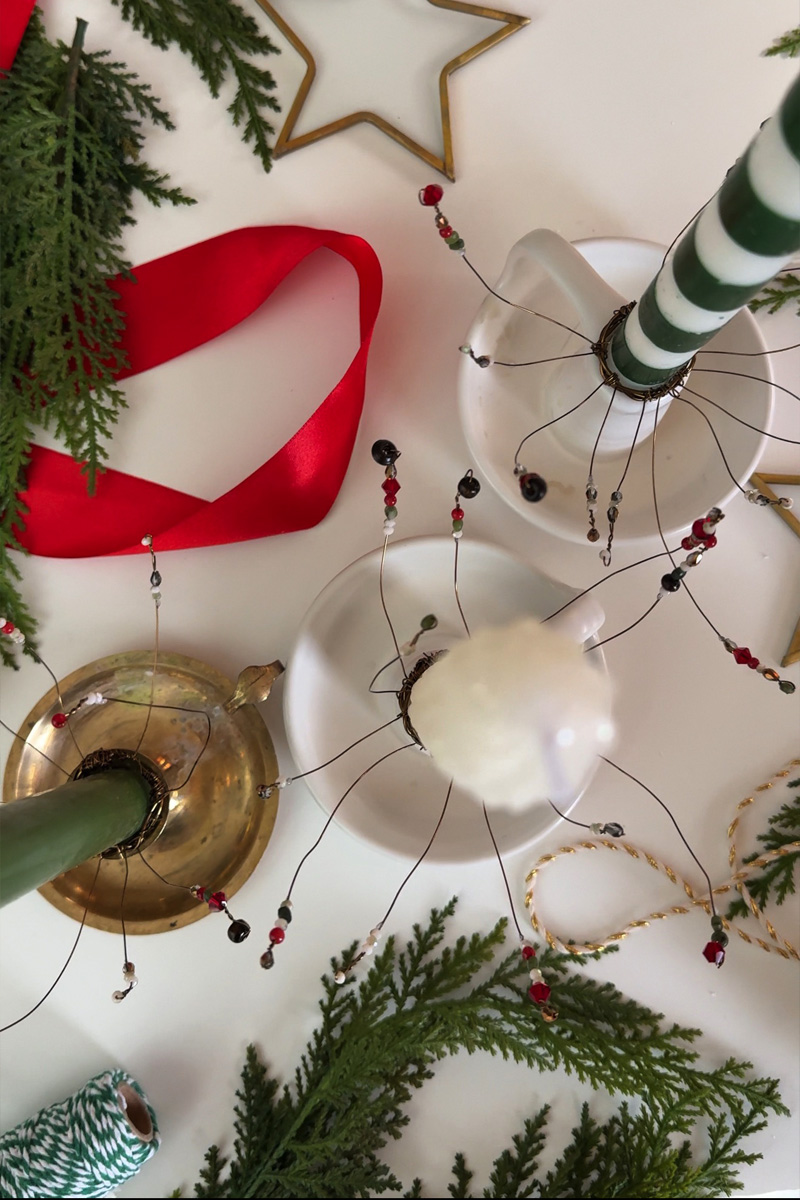
Creating a Beaded Candle cuff
Now that I had my braided wire cuff assembled and all the thinner wires with their beads on them, it was time to finally assemble these adorable decorative candle cuffs!
I threaded the un-beaded end of my thinner wires through the braids of the thicker braided wire and wrapped that thin wire around it, until it felt secure. Some wires took just a wrap or two and some took a few more twists to stay in place. But, this is all part of the whimsical look of these cuties.
Once all the wires were on the braided ring, I gently slipped them onto my taper candles. I played around with gently arcing and bending the wires to create the shape and organic look I was going for.
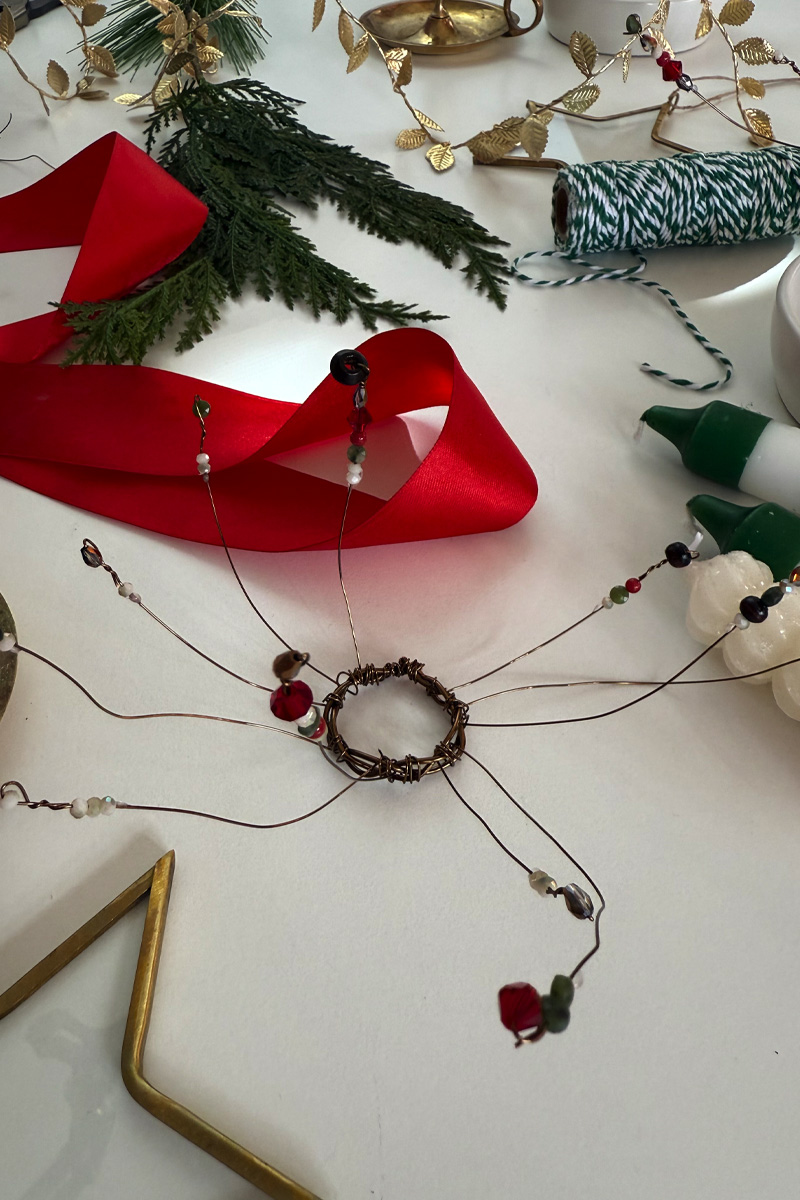
You could also leave them straight for another fun more modern look, too.
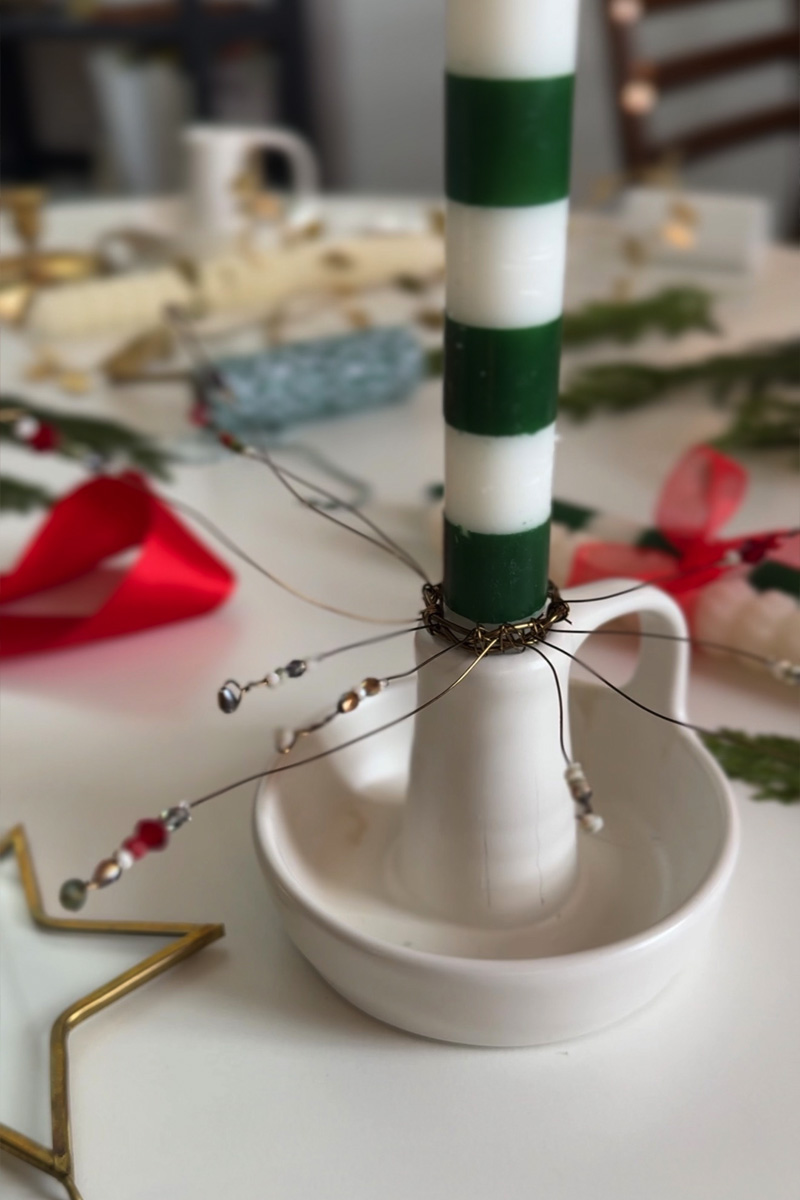
Christmas Candle decoration
Whether you have painted your candles with holly and bows or are using cute green and white stripe candles like mine, adding these fun cuffs are such a fun Christmas addition!
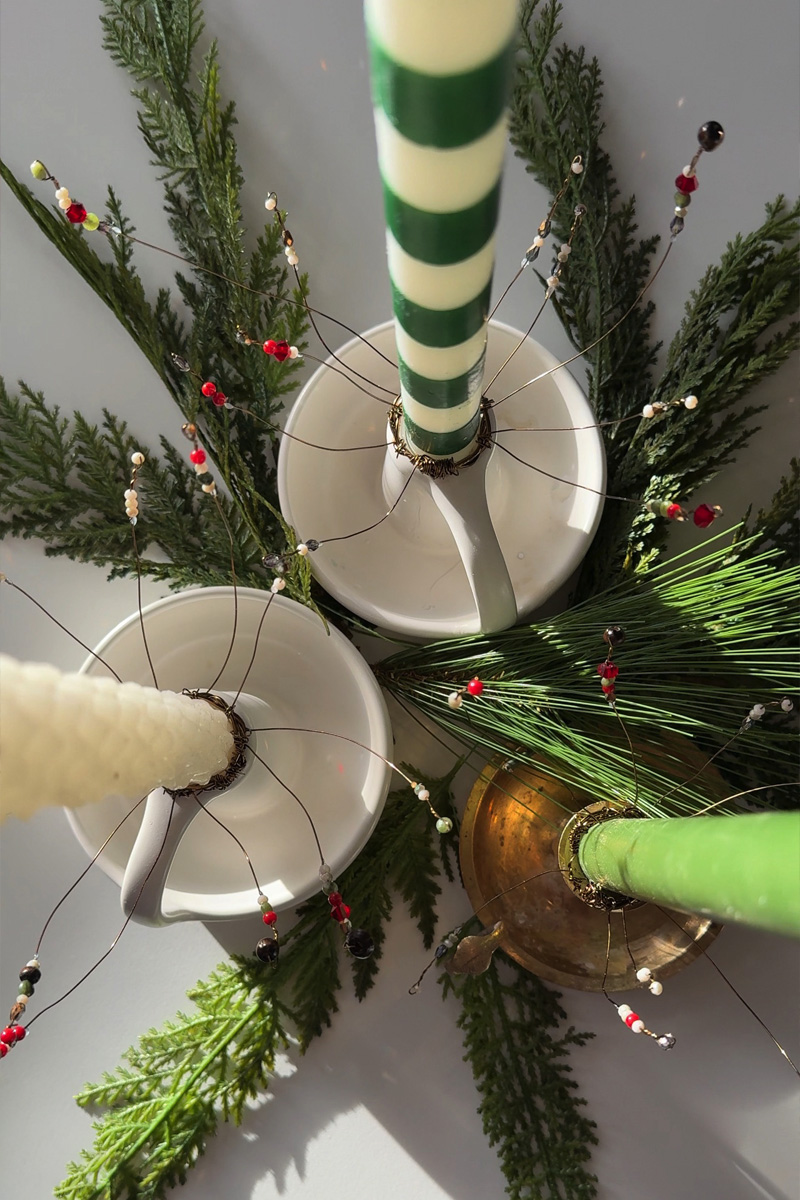
And if you used all white candles with all white beads, these candle cuffs would be perfect for a wedding or wedding shower even.
The combinations of beads really makes this fun budget friendly project great for all occasions, parties and celebrations.
Looking for other fun Holiday idea? Check out some of these…