How to Make DIY Oversized Candles in Windows
INSIDE : Learn how to make DIY Oversized Candles to place in windows. They are a great way to add big impact to your space this Christmas season, but in a very budget friendly way.
This post may contain affiliate links. See my full disclosure.
As Christmas began to get closer, I was tasked with helping my church come up with a way to decorate our space to reflect “Light in the Darkness” which was the series we focused on during the month of December.
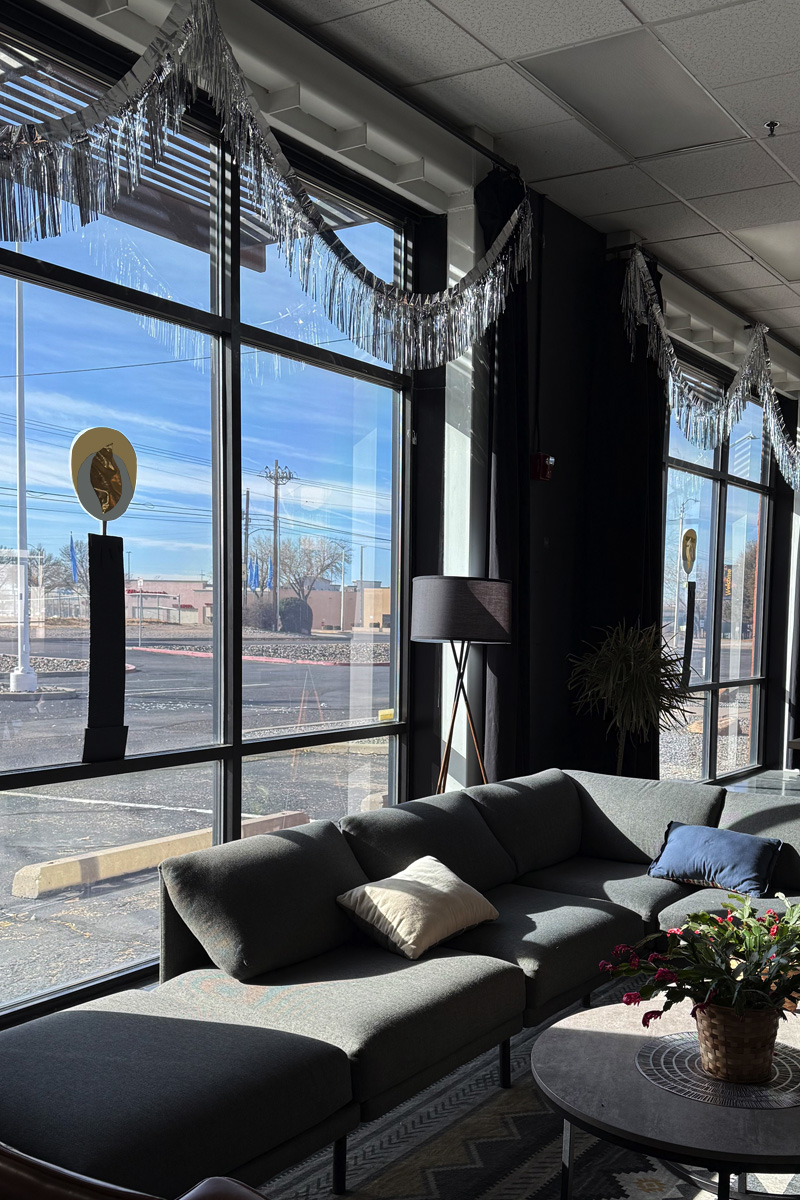
We have numerous big tall windows in our auditorium and I decided it would be so fun to buy really big candles to put in the windows like the more traditional concept of window candles at the holidays idea. The only problem is huge 24″ tall candles are SO expensive and I needed six of them.
I found gorgeous Oversized Candles at places like Walmart and Michaels, but I was looking for that look but BIGGER and without the big price tag. DIY to the rescue!
DIY Paper candles
These fun DIY crafty candles were easy to make and saved me a TON of money! Plus, I could make them as big or as little as I needed.
Let’s get into the supplies needed and how to make them below.

Looking for other fun backdrop party ideas?
Supplies needed to make an Oversized Candle display
- Black Foam Core
- Black Crepe Paper (wide)
- Gold Crepe Paper (wide)
- Silver Crepe Paper (wide)
- Gold Wrapping Paper
- Scrap cardboard pieces for wicks
- Hot Glue
- Zip Snips (or strong scissors)
- Pencil
- Ruler
- Something large and round to trace (I used a wall clock)

How to make oversized Candle craft
Cut candle bases
To make these large paper candle displays, you start by deciding how large you need your candles to be. I used 24″ x 36″ black foam core for my candle base, so the height of my candle base was 36″ tall.
Using a pencil and ruler, mark out 6″ and then using either strong scissors or my preference, Zip Snips cut the foam core to size.
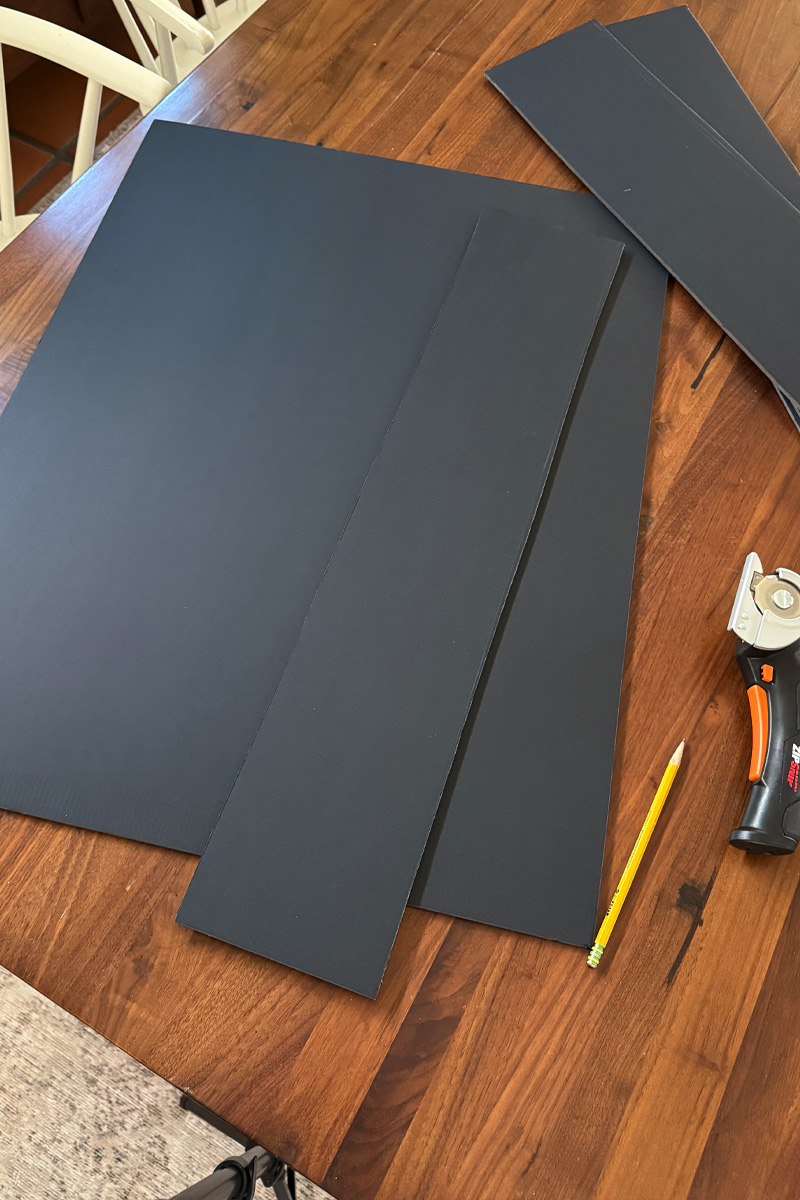
If you are wanting a little texture for your candle, you can add black crepe paper to the candle base. Simply fold it like you fold a present and hot glue it in the back.

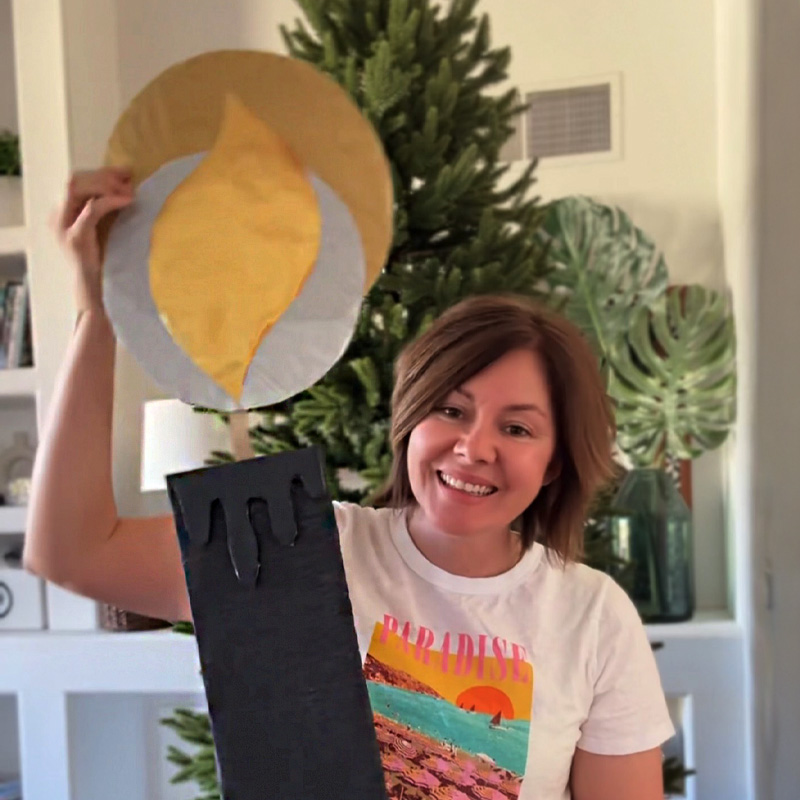
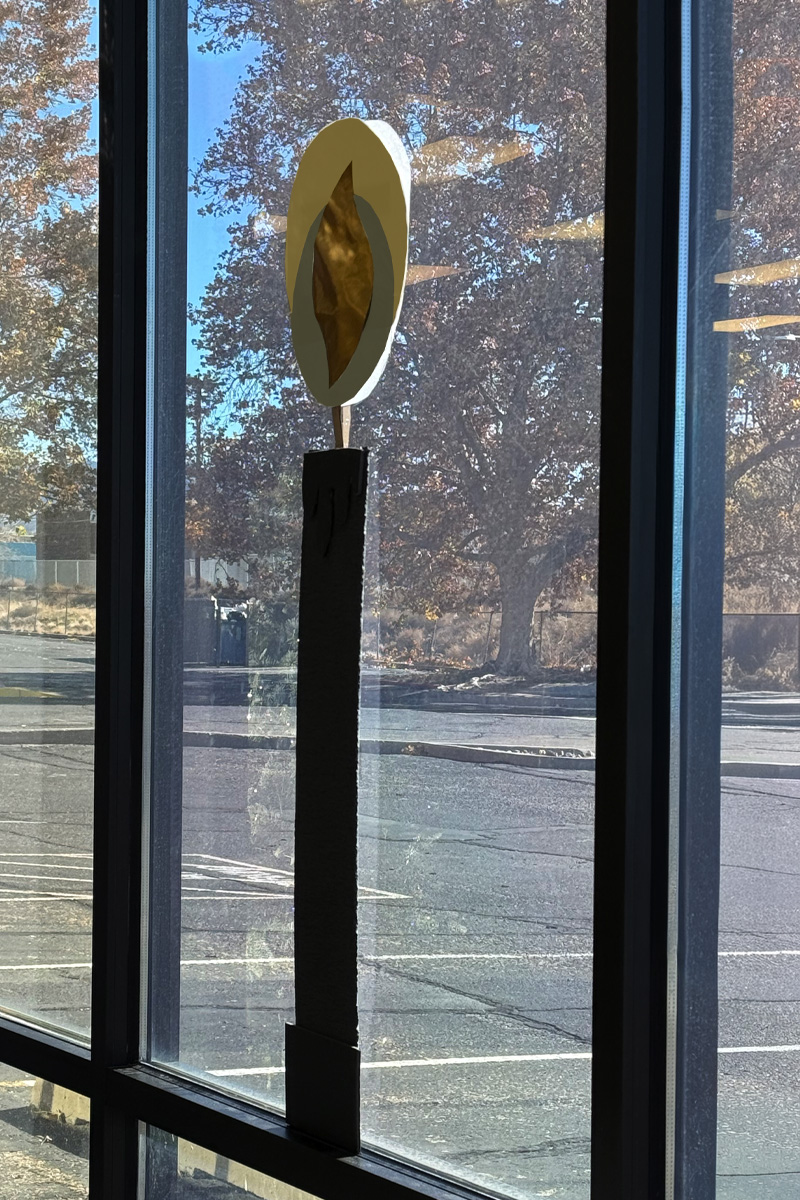
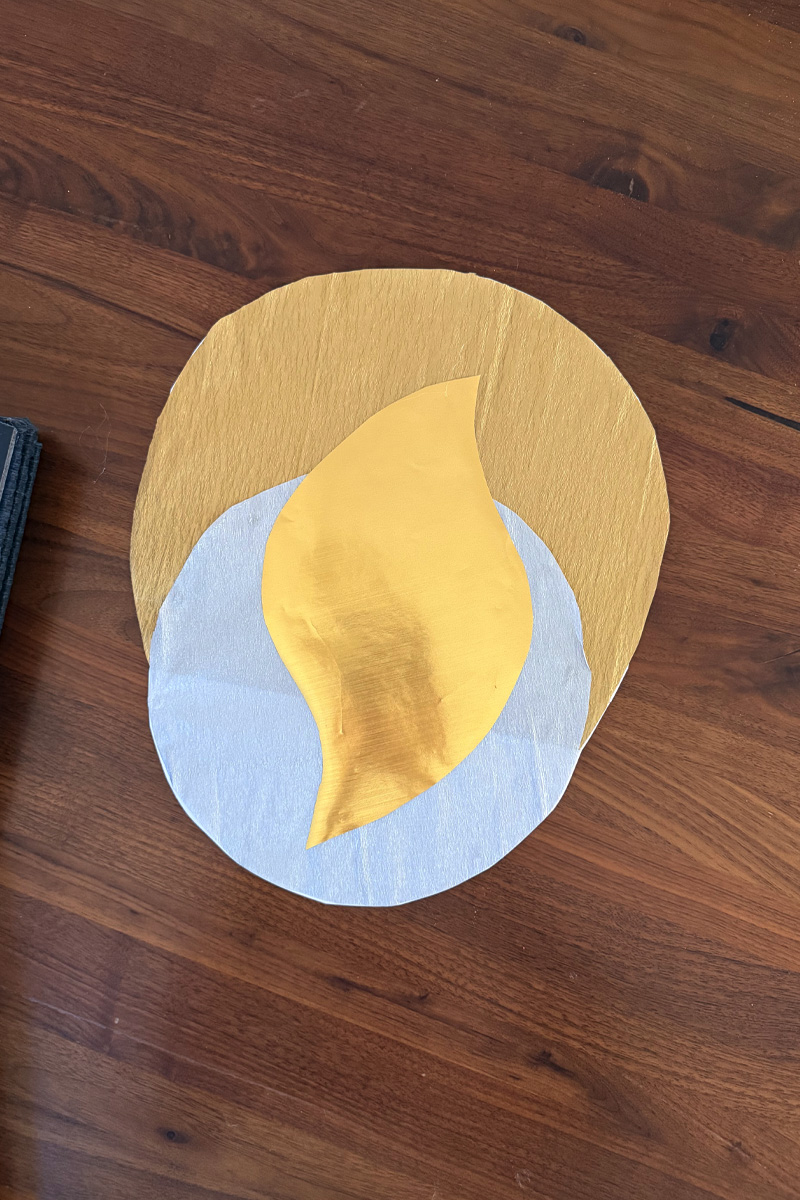
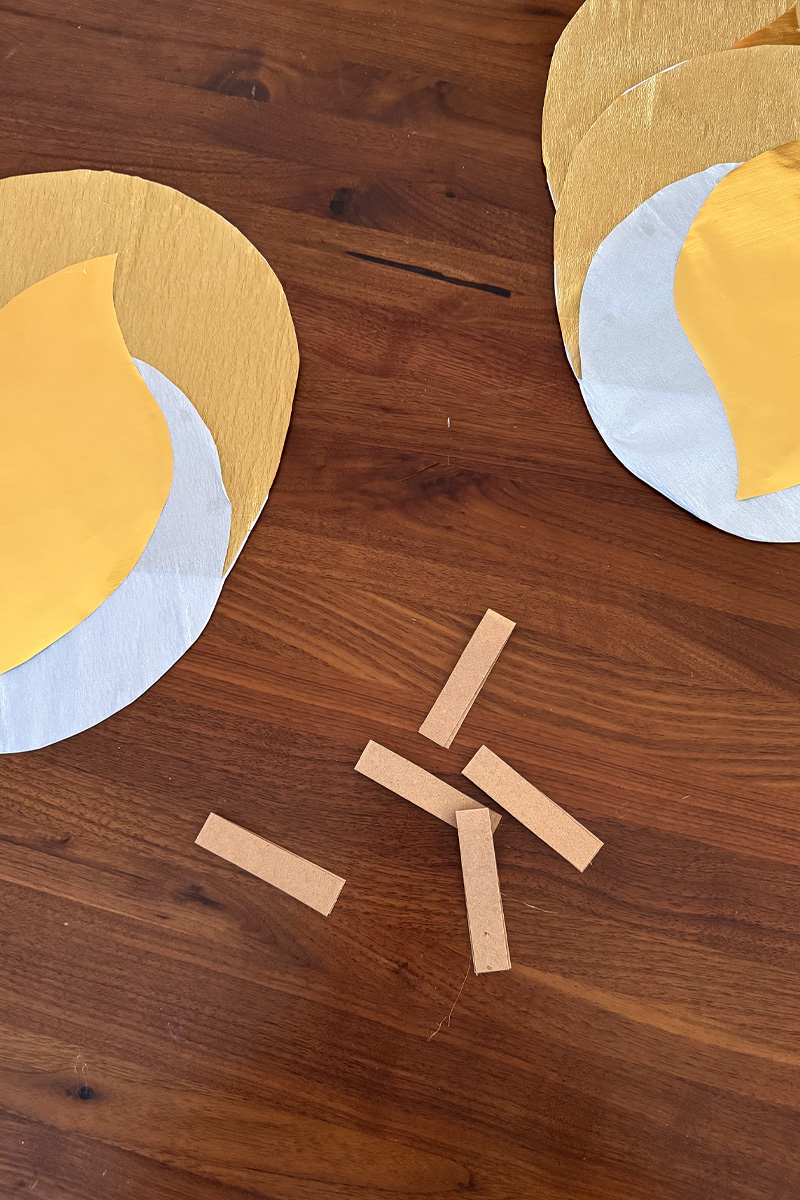
Create the candle glow
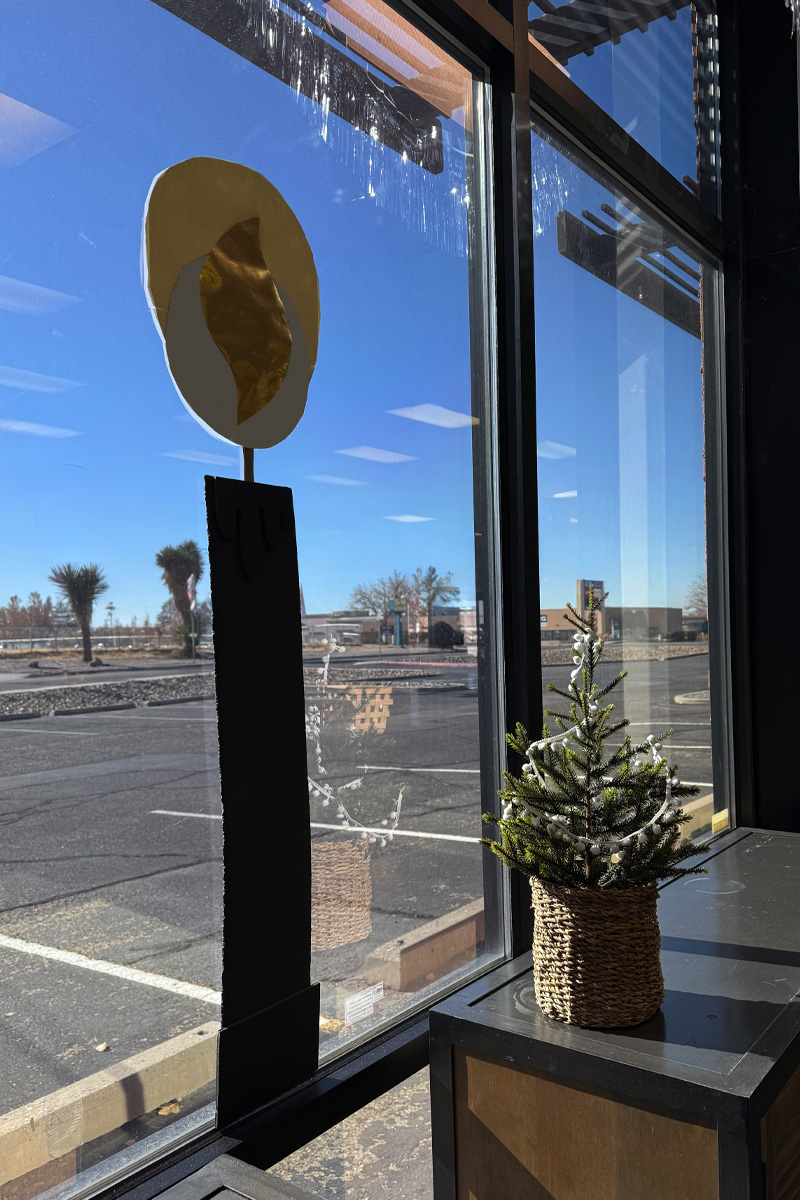
Now it’s time to craft your candle’s flame glow. Spread out the gold crepe paper and trace a large wall clock using a pencil and cut them out.
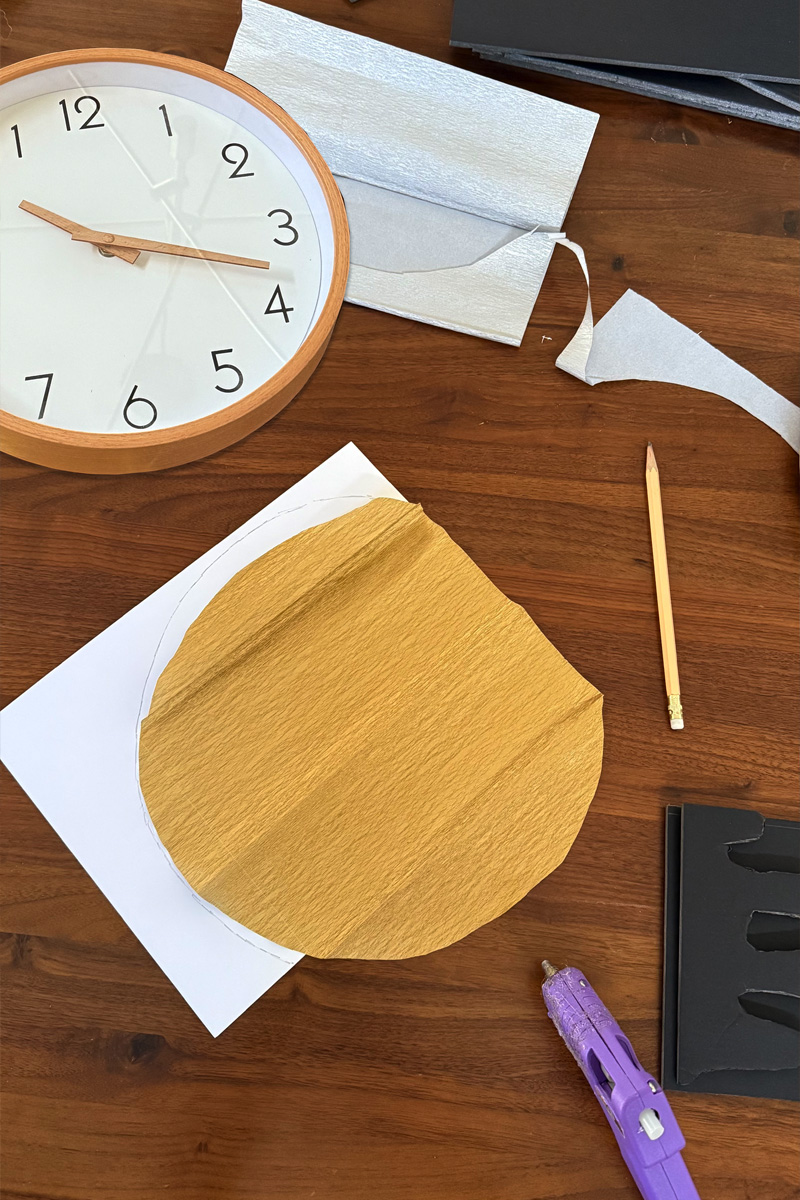
I also traced a smaller bowl on silver crepe paper and then cut out a gold “flame” with scissors. Using hot glue then put all the pieces together. Layer the silver glow onto the larger gold glow. Then, hot glue your gold wrapping paper “flame” to the very top.
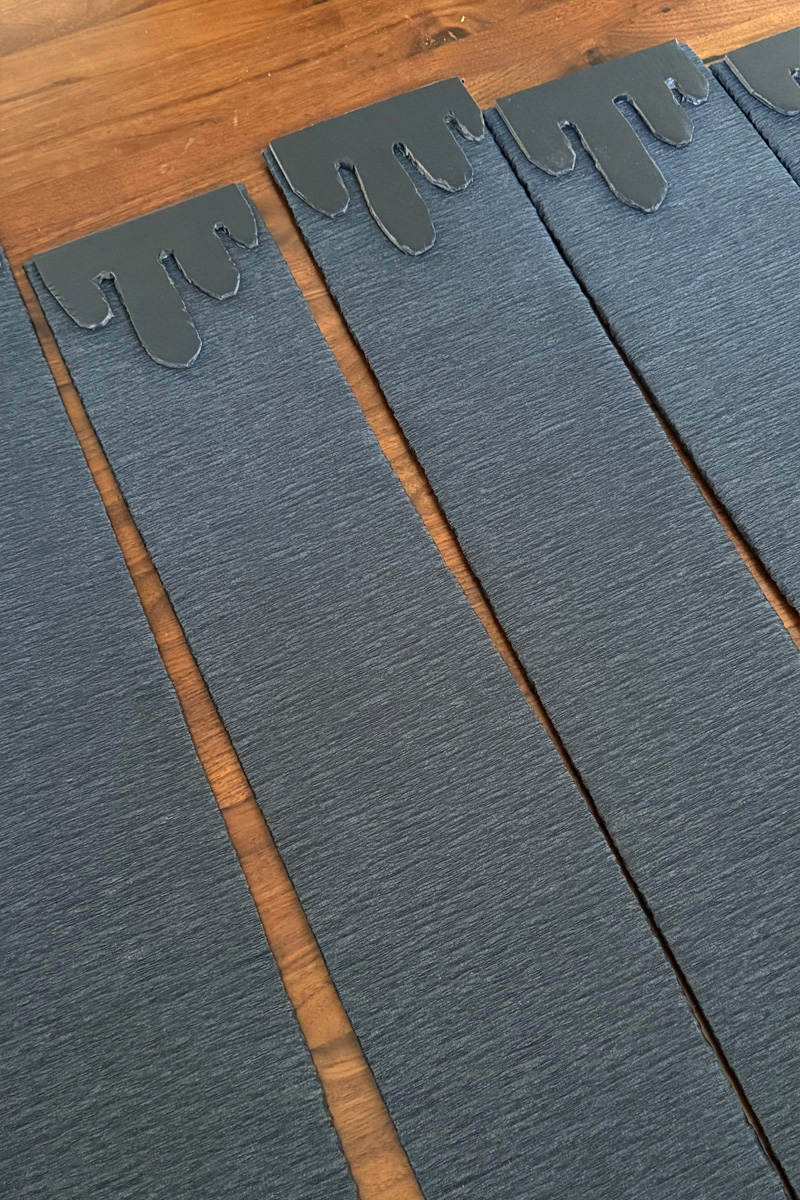
Craft candle wax drips
I wanted to add some cute black wax drips to my crafty candles. Start by drawing a drip like shape the same width as your candles. Then using scissors cut the shape out.
I found using a pencil to sort of smooth out the edges. It really helped to clean up any mistakes from the scissor cuts.
Next, hot glue the wax drips to the tops of the candles. Your crafty candles are really coming along now!
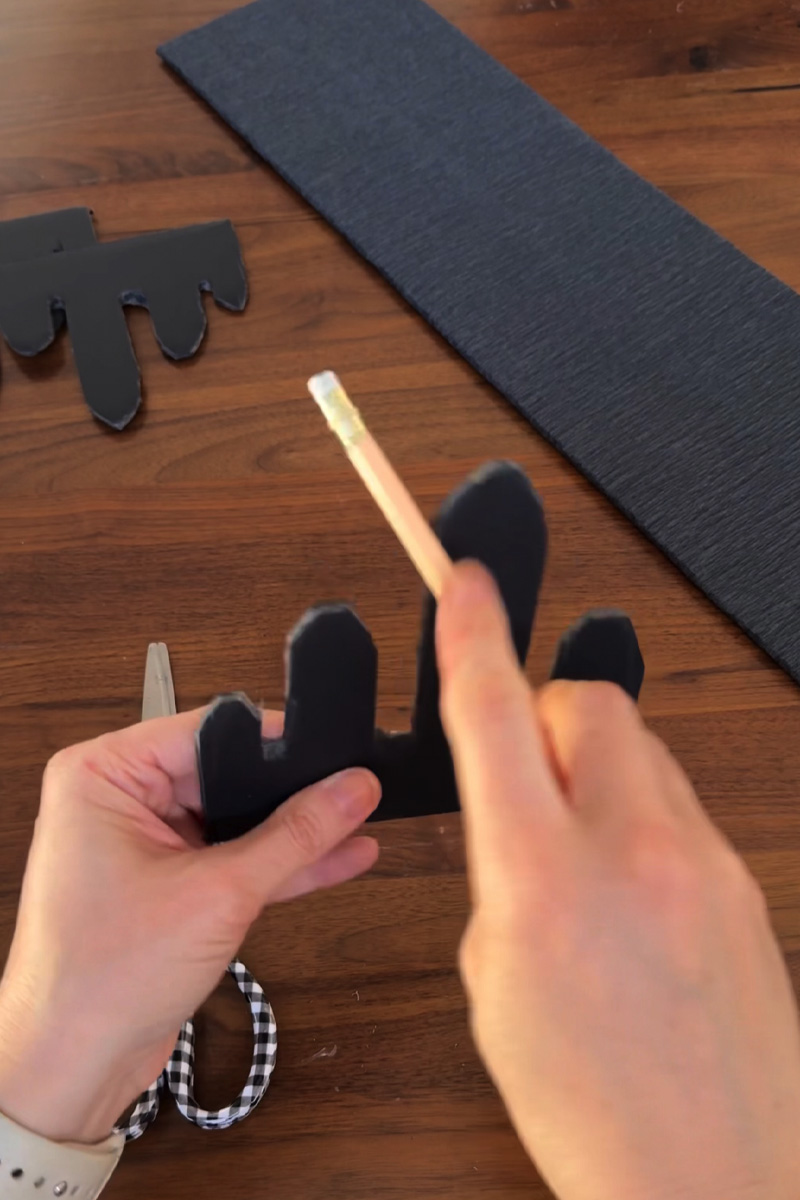
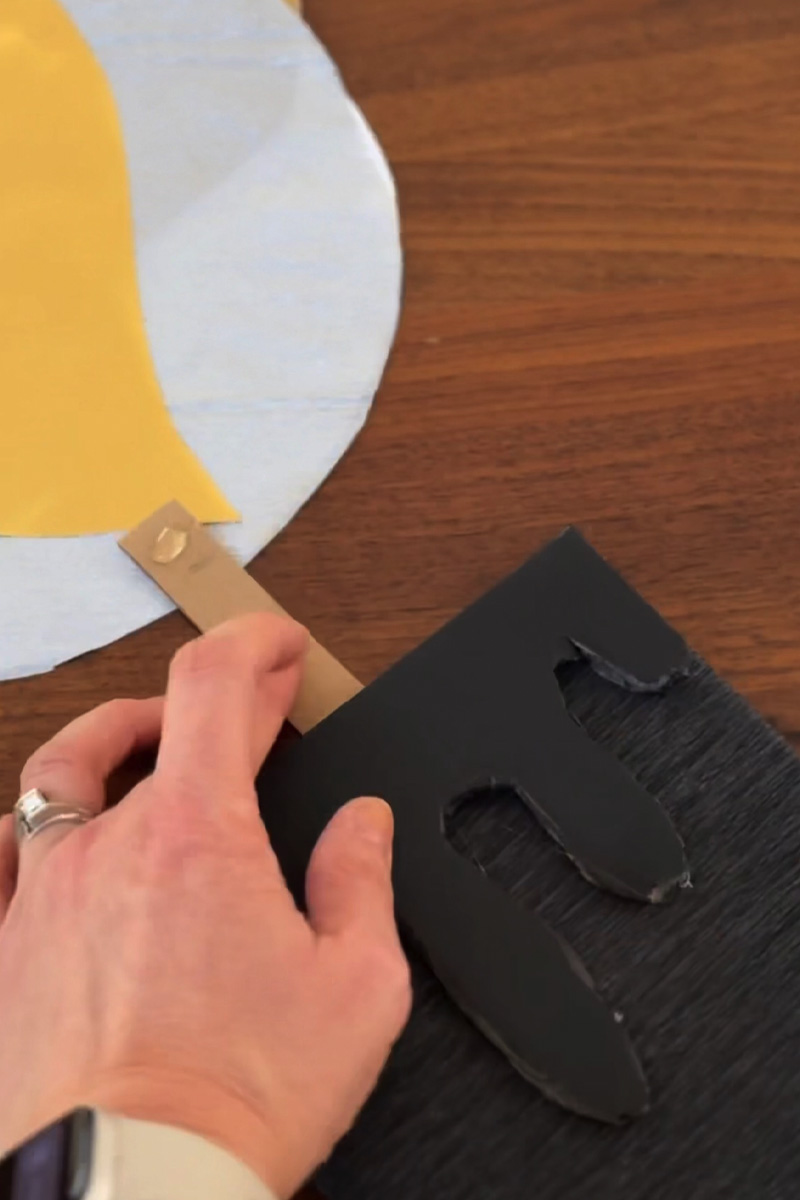
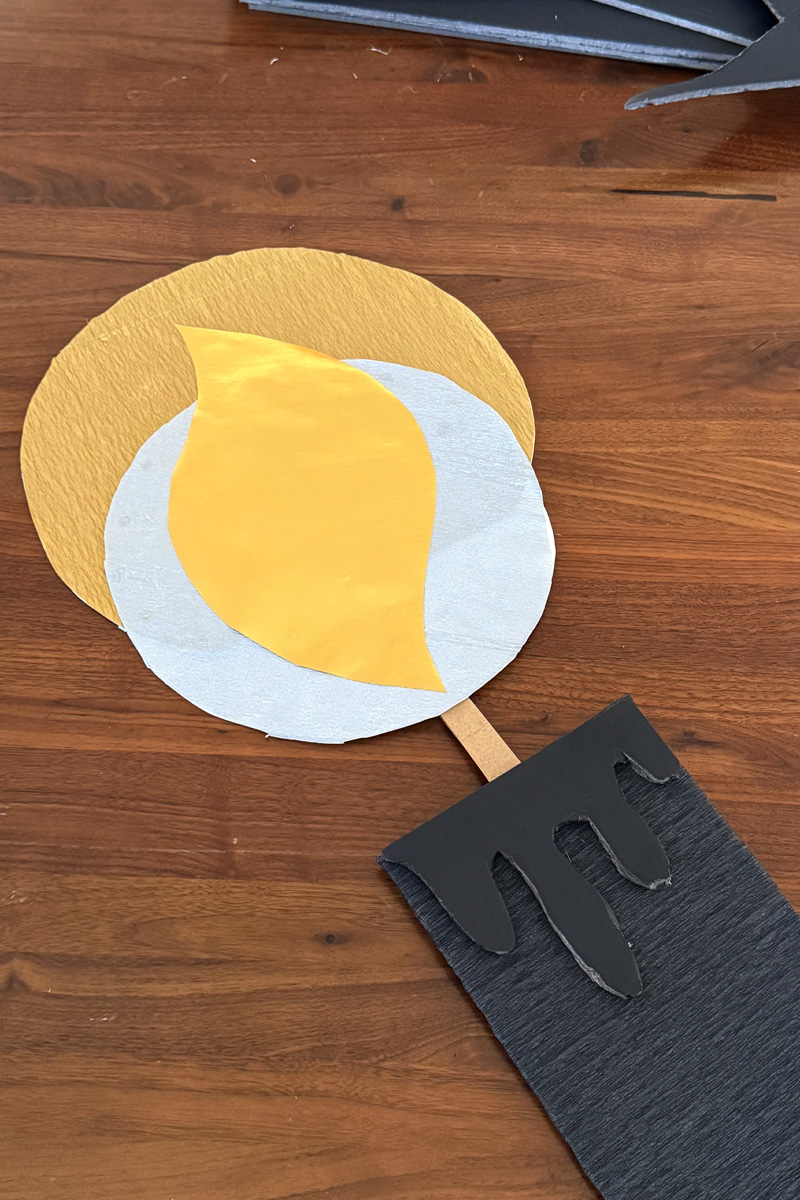
Construct the candle
Cut simple cardboard strips to act as a candle wick.
Hot glue the wicks to the wax drip and to the flame glow.
Crafty Oversized DIY Candles
This crafty oversized DIY candle is completed and it’s full of charm and creativity! It’s time to find your candle it’s perfect place to shine.
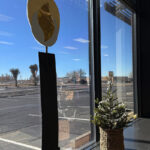
Installing DIY Candles in windows
I ended up placing the candle in the center of our church window. I used a little sticky tack to help keep it in place on the window. It helps to keep it stuck, but without forever adhering.
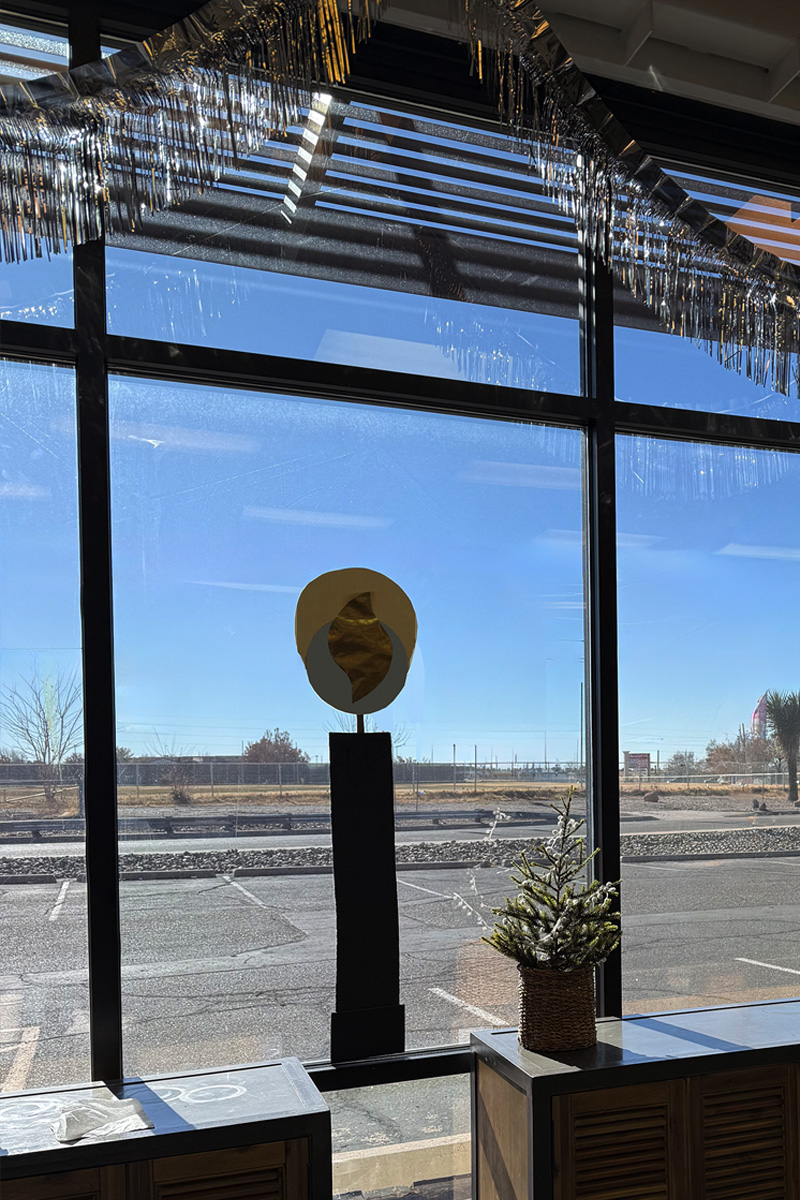
These candles provided charm and a festive look this Christmas Advent season!
Looking for more Christmas related projects? Check some of these out…