Stained Glass Window Display
INSIDE : Looking to add some color and pattern to your windows? Learn how to create a very simple and inexpensive Stained Glass Window Display for a modern timeless look, but with tons of creativity!
This post may contain affiliate links. See full disclosure here.
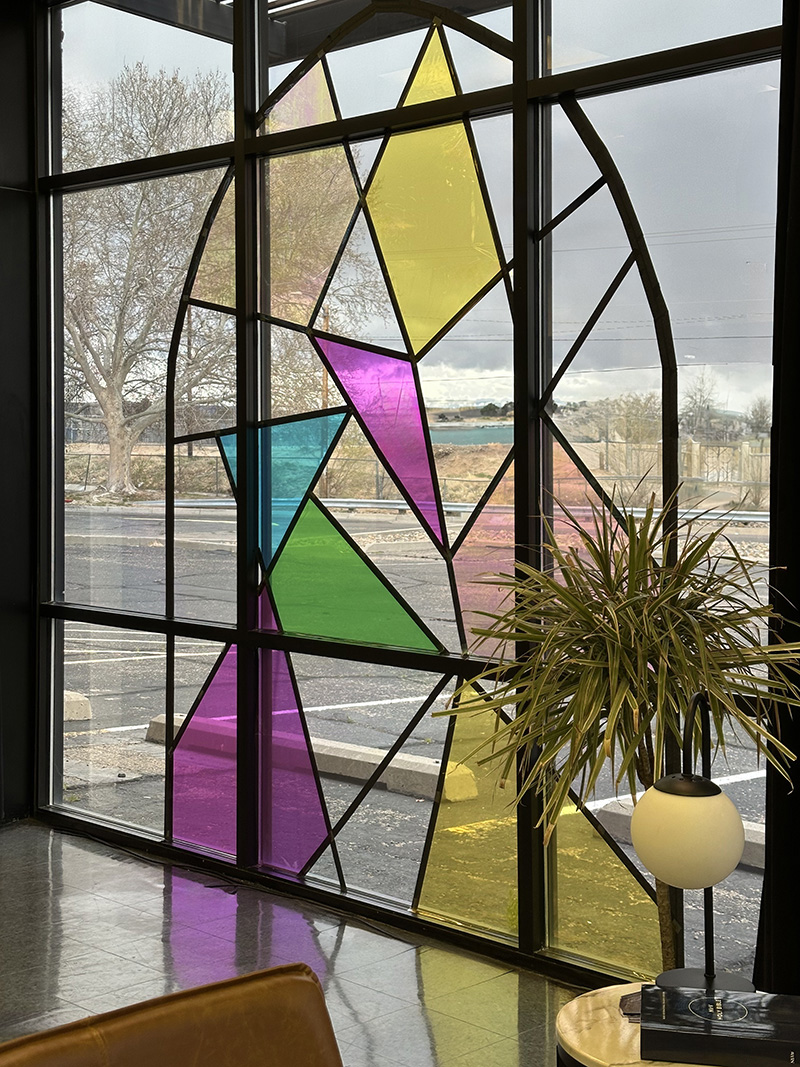
I have the honor of designing and decorating my local church for each season during the year. And last year during the Easter season, we wanted to bring a feel of celebration, color and joy to all who entered our building.
With six very large (roughly 12′ x 10′) window in our main atrium foyer area, I thought it would be such fun to create large stained glass windows AND I did it in two stages, which if you know the Easter Story – you know leading up to Easter is more solemn with Good Friday and the Crucifixion. And then on Easter Sunday we have MUCH to be joyous about!!

Before I get into the stages though, let’s see the supplies needed to make these window displays.
What supplies are needed to make Colorful Stained Glass Window Displays?
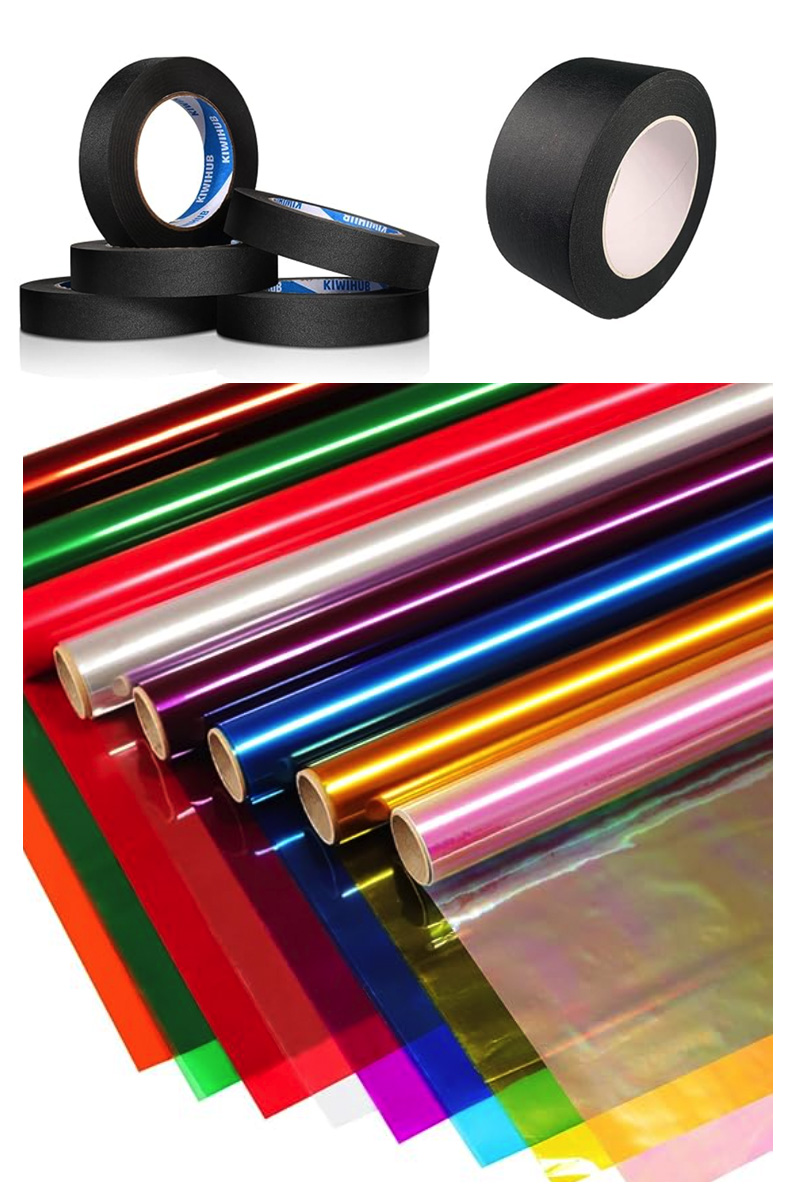
- Scissors
- Scotch tape
- 2″ wide Black Painter’s tape
- 1″ wide Black Painter’s tape
- Multiple colored rolls of Cellophane
- Black Sharpie
Note : I bought individual sheets of cellophane in beautiful soft muted blues, greens, peach and yellows. I did a test and held the sheets up to my window and the colors completely disappeared. COMPLETELY disappeared. So before you buy huge amounts of cellophane, be sure to test them out against a window. FYI, the rolls I linked above worked wonderfully.
Whether you are decorating your entire church for Easter or simply wanting to add some color to your windows at home, this is a simple project that can be applied to many different window sizes!
How to create an Arched Stained Glass Window
I wanted to create a traditional arch lookin window within our windows and then use more geometric stain glass lines as a way to modernize the look.
Create the basic arch shape
I started by taking measurements of the windows height and width. Then, I marked the center point of the window and decided how tall I wanted that center point of the arch to be.
From there, I also marked how wide I wanted the arch to be. Then I did a vertical line of the black painter’s tape from the floor to about 6′ high for the straight edge of my arch.
Using about 6′ pieces of tape, I slowly started arcing from the top center point to the edge of my straight edge. Make sure to stop and stand back to make sure you are liking the basic arch shape.
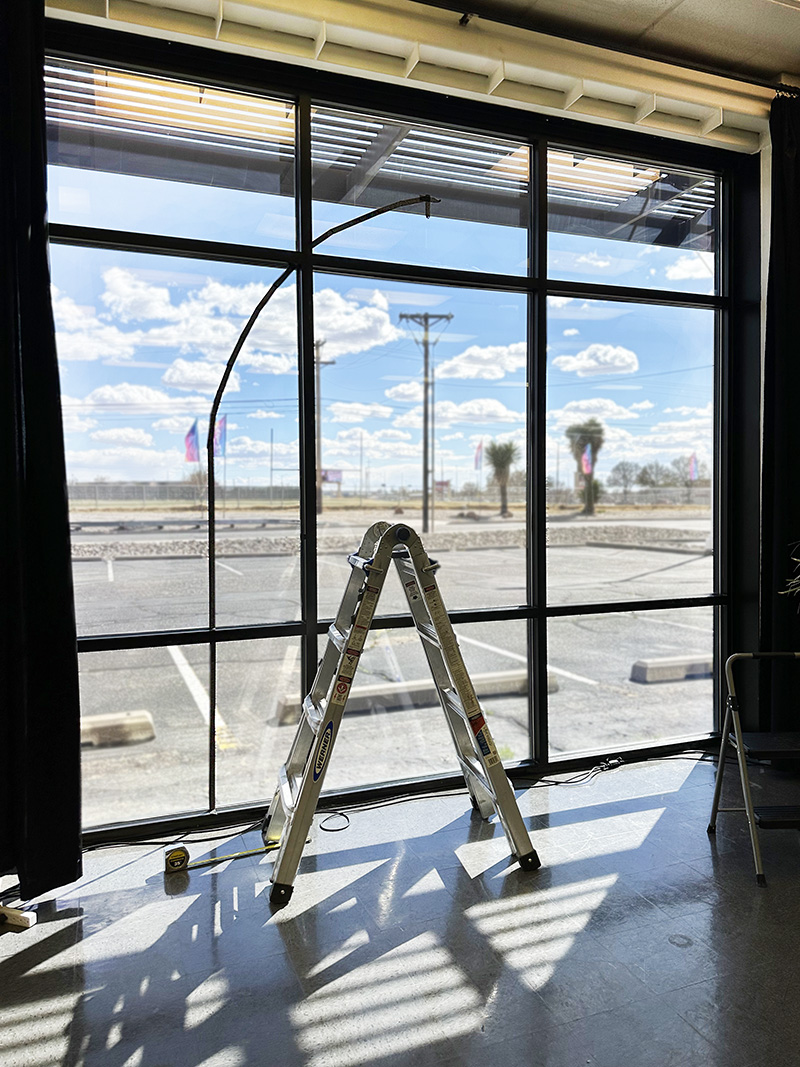
Once I got one side of the arch done, I realized I wanted the perimeter of the arch to be thicker. So I followed the line work I had put down using the 2″ think painter’s tape. I think it looked MUCH better with that thicker edge.
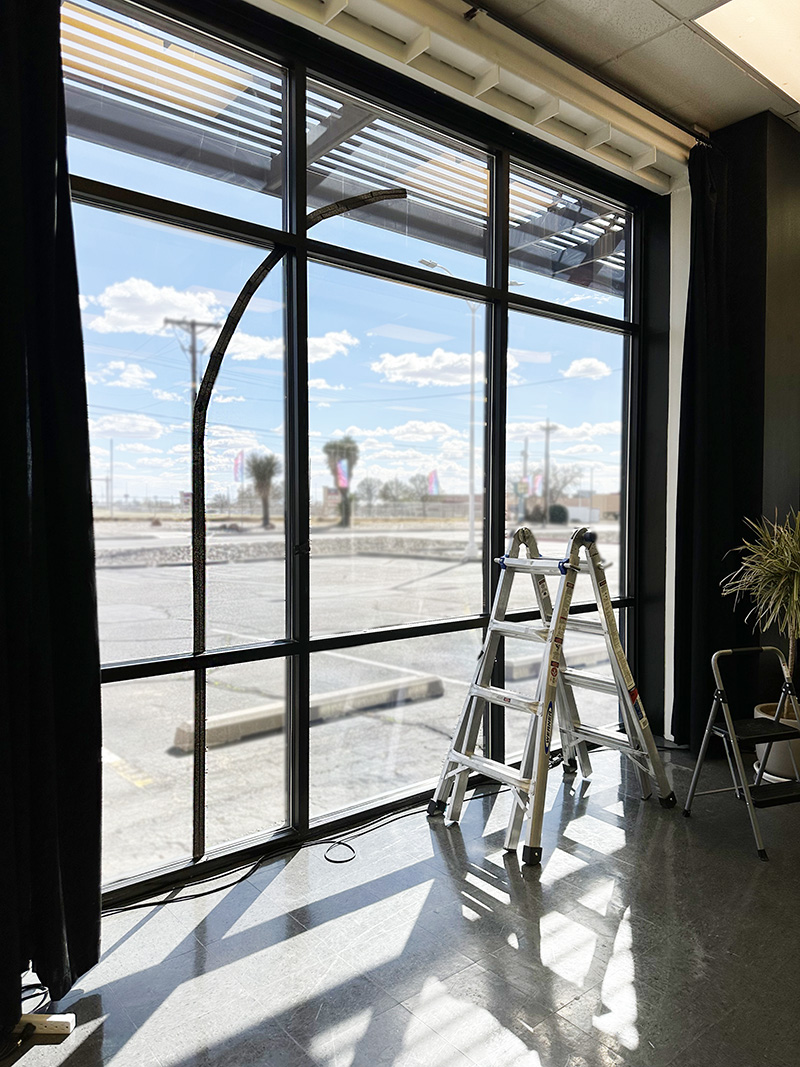
Once, you had one side laid out I found it helpful to take basic measurements every 12″ or so and draw it out. This really helps each side match each other and if you are doing more than one arch window, for all of them to match each other as well.
Add in center stained glass line work
Once you have the basic arch shape, it’s time to add in the center stained glass line work. I went back to using 1″ tape for this area.
This is the area where you can really just have fun. There is no right or wrong here and I didn’t worry about anything matching from window to window.
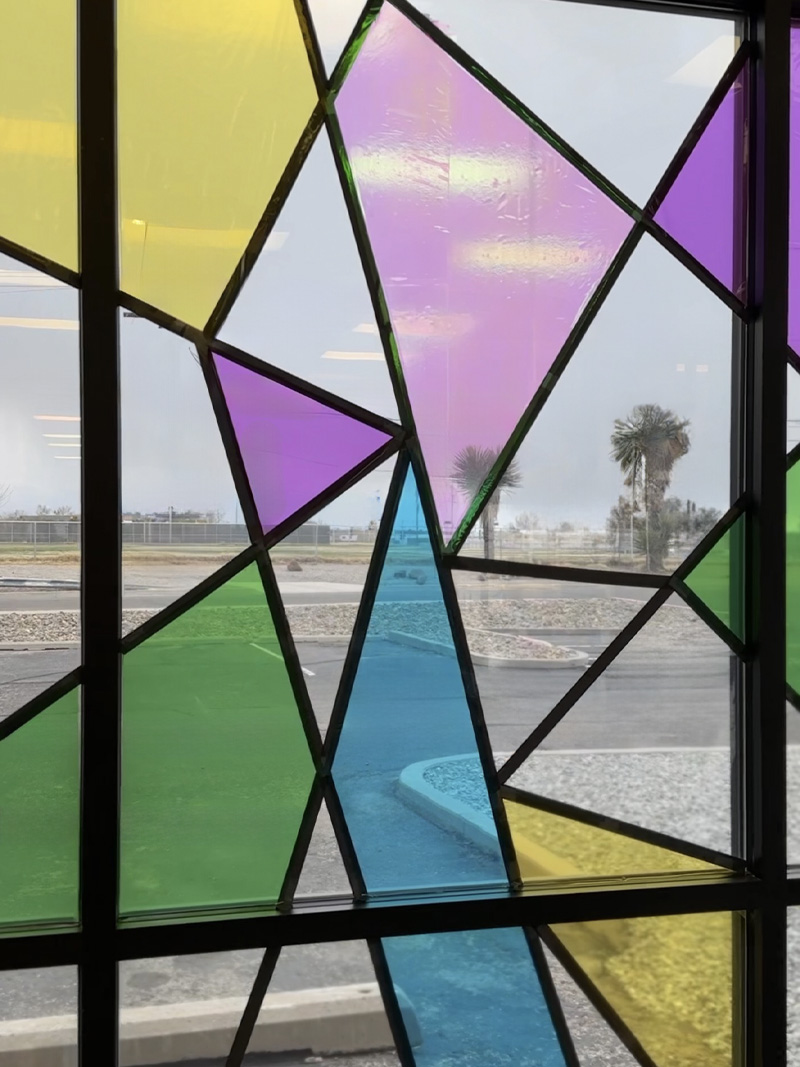
I wanted the interiors to be more geometric in style to create a more modern look, so I had fun creating cool shapes.

You can see the basic shapes for three of our six windows below. Each arch is the exact same shape and size, but the interiors of each arch are different.
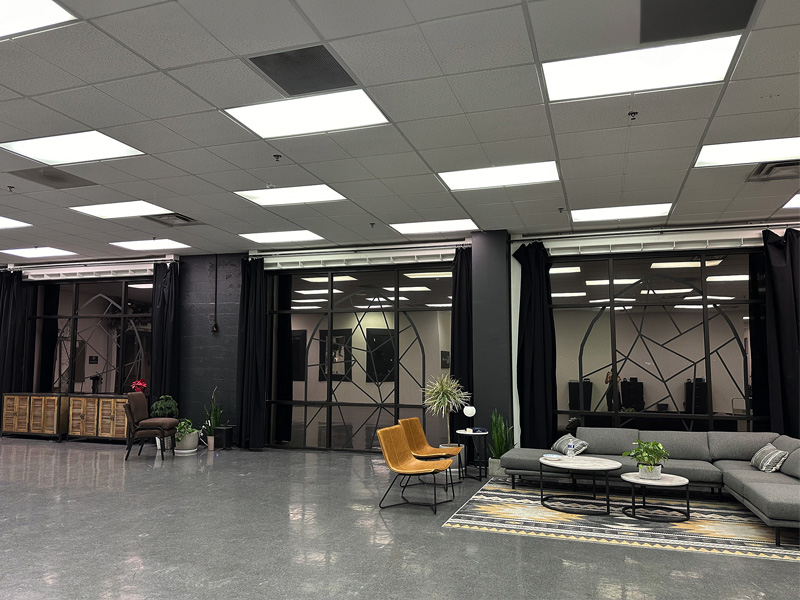
I really loved the simple look of just having the black line work. I kept the windows like this for the week before Easter. It was a nod to the sadness and bleakness felt as we led up to the joy of Easter.
Looking for other fun backdrop party ideas?
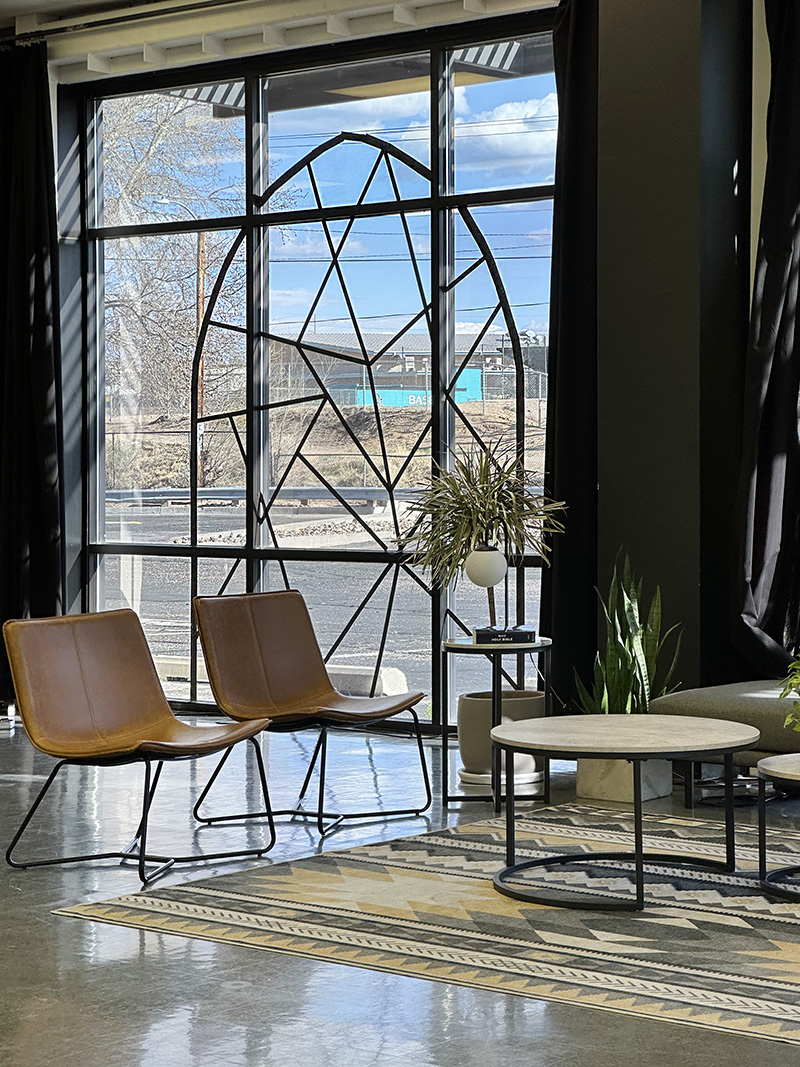
Adding color to your Stained Glass Window Display
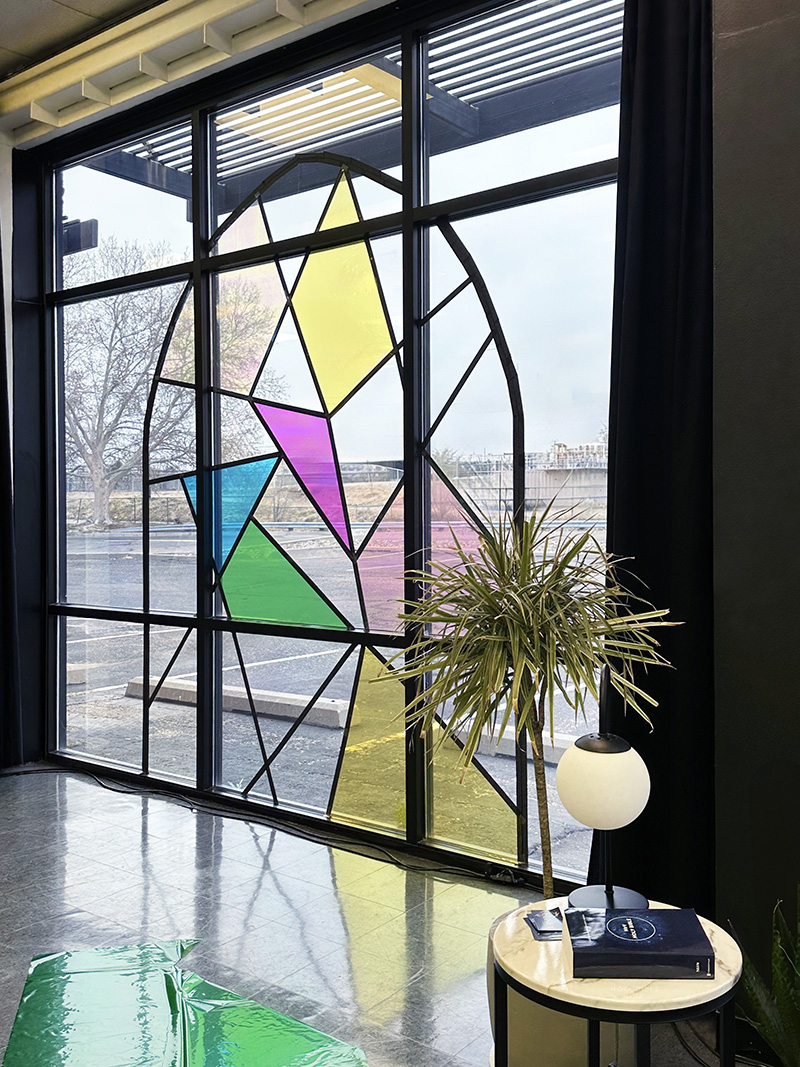
Adding color to the stained glass window display really took the windows from wow to WHOA.
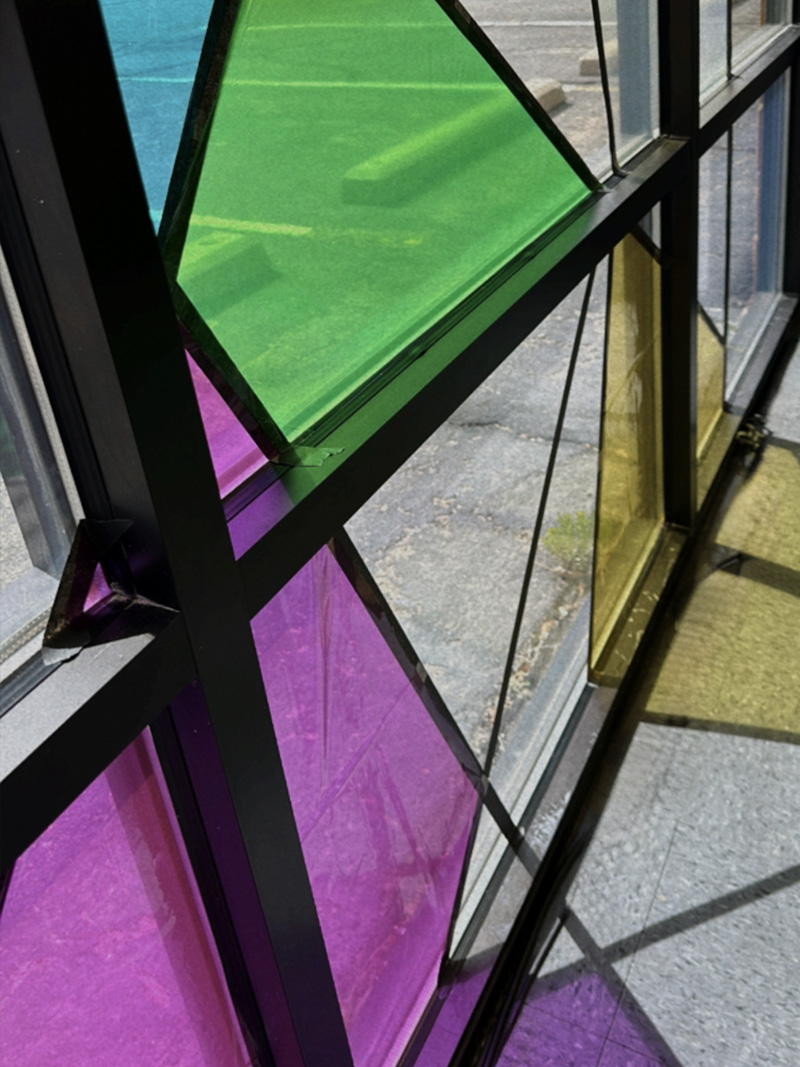
I choose to use green, blue, yellow, purple and the iridescent pink cellophane colors.
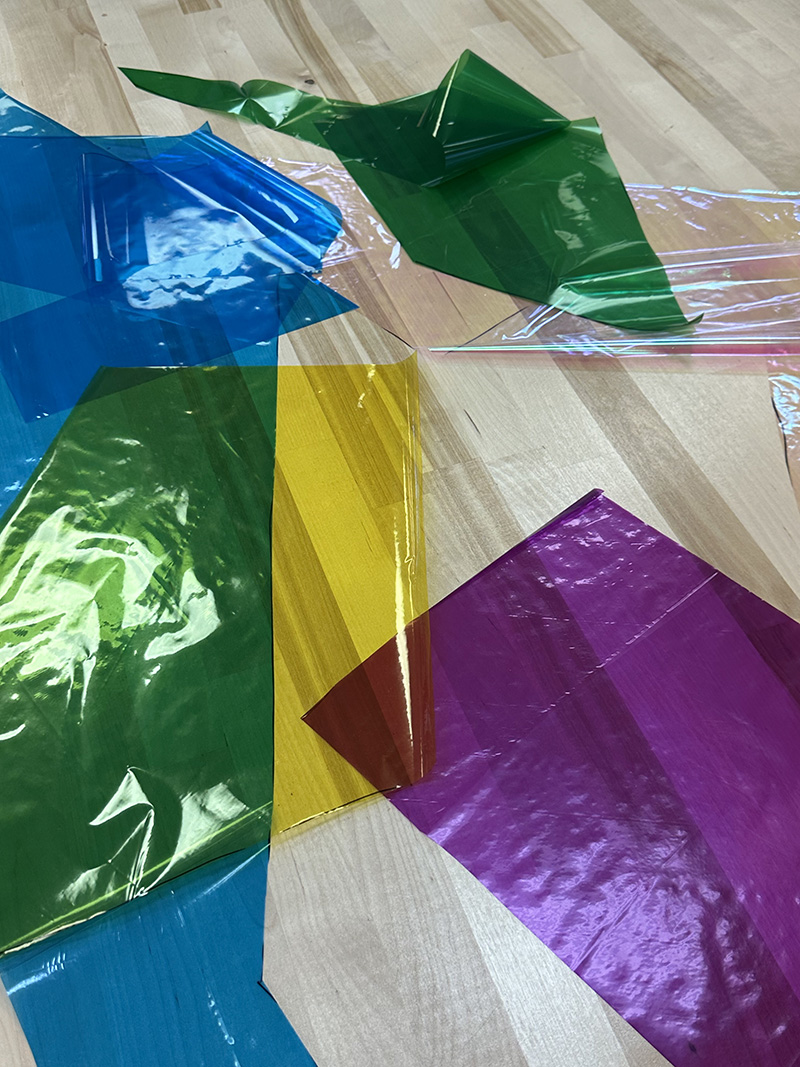
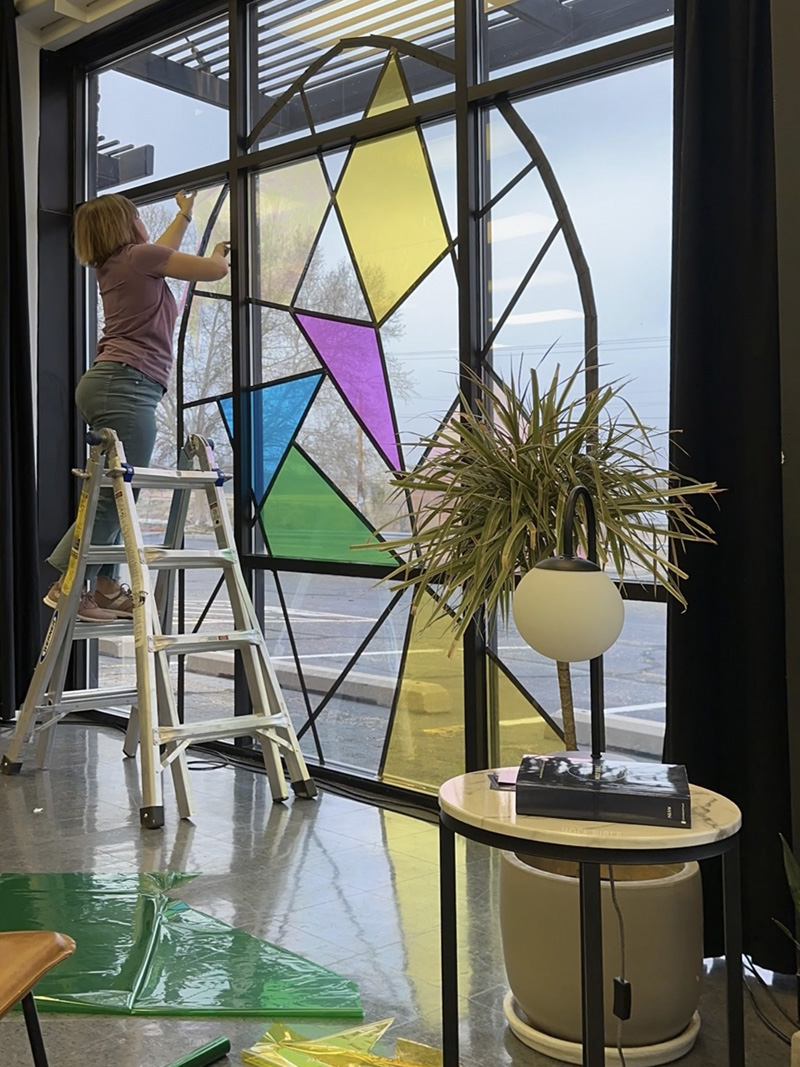
To fill in the stained glass sections with color, I would cut very rough sections and hold it up to the area I was wanting to add in the color. I would then use a thick black sharpie and quickly trace the black tape lines onto the cellophane.
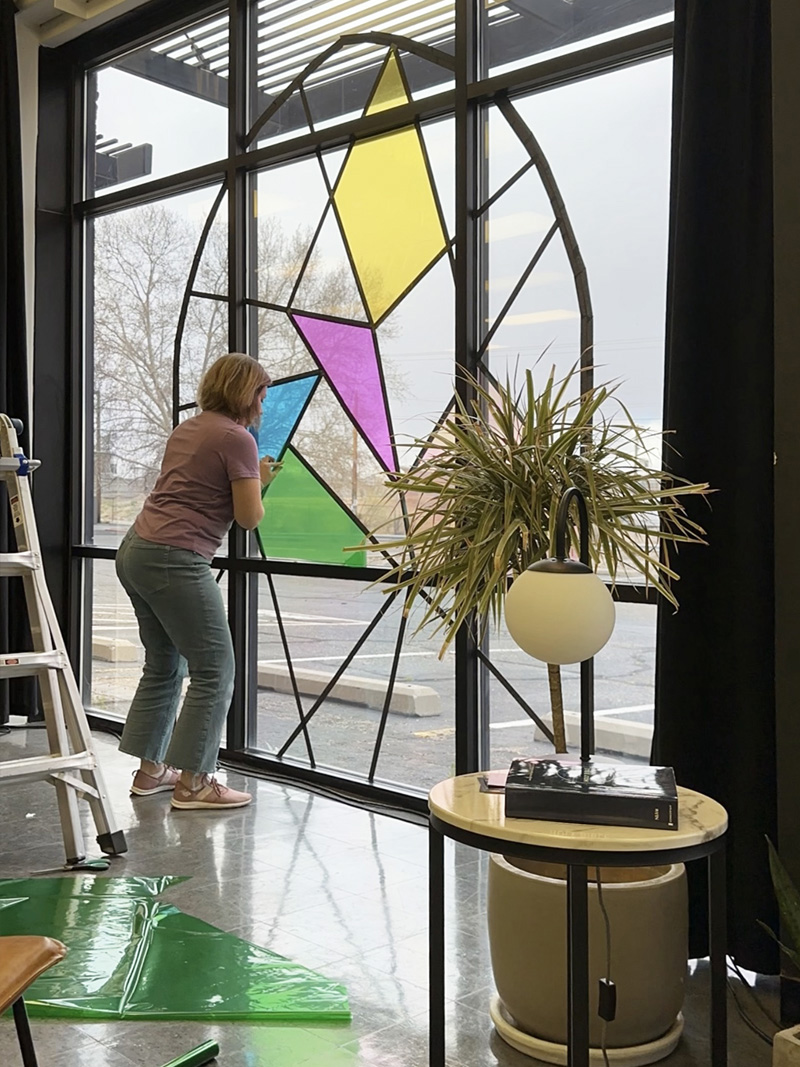
After bringing the cellophane back down off the window, I would use simple scissors to cut the shape. Using scotch tape, I would then tape the cellophane up right on top of the black painter’s tape edge.
Stained Glass Window Display
I also didn’t fill the entire window in. I thought it was fun to have just portions of the stained glass window filled with color.
These windows were south facing and all day, every day receive SO MUCH sun. And after a few days, I noticed the scotch tape was starting to warm and peel off the window. So I ended up doing one more round of the 1″ black painter’s tape down overtop all the colored sections to help really secure everything in place.
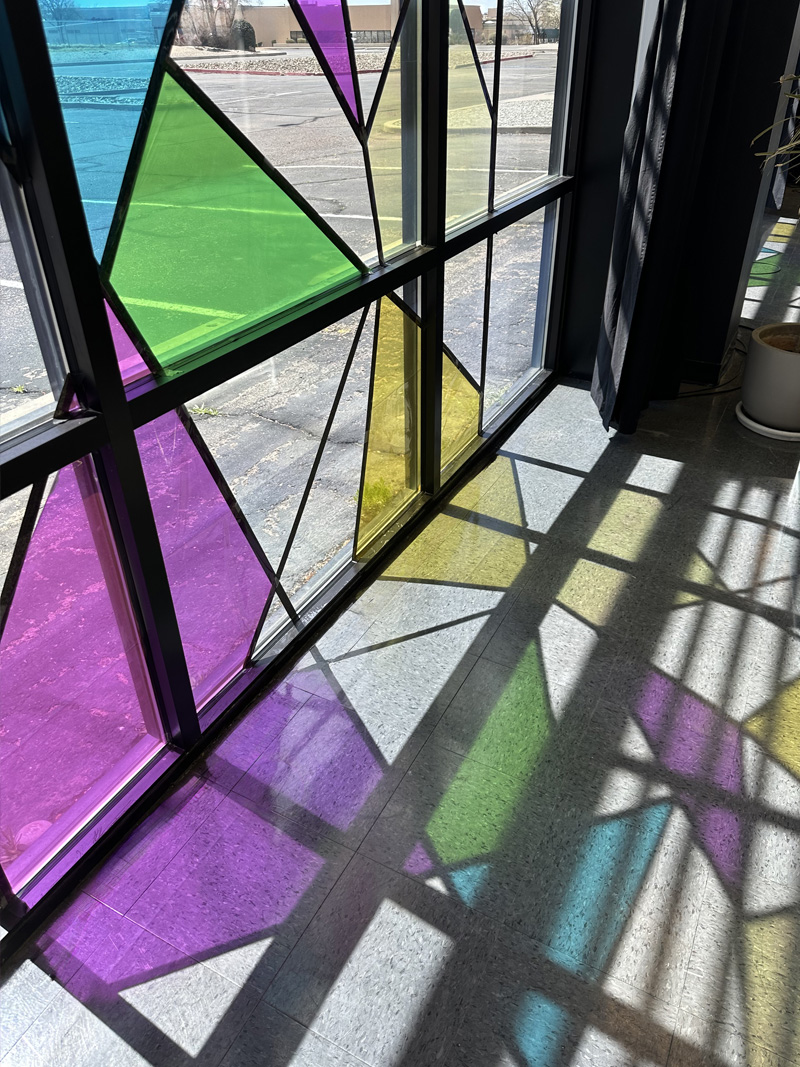
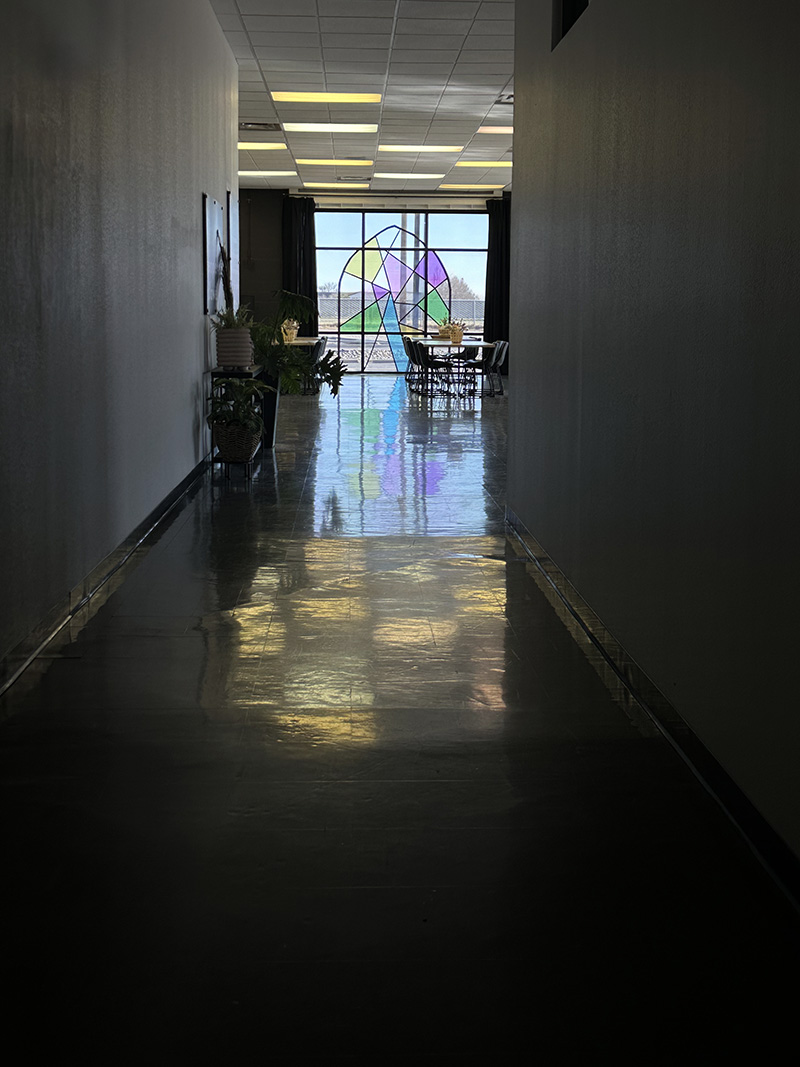
I thought the patterns made on the floor by the sun was absolutely stunning. I think it was my favorite part of the entire display!
Walking down the hall, it was so lovely to see these bright cheerful moments of color.
Looking for more creative Easter content? Check out some of these ideas…

What a beautiful idea!