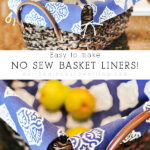
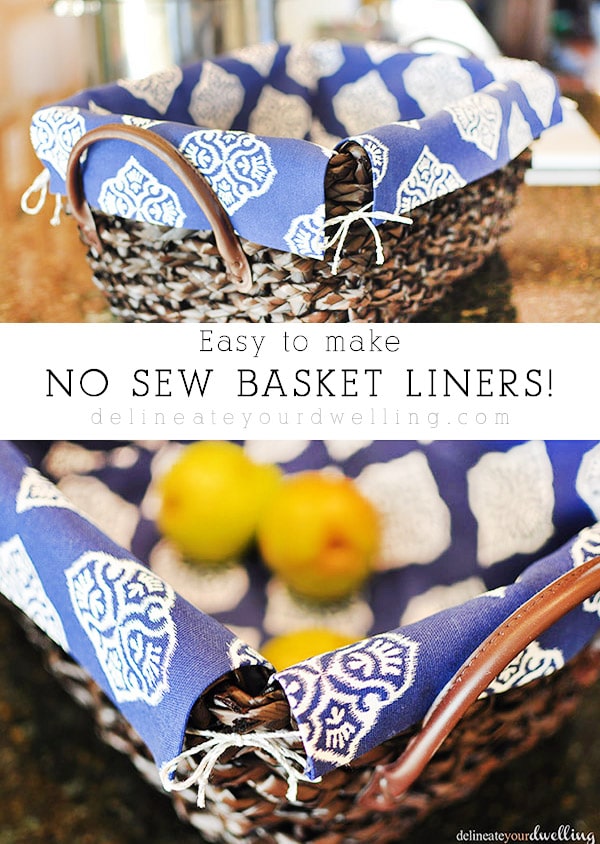
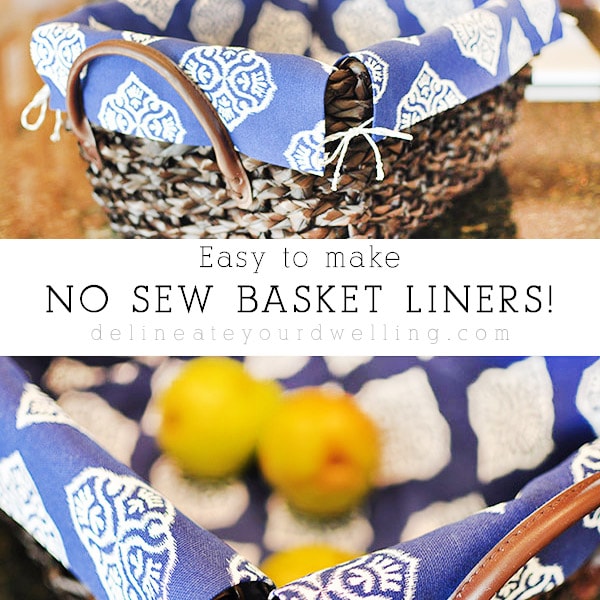
How to make No Sew Basket Liners
INSIDE : Learn how to make no sew basket liners without any sewing skills needed! Follow these simple instructions on how to take make DIY basket liners with no sewing involved.
This post contains affiliate links. See my full disclosure.
This post has been updated since it’s original February 2014 publish date.
Today I am touching on the never ending toy clutter in our home. I love organizing our home and have taken many steps to make sure things are organized, tidy and have a place.
You can check out some of my other organizing posts here…
I will be sharing a simple technique I have been using to help contain the clutter in a more pretty way. Get ready to learn how to line an everyday basket with fabric and there is no sewing involved! Yes, you heard me right, follow these simple instructions and step by step details on how to make a DIY No Sew Basket Liner.
DIY Fabric Basket Liner
We have two little babies and SOOOO many toys.
Despite being little, their toys somehow spread throughout the entire home. I swear the toys multiple during the night! I have been working on some toy rearranging in our living room and bought a handful of new baskets to help with this new method of “toy play” which you can see here, Living Room Toy Storage.
The new baskets I had bought were lacking a little extra structure and I kept having to pull small toys out, that had slipped into the basket weave. I decided it was time to create a few basket liners… but I’m not a great seamstress, so I found an easy no sew solution to my problem!
What supplies do I need for a No-sew Basket Liner?
- Fabric (Spoonflower is my FAVORITE online fabric spot!)
- Sewing Scissors
- Measuring Tape
- Hem Tape
- Baker’s Twine
- Baskets
- Iron

How to make Wicker Storage Basket Liners
In this tutorial you will be making two long strips of fabric and laying them on top of each other in the basket. By adding simple ties to each corner, the fabric will easily be held in place.
Measure
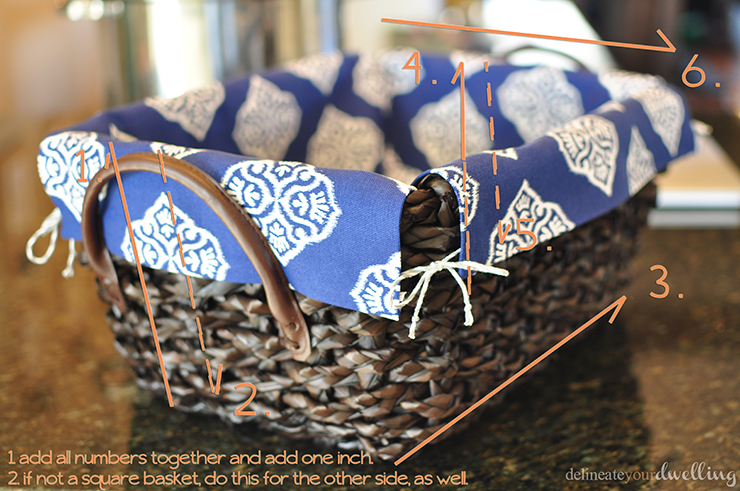
To start, use your flexible measuring tape and take six different measurements of your basket in these places (see diagram below for help on what to measure).
- 1. The outside bottom, to the top of the basket.
- 2. On the inside of basket, from top to bottom.
- 3. Across the bottom, length of the basket.
- 4. Up the inside of the basket, from bottom to top.
- 5. On the outside of the basket, from top to bottom.
- 6. Across the top width of the basket and then add one inch to that last measurement.
Add up ONLY above numbers 1-5, this is the measurement for your first fabric strip’s length. Measurement 6 will be the width of your first fabric strip.
My first piece of fabric ended up being 30″ by 11″ wide (including that extra inch at the end).
Next, repeat this process for the other direction, if you do not have a square basket. If your wicker basket is a square, then you will do two of the same sized strips.
Cut and hem fabric
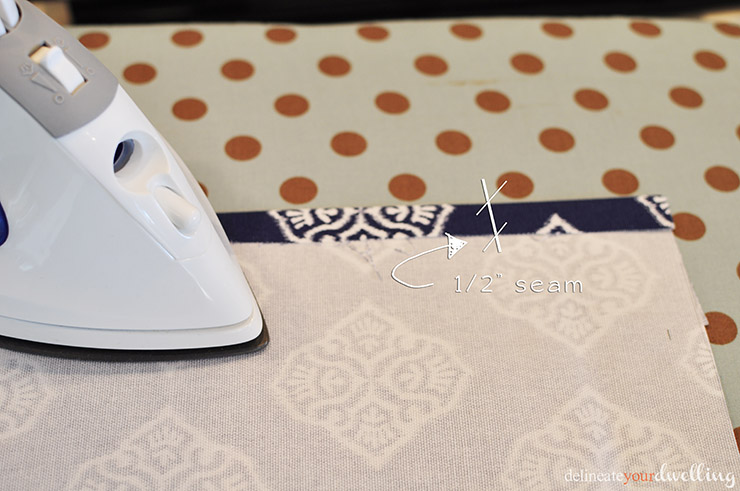
After your strips are cut out, mark a half inch on all sides and iron down these seams.
Note : This next step is not a necessity, but if you cut your corners on a diagonal, it will give a cleaner look and not be as bulky looking.
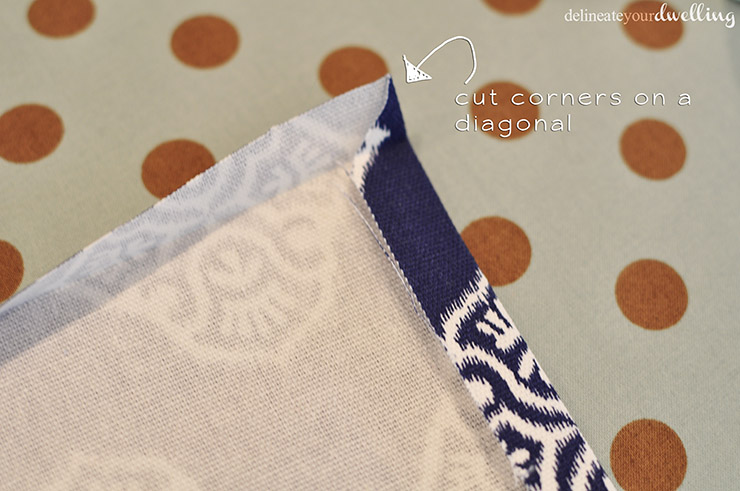
Next, cut the hem tape to the length of each side and iron the appropriate time to activate tape. This completes one basket panel, yay!
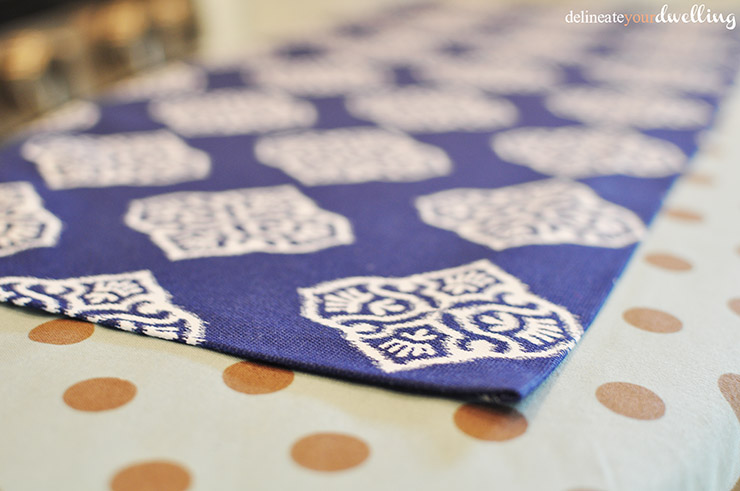
Next, repeat this process for your second panel based on your other basket measurements.
Once both panels are completed, lay them inside your basket one at a time with the pattern facing up. You might have to do a little situating to get them to lay nice and flat but if you did your measurements correctly, they should fit well.
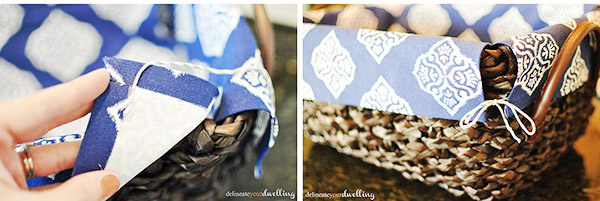
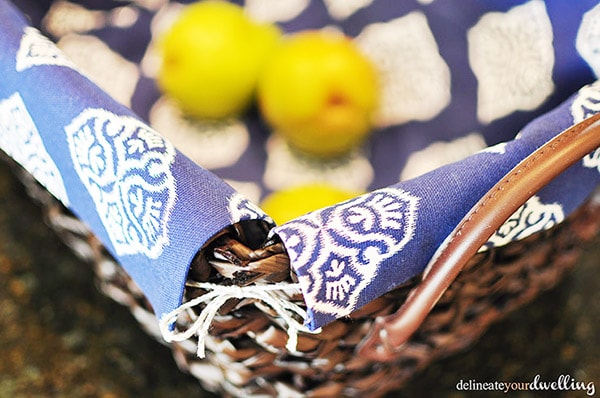
Finally, cut some ribbon or in my case, baker’s twine. I cut mine about 8″ long and tied a small knot at one end. Using hot glue, just glue one end to the inside flap of your liner. Do this all the way around with all eight corners.
Lining a basket with fabric
Tie the twine into a simple bow and you are done!
I made two of these basket liners without sewing and it probably took me 45 minutes total… and that was with two small kiddos running underfoot! I love being able to make basket liners with such ease.

No Sew Basket Liner
Learn how to make no sew basket liners without any sewing skills needed! Follow these simple instructions on how to take make DIY basket liners with no sewing involved.
Materials
- Fabric
- Sewing Scissors
- Measuring Tape
- Hem Tape
- Baker’s Twine
- Baskets
- Iron
Instructions
- To start, use your flexible measuring tape and take six different measurements of your basket in these places (see diagram below for help on what to measure).

- #1 The outside bottom, to the top of the basket.
- #2 On the inside of basket, from top to bottom.
- #3 Across the bottom, length of the basket.
- #4 Up the inside of the basket, from bottom to top.
- #5 On the outside of the basket, from top to bottom.
- #6 Across the top width of the basket and then add one inch to that last measurement.
- Add up ONLY numbers 1-5, this is the measurement for your first fabric strip’s length. Measurement 6 will be the width of your first fabric strip.
- My first piece of fabric ended up being 30″ by 11″ wide (including that extra inch at the end). Next, repeat this process for the other direction, if you do not have a square basket. If your wicker basket is a square, then you will do two of the same sized strips.
- After your strips are cut out, mark a half inch on all sides and iron down these seams.
- Next, cut the hem tape to the length of each side and iron the appropriate time to activate tape. This completes one basket panel, yay!
- Next, repeat this process for your second panel based on your other basket measurements.
- Once both panels are completed, lay them inside your basket one at a time with the pattern facing up. You might have to do a little situating to get them to lay nice and flat but if you did your measurements correctly, they should fit well.
- Finally, cut some ribbon or in my case, baker’s twine. I cut mine about 8″ long and tied a small knot at one end. Using hot glue, just glue one end to the inside flap of your liner. Do this all the way around with all eight corners.
- Tie the twine into a simple bow and you are done!

Looking for other fun No-Sew projects? You might be interested in check these out!

Love the basket so pretty and it looks very easy to make the liner. Thanks for sharing.
I love this simple no-sew option for lining baskets…so smart! Thanks for sharing, Amy! 🙂