DIY Felt Garland

INSIDE : Learn how to fold and cut simple square sheets of felt to create a gorgeous DIY Felt Garland. It’s perfect for Christmas or any other occasion!
This post may contain affiliate links. See my full disclosure here.
This post has been updated since it’s original December 2017 publish date.
Looking to add a touch of handmade charm and cozy texture to your home decor? This easy to follow tutorial will guide you step-by-step in creating a beautiful DIY felt garland whether it’s for holiday decor or just the perfect neutral addition to your home.
Add a festive touch to any season or simply bringing a whimsical garland to your living space. This crafty garland project is a fun and accessible way to personalize your home.
Let’s get started and learn how to make your own stunning felt garland!
I made these fun DIY Felt Ornaments a few years back and fell madly in love with them. I loved the cool shape they make.
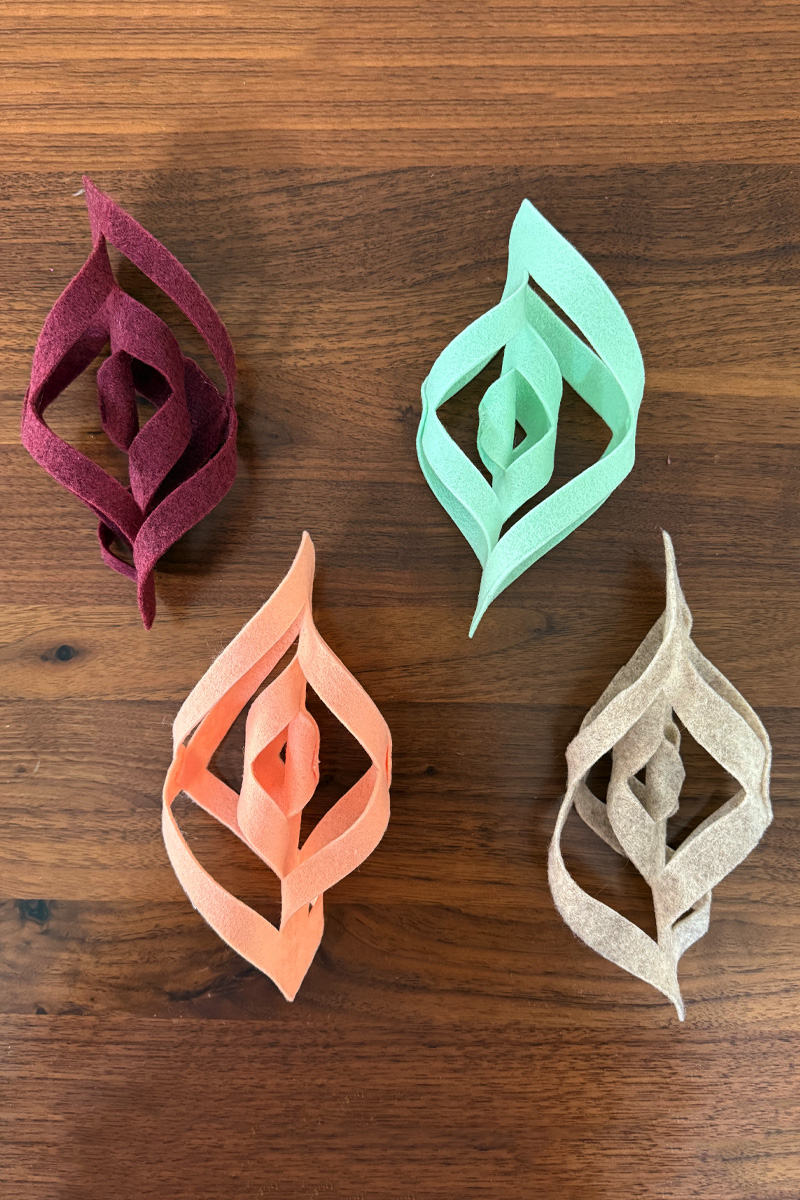
I decided to take them to the next level by turning them from ornaments into a gorgeous garland! Check out below how to make this lovely DIY Felt Garland.
What supplies do I need to make Felt Garland?
- Etsy has the BEST Felt colors
- Sewing Scissors
- Hot Glue Gun
- Black Baker’s Twine (optional)

How to make Felt Ornament Garland
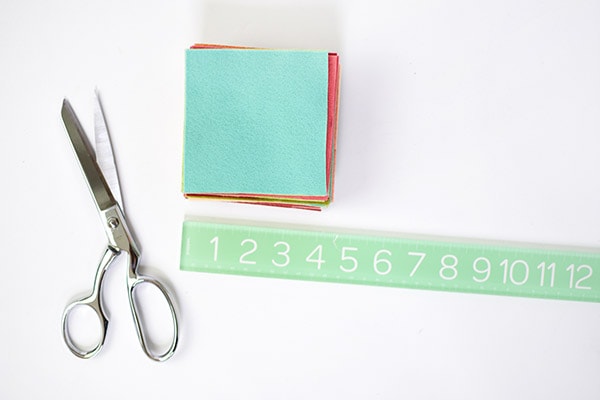
I think the best part of crafting with felt is how many color options are available these days! You can really find nearly every color imaginable and therefore your garland can perfectly match your home decor, party or holiday color scheme.
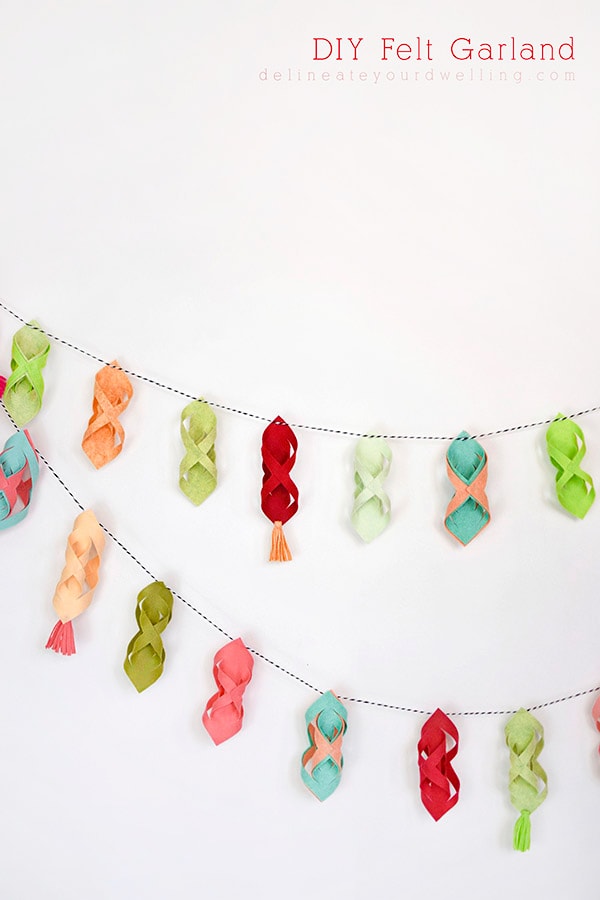
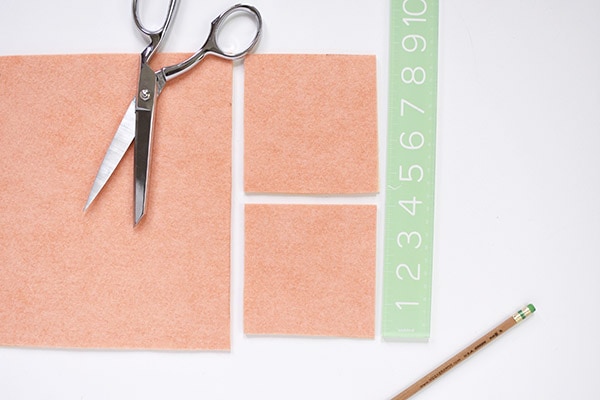
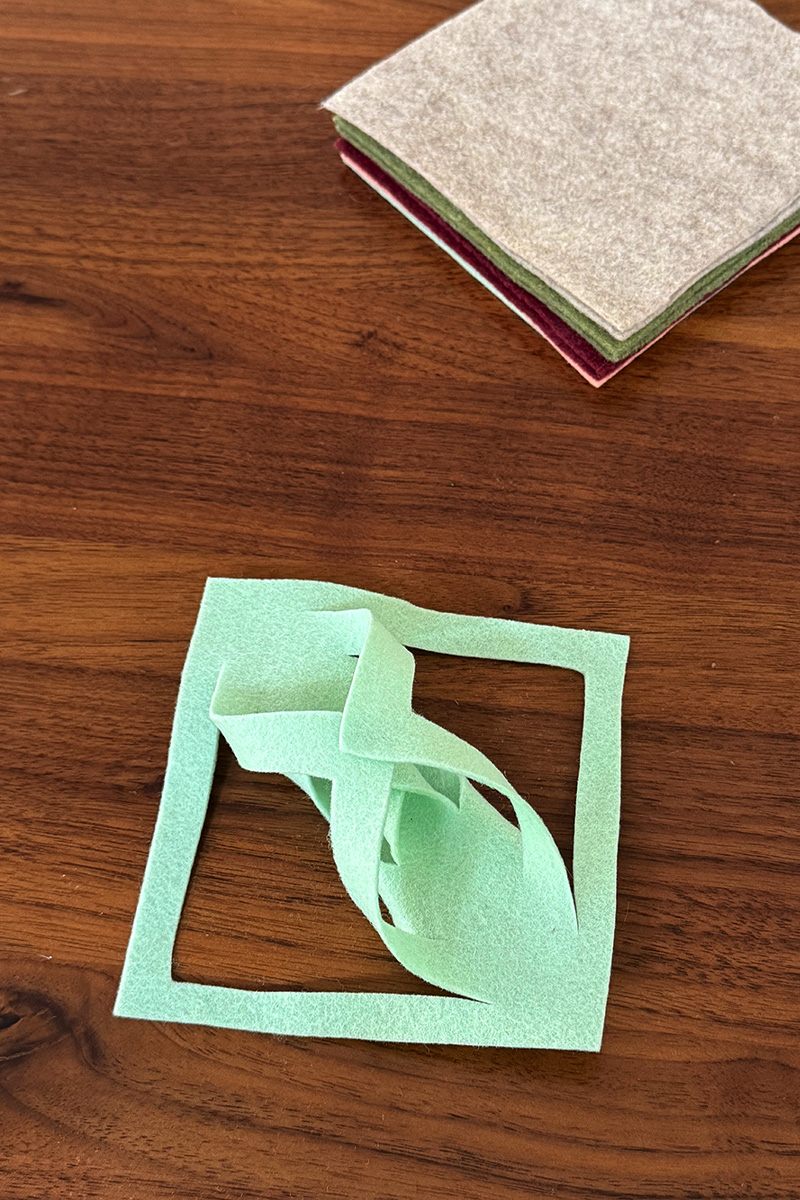
Start by cutting your felt into 4″ x 4″ square sections. Having sharp fabric scissors for this step really makes a huge difference, fyi.
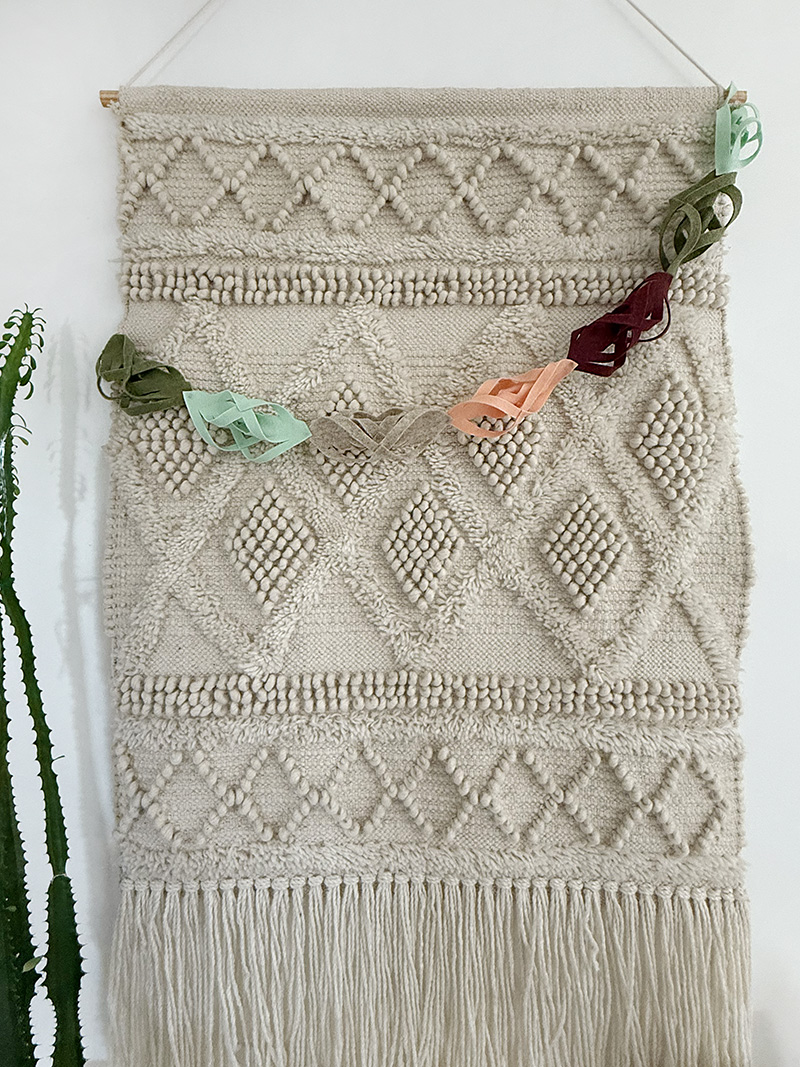
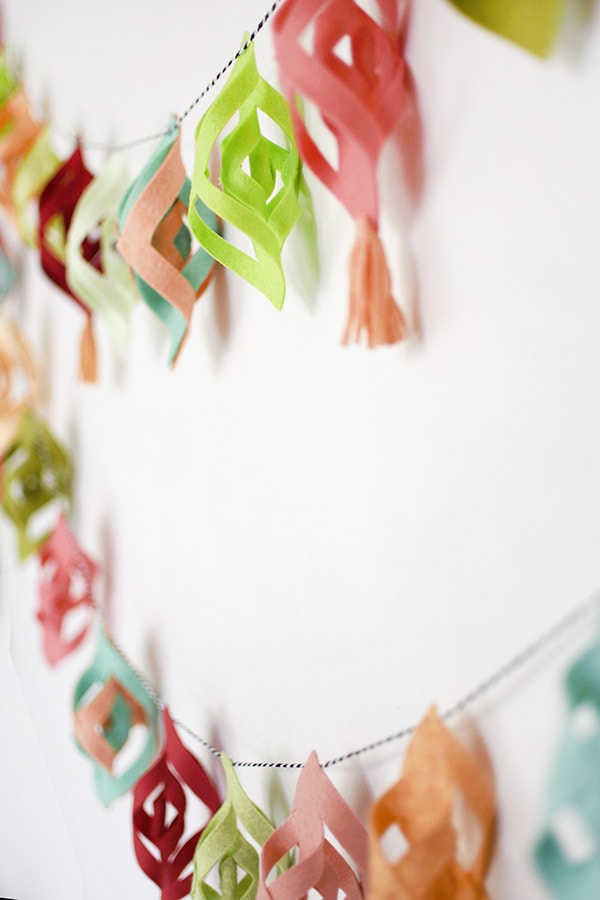
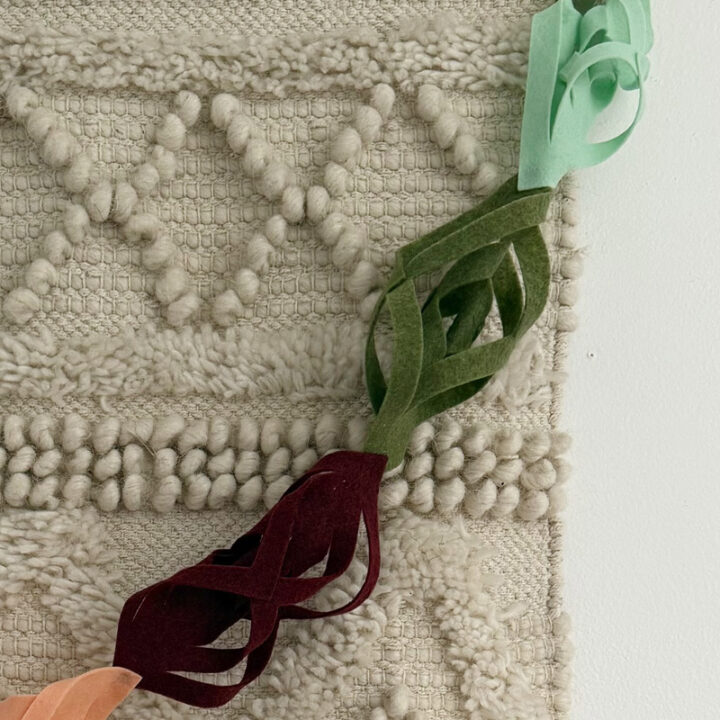
I used shades of green, orange, blue and red for my holiday garland. And then mint green, tan, coral, olive and burgundy for my neutral garland.
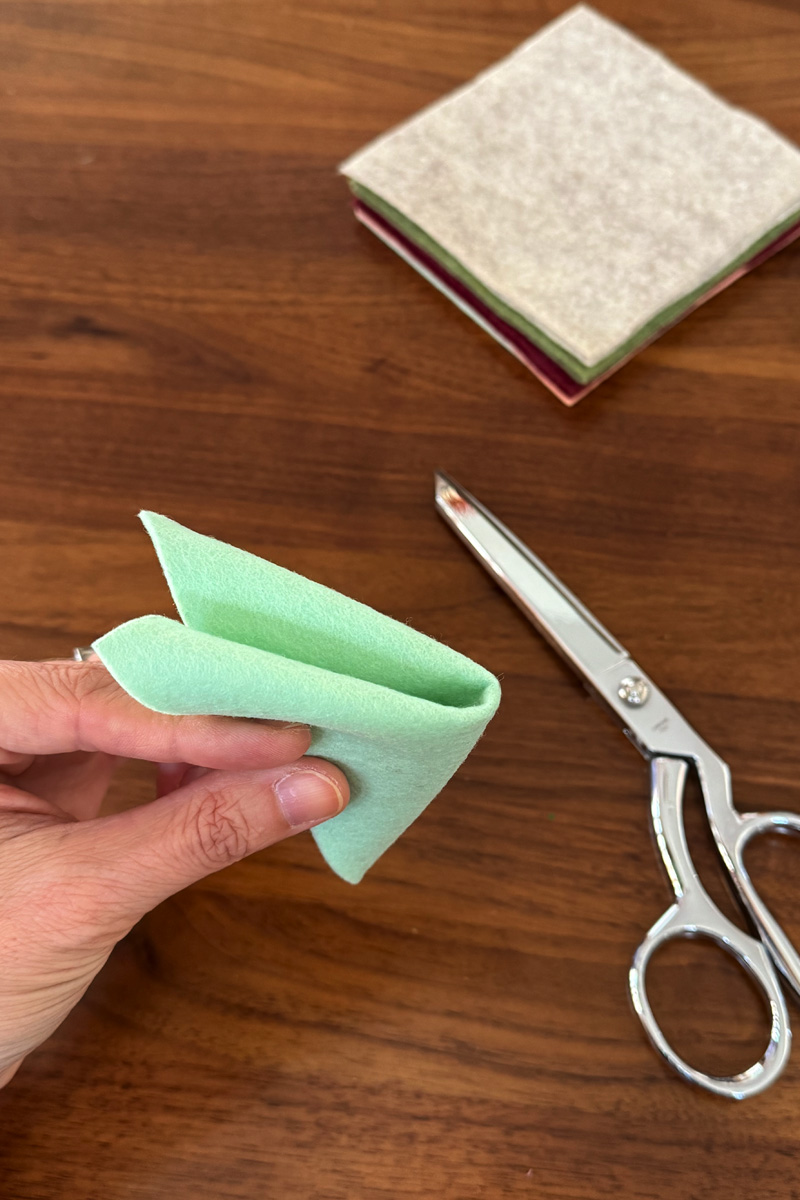
Fold your felt shape
Next, fold your square diagonally into a triangle and then fold in half as a triangle once more.
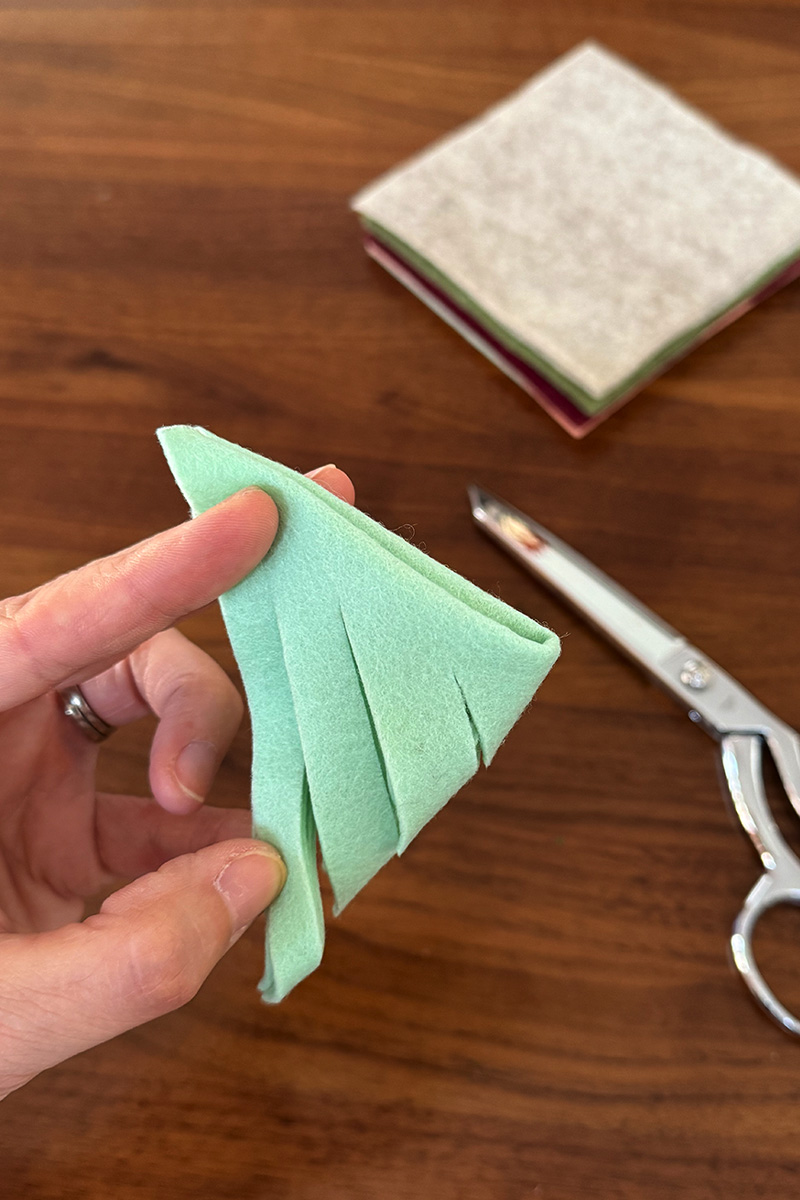
Cut your felt shape
Keeping the inner folded edge up, cut three straight lines but DO NOT CUT ALL THE WAY UP. Leave just a little bit of edge uncut.
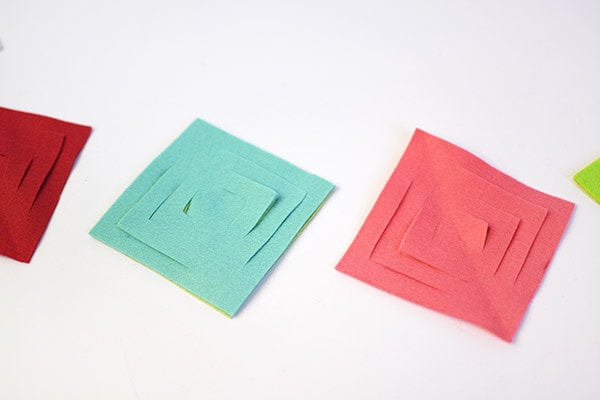
Once you unfold your square, it should have these cut shapes as shown below.
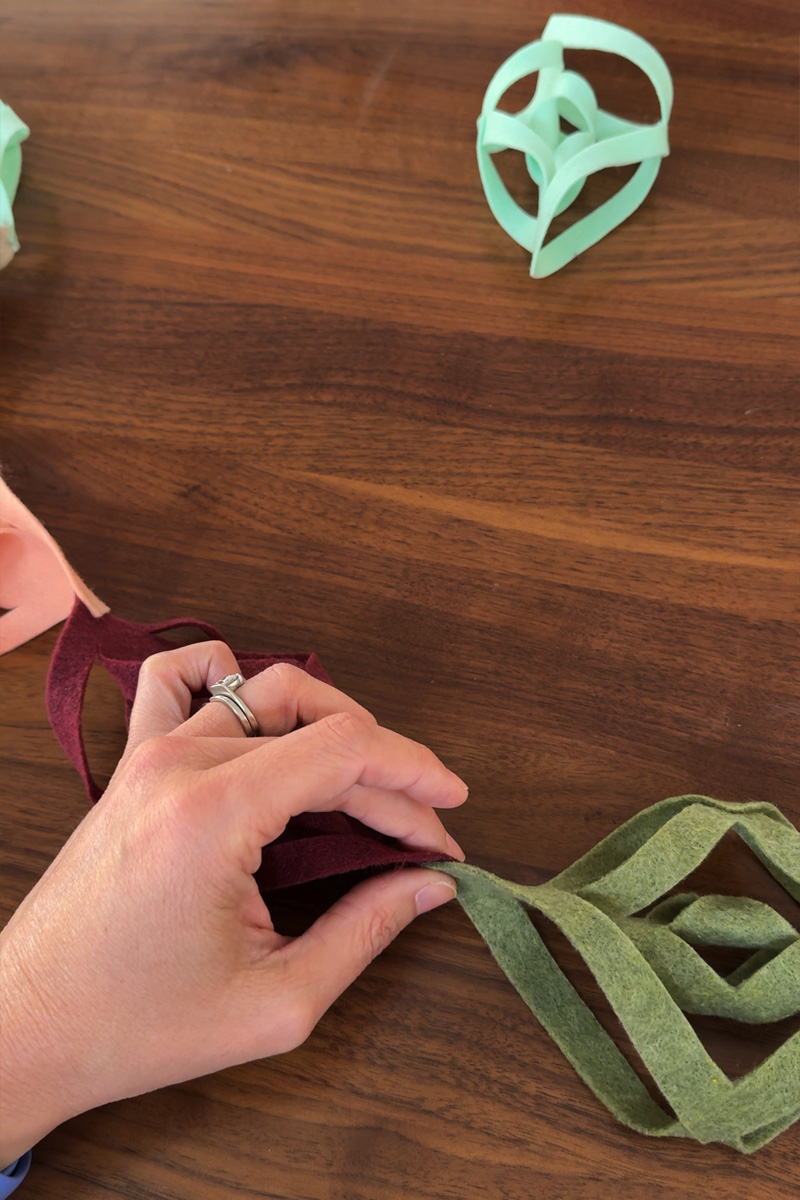
Glue your felt shape
Start with the inner cut shape and add one dab of glue to the edge and fold over to create your first glued shape. Then FLIP OVER.
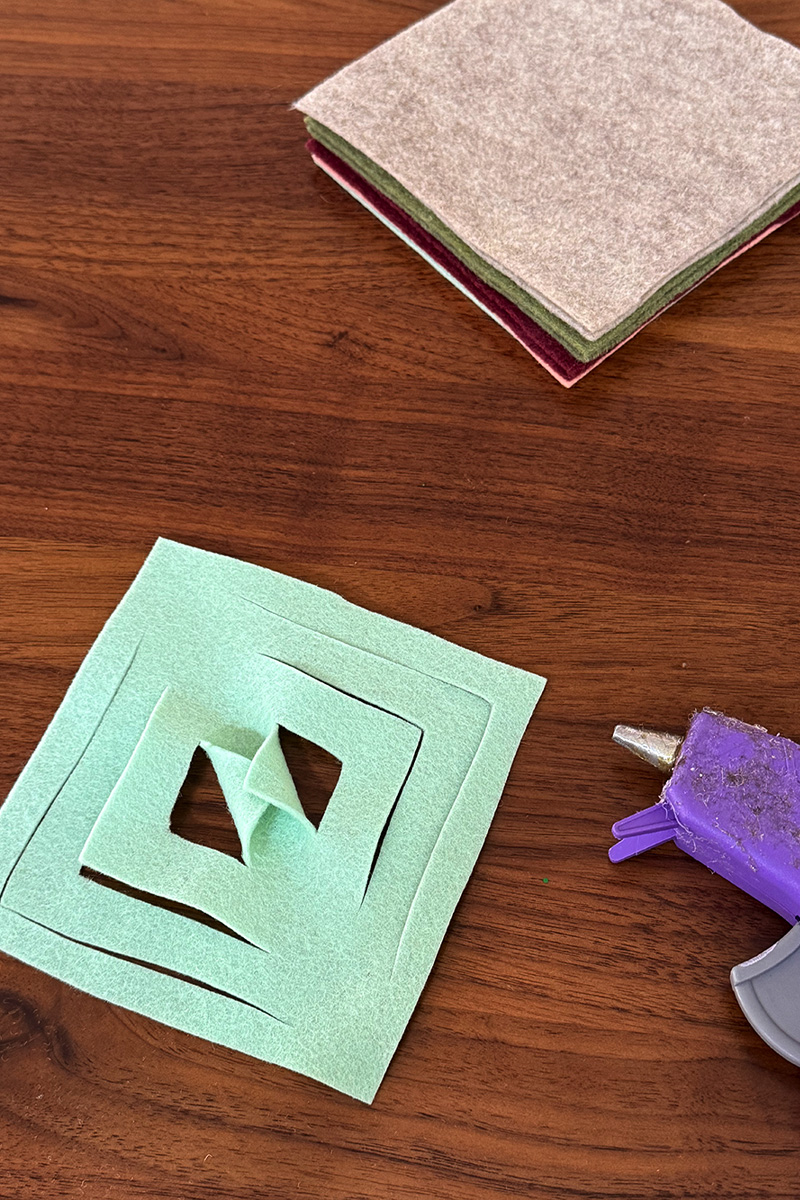
Once your felt is flipped over, you can begin to hot glue the next cut pieces together. Once dry, flip your felt shape over again.
You will continue gluing and flipping until all the cut edges are glued together.
Creating the garland
There are a few ways to turn these felt shapes into a garland.
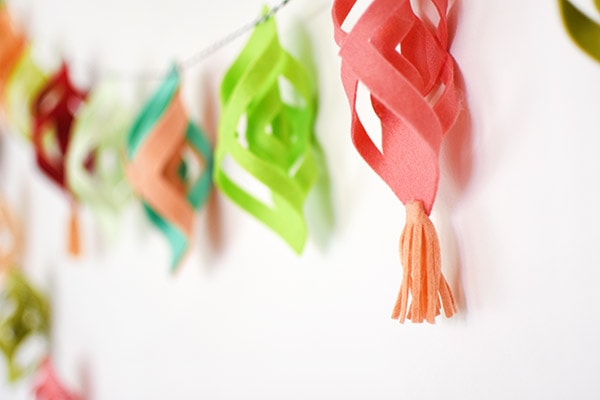
You can simply cut a long piece of twine or string and glue them along it, as shown below. This is a great option if you are hanging this garland along a fireplace mantel or along a bookcase edge.

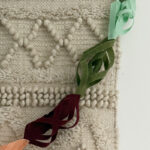
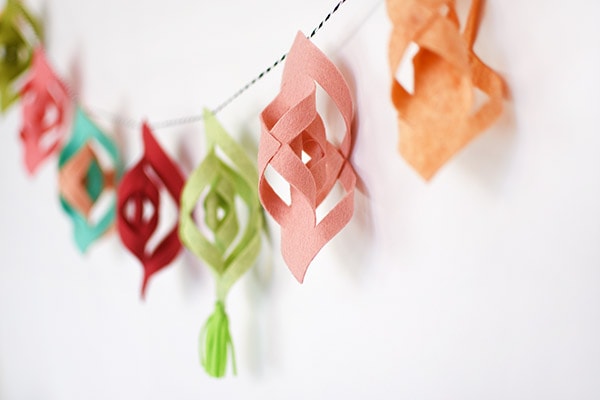
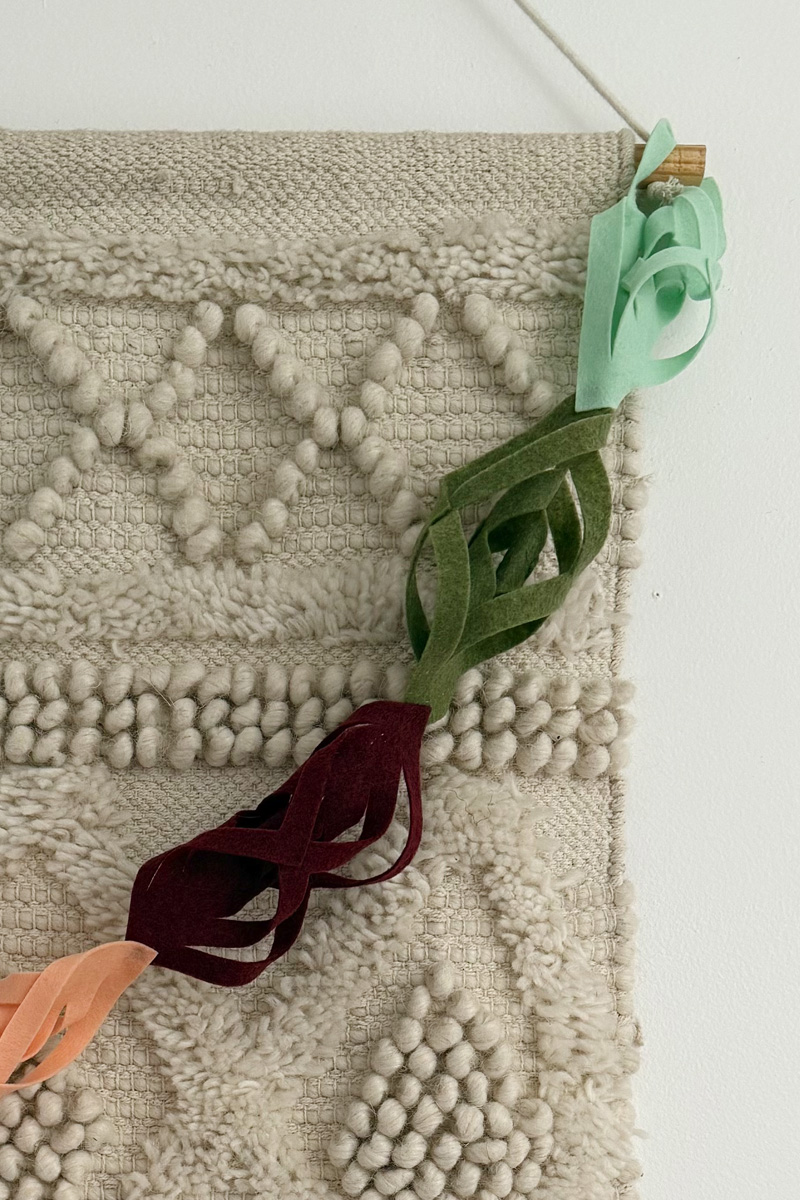
And you can also glue each felt ornament together edge to edge like shown below.
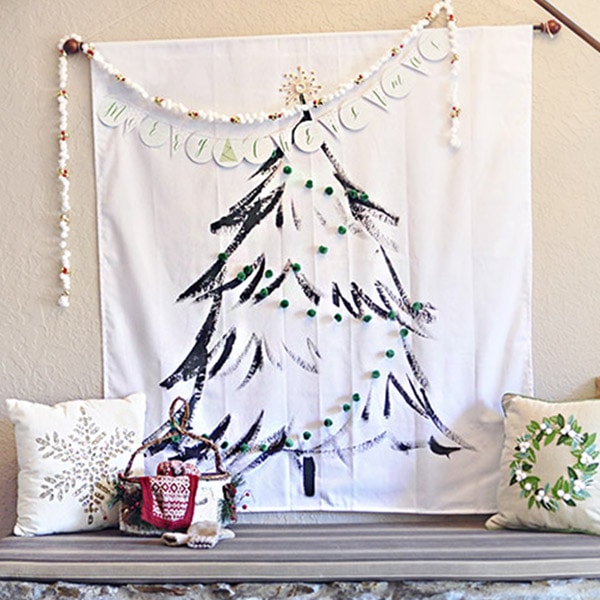
I think edge to edge is a fun look when hanging them against something like this wall hanging.
Looking for more garland ideas? Learn how to make DIY Dried Persimmon Garland for Christmas, check this post out.
Felt Garland Accessories
And if you are looking for a little extra charm, why not add some homemade felt tassels also!
Every four or five felt ornaments I made a small felt tassel, for a little extra pop of color and texture.
How to make DIY Felt Garland
Learn how to fold and cut simple sheets of felt to create gorgeous DIY Felt Garlands for the holidays or any occassion!
Instructions
- To create a simple felt garland, start by cutting 3" or 4″ square sections of your felt. Make at least 5 for a nice garland length, but the more squares you cut, the longer your garland will reach.
- Next, fold your felt square into a triangle and then fold it once more into a smaller triangle shape.
- Cut three straight lines in your felt, starting at the bended side of the triangle. Be sure to not cut all the way to the end.
- Gently, unfold your felt square and lay out on a table.
- Grab the center corner edge pieces and using your hot glue gun, adhere the center corner edges together. Allow to dry.
- Turn your felt over so the section you just glued is now facing down.
- Now, grab the second set of corner cut pieces and glue the corner edges together.
- Turn the felt over again and repeat this process until all the corners are glued together.
- Using a hot glue gun, secure each ornament onto the Baker's Twine to create your garland string. Or you can glue the felt shapes end to end together to create another type of garland!
- Hang and enjoy!
Notes
-Every four or five felt ornaments, make a small felt tassel for a little extra pop of texture.
I hung the garland on our fireplace mantel, but these would look equally as lovely hanging on a Christmas tree, on a entry stairwell or along a bookshelf.

Looking for a few other fun felt project ideas? Check these out…
I’m already debating whether or not I should cover my tree with these fun felt ornaments next year!
Check out some of my other fun Holiday projects below.
So cute!! I love the colors and tassels!