Painting your Mailbox and Address Tiles


INSIDE : Learn how painting your mailbox and address tiles can completely change the look of your home! It’s so much easier than you think and is an inexpensive curbside update.
This post may contain affiliate links. See full disclosure here.
This post has been updated since it’s original September 2020 publish date.
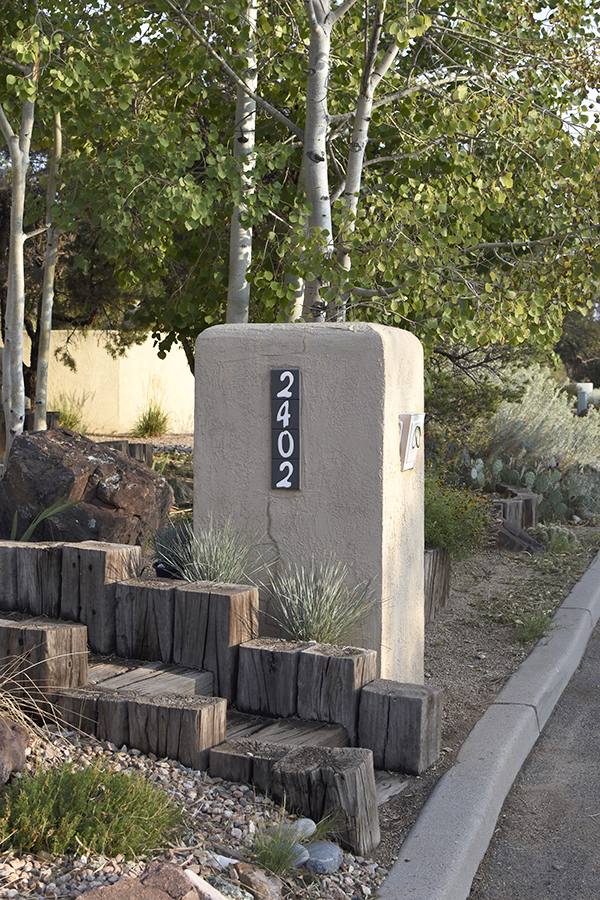
Last week, I finally shared my refreshed curb appeal Front Door and how I was able to do it all with a little wood repair and PAINT! Part of giving your curb appeal a new look, is updating your mailbox. Our mailbox is built into a stuccoed structure, so there isn’t a ton I can do to update it but there are a few things.
Today I am going to share two of the most simple updates, how to paint your mailbox to match your home and how to paint your address tiles with new colors.
What supplies do I need to paint my metal mailbox?
Sanding Blocks
Microfiber Cloth
Wooster Shortcut Angle Paintbrush – This is my FAVORITE brush and I use it ALL the time.
Small Craft Paint Brush
Painter’s Tape
Behr Ultra Exterior Paint + Primer in Winter Way (for mailbox)
How do I paint my metal mailbox?
Most likely your mailbox is a more typical free standing mailbox on a post, of some kind. However, regardless of the type of mailbox you have, the steps to painting it should be fairly similar.
You might have old peeling paint on your metal mailbox, rust spots or even dents in the metal. If there are dents, unscrew your mailbox from the post and make your best efforts to bang out any dents.
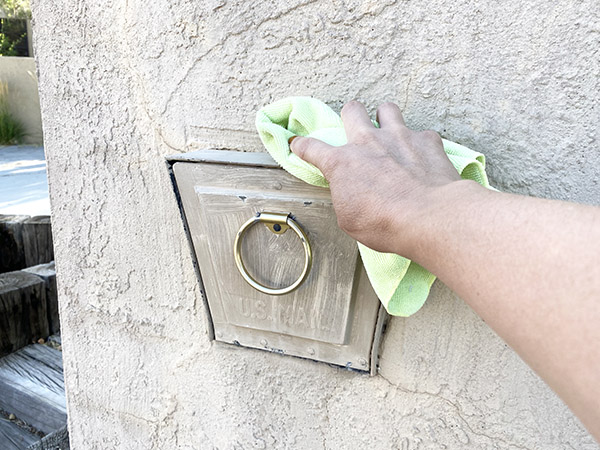
If there is peeling paint or rust, giving the entire mailbox a sand down is the next step. Once you have sanded your mailbox, be sure to wipe it down from all the dust and grime with a damp cloth and allow it to fully dry.
Adding painter’s tape to your mailbox
Next, prep your mailbox with painter’s tape if you have areas you want to remain unpainted. This might be around a mailbox flag, decorative metal work or in my case, where the mailbox and the stucco structure meet.
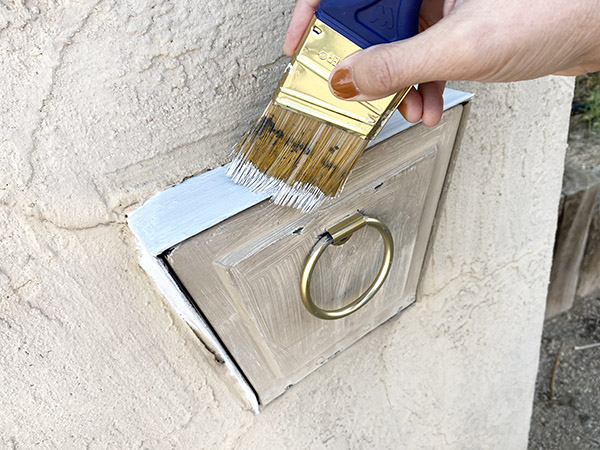
Lastly, be sure you are using an exterior paint and get to painting! I used a Small Handheld Paint Brush for most of the larger flat areas and then a small Craft Paint Brush for the tiny detail areas.
If you are able, the best paint for painting a metal mailbox is often spray paint due to the ease of applying and how even the coats are applied.
Allow your mailbox to dry fully and then do another coat. I found if you are using quality paint, two coats were sufficient coverage.
Painting a Mailbox
Learn how painting your mailbox can completely change the look of your home! It’s so much easier than you think and is an inexpensive curbside update.
Materials
- Sanding Blocks
- Microfiber Cloth
- Wooster Shortcut Angle Paintbrush – This is my FAVORITE brush and I use it ALL the time.
- Small Craft Paint Brush
- Painter’s Tape
- Behr Ultra Exterior Paint + Primer in Winter Way (for mailbox)
Instructions
- You might have old peeling paint on your metal mailbox, rust spots or even dents in the metal.
- If there are dents, unscrew your mailbox from the post and make your best efforts to bang out any dents.
- If there is peeling paint or rust, giving the entire mailbox a sand down is the next step.
- Once you have sanded your mailbox, be sure to wipe it down from all the dust and grime with a damp cloth and allow it to fully dry.
- Next, prep your mailbox with painter’s tape if you have areas you want to remain unpainted. This might be around a mailbox flag, decorative metal work or in my case, where the mailbox and the stucco structure meet.
- Lastly, be sure you are using an exterior paint and get to painting! I used a Small Handheld Paint Brush for most of the larger flat areas and then a small Craft Paint Brush for the tiny detail areas.
- If you are able, the best paint for painting a metal mailbox is often spray paint due to the ease of applying and how even the coats are applied.
- Allow your mailbox to dry fully and then do another coat. I found if you are using quality paint, two coats were sufficient coverage.
You might also like this post about the Best Mailbox Painting Ideas.
What supplies do I need to paint address tiles?
Microfiber Cloth
Rubbing Alcohol
Wooster Shortcut Angle Paintbrush – This is my FAVORITE brush and I use it ALL the time.
Small Craft Paint Brush
Painter’s Tape
Behr Ultra Exterior Paint + Primer in Gazebo Gray (for address tiles)
How do I paint my home’s address tiles?
Often times, address tiles on your home can be a very particular choice for a homeowner’s style and aesthetic. However, every home I have moved into… I never like the address tile our home has had. Either the colors are way off or there is a random Chili Pepper at the end of the numbers. I have a simple fix that I’ve done at both of our homes and it takes 15 minutes to do!
Exterior paint is the answer again. Be sure to clean off your address tiles with a cloth and rubbing alcohol.
If your address tiles are flush with your home or the wall, it might be helpful to put painter’s tape around the tiles. Our address tiles were stuccoed onto the mailbox and weren’t flush. So I didn’t need any tape on mine.
Next, it’s painting time! To make sure you can paint around the smaller details of numbers, I found it best to use a small craft brush.
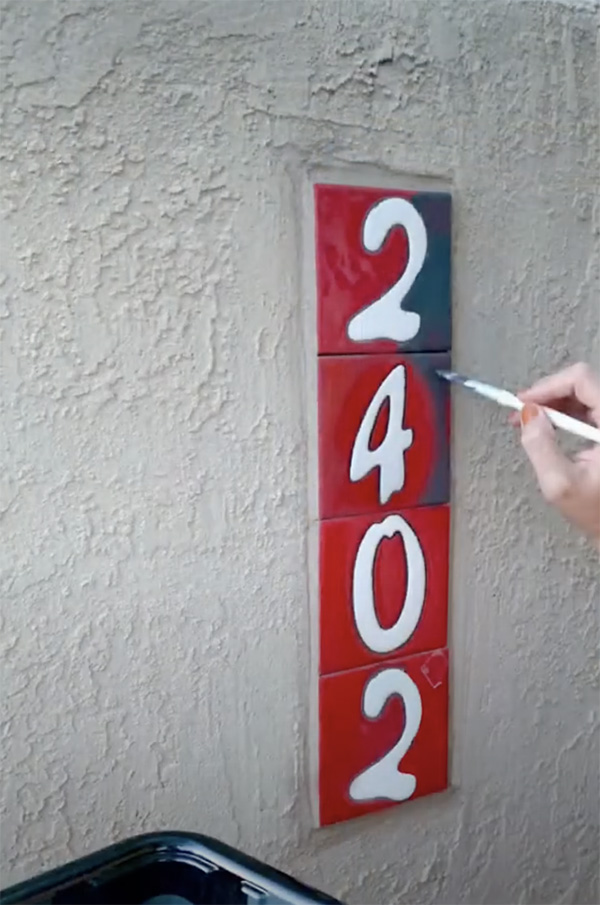
I used an angle brush so I could paint wider areas, but also could handle some details.
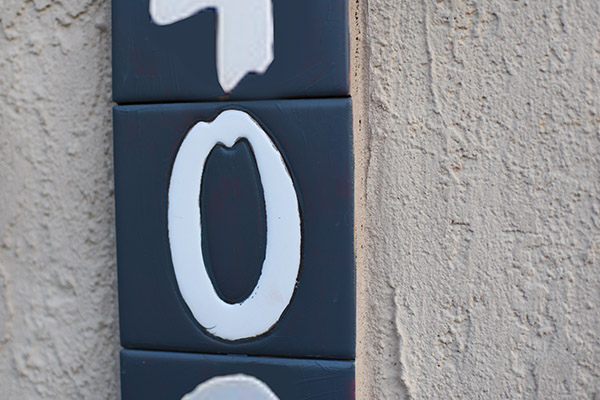
When you paint with exterior paint on tile, the first coat will immedatialy make you nervous. The first coat looks like a disaster, but thankfully the second coat goes on smoothly. I found it covered perfectly on that second coat.
I’ve done this technique on two different houses and have never had any trouble with the paint scratching off, bubbling or having any issue.
Paint a Mailbox and Address Tiles
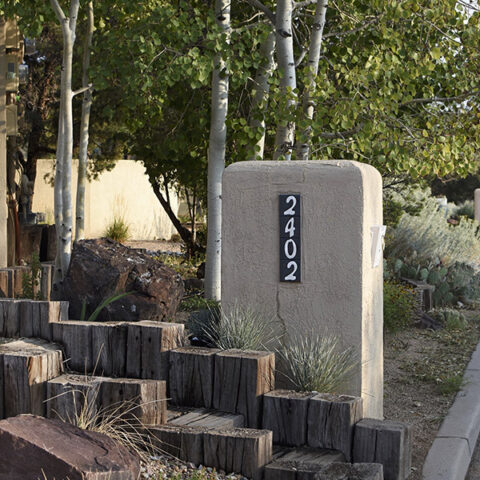
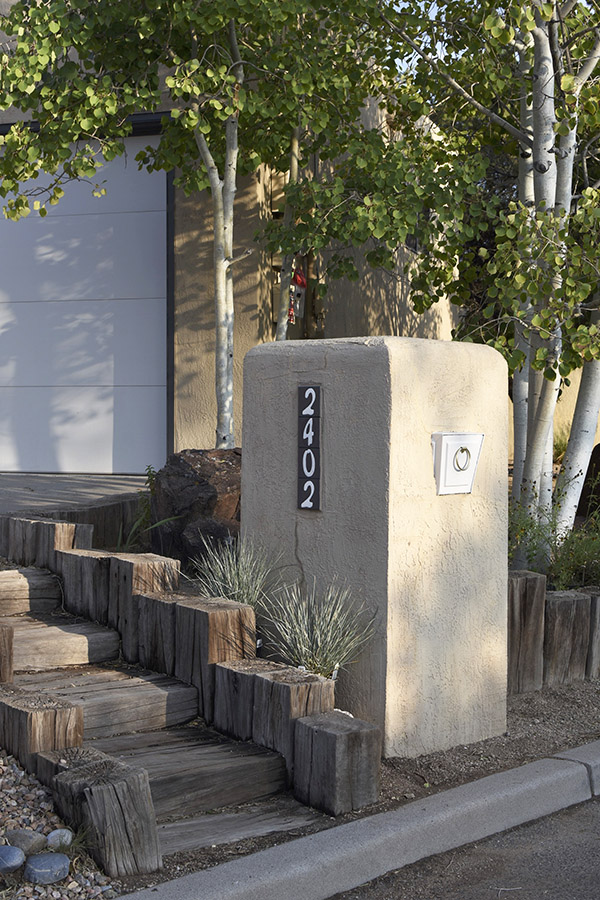
I can’t even express how much better painting a mailbox and the address tiles did to our front curb appeal. The address tiles previously were red and now they perfectly match our front door and gates.
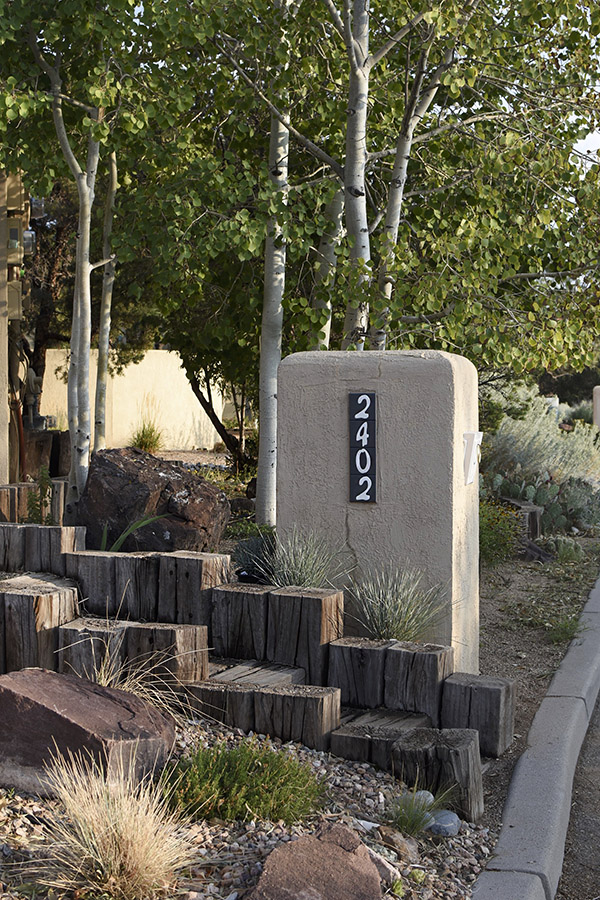
And the best part is I used paint we already owned! Inexpensive curb appeal updates are my favorite thing ever.
Looking for my other outdoor Curb Appeal projects? Look no further!

- Give your Curb Appeal a fresh look with paint
- Painting your Garage Door
- Painting your Mailbox and Address Tiles
- How to Easily Repair Minor Wood Rot
- Install Faux Garage Door Windows
- Decorative Garage Door Hardware
- DIY Wooden Sunburst Doormat
- Magnetic Garage Door Window Clings
MY Home –> Want to check out a few other rooms in my home? I love sharing inspiration, tips and inexpensive ways to make your home YOU.