DIY Nativity Scene

INSIDE : Learn how to make a DIY Nativity Scene for the Christmas Season out of simple wooden clothespins, paint and ribbon from your local craft supply store.

This post may contain affiliate links. See full disclosure here.
This post has been updated since it’s original publish date of November 2013.
As Christmas approaches, I have been trying to shift my focus from the typical “buy buy buy” mantra that is so easily our mindset and onto what the real focus should be, the birth of Jesus.
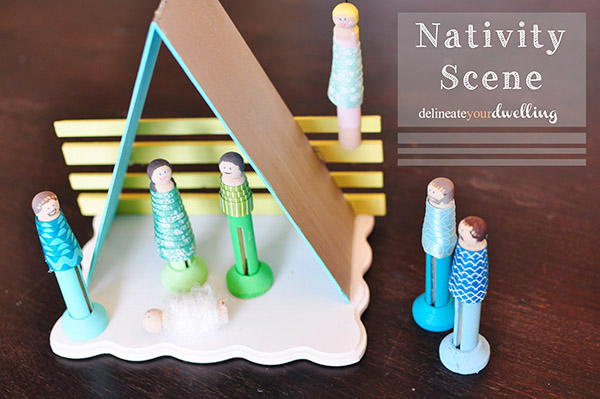
I thought creating a fun Nativity Scene for my kids to play with would be a wonderful way to celebrate Christmas and make the birth of Jesus feel more real. It was finally time to break out my spare clothespins, some balsa wood, paint and ribbon. I am so thrilled with the outcome!
What supplies do I need to make a Wooden Nativity Scene?
- Wood plaque for manger base
- Miscellaneous sized wooden parts for roof and back of manger
- 7 clothespins for people (or peg dolls)
- 7 clothes pin bases
- Ribbon and yarn for outfits
- Acrylic Paint
- Hot Glue
- Thin tipped Permanent Markers
- Thin tipped gold foil marker
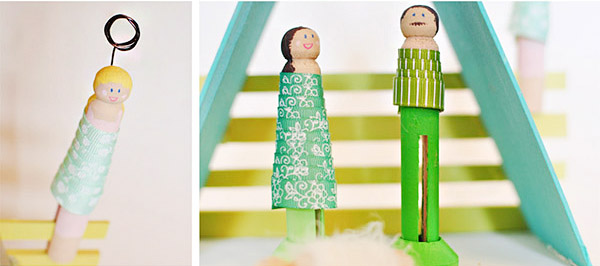
- Small amount of bead wire for angel’s halo
- Yellow button for the guiding star (I added mine after all the pictures were taken)
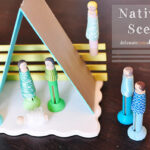
How do I make a small Manger Scene?
To make a small manger scene, start by sanding all of your wood pieces for a more smooth finish.
Next, paint all of the wooden parts of your manger and allow them to fully dry. I painted the base of the manger white, the interior of the roof a soft blue and the back of the manger pieces, yellow.
Start to slowly assemble them together using a hot glue gun. I built the roof first and secured it to the main base. I, then added the yellow back pieces one at a time.


You might also like these Holiday projects…
How to make Clothespin Manger Scene people?
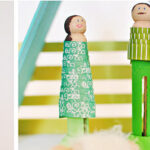
Next, we are going to make our Nativity Scene people from the clothespins. I planned on making Joseph, Mary, baby Jesus, three Wisemen and an Angel. You could also make additional Angels or even some animals if you wanted.
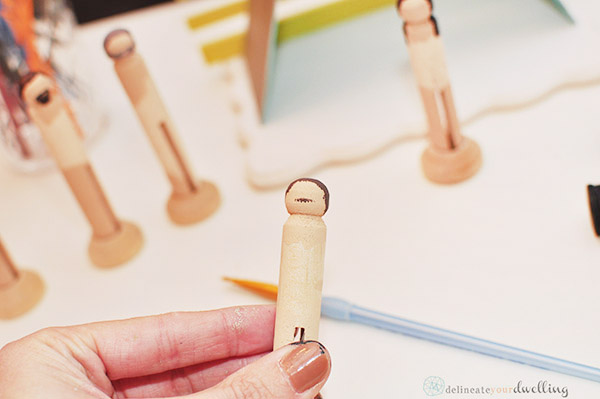
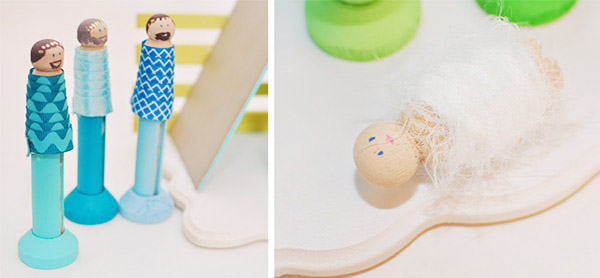
Start by sanding smooth all the clothespins selected to be your Nativity characters. Using a flesh color of your choice, paint the heads, necks and shoulders of all the people.
I cut down one clothespin in half, to be baby Jesus.
Adding Hair
Now, this is the fun part!!
Using different colors of paint, create each person’s hair.
I added facial hair for Joseph and the three wise-men. And apparently in my Nativity, Joseph is quite the hipster with that mustache. ha!
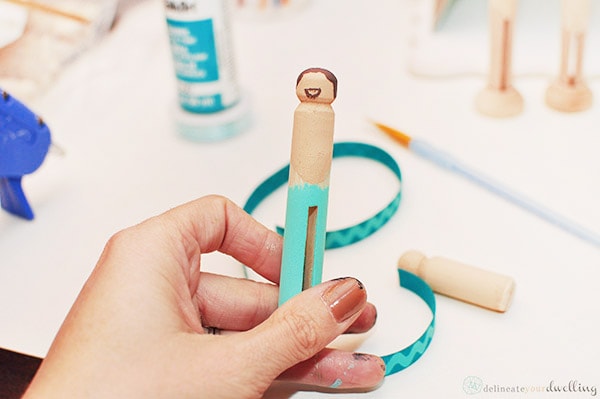
Adding Clothing
While hair was drying, I selected a paint color and coordinating ribbons for each character and proceeded to paint everyone’s “pants”.
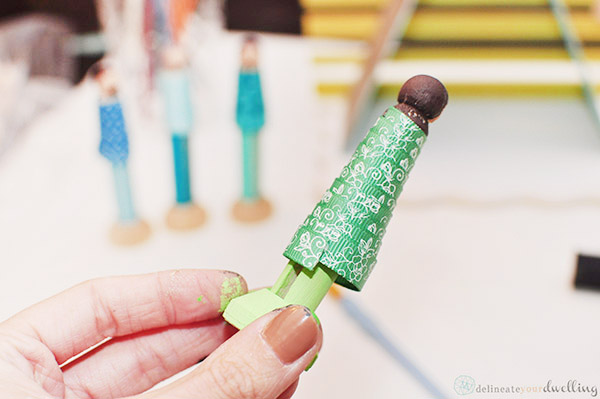
Using ribbon, I made each character’s outfit and secured with hot glue.
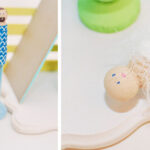
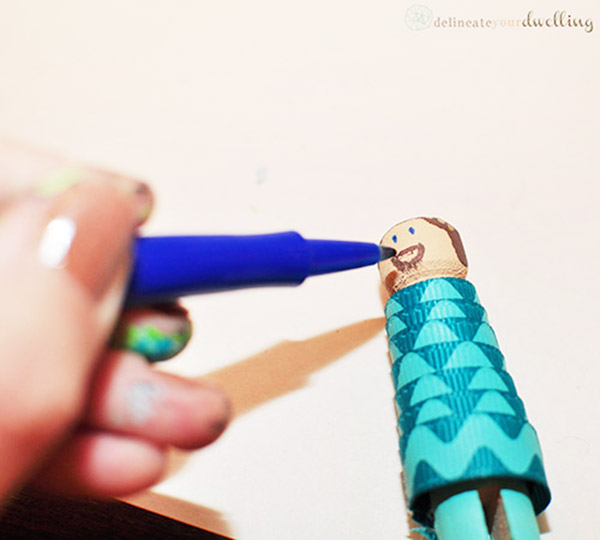
Adding Faces
Lastly, everyone got a pair of eyes. The ladies + Jesus got little pink lips using thin tipped markers. And the three wisemen received gold foil marker crowns.
A steady hands is the name of the game here, folks.
DIY Nativity Set
I originally intended for this to be a set that my children could play with, but being only 1 + 2, this is a little too fragile for them still. But, oh it is adorable and I love it.
Do you have a favorite Nativity set that you get out each Christmas?
Looking for some other types of Nativity Scenes? Check out some of these fun ones –
You might want to check out some of my other fun Christmas projects!
Holiday Marbled Dipped Oreos

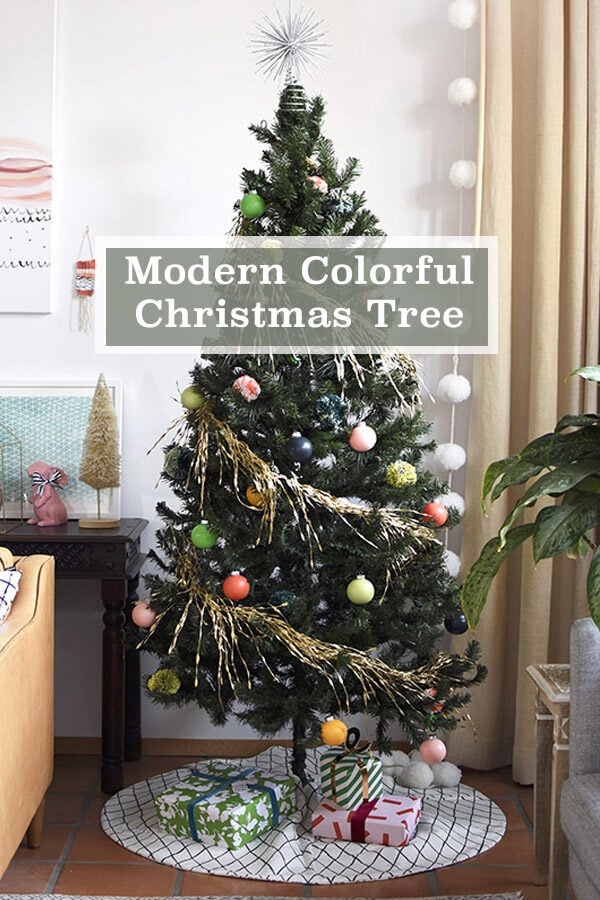
Modern Colorful Christmas Tree