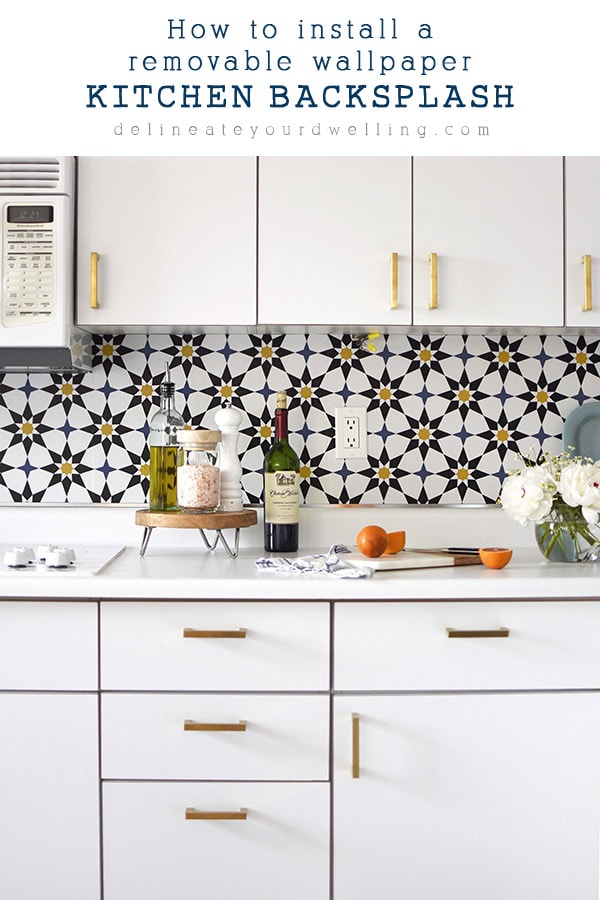
How to install a Removable Wallpaper Backsplash


INSIDE : Learn how to completely transform your kitchen by installing a removable wallpaper backsplash. Removable tiled wallpaper is both easy to put up (and eventually remove) but also quite cost effective when compared to purchasing tile.
This post may contain affiliate links. See full disclosure here.
This post has been updated since it’s original 2019 publish date.
This post has been a long time coming and I am so thrilled to share I have partnered with an amazing company, Tempaper Designs, on this gorgeous Moroccan backsplash wallpaper.
UPDATE – It has been four years since I installed this backsplash wallpaper and it’s still holding up wonderfully!
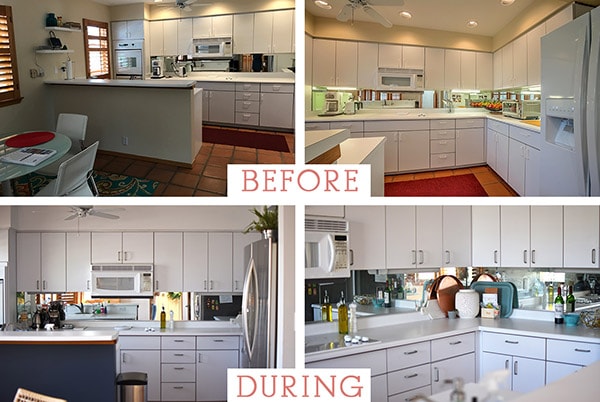
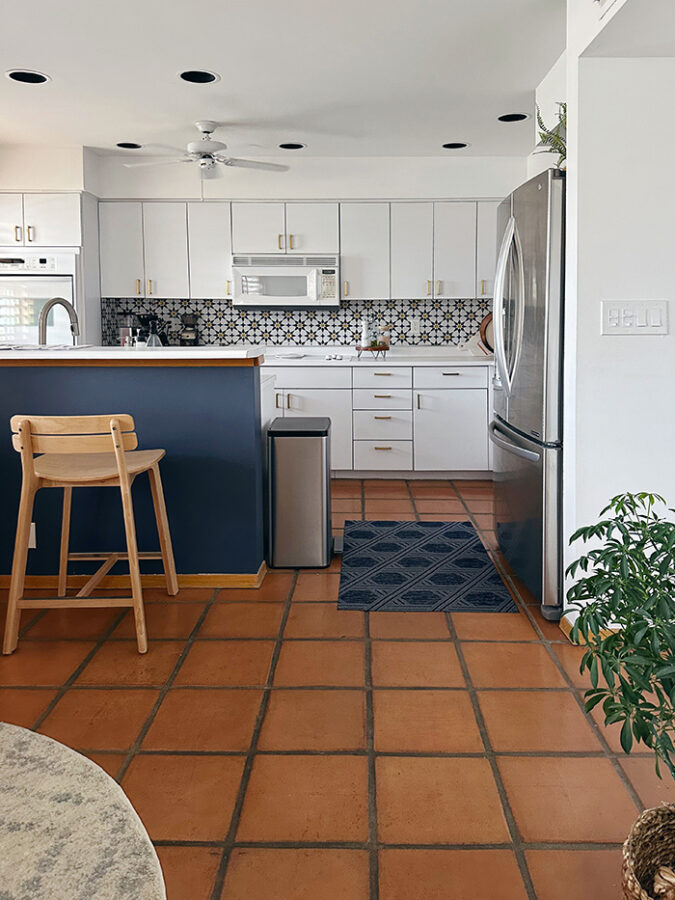
Before Kitchen:
Now, before we get too far along on how to install this wallpaper – let’s quickly take a peek at what our kitchen looked like when we bought the house.
This lovely home had a mirrored backsplash in the kitchen. I was constantly trying to keep it clean, really disliked the outdated look it gave the room and to be honest, didn’t like seeing my lower mid-section each time I was cooking dinner!
After a few months, I painted the kitchen a nice crisp white and our island a dusty navy blue color.
You can see the full updated kitchen reveal post here.
Check out these amzing wallpaper projects!
– How to install a Removable Wallpaper Backsplash
– Simple Dresser update with Wallpaper
– Adding Removable Wallpaper to a room
– How to create a Circle Accent Wall with Wallpaper
– Favorite Tile Removable Wallpapers
– How to create a Wallpaper look without using Wallpaper
– DIY Wallpaper Nightstand
– Best Checked Wallpapers
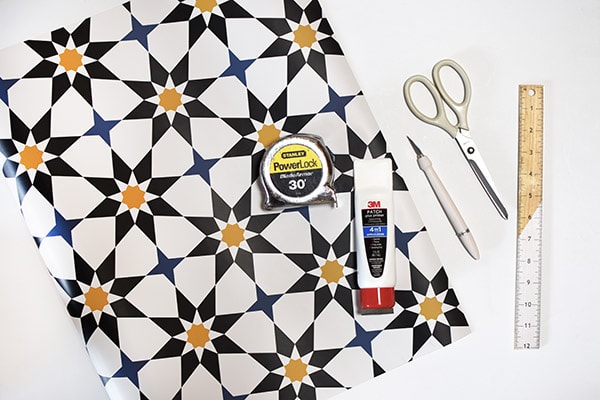
What supplies do I need to install a Removable Wallpaper Backsplash?
- Tempaper : Soleil Moroccan Spice – (Amazon also sells the same pattern)
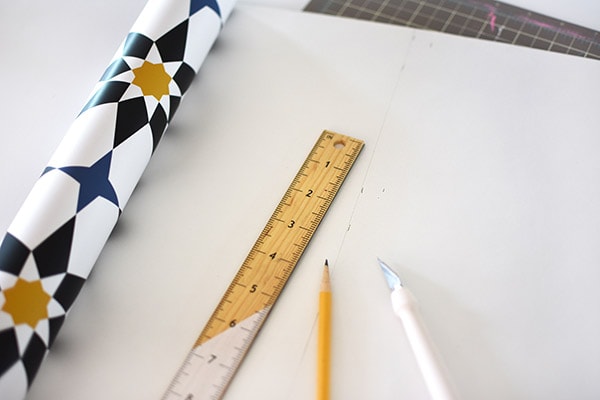
- Measuring Tape
- Sharp Scissors
- X-acto Knife
- Small ruler
- Optional – Wall putty
How to install a Removable Wallpaper Backsplash in your kitchen
The first item to take care of when installing a removable wallpaper backsplash is prepping your existing backsplash and/or wall.
As per Tempaper’s website, removable wallpaper adheres best to clean smooth surfaces. I followed their direction and cleaned our mirrored backsplash with Vinegar Windex cleaner.
Second, remove all light switch and electrical outlet covers – I had to laugh that EVEN our covers were mirrors, yikes!
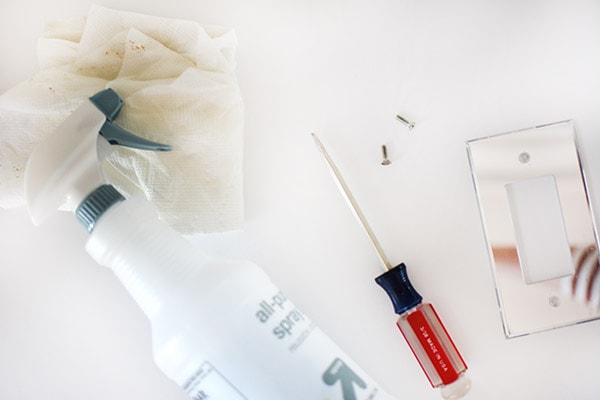
Next, BE SURE TO TURN OFF YOUR ELECTRICITY and remove any under cabinet lighting fixtures. Ours were also quite old and took a bit of muscle for me to remove them.
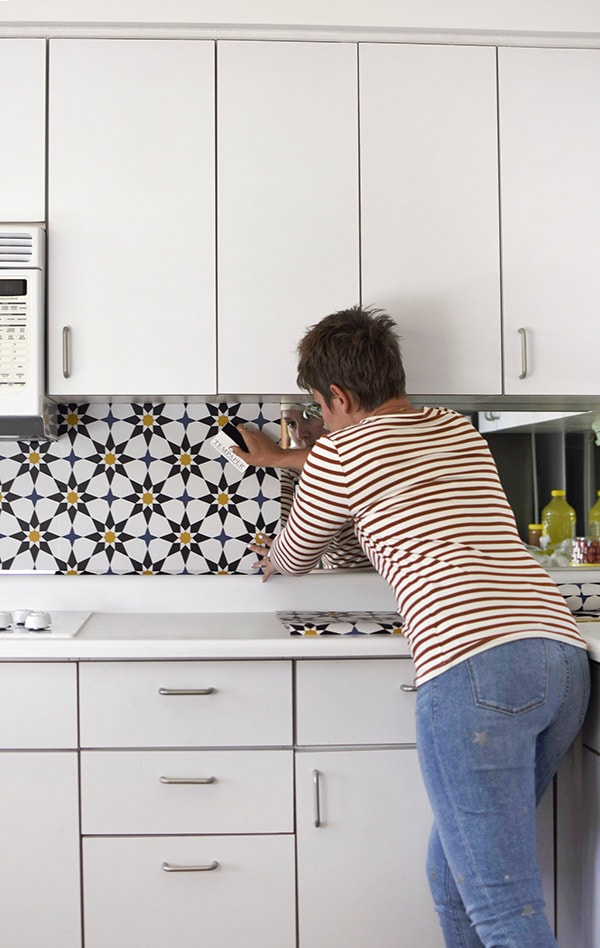
It’s time to start measuring and cutting your removable wallpaper now! One of the things I loved about buying my paper from Tempaper was they had online video instructions, a wallpaper calculator and even a FAQ page. So I really felt like I had all the resources I needed as I got started.
Removable Wallpaper Hanging Tip
One thing to remember, just like if you were hanging this paper on a full wall, install at the top of your backsplash to the bottom of your backsplash. This will ensure that your pattern matches up correctly and you have manageable sized sections to adhere to the wall.
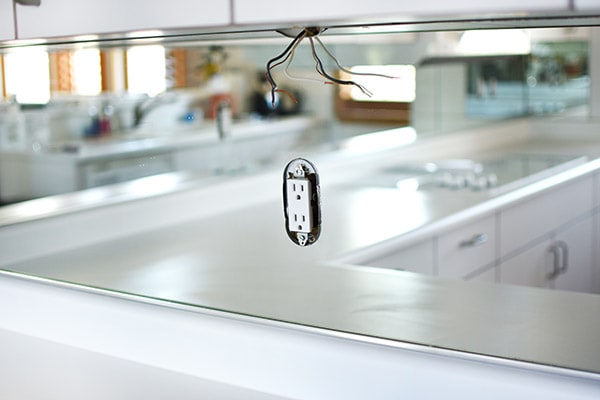
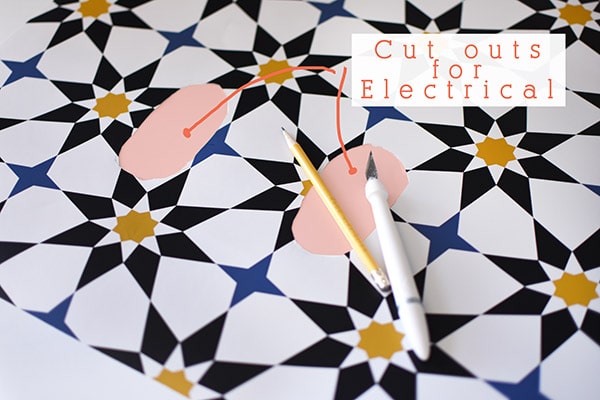
As I went along, I ran into many electrical outlets that needed to be cut out prior to installing the wallpaper onto my mirrored wall.
I simply, measured the location and size of the cuts and then using my x-acto knife was able to cut them out. (I highlighted the cut outs in pink below for ease of viewing.)
My outlets were cut in odd oval shapes, but most likely yours will be easy to measure and cut rectangles.
I also found it easier to start by pulling maybe 3-4″ of the backing off the wallpaper in the upper left hand corner and getting that full edge lined up correctly.
Once that far left hand side was lined up and stuck to the wall, I would slowly pull the backing off with one hand and use the Tempaper smoother tool to get all the air bubbles out.
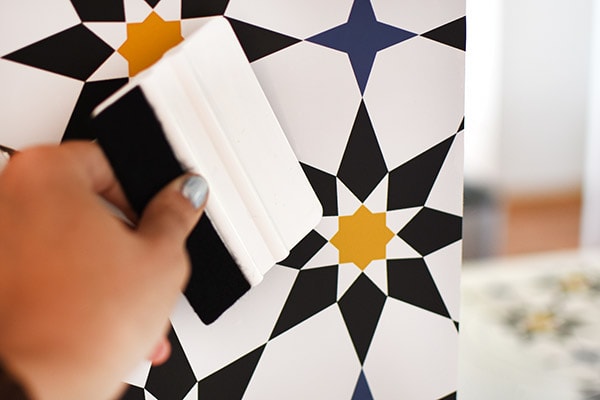
You can see how that process looked below – starting from the far left hand side and slowly working section by section to the right.
Another tip I read on Tempaper was if you can’t seem to get a few bubbles here and there with their smoother tool, you can use a small needle pin and pop the bubbles. I found that very useful in a few select sections.
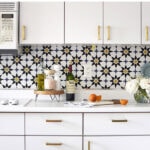
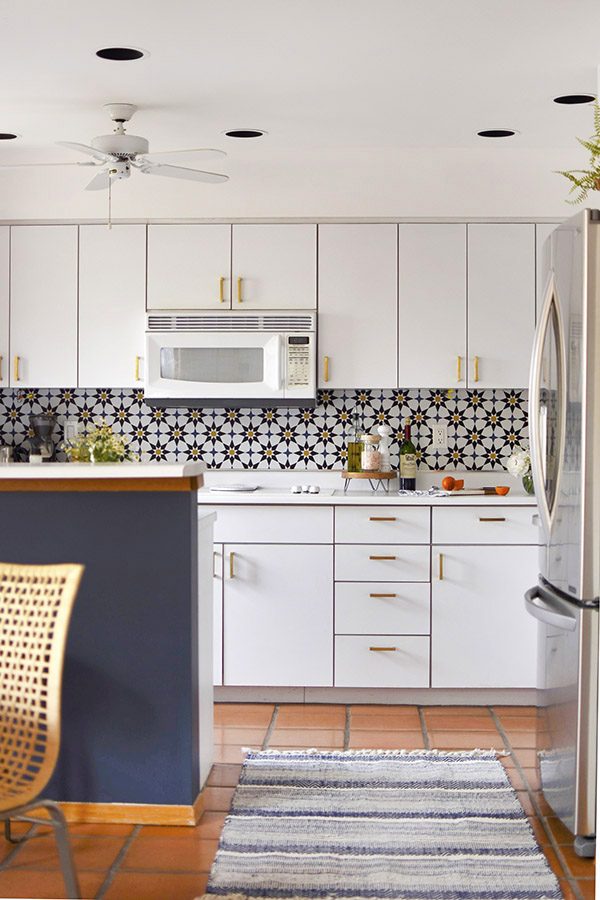
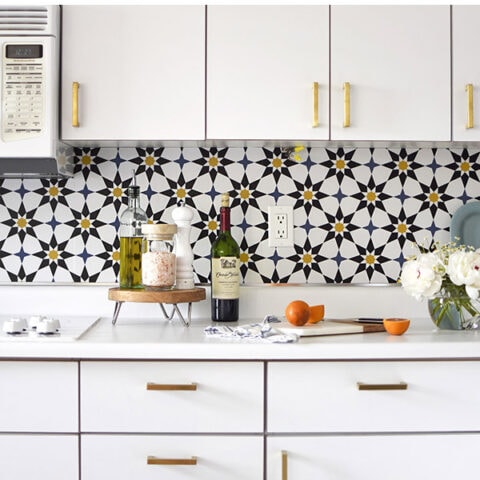
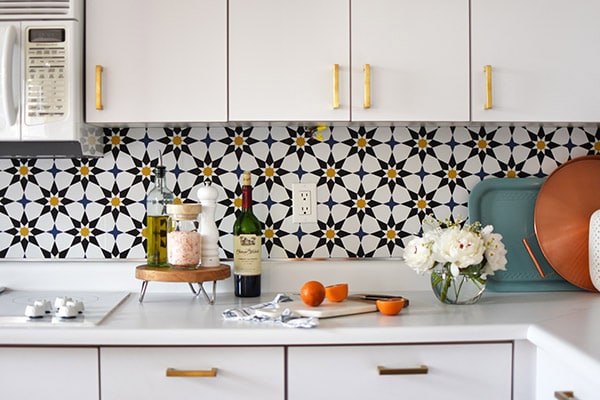
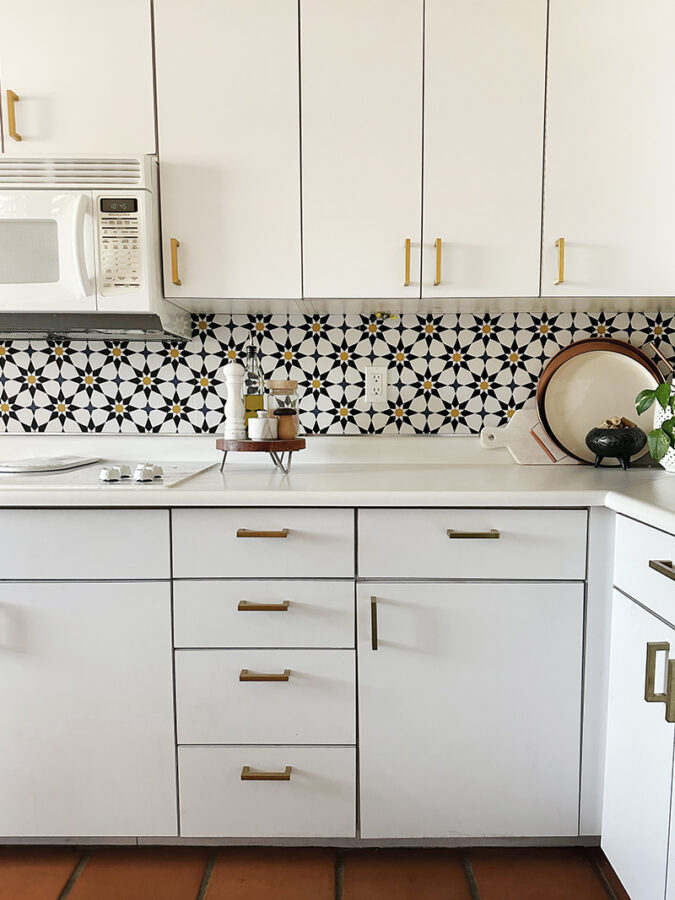
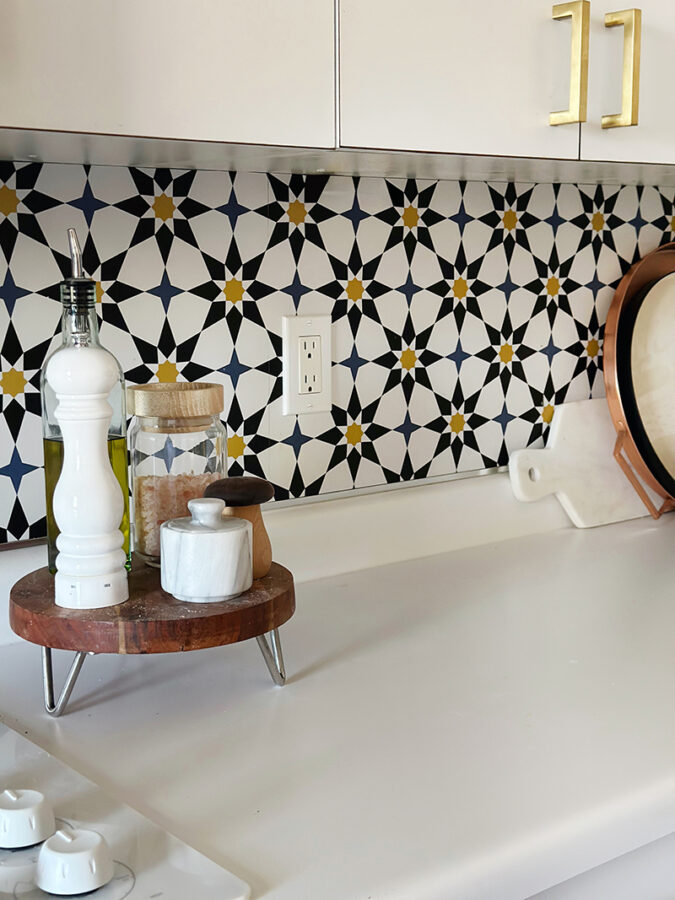
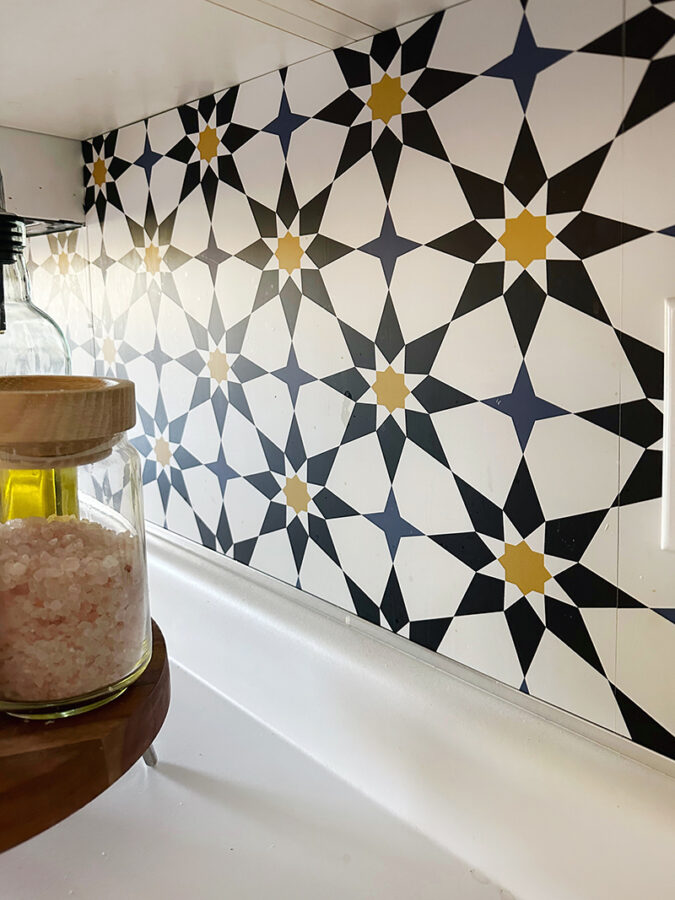
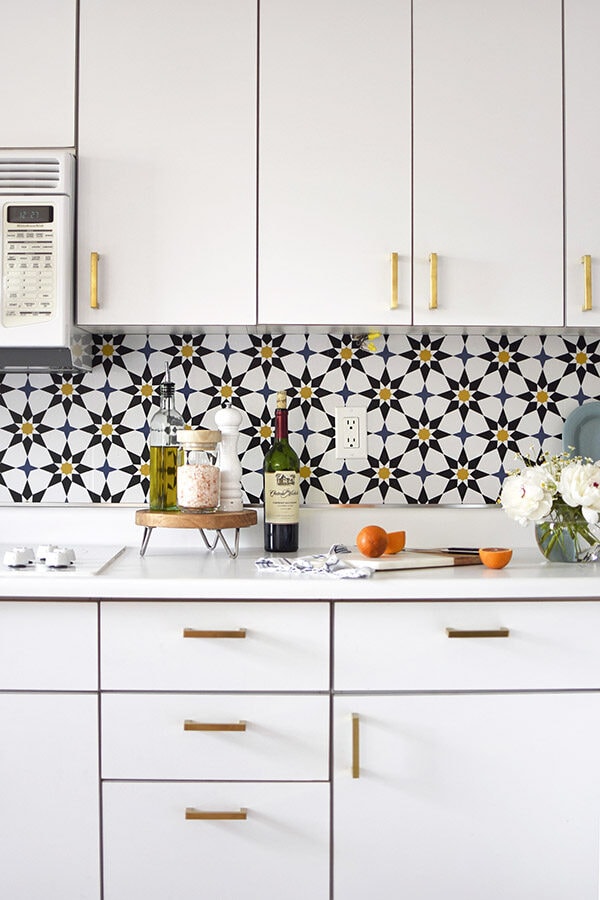
Moroccan Wallpaper
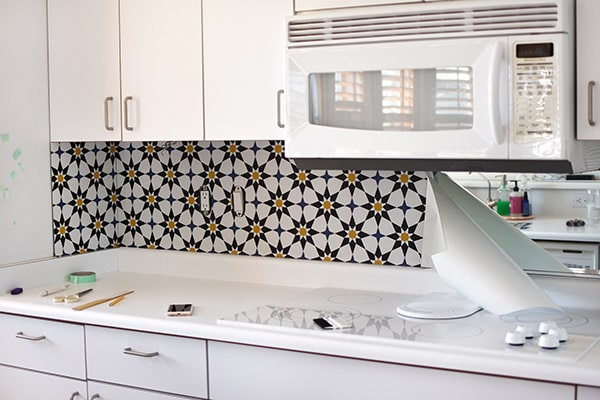
As I went around the kitchen on the backsplash, I just could not believe how amazing it looked! I loved the Moroccan / Geometric feel it brought to our kitchen, but still think it speaks to our Southwest styled home perfectly.

Once all the removable wallpaper was laid, I went back and made a few final trims to the lower edge. I also installed new crisp clean white electrical covers!
Install Removable Wallpaper Backsplash in Your Kitchen
Learn how to completely transform your kitchen by installing a removable wallpaper backsplash. Removable tiled wallpaper is both easy to put up (and eventually remove) but also quite cost effective when compared to purchasing tile.
Materials
Instructions
- First, start by prepping your existing backsplash. As per Tempaper’s website, removable wallpaper adheres best to clean smooth surfaces. Follow their directions and clean your smooth backsplash with a vinegar cleaner.
- Secondly, remove all light switch and electrical outlet covers. BE SURE TO TURN OFF YOUR ELECTRICITY. Then, remove any under cabinet lighting fixtures.
- It’s time to start measuring and cutting your removable wallpaper now!
- As you go along, you will run into electrical outlets that need to be cut around prior to installing the wallpaper. Measure the location and size of the cuts and then using an x-acto knife, cut them out.

- Pull about 3-4″ of the backing off the wallpaper in the upper left hand corner and get that full edge lined up correctly. Once that far left hand side is lined up and adhered to the wall, you can slowly pull the backing off with one hand and use the Tempaper smoother tool to get all the air bubbles out.
- Once all the removable wallpaper is laid, go back and make any final trims to the lower edge.
- Reinstall your electrical covers and turn the power back on.
Notes
- Install the wallpaper from the top of your backsplash to the bottom. This ensures that your patterns will match up correctly and you have manageable sized sections to adhere to the wall.
- If you can’t seem to get a few bubbles here and there out with the wallpaper's smoothing tool, you can use a small needle pin and pop the bubbles.
If you want to see all the updates I made (hint hint, EVERYTHING totaled under $300) you can check out my 5 Ways to Update your Kitchen post.
However, the real show stopper of this room is 100% the wallpaper. I am so in love with it and am ready to start adding removable wallpaper to every room in my home!!
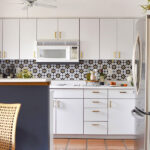
Does Removable Wallpaper as a backsplash hold up well?
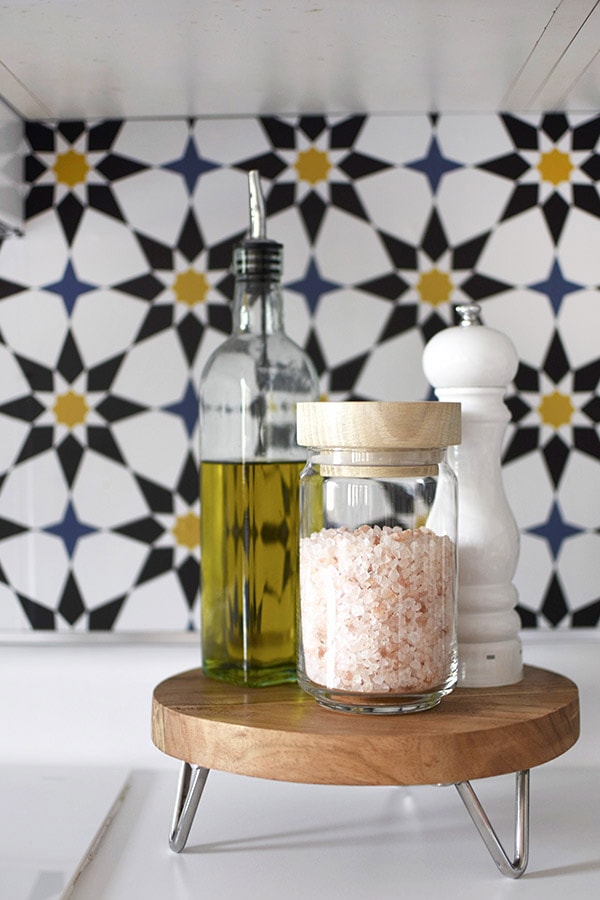
I added removable wallpaper to act as a backsplash in our kitchen four years ago. The pictures below are not staged or “cleaned” for todays’ update.
I think the longevity of removable wallpaper as a backsplash 100% is determined by the quality of the wallpaper. As you can see if you look closely on our wallpaper below, there are oil splashes and other random food marks because we USE our kitchen.
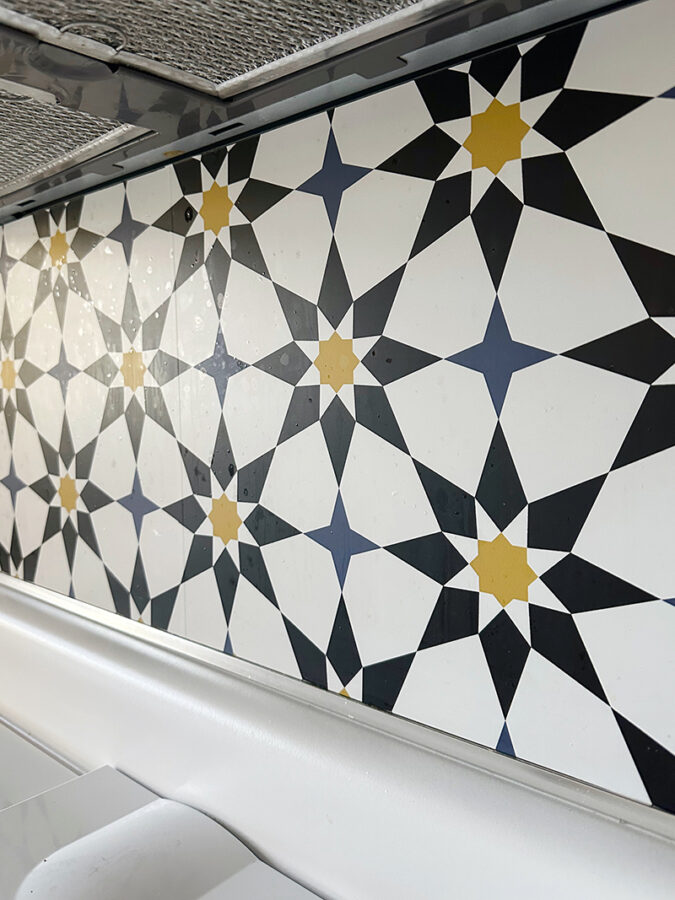
However, just as with a tile backsplash, every so often I spray the wallpaper with a vinegar cleaning solution and it wipes perfectly clean! All the splashes and marks disappear with the ease of a paper towel wipe.
There hasn’t been any additional bubbling of the wallpaper and the seams are exactly as they were when I installed it. I have been SO thrilled with the four years of use I’ve had from this wallpaper.
I was provided the removable wallpaper for this post. Thank you for supporting the amazing brands like Tempaper that make Delineate Your Dwelling possible.
Looking for more kitchen? Check these posts out…
5 Ways to Update your Kitchen for under $300
Could you install horizontally, so you would not have to worry about seams, and lining up patterns? Or would it be hard to handle a long horizontal roll ? Thank you
Great question. Yes, for this pattern you could probably install horizontally… however, as you mentioned, it would be a challenge to hang that direction.
I’m curious if you have any feedback now on how this has held up, specifically to any potential stains that could occur near the stove top! I love the look of this and am planning on putting it in my kitchen too to cover up a cream laminate backsplash, but I’m worried about how messy my cooking can get sometimes!
I can say with 100% honesty, that I have been shocked at how well it’s held up! I cook very regularly and the wallpaper looks as good today as it did when I installed it. I simply use a damp paper towel and wipe up any splatters. No marks or stains. Now, I don’t leave the splatters on for days and days, but try to wipe them up within the first day I notice them. I’ve been REALLY happy with the $40 it took to cover my entire backsplash!
Thanks for this post! I’m thinking of getting this wallpaper to cover a tile backsplash. The existing tile is a horizontal mosaic though, so I’m worried that the texture of the tile might show through the wallpaper where the grout lines are. Do you think tile underneath would distract from the pattern?
I put my wallpaper over a flat mirror backsplash and just where the seams of the mirrors are, you can see the line. Even though I would LOVE for you to be able to use this idea in your kitchen, I am hesitant to have you put it over existing tile. Maybe you could buy inexpensive contact paper and give it a test before buying the paper I used? Just an idea. 😉
What about using a wallpaper liner directly over your tiles first? It’s supposed to work well even over cinder block walls. I’ve used wallpaper liner over a tiled wall and it worked out beautifully.
Ah, that’s a great idea! I will have to try that next time. Thanks for sharing.
After seeing your Moroccan Tile wallpapers on Instagram, I was hoping there’s a post on your blog about how to install them and I’m so happy there actually is. I love how the wallpaper serves as the accent wall and how it instantly draws attention. A big plus is a fact that it’s removable, so easy to put together and on a budget. Thanks for sharing this!