DIY Nightstand
INSIDE : Learn how to create your very own DIY Nightstand using a thrifted find, spray paint and some removable contact paper!
This post may contain affiliate links. See full disclosure here.
This post has been updated from it’s original 2015 publish date.
My sweet little guy has been wanting something special for his bedroom for a while. In our new rental home, our kids have their own rooms now and it’s been such fun being able to create a space just for each of them.
When my friend, Audrey from This Little Street announced she was creating a fabric and wallpaper line with Spoonflower, I knew exactly what I was going to do! I’m so excited to share this DIY Nightstand.
What supplies do I need to make a DIY Nightstand with Wallpaper?
- Nightstand
- White Spray Paint
- Scissors
- New Blue knob
- Removable Yellow + White Wallpaper
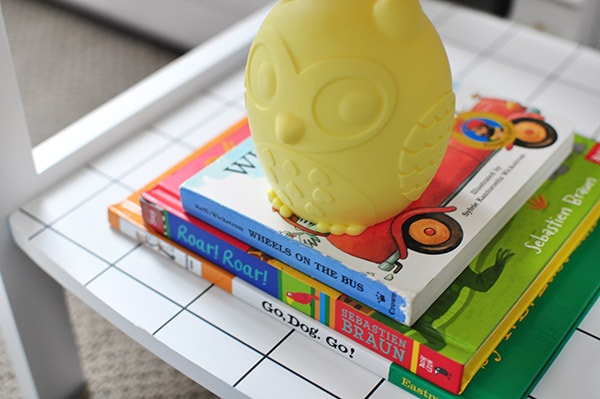
- Removable Black + White Grid
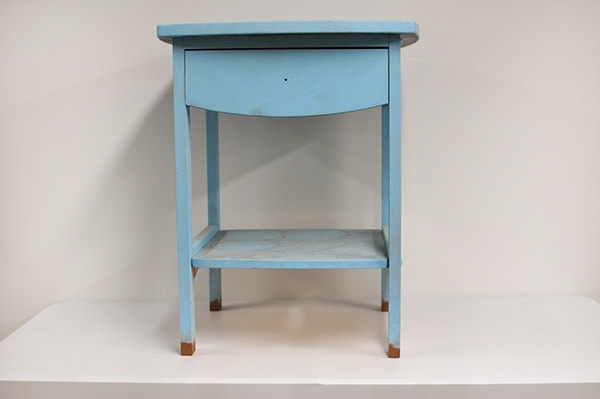
I have owned this little nightstand since early college… which was roughly 16 years ago (wow).
My mama bought my sister and I matching ones my last year of college, when we lived together. It was originally a natural wood color. I’ve since painted it black, brown, soft orange and the last color was this light blue.
And now it’s going to go from an old college nightstand to my cutie pie’s big boy bedroom nightstand! Oh how the times have changed, ha.
Check out these amzing wallpaper projects!
– How to install a Removable Wallpaper Backsplash
– Simple Dresser update with Wallpaper
– Adding Removable Wallpaper to a room
– How to create a Circle Accent Wall with Wallpaper
– Favorite Tile Removable Wallpapers
– How to create a Wallpaper look without using Wallpaper
– DIY Wallpaper Nightstand
– Best Checked Wallpapers
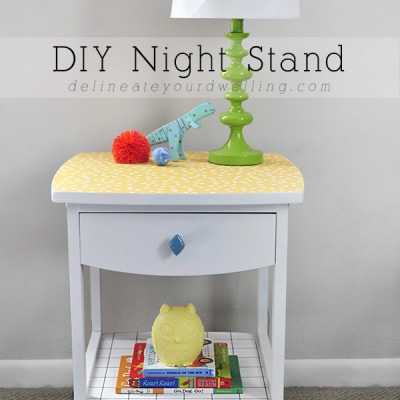
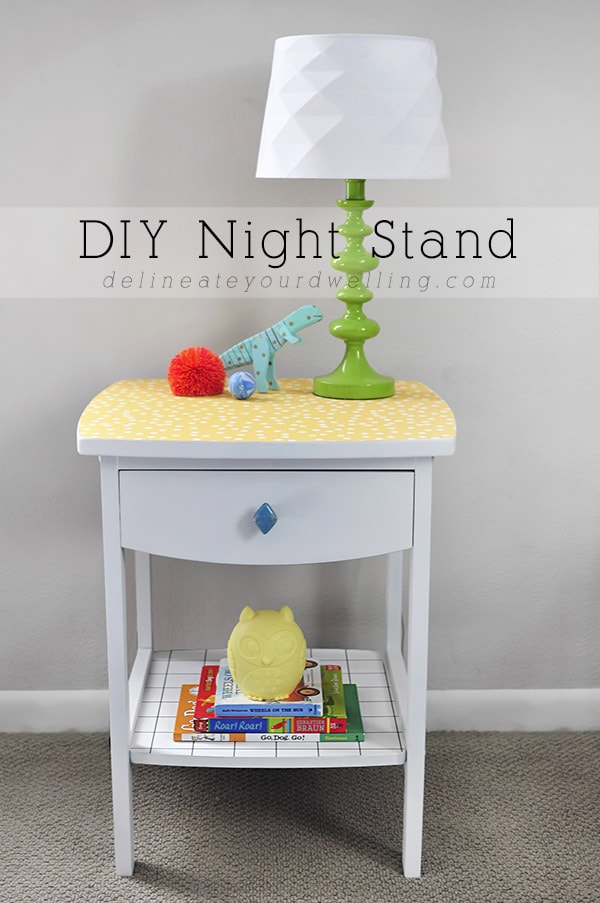
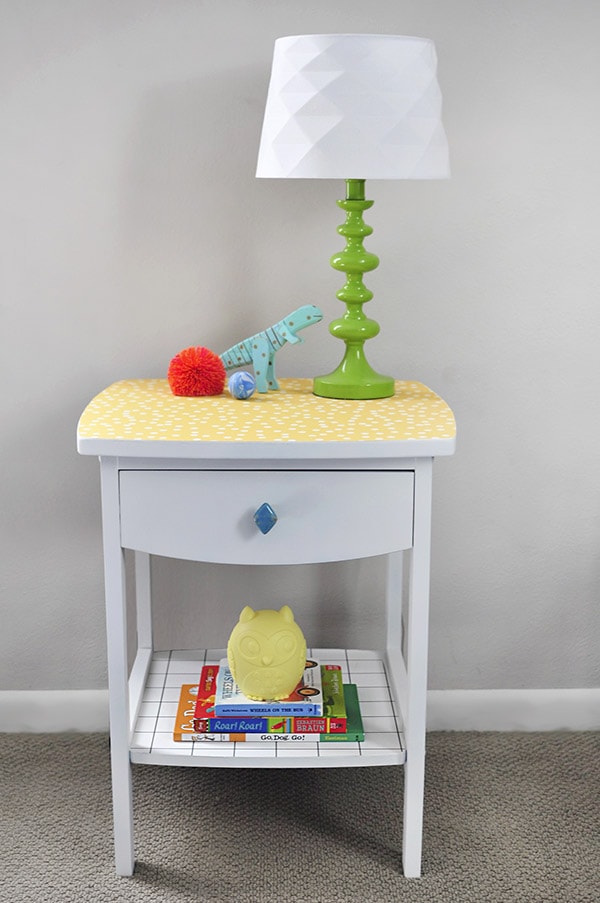
How to make a DIY Nightstand with removable wallpaper
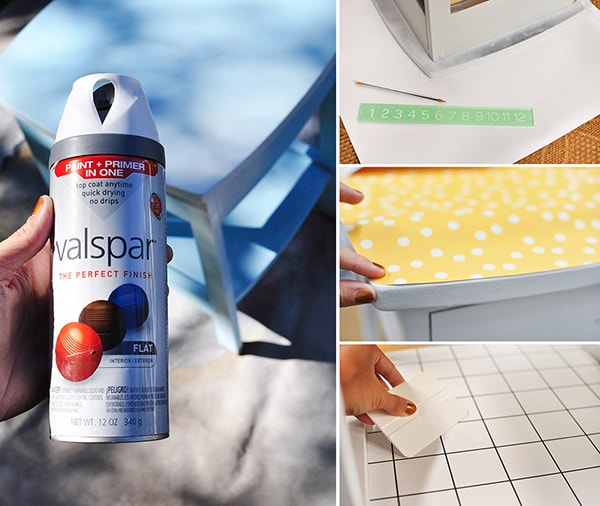
I lugged this guy from the basement and gave him a quick clean and sand. I used a Flat white spray paint and gave it 2-3 coats.
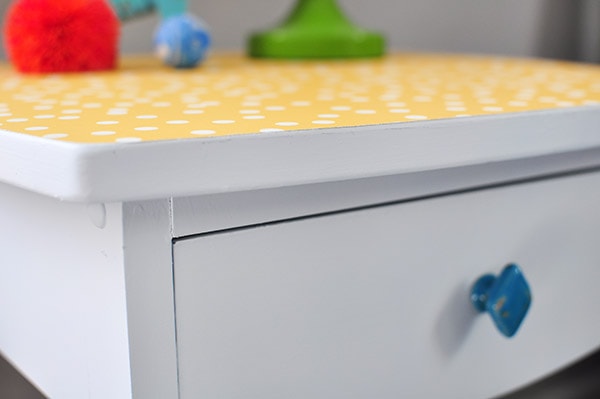
After the painted was adequately dry, I brought it inside and prepped for my lovely paper additions. I fell in love with all the fun patterns that Audrey + Spoonflower have available. They all mix and match so well. I choose the Dots in gold and the small scale Grid, both in removable wallpapers. I would describe the texture more like a lightly textured contact paper.
I turned the nightstand over and traced the top onto my Dots in gold paper and then cut.
Since these are removable wallpapers, I was able to place the paper, take it up, move it slightly and place it down again. They were really easy to work with and they also came with a card to help you smooth out any air bubbles.
After my papers were in place, I added a fun blue diamond knob to finish it off.
Added his books back in and presto… it was complete!
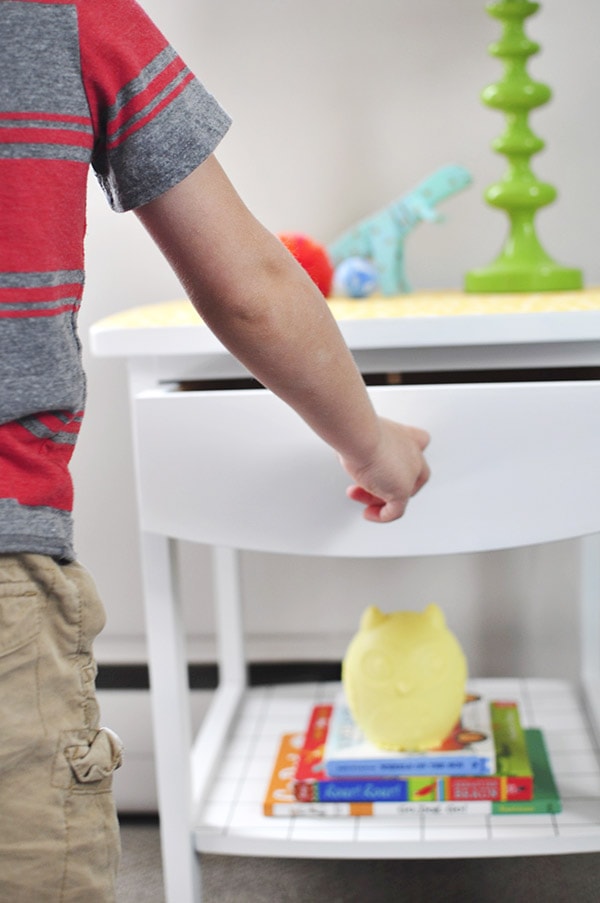
When my guy saw the new nightstand sitting in his room, he was thrilled!
He ran over and kissed me with a huge, “Awwww, thanks mama!”

He will be able to store so many fun little boy treasures in that drawer now just like a big kid!
You might be also interested in…
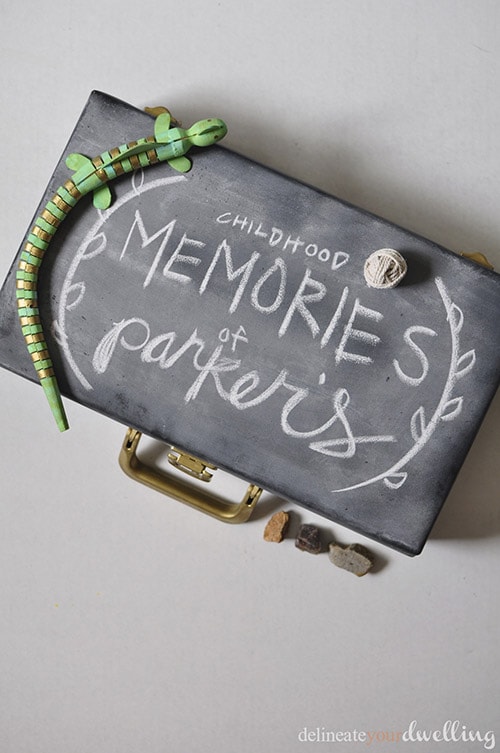
Cassette Case turned Memory Box
Love it, great use of the wallpaper! Thanks for sharing at the #HomeMattersParty -hope to see you again next week.
Thanks, Chelsea!
So cute and really love that green lamp stand. A beautiful blog. Found you at Home Matters Link Party.
Thanks so much for stopping by, Tracey! And I got that green lamp stand from Target a few years ago… but I think it’s one they always have on stock. =)
Oh wow, a trash can! Amazing what a new covering can do to an item!!
Such a cute makeover! No wonder he was thrilled!!
That night stand never looked so good!
Thanks mama!
This is adorable! I love the two beautiful patterns together! That’s so cute how happy he was to see it!
This looks so so great! I have a few pieces hanging around since the same time period, I might need to see about giving something a makeover. 😉
11 years?! Holy moly that thing is still in pretty great shape! Hope your little man loves it, it’s adorable!
This is SUCH a great makeover, and I love that you’ve repurposed something you’ve had in your life for such a long time!
Thanks girl! Fun to take an old college item and have my son enjoying it now!