How to Hang String Lights on Stucco Walls (The Permanent Way!)
INSIDE : Hanging outdoor string lights is the ultimate way to bring warmth to a backyard, but if you are dealing with a desert landscape surrounded by stucco walls and concrete block, it can feel like a major DIY challenge. You can’t just slap a command strip onto stucco and expect it to hold through high desert winds!
This post may contain affiliate links. See full disclosure here.
In this final project of our backyard oasis series, I’m breaking down exactly how we securely mounted three tall black light poles to our stucco CMU block wall and anchored them directly to the house. Here is the step-by-step guide to getting that permanent, professional cafe-light look.
If you have been following along, this is the 7th and final project for taking our High Desert Southwest backyard and making it a more green enjoyable oasis. I can’t help that I’m a Midwest landscape architect green loving lady – within reason I had to do something to soften the edges and make our backyard a space we were excited to spend time in!
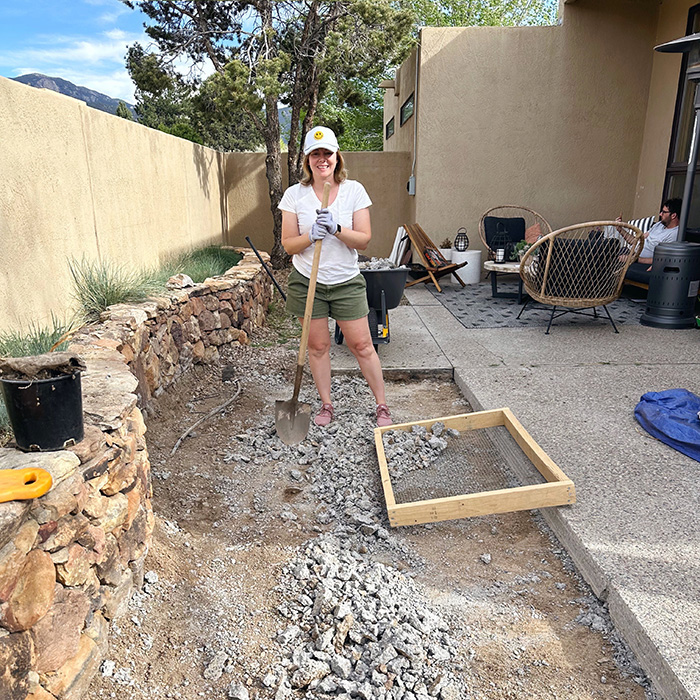
The BEFORE
Here is the before. We had all these small pieces of concrete, a pine that constantly dropped sap and pine needles and so much gravel rock that hurts to walk on and grows weeds.
I wanted a just a small section of grass to help soften the space and a place for my kids and dog to run around a bit.
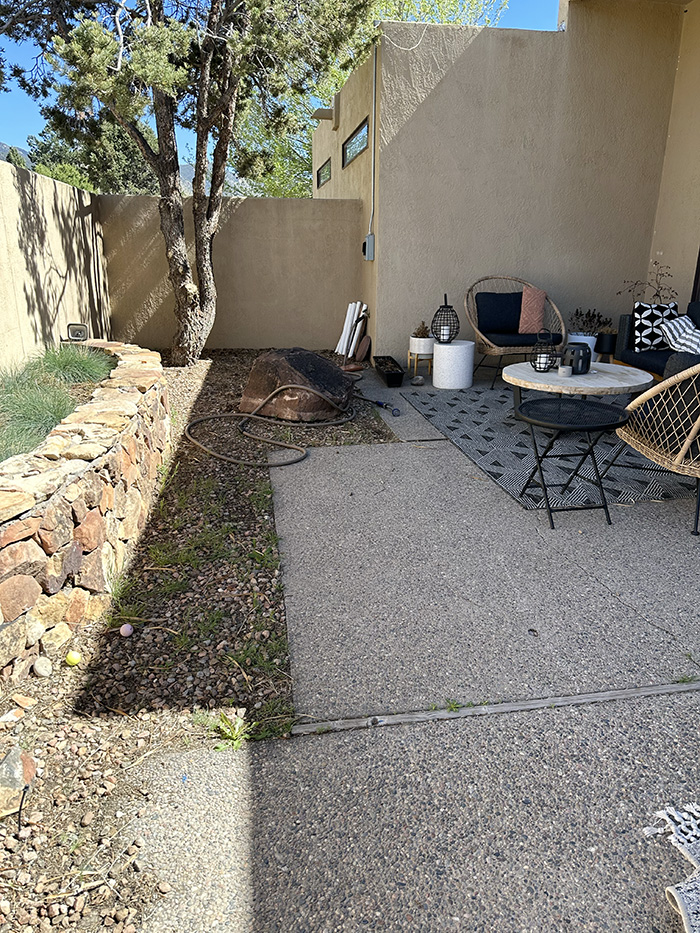
With the right tools and a little effort, I knew we could make this backyard work better for us!
You can see the entire backyard timeline here…
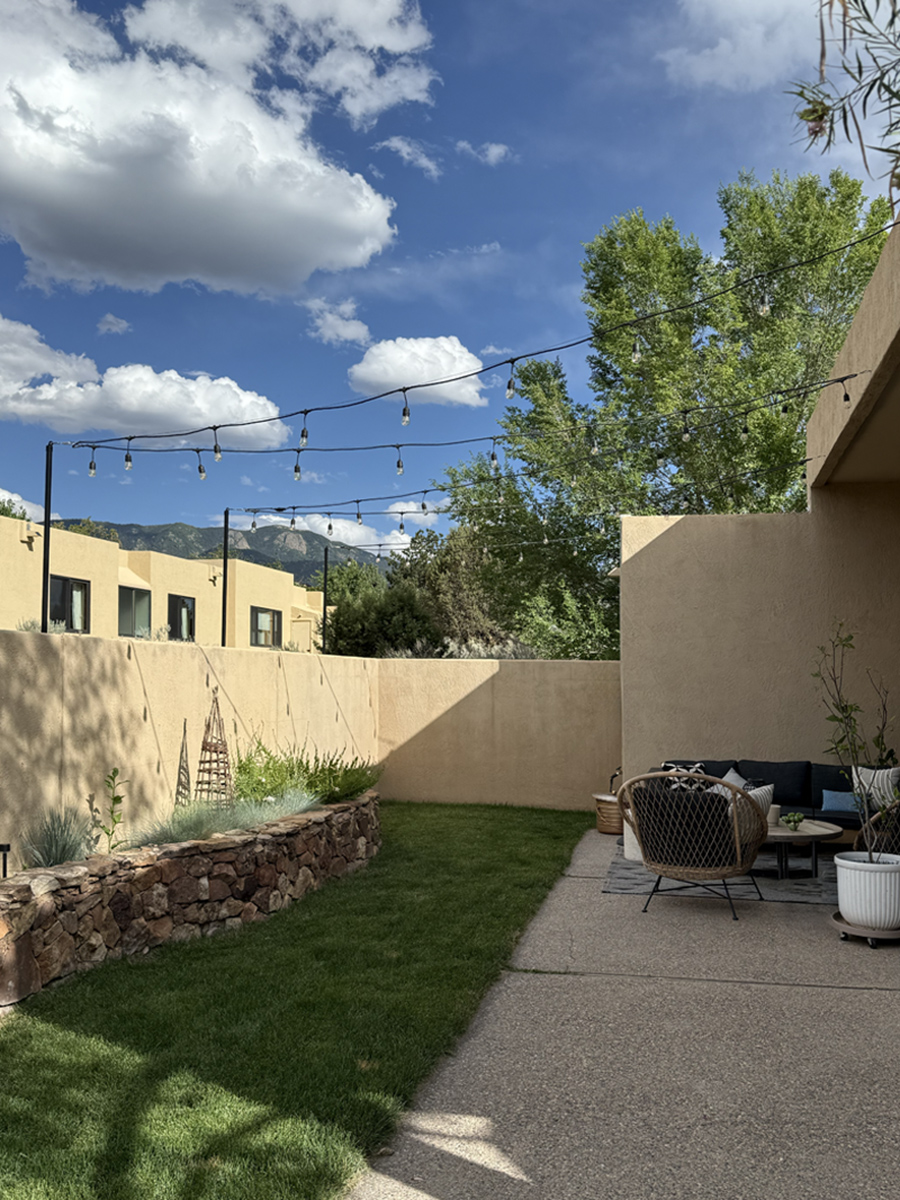
Now that the sod had been installed in the backyard, our space was REALLY looking good. We’d removed so much concrete and put lovely grass in. But there was one final detail to finish off the entire backyard… string lights!
Installing Bistro Lights in backyard supply list
Hardware
- LED outdoor bistro lights
- 3 Tall black metal light poles (conduit or heavy-duty metal poles)
- Heavy-duty eyelet hooks (screwed into the house /stucco studs)
- Masonry anchors and sleeve anchors (for the CMU block wall mounts)
- Circular base plate for pole
- Metal conduit straps/clamps (to secure the poles to the outside wall)
- Stainless steel cable suspension kit (Crucial for preventing sag over wide spans- guide wire!)
- Quikrete all-purpose gravel (Any gravel will do)
- Quikrete concrete
- Wire crimps
Tools
- Hammer drill (a regular drill will struggle against CMU blocks and stucco)
- Masonry drill bits
- Silicone exterior caulk (to waterproof the holes in your house stucco)
- Wrench or socket set
- Post Digger to make circular hole
How to hang string lights on stucco
Step 1 – Prepare holes for poles
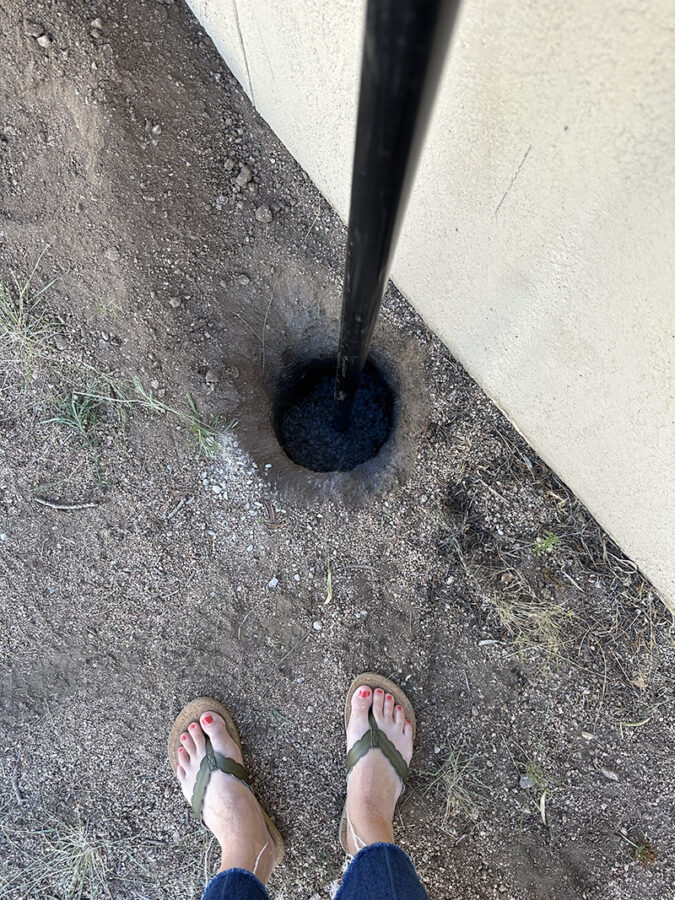
The first step to hanging string lights in your yard is deciding where to hang them. We decided since our backyard courtyard is long and narrow, to install poles on the outside edge of our stucco wall. So, we needed to dig holes for each of the three poles to be secured in.
Using a post digger, make sure your hole is at least around 24″ deep.
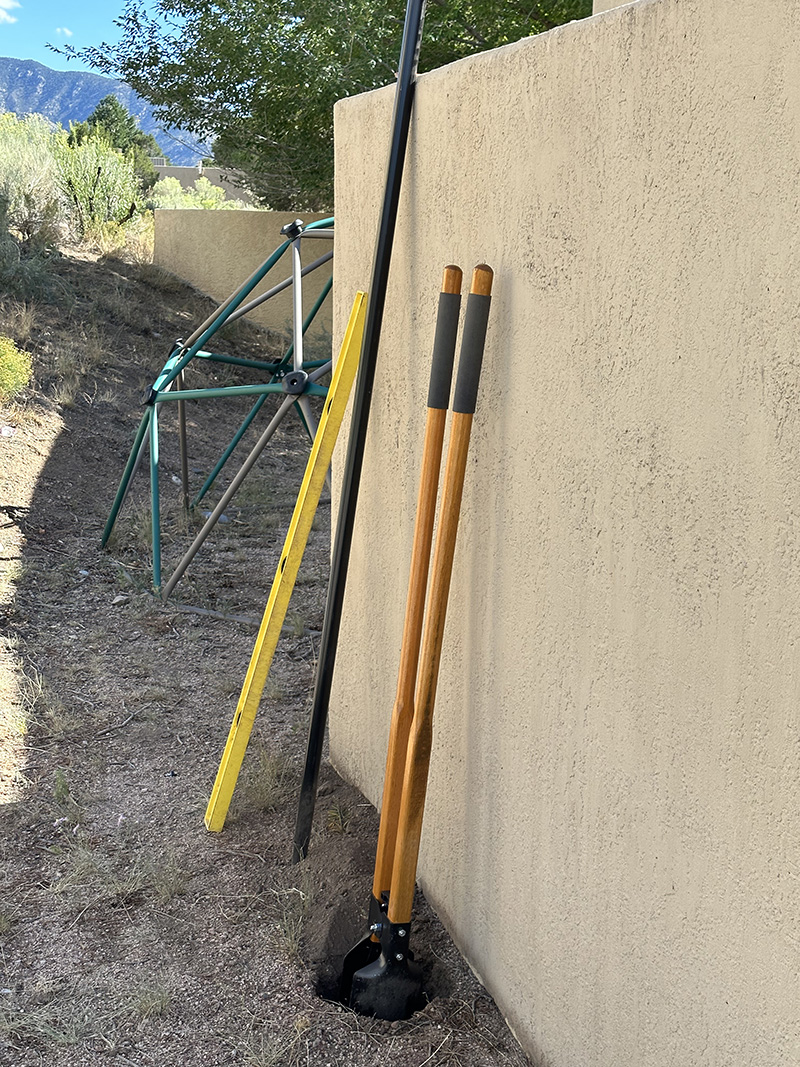
Next, pour Quikrete all purpose gravel into the hole. Make sure to leave about 6″ at the top for the concrete portion.
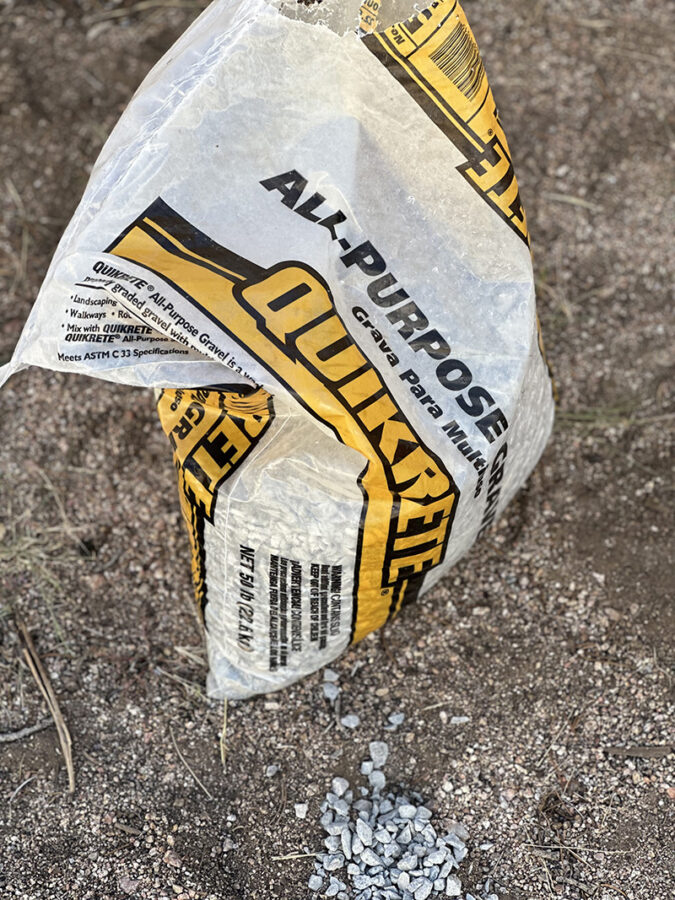
Once you have poured in the concrete, it’s as simple as adding water. We used our hose and added water. Follow the directions on your specific concrete mix, but ours was simply adding water and allowing to cure fully.
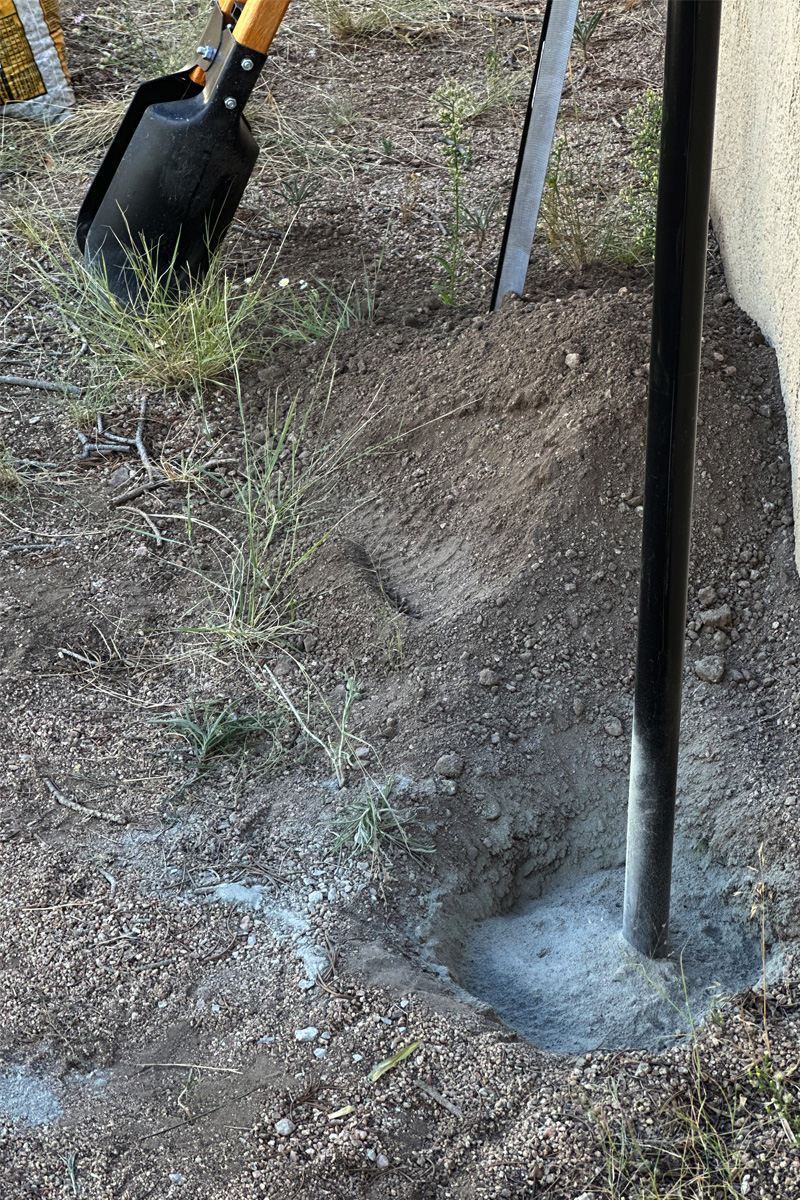
Make sure as the concrete is drying that you have already made the pole level to your wall and/or perpendicular in regards to the ground.
Since we were mounting these poles to our stucco wall, we kept an about 4″ distance to allow for the pole to move/bend with wind, but not to hit the wall. Using various clamps be sure to hold your pole in place while concrete cures.
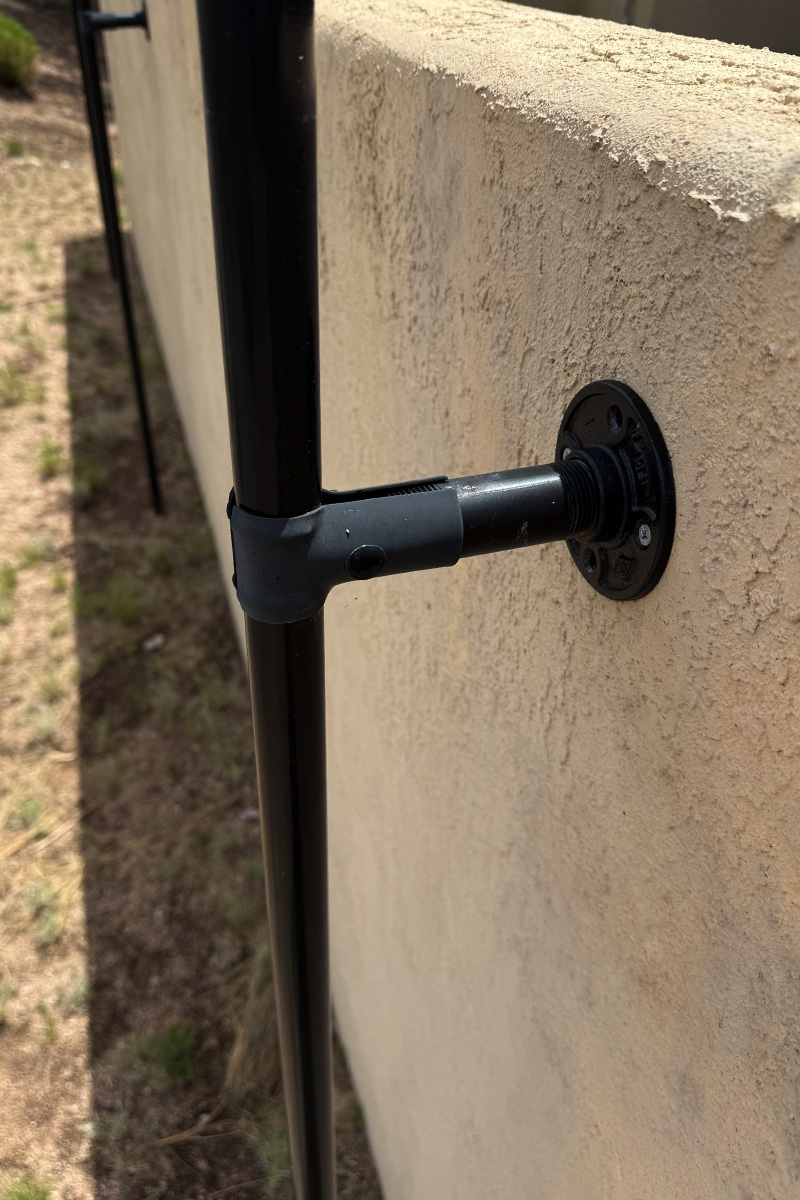
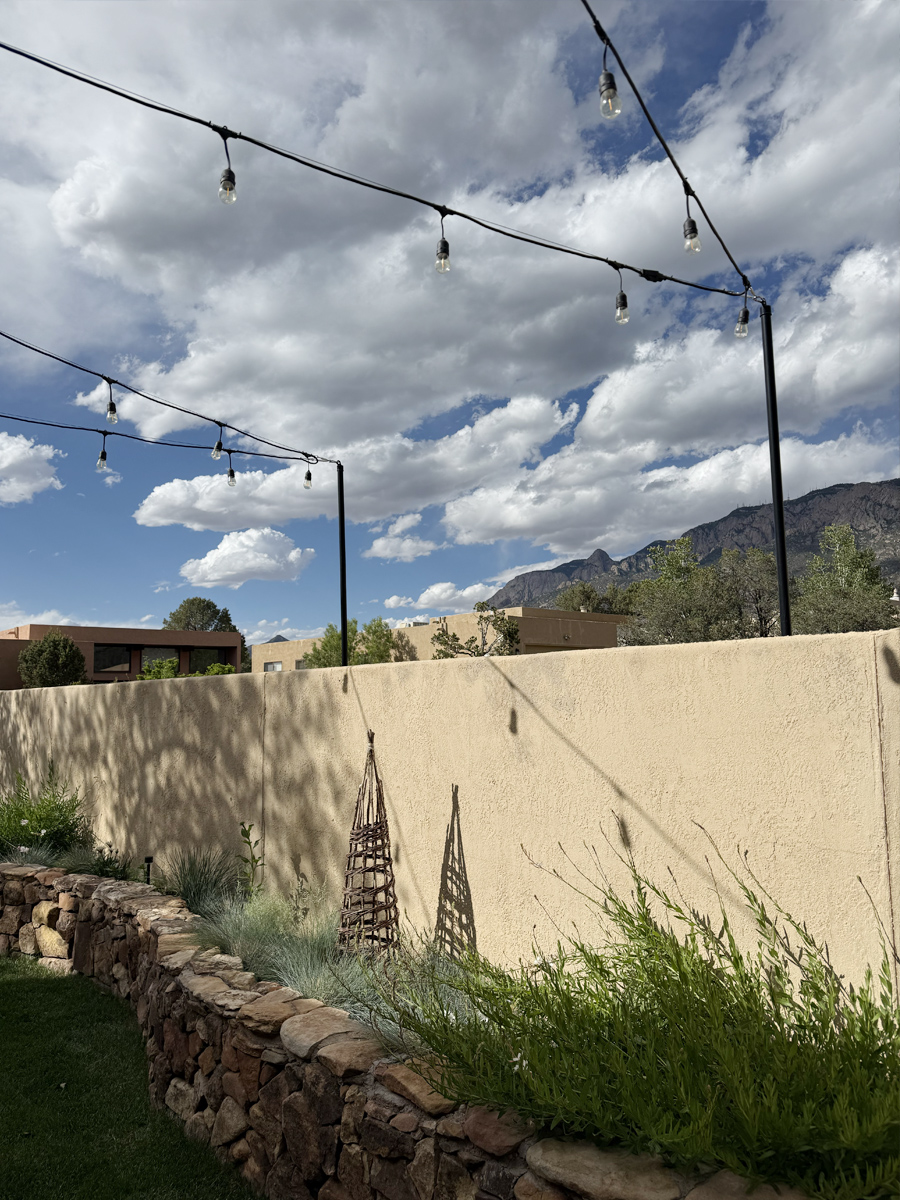
Step 2 – Mounting Light Poles to a Stucco CMU Wall
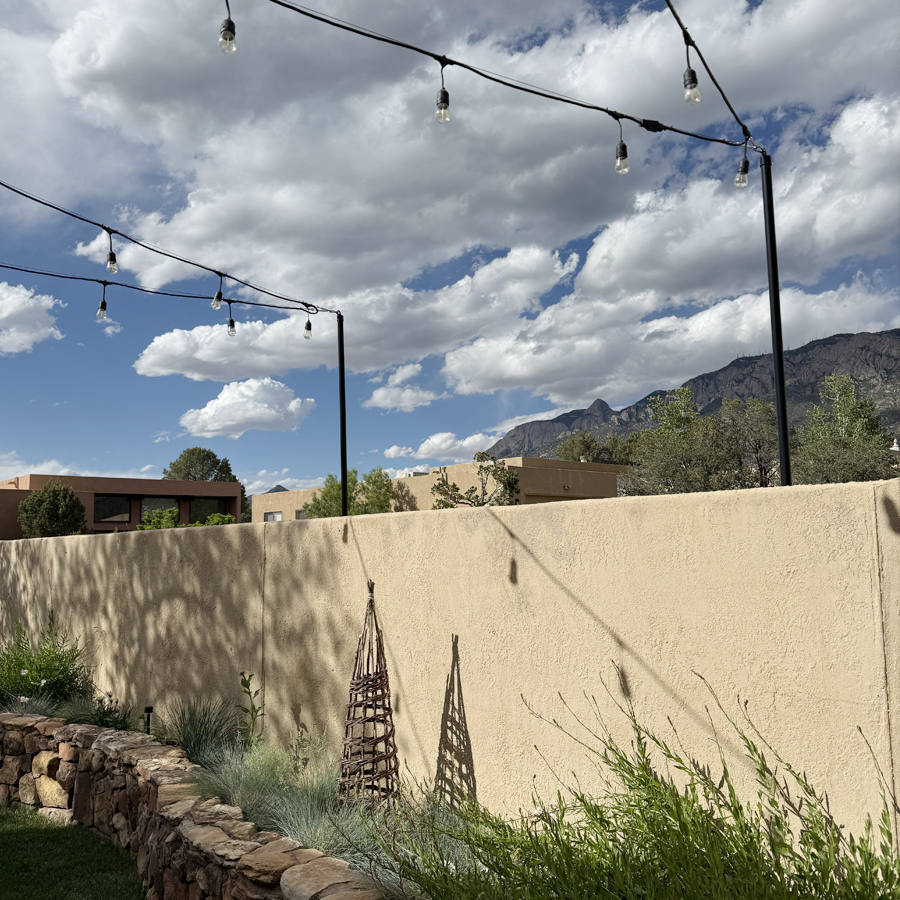
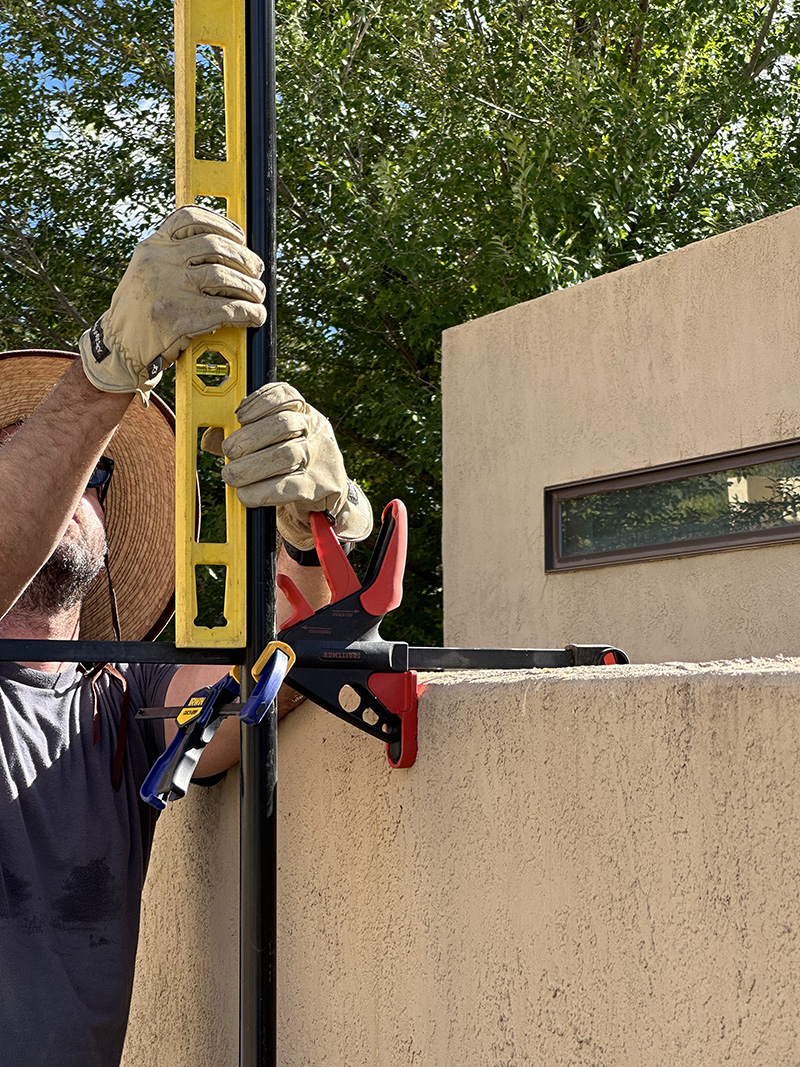
The biggest common hurdle in a desert backyard is often the perimeter courtyard CMU block wall. We wanted our poles completely out of the way, so we mounted three tall black metal poles to the outside face of our stucco CMU block wall.
If you decide to go an easier route and attach the poles directly to the wall, that is fine – however, know that there will be rubbing and swaying of your pole with weather and your stucco will suffer because of it.
Drill the Concrete Block – Using a hammer drill and a masonry bit matching your sleeve anchors, drill your pilot holes through the stucco and into the solid part of the CMU block.
Screw in the base plate – Once your hole are made in the stucco wall, add your circular base plate and screw into place. There will also be a small straight flange arm piece you will screw into the plate, add that piece now.
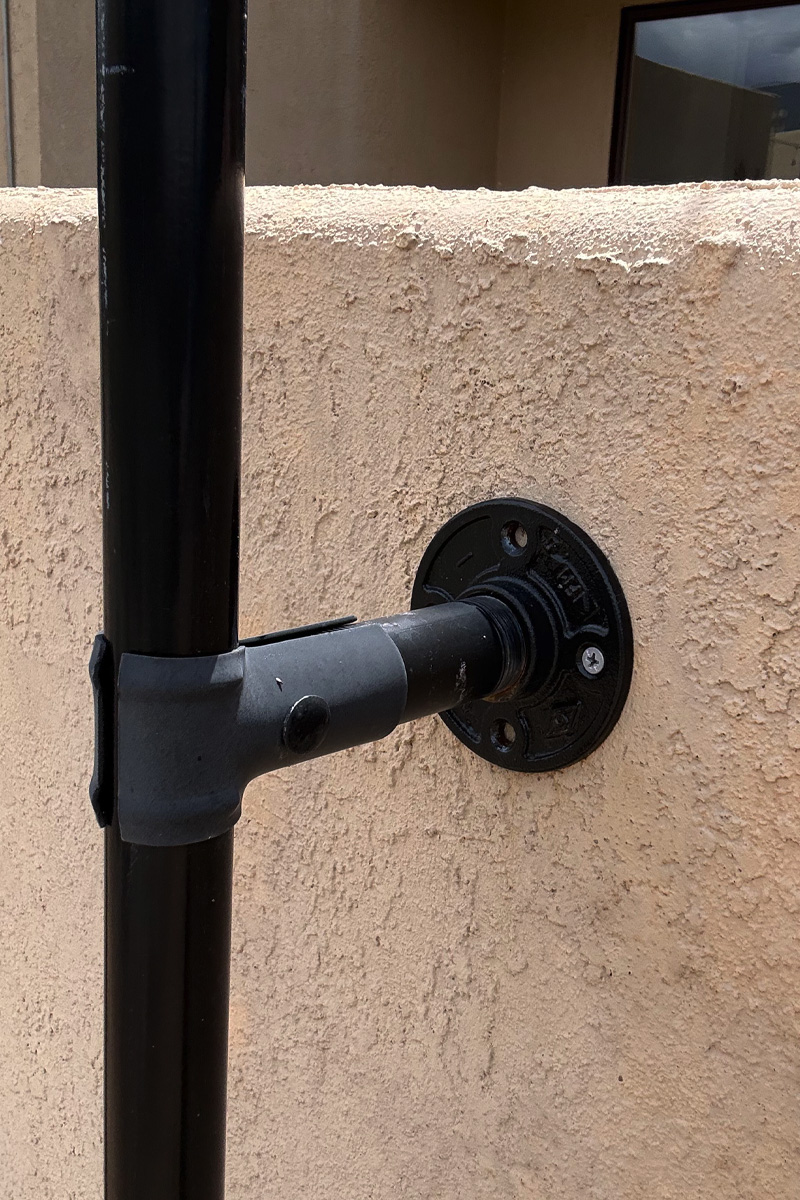
Secure the Clamps – Position heavy-duty metal conduit straps over the black poles. Insert your sleeve anchors through the straps into the wall and tighten them down. This keeps the poles flush, vertical and incredibly rigid against heavy gusts (Very important with all the spring winds we get here in Albuquerque, NM).
Step 3 – Installing Eyelet Hooks into House Stucco
Hanging the other side of the light string requires a solid anchor on the house itself. You never want to anchor into just a thin layer of your home’s facade (stucco in our case) – you must hit wood framing underneath.
Locate the Stud or Fascia – Find the solid wood structure behind your exterior stucco layer (usually the top rim joist or roof fascia board).
Drill a Pilot Hole – Drill a clean hole through the stucco layer using a masonry bit just slightly smaller than your eyelet screw.
Screw in metal eyelet – Screw in the heavy-duty eyelet hook into the framing until it sits flush against the stucco.
Waterproof with Caulk – Squirt a small amount of exterior-grade silicone caulk into the hole before inserting the screw. Don’t skip this! This protects your home’s interior from moisture.

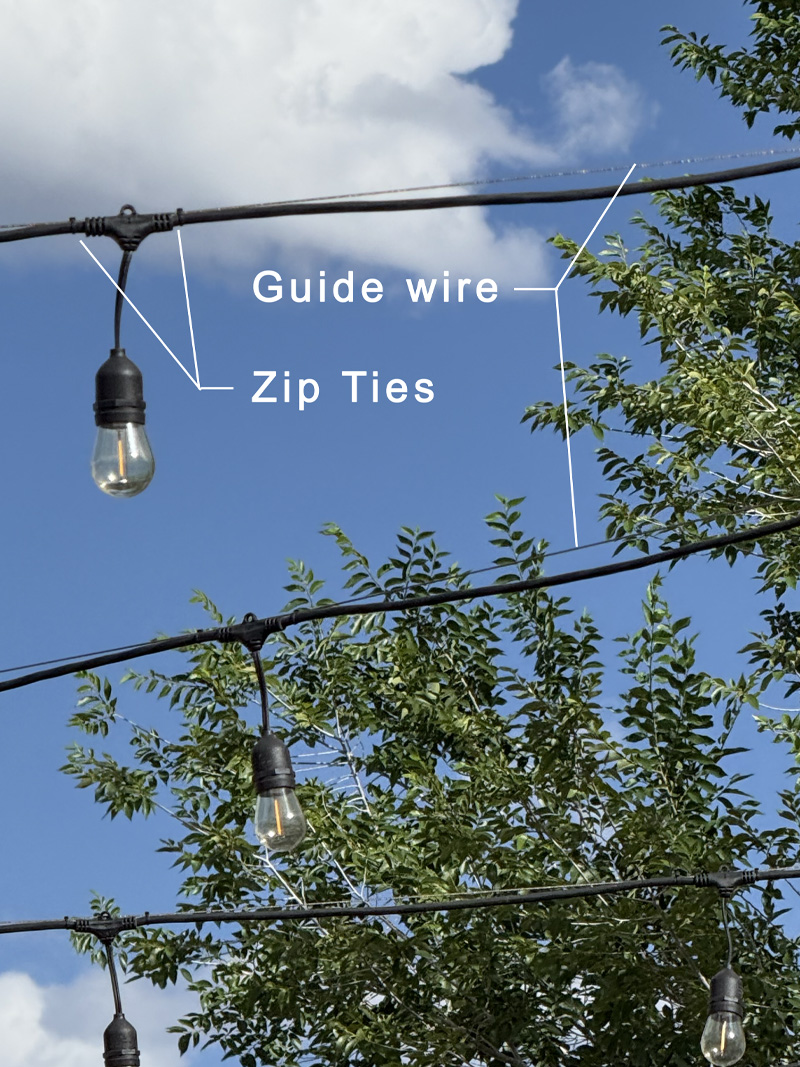
Step 4: Stringing the Lights (The Anti-Sag Method)
For wide-open desert yards, always use a guide wire cable kit. Hanging heavy string lights directly by their cord, puts too much tension on the plugs and causes severe drooping over time.
How to keep your outdoor string lights from sagging it is essential to use a guide wire and thankfully it’s easier than you may think to install one.
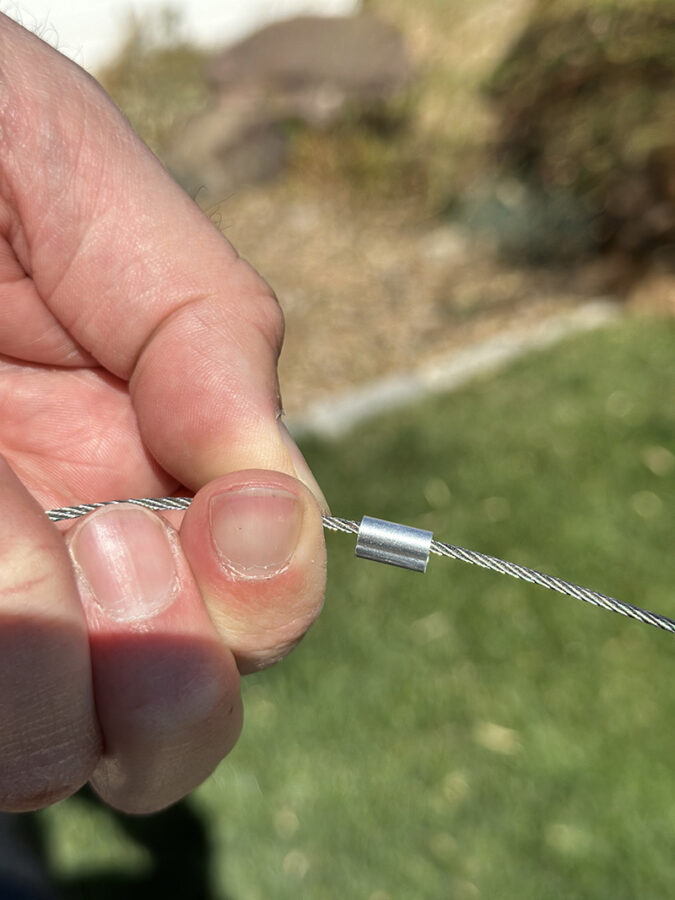
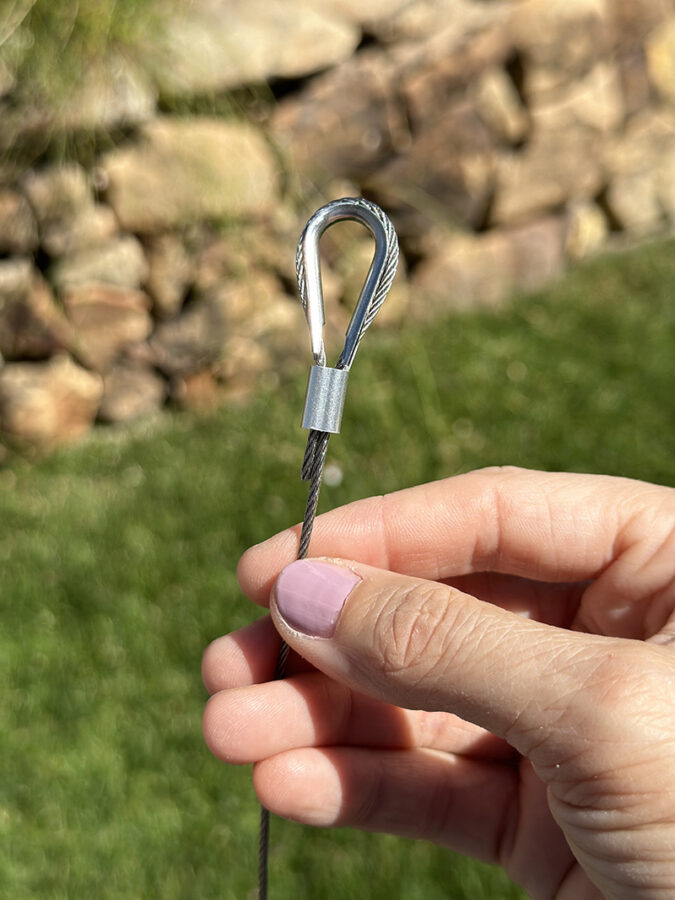
Setup the guide wire
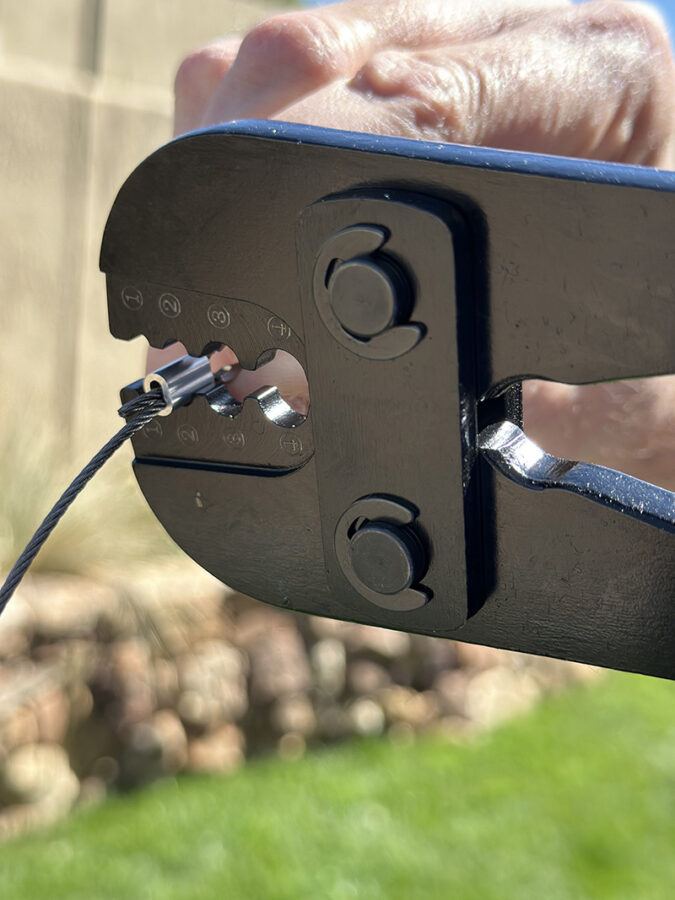
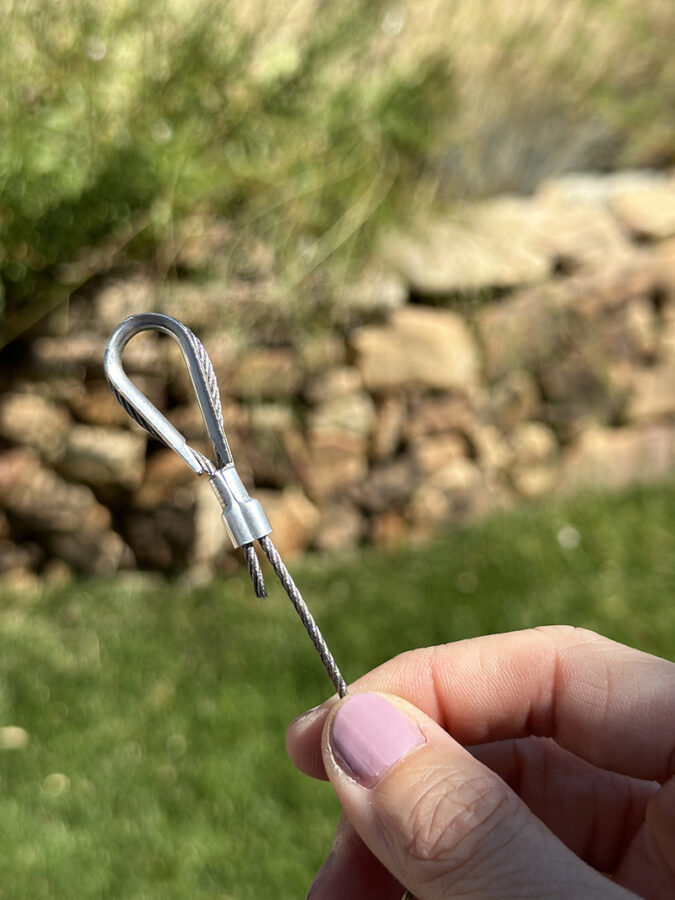
Using a wire cutter, give the wire a clean cut and slide a crimp onto the wire. Loop the end of your wire back through the crimp to create a loop. BEFORE using your crimp tool, slide on a metal horseshoe piece that will add stability to your wire on this high tension area.
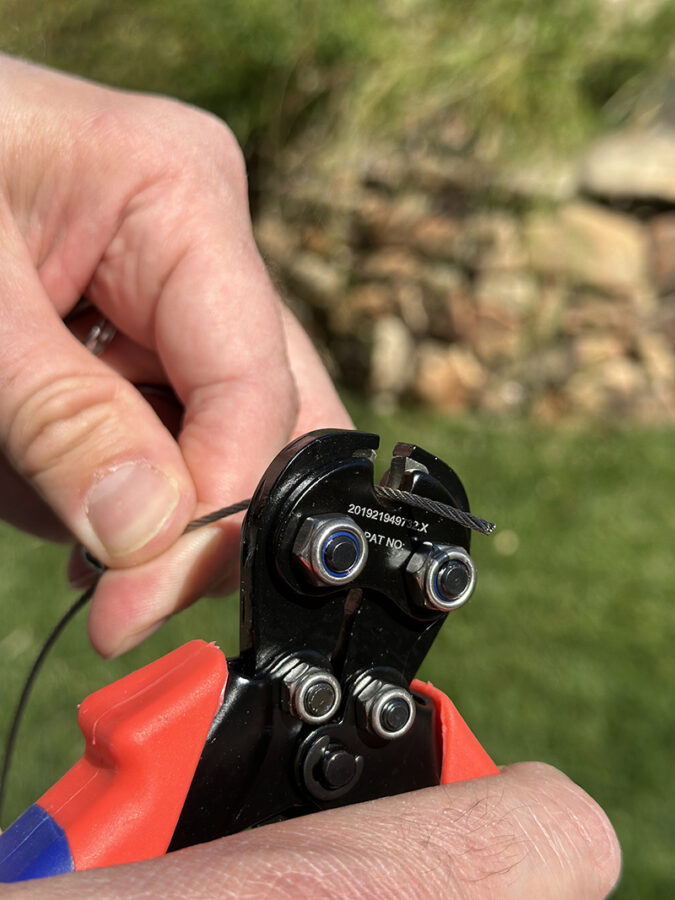
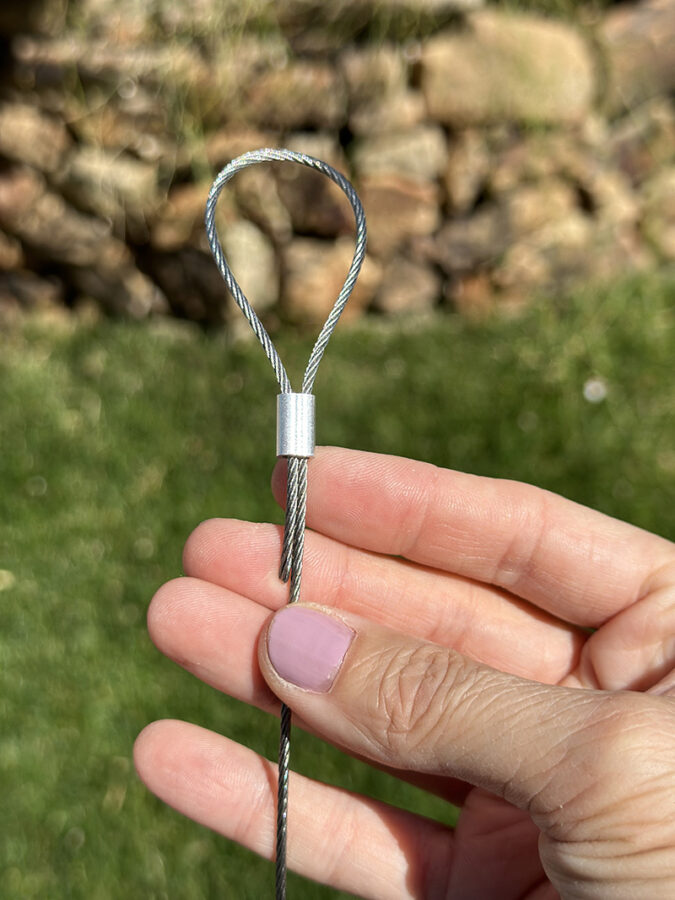
Once the metal horseshoe piece has been added, pull your wire taut and use a wire crimper to secure. The finished product is a strong and secure metal wire loop.
Run the Guide Wire – Attach your stainless steel tension cable to the eyelet hook on the house, stretch it to the top of your newly installed black wall poles and tighten it. Here is the entire guide wire kit.
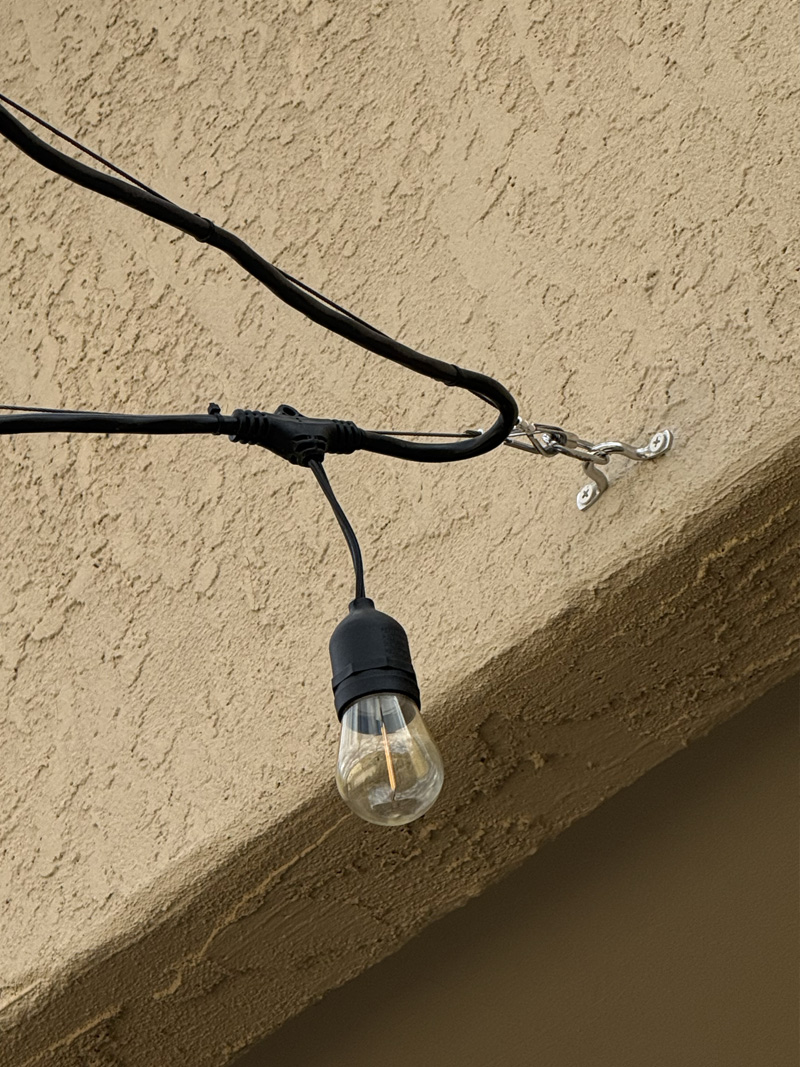
Hang the Strands – Use zip ties or carabiners to clip the bistro light string directly onto the support wire. This ensures your lines stay crisp, level, and perfectly taut above your outdoor living space.
Desert String Lights
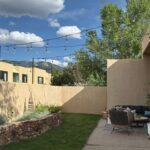
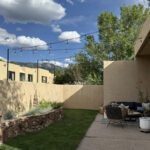
I can hardly tell you how much I love this look desert string light oasis! We spend time out in our yard daily, enjoying the grass, the softness of the plants and the beautiful mountain view just behind us.
The string lights really have become a staple feature in our yard and one that I am glad we put forth the effort to add to our space.
Here is a quick FAQ section about installing the bistro string lights in our yard…
Yes, but you must use a masonry bit and a hammer drill. Always ensure you are anchoring into solid wood framing (for house stucco) or a solid concrete block core (for wall stucco), and seal the hole with exterior silicone caulk to prevent water damage.
The most secure method is using metal conduit clamps secured with masonry sleeve anchors. This distributes the weight of the tall poles evenly across the concrete block and keeps them sturdy during high winds.
If your span is greater than 15-20 feet, a guide wire is highly recommended. It takes the physical tension off the electrical cord, prevents sagging, and vastly extends the lifespan of your lights.
Looking for more outdoor content ideas? Check out these below…