Installing a small Turf Irrigation System
INSIDE : Learn how to green up your yard by installing a small turf irrigation system! You don’t need to hire this project out because with a little research, planning and some DIY work – you can save a ton of money and do it yourself.

This post contains affiliate links. See my full disclosure.
Last summer we turned our concrete and rock (desert) backyard into a lovely little oasis that we actually want to spend time in! I’m not sure why we waited until it was over 100’F here in New Mexico to tackle this project, but what can you do – ha.
In-ground lawn sprinklers deliver a precise amount of water, then automatically shut off and drop out of sight. Learn how much one costs and how to install it yourself.
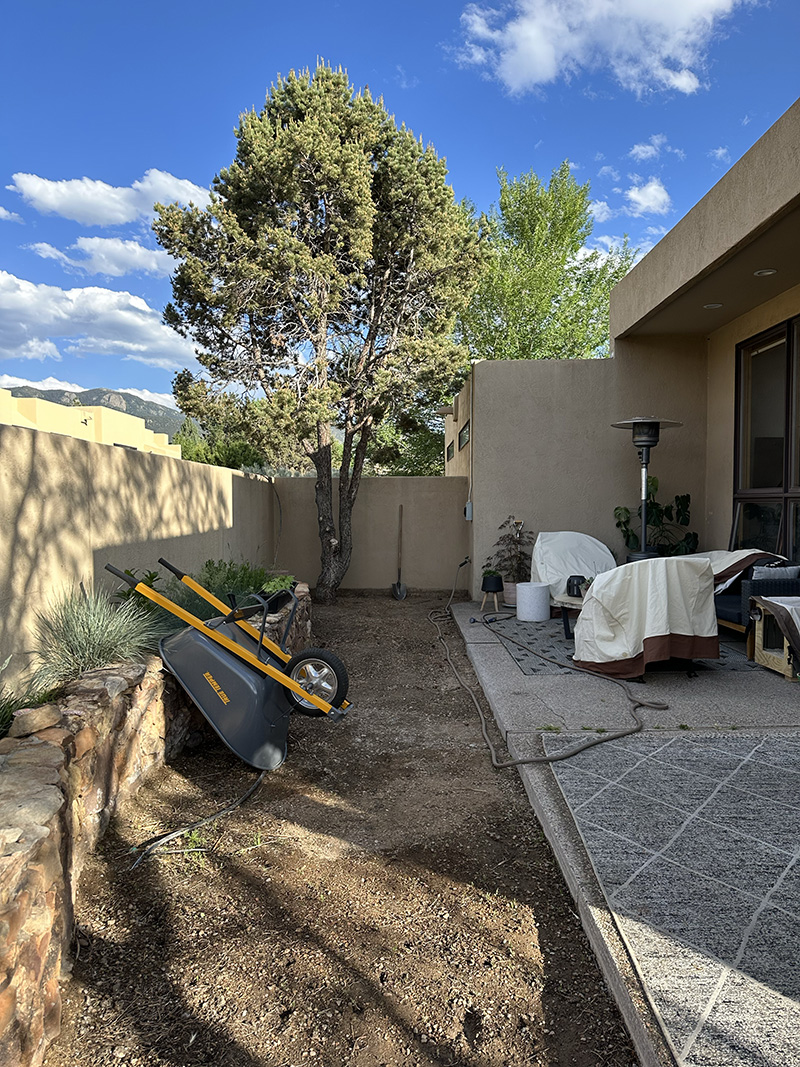
The BEFORE
Here is the before. We have all these odd shaped concrete pads, a pine that constantly leaves sap and pine needles for us to step on and lots of gravel rock that basically grows weeds.
I wanted a just a small section of grass to help soften the space. A place for my kids and dog to run around a bit.
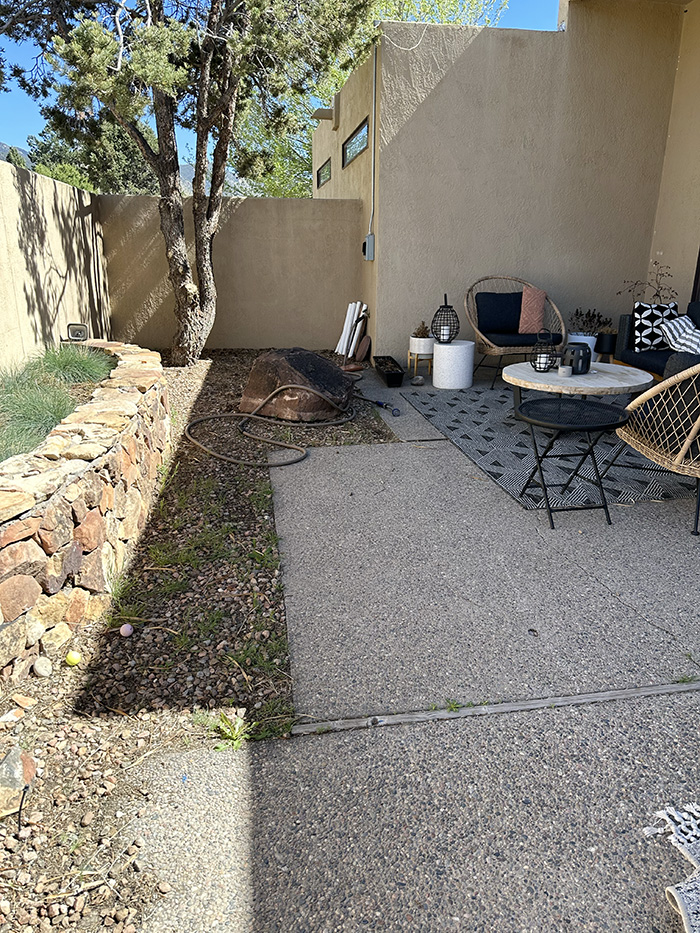
With the right tools and a little elbow grease I knew we could make this backyard space work better for us.
You can see the entire backyard timeline here…
Can you install underground sprinklers yourself?
Installing your own irrigation system is completely doable, if you are willing to put in the time to design it and the required work to do it right.
However do not be misguided, installing an irrigation system takes time if you don’t have a full time crew working on it, but little by little you can work on each step.
From digging trenches to connecting pipes there is a little learning curve to it all, but the components of a sprinkler system are lightweight and easy to install.
Do I need a permit to install a turf irrigation system?
Landscaping does not generally require a permit. However, a permit is needed to install a NEW water supply for an irrigation system if you don’t already have a water supply on your property.
In our case, we already had an irrigation system installed for drip lines and bubblers to various plants, bushes and trees in our yard. So we were able to add another valve and install/connect our lawn sprays to the existing system.
How deep to bury lawn irrigation pipe?
Sprinkler lines should be buried below the grass roots and also deep enough that the sprinkler heads sit flush with the soil surface or slightly above grade. Also make sure to bury your lines deeper than the freeze depth for where you live.
The depth varies depending on factors, but typically ranges from eight to 12 inches.
How to install a grass irrigation system beside a concrete patio
In the scenario of having an area of turf beside of a concrete patio, there are a few things to think about. Our backyard has a large concrete patio space and we wanted the turf to come right up to it.
First thing to mention is you want the water to stay off the concrete as much as possible. Make sure the grade of your turf area slopes AWAY from the concrete.
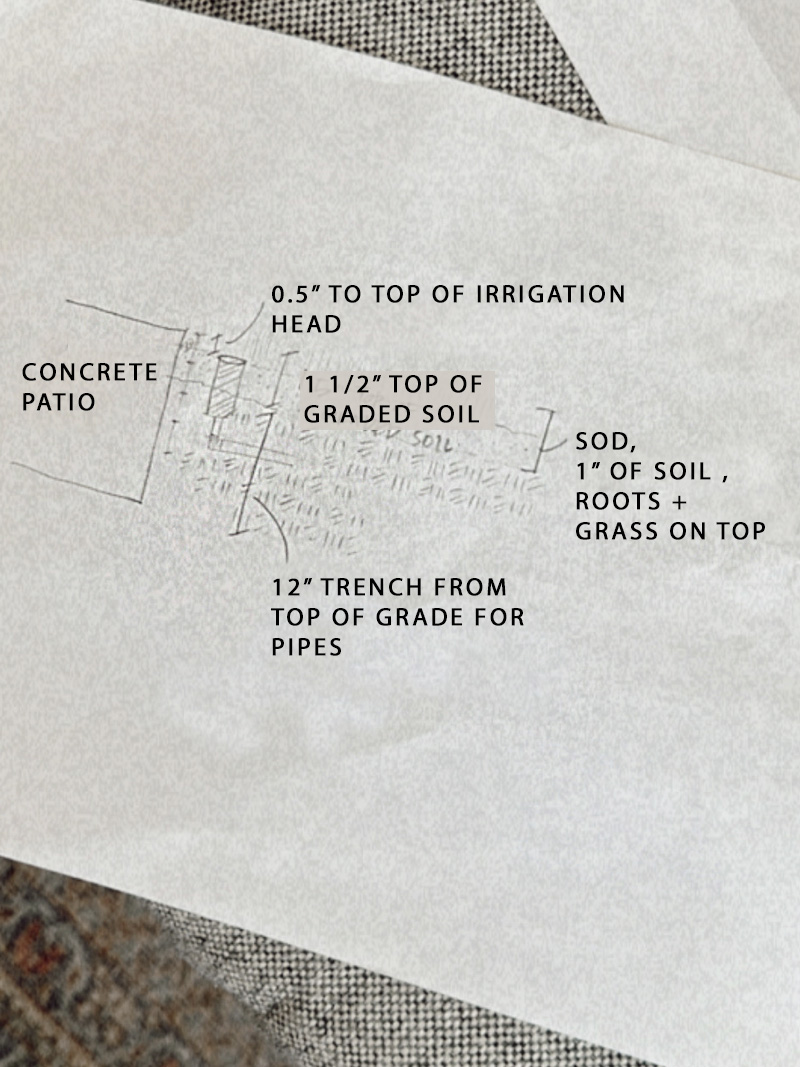
As shown in the image I sketched below, starting at the top of the concrete pad there should be 1/2″ of space to the top of the installed irrigation heads and the patio roughly 1 1/2″ above grade.
The base dirt grade should be about 1” below concrete patio.
Soil height in sod is about 0.5”, so the total soil level will be about 1/2” below concrete after sod is installed.
Top of sprinkler head height should be level with top of soil or 0.5” below concrete.
Turf Sprinkler System Installation
Learn about your Water Supply
The very first thing you need to do when designing an irrigation turf system is learn about your water supply. This will help you know also what type of irrigation components and tools to get (will you need pressure reducing valves or heads or will the normal heads work just fine, etc…).
Here is what you need to know about your point of water supply –
- Size of the water service line
- Water pressure in PSI (pounds per square inch) using a pressure gauge you can attach to the outside faucet
- Size of the water service line
Make a plan
Having a plan is absolutely essential when installing a turf irrigation system. Start by drawing out your property/backyard/turf area. You can do this on paper with a pencil and measuring tape or using Google’s Sketchup project like I did below.
The important things to make note and dimension are the overall dimensions of your turf area and any surrounding trees, walls, patios, shrubs, etc… the items that are permanent and staying.
If you have an unusual shaped turf area, be sure to take measurements roughly every 5′ or so. This will help when figuring out what sized irrigation heads you need.
Homeowner Irrigation design vs. Irrigation supply company design
Homeowner Irrigation design
Now, it is at this step that you have two choices. You can go to an irrigation supplier’s website (Rainbird is my favorite) and design your irrigation system yourself OR you can take your water supply information and your dimensioned plan to a local irrigation supply company and have them assist you in your design.
Since I was a practicing landscape architect for 8 years, I did my own design. I knew I wanted to use Rainbird Popup Spray heads. So, it’s as simple as picking out various radii based on the dimensions our turf area was going to be and then deciding if they would be quarter heads (on the edges), half round heads (all the middle irrigation heads) or a few 3/4″ adjustable heads (weird areas that needed a little flexibility).
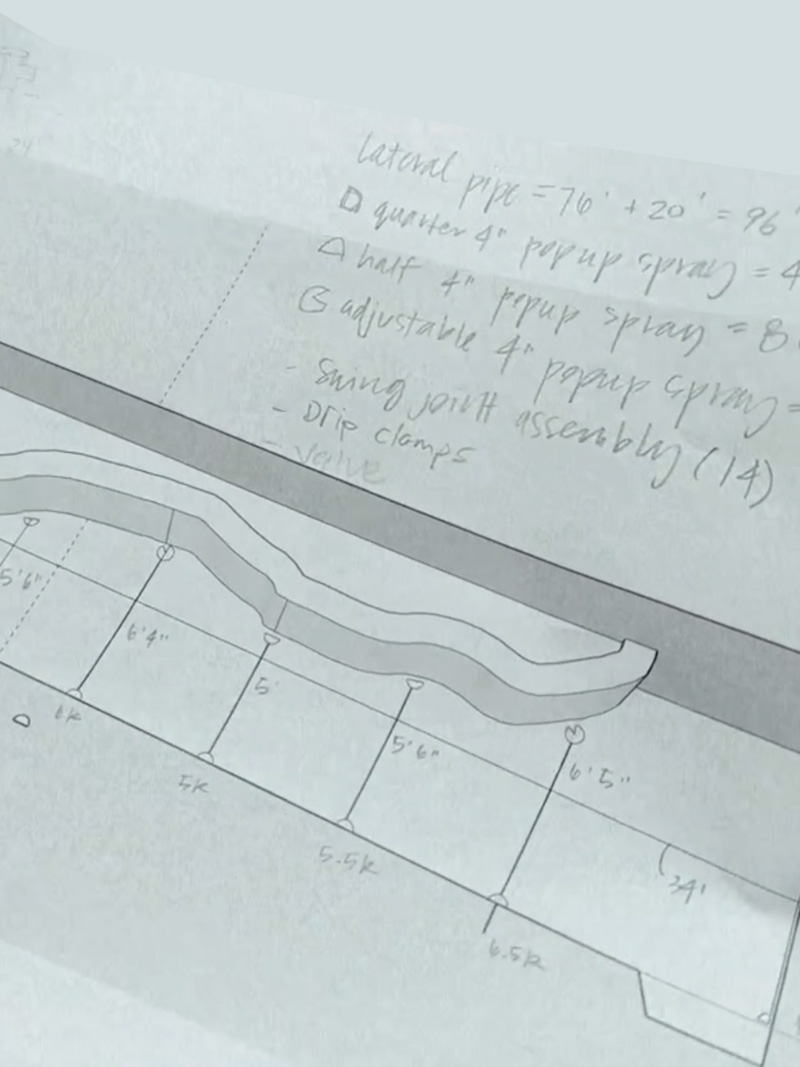
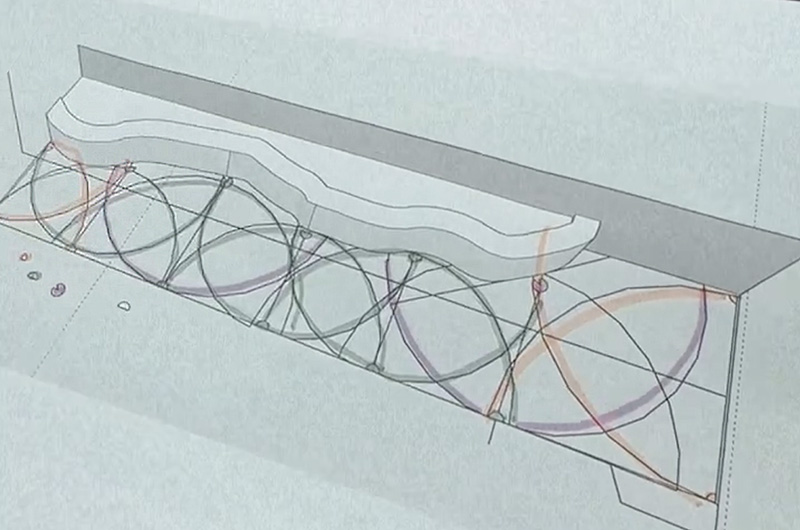
Another tip if you are designing your own system is this, ALWAYS DESIGN FOR HEAD TO HEAD COVERAGE. You want every single head to spray out (have it’s radii touching) the irrigation head beside it. That will provide adequate coverage and a healthy lawn.
You can see the head to head coverage in my sketch below for our irrigation system.
Irrigation supply company design
If you move forward with having an irrigation supplier design your turn irrigation plan they will provide a design for you. You can give them a sketch and they will send back a detailed plan, including specific instructions as well as a list of what you’ll need to buy at the hardware store.
Buying supplies
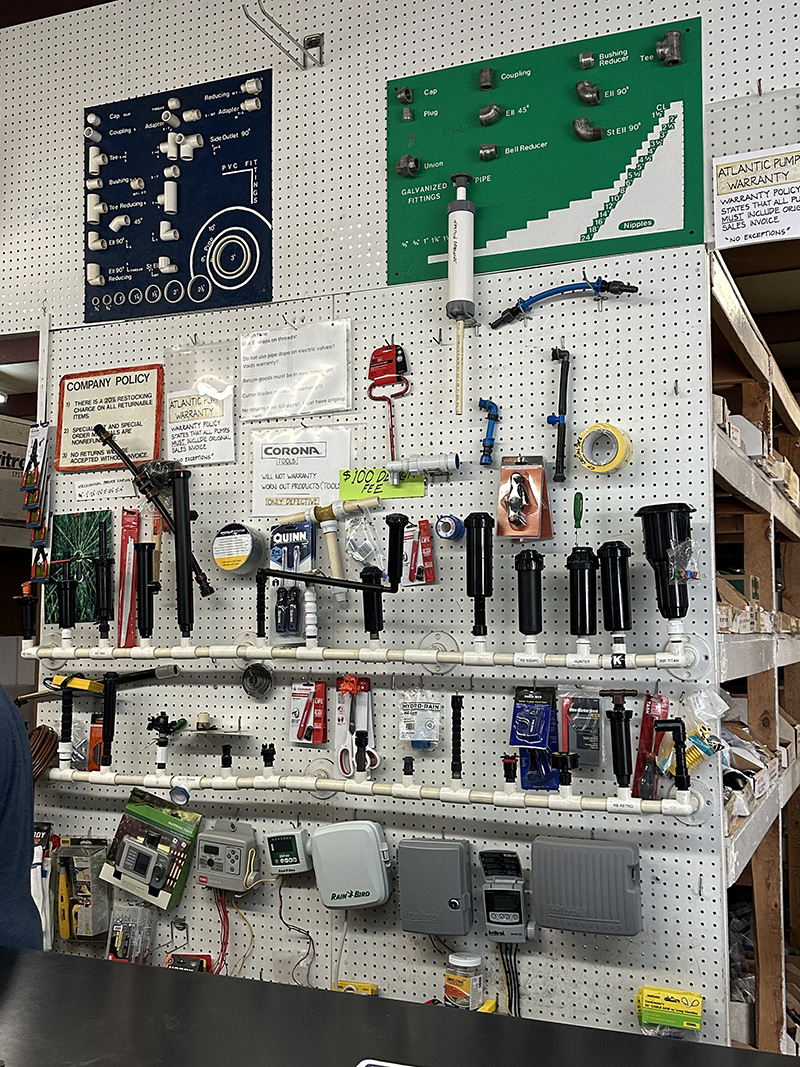
Once you have your irrigation plan and the supply list of your irrigation system, it’s time to gather the components of your system.
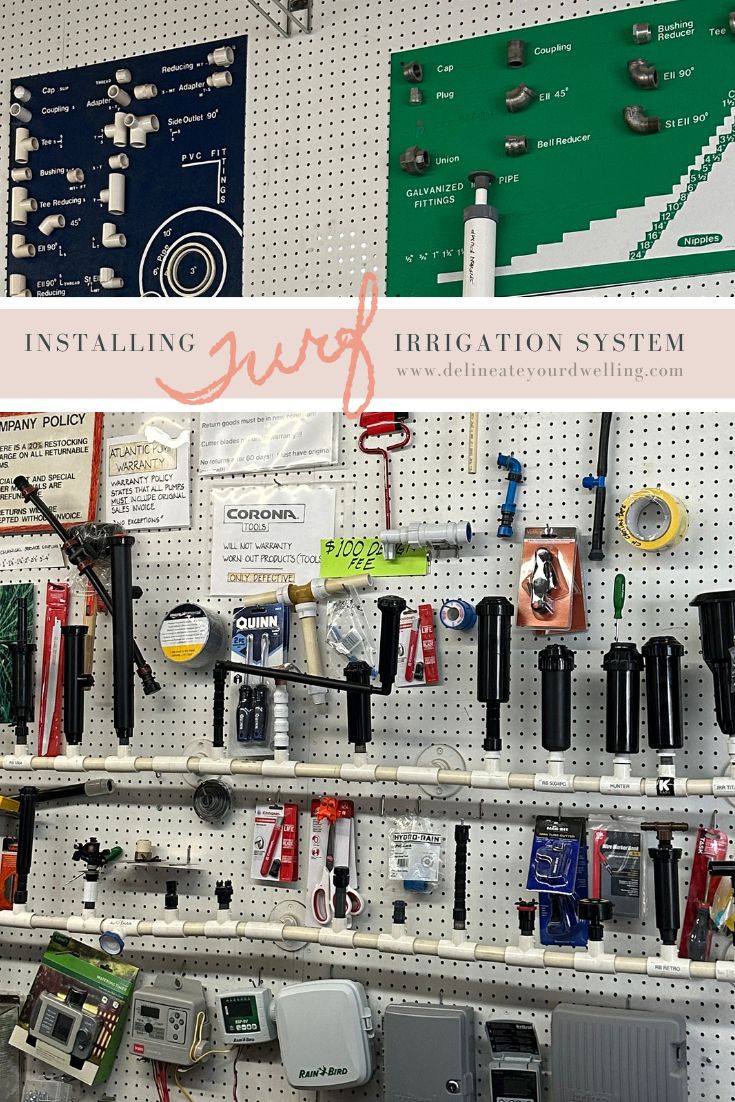
Every sprinkler system has the following main parts :
Rainbird is my favorite irrigation brand. There are other good ones, but they are the best in my opinion.
- Polyvinyl (PVC) pipe or polyethylene pipe
- PVC Schedule 40 couplings (You may need 90′, Tee Fittings or Cross Fittings based on your design)
- Control valves
- Irrigation risers
- PTFE Plumber’s Thread Tape
- Sprinkler heads
- Automatic timer
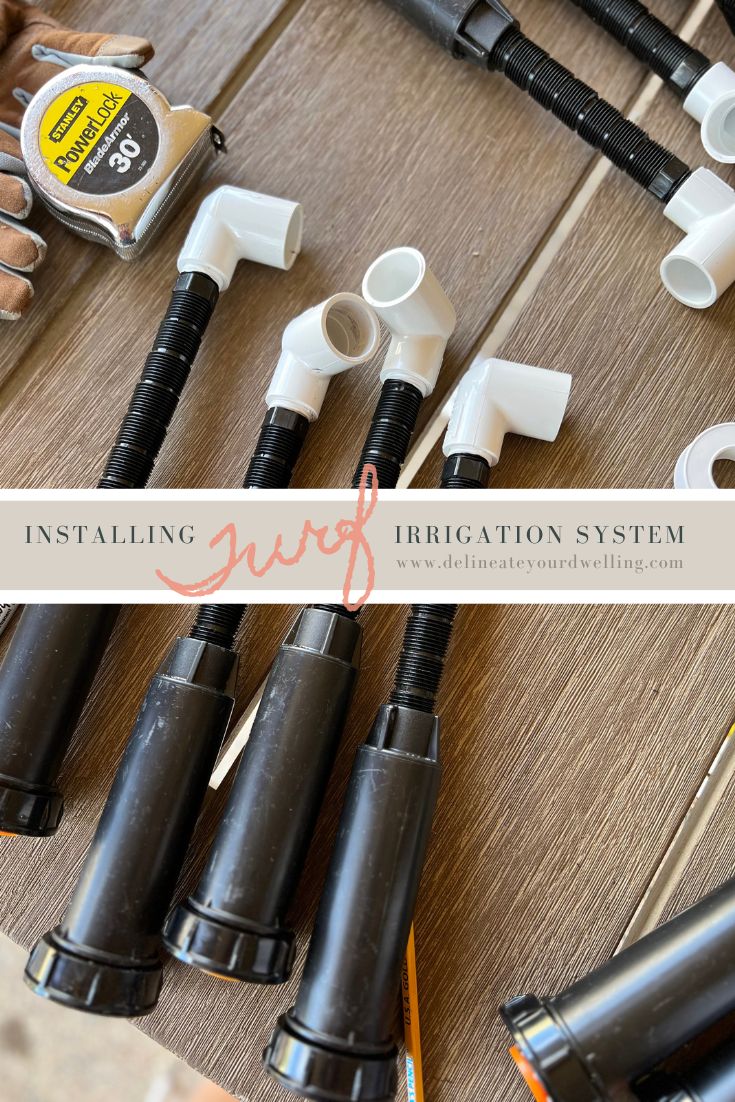
Other tools needed to install a Turf Irrigation system :
- Trench Shovel (or Rented Trencher)
- String + Stakes
- Level
- PVC pipe cuter
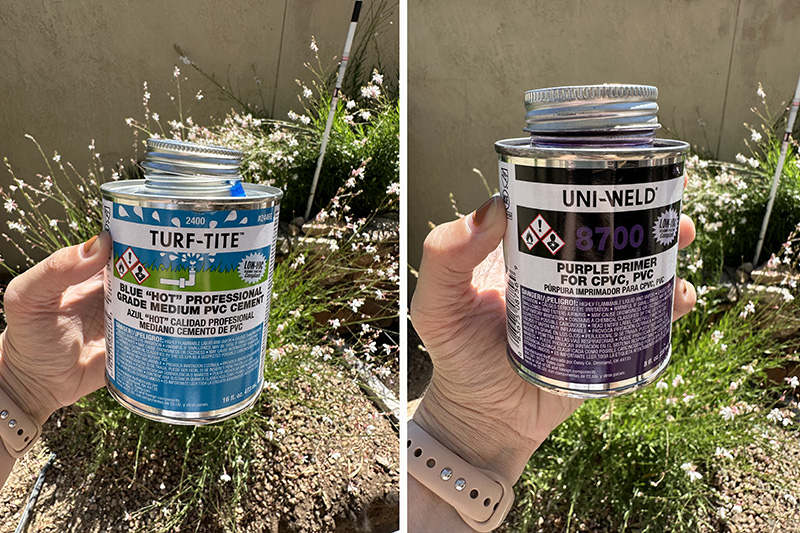
- Purple PVC Primer
- Turf Tite PVC glue
Guide Your Installation Using String and Stakes
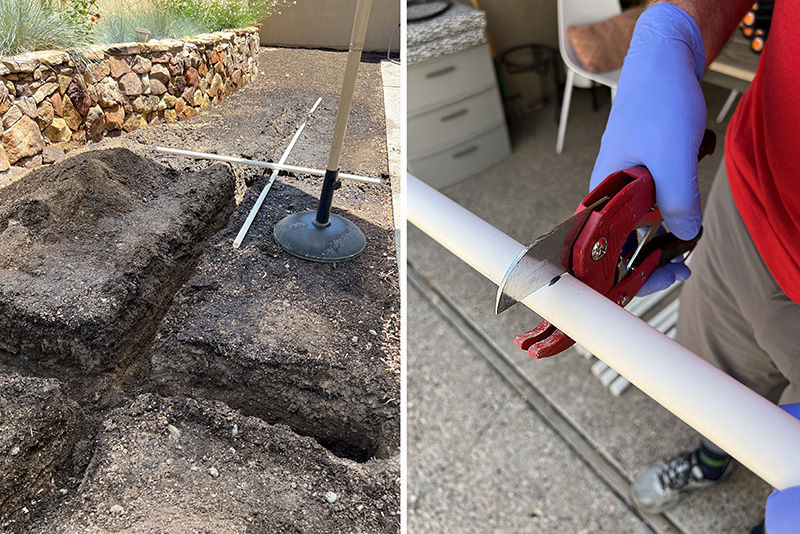
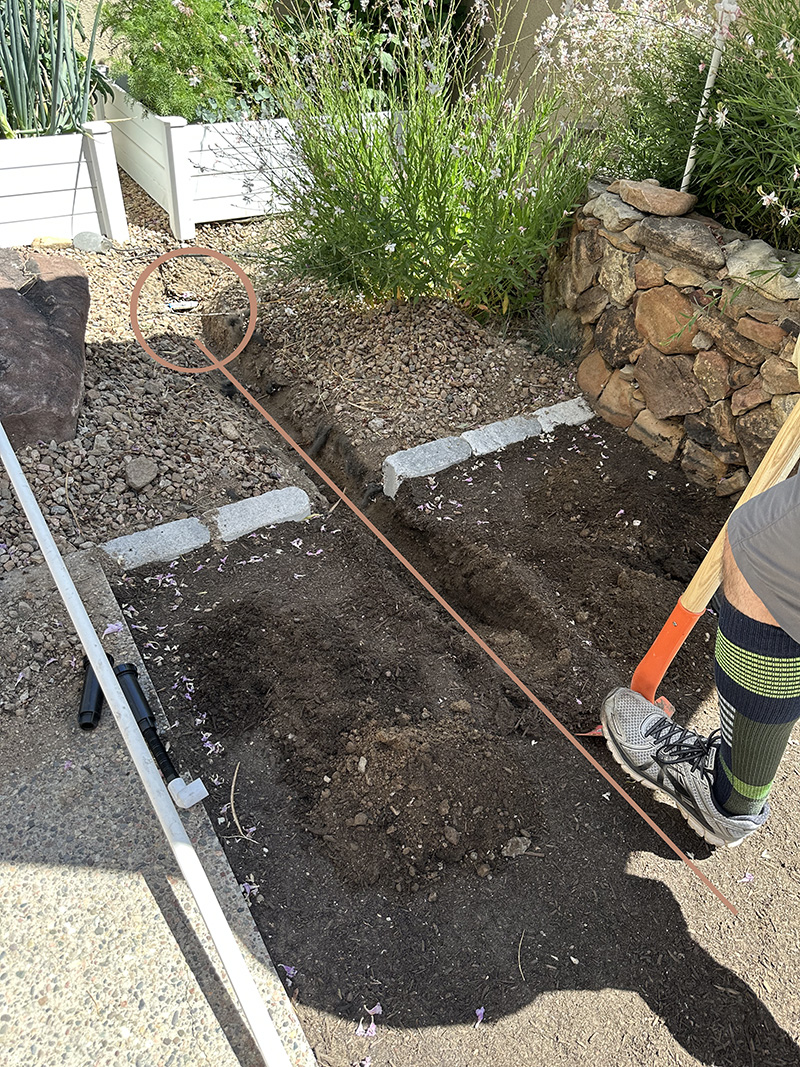
Using flags or stakes in your yard to mark where each sprinkler will go is so helpful as you begin to install your turf irrigation system. You can also use string tied to stakes to show where the pipe will lay.
We used our uncut pvp lateral pipe to delineate the first trench we would need to make, as you can see below.
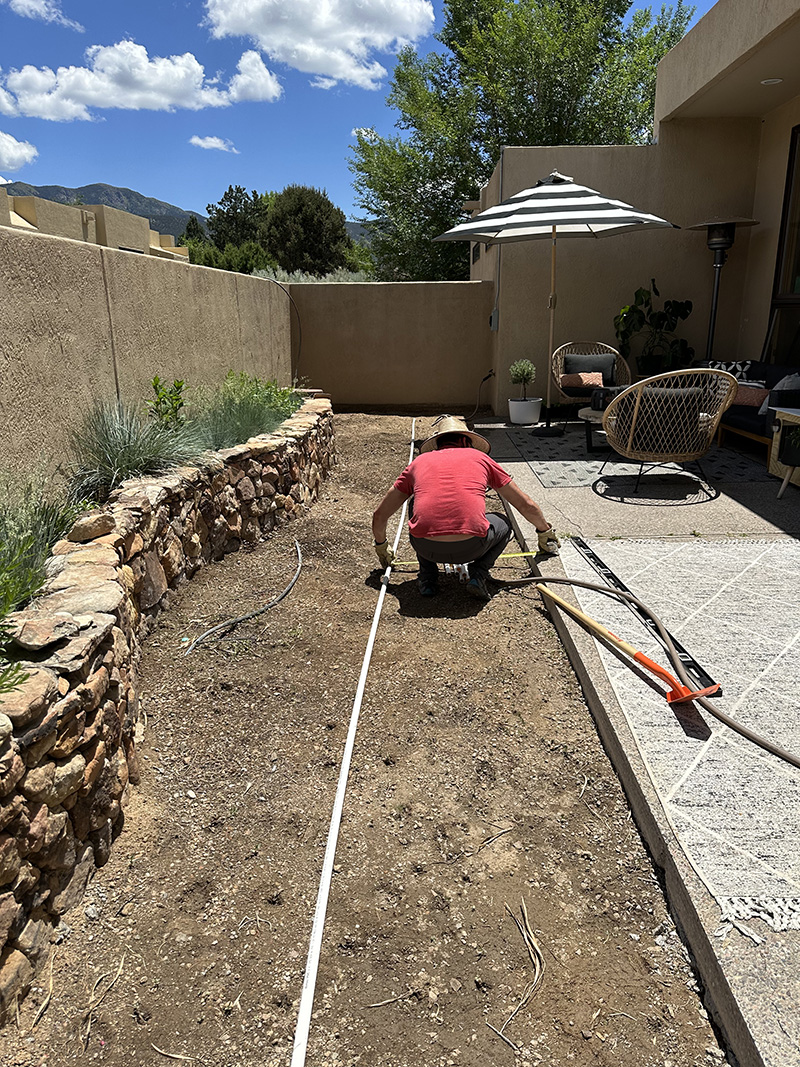
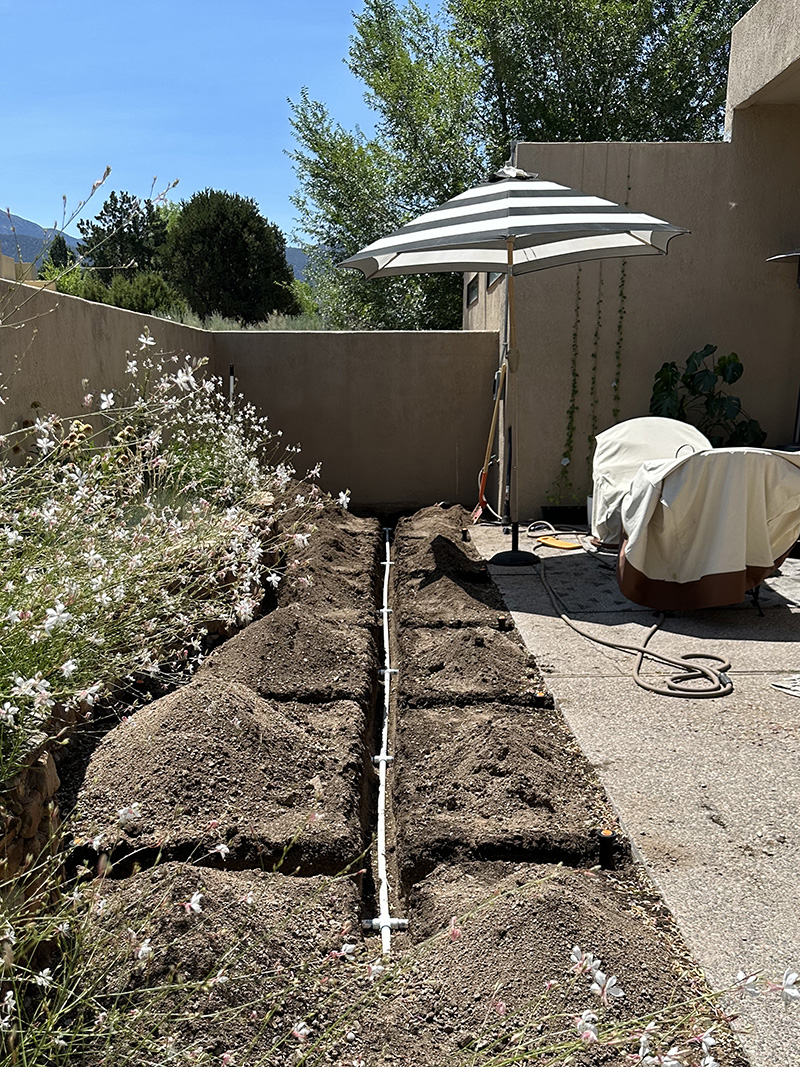
Dig the Trenches
Use the string as a guideline as you dig your trench. It should be at least 4 inches wide and 8 to 12 inches deep.
We used a trench shovel since our trench length was 30′ and the side runs were ranging from 4′-6′ max. Using a rented trencher is a good idea for larger lengths, as this was tedious work… especially with our DRY HARD New Mexico soil.
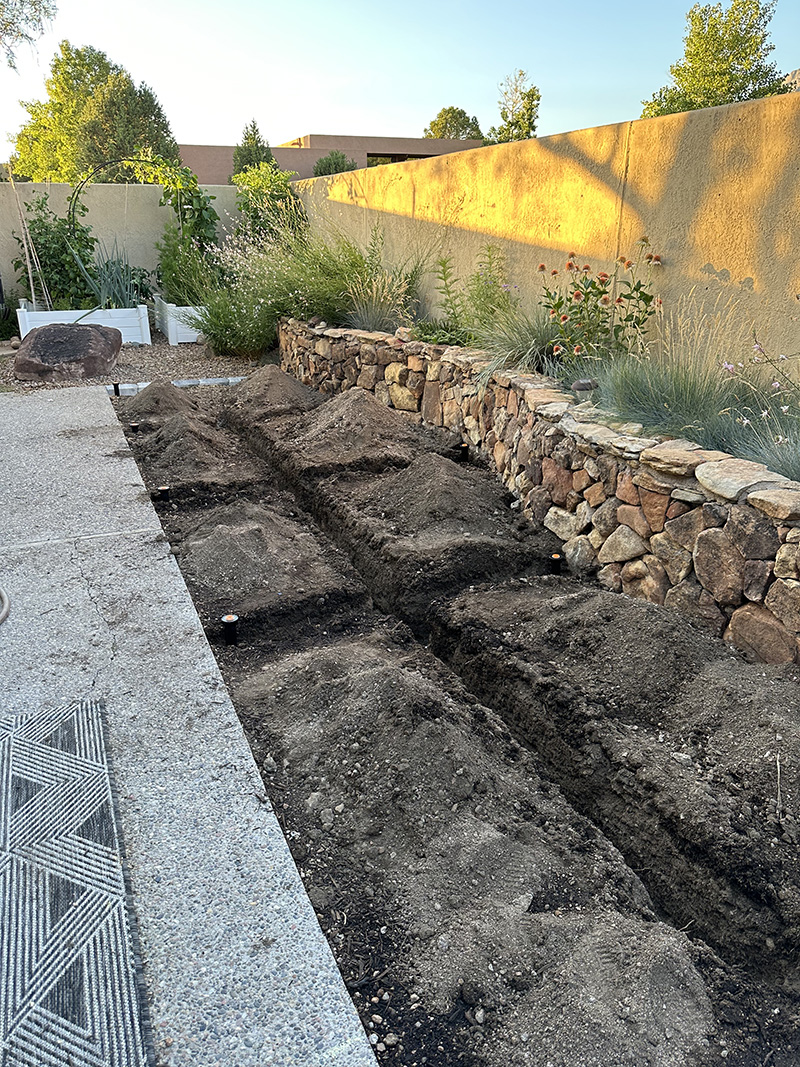
Place the Pipes in the Trenches and Connect
Following your irrigation plan, measure, cut and lay the PVC pipe in all the trenches leading from the main lateral line.
Note, we started at our main connection to the waterline and worked out from there going in 5′ increments due to the space of our heads. Example, we cut 5′ of lateral pvc line and then cut the two branching off lines with irrigation sprinkler heads attached to them. We then would install as written below all three of those components together and then move on to the next 5′ increment.
When cutting be sure to use a pvc cuter tool like shown below, as it makes the job so much easier! The cuts are straight and it really takes minimal effort (I found it sort of fun to be honest!).
As you install the branches from the main lateral line heading to a sprinkler head, splice in tee couplings. Join all pipe sections with couplings (whichever are appropriate to your design), adding Purple Primer first and then Turf Tite PVC cement. Work quickly because both the purple and blue dry very quickly and have paper towels nearby to clean up messes.
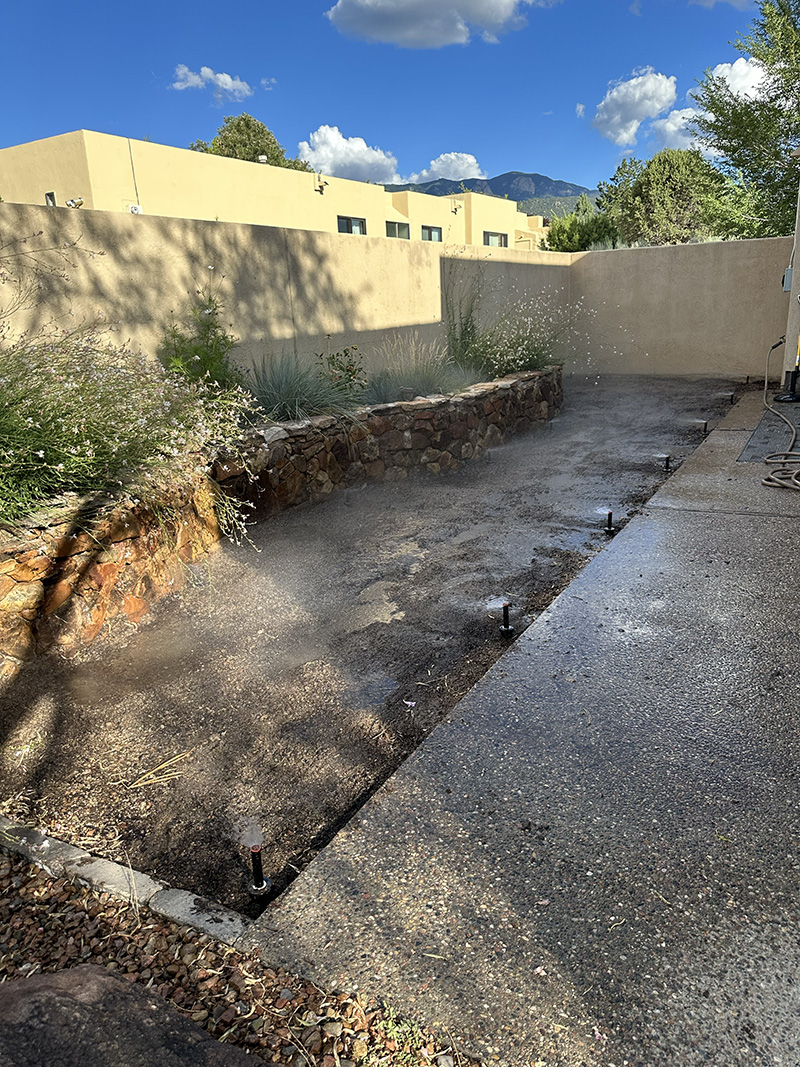
Install the Pop-Up Sprinklers
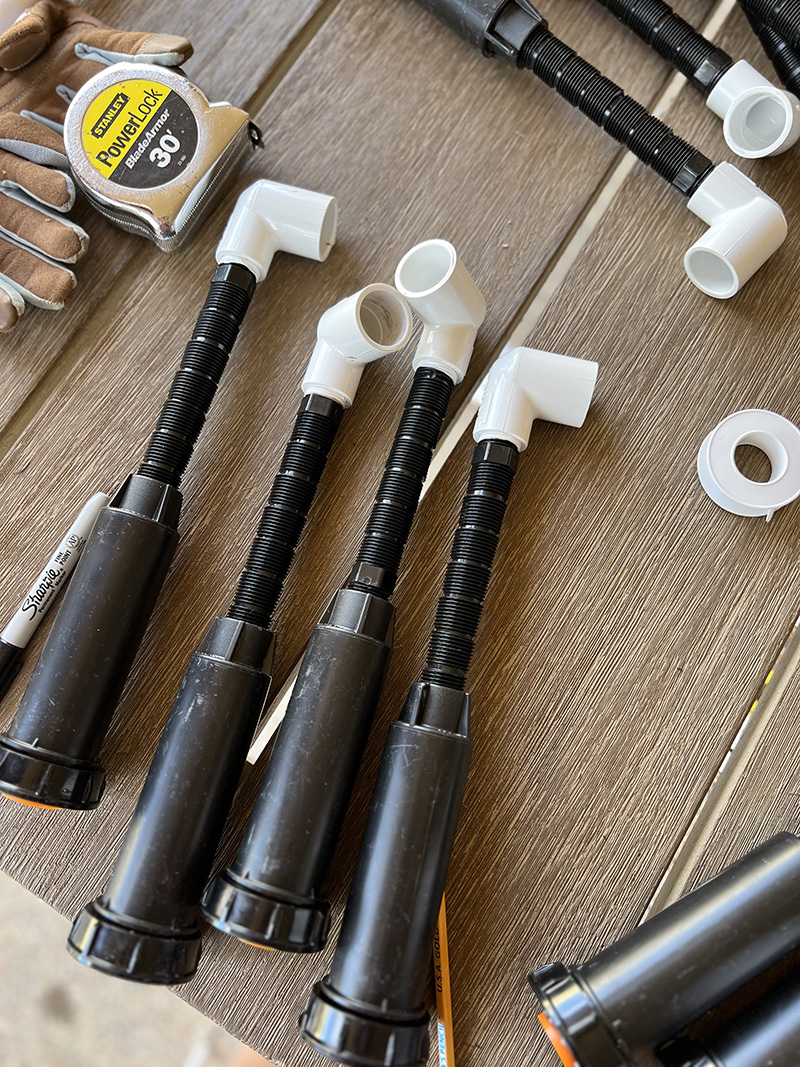
As you are laying, cutting and connect pipes in the trenches you also will be installing the pop-up sprinklers to your branched or tee-d off lines.
Start by first putting together your pop-up sprinkler components. Add PTFE Plumber’s Thread Tape to the riser and then screw in to your pop-up head.
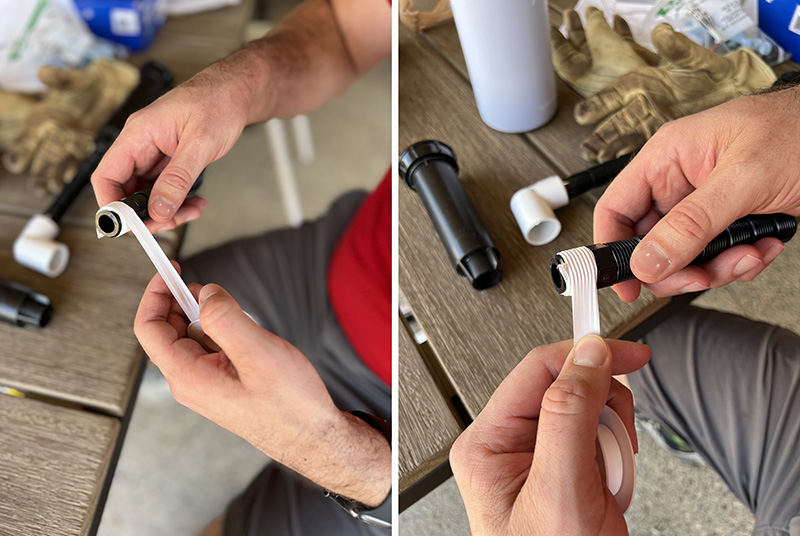
Add plumber’s tape to the other side of the riser and add on your 90′ coupling, no glue is needed. Below is what a completed pop-up sprinkler head should look like.
Now that your head components are installed, you can remove the cap from the sprinkler and install the appropriate spray nozzle, as indicated on the plan.
Ensure the nozzles are facing the right direction and that they are just above the soil level for best results. To hold them in place, pack soil firmly around the heads.
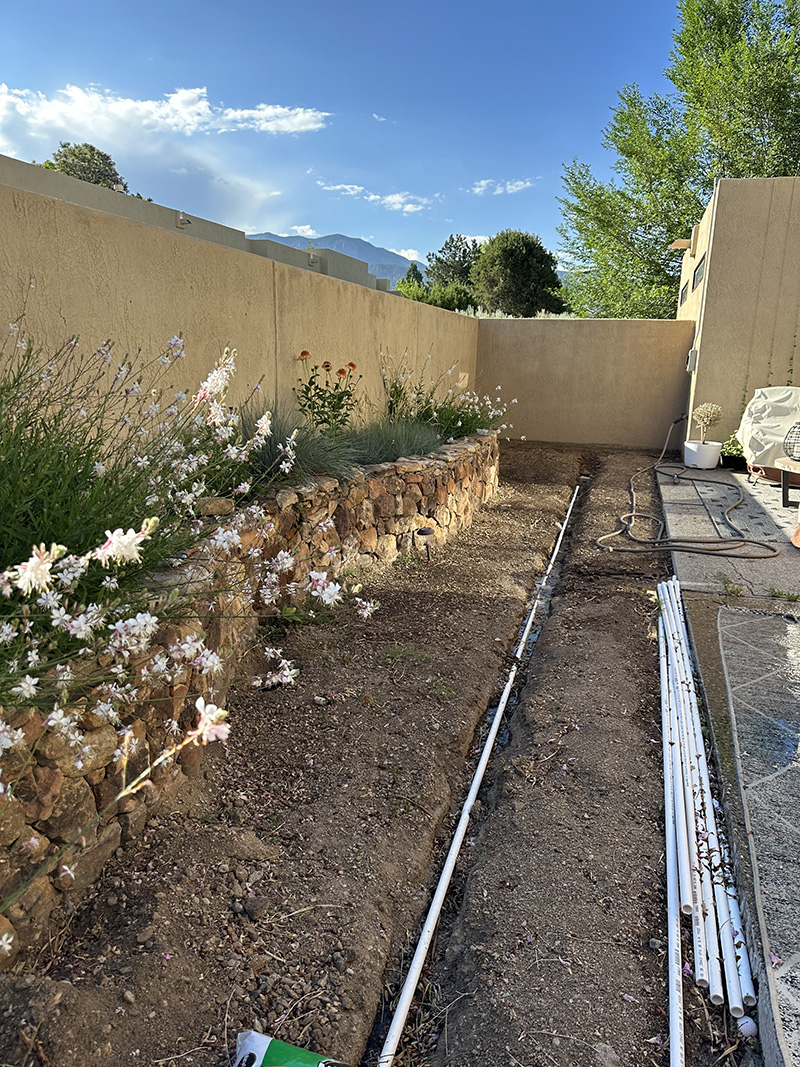
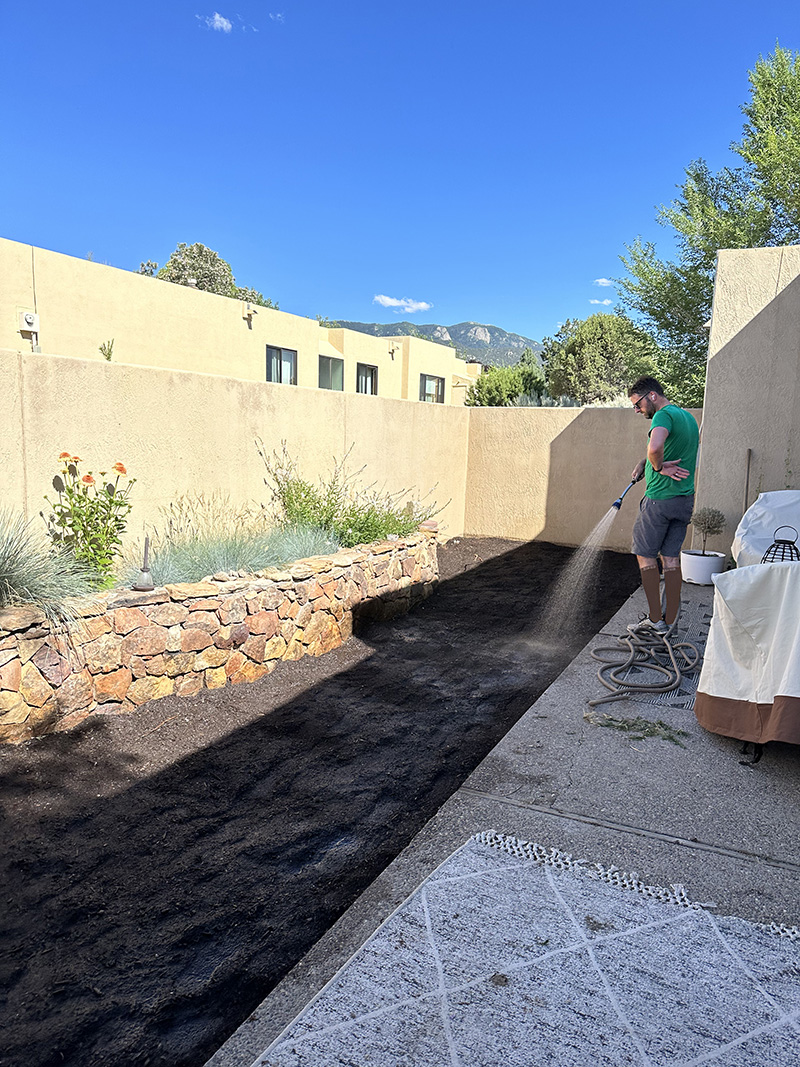
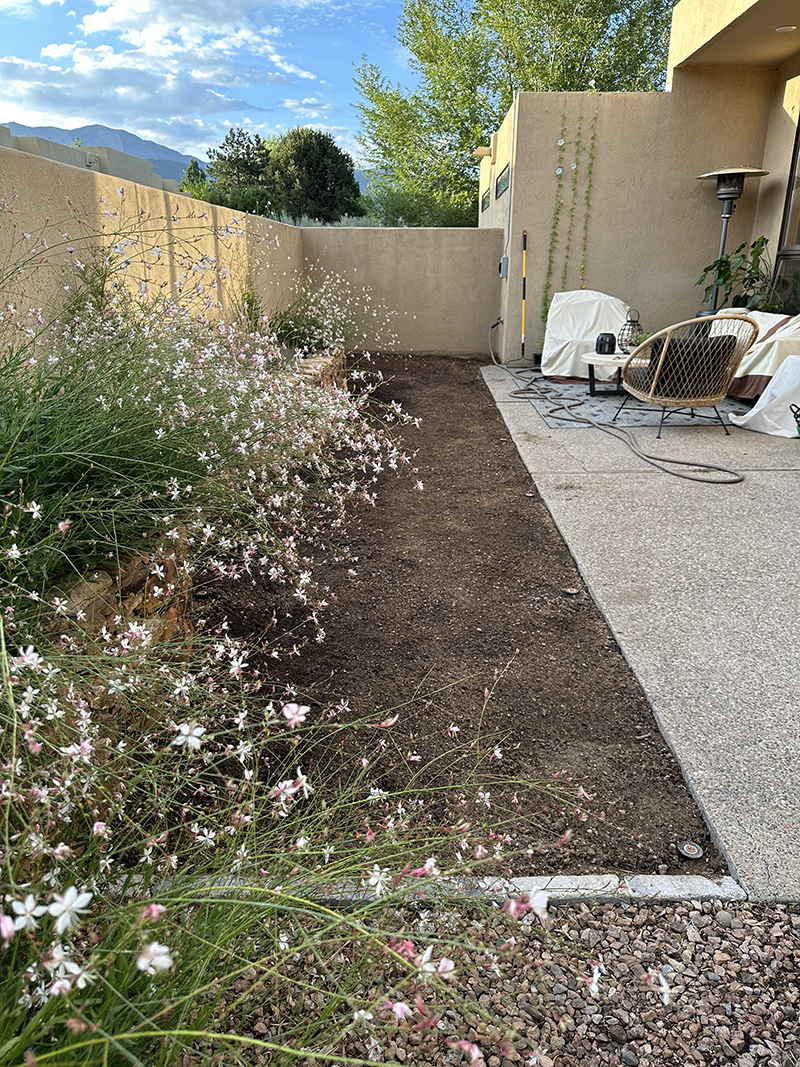
Continue this process until the whole turf area is installed. Once it has been all installed you can back fill your trenches and using a hose, sprinkle water over the trenches to help compact the ground again so there isn’t any divots.
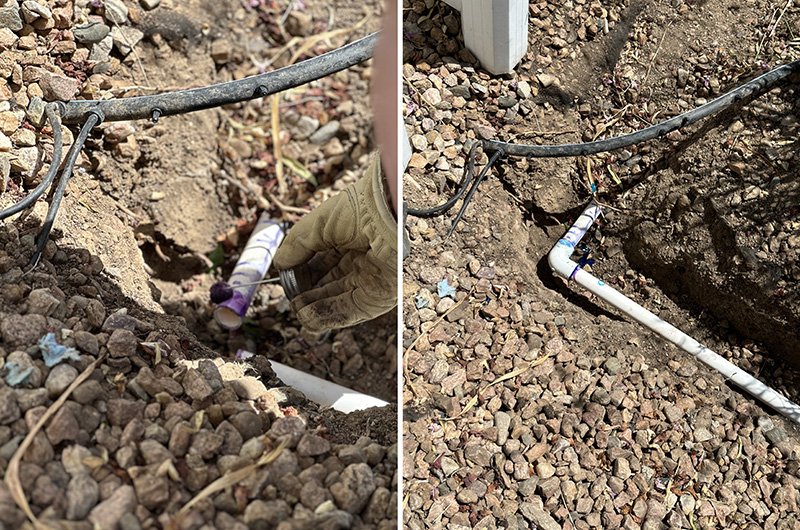
Make the Water Connection
It was finally time for us to connect the turf system to our water source. You can see in the image below where we were going to make that connection.
Just like when installing the spray heads, it was the same technics for connecting to our water line. However, when doing this step, be sure to turn off your water to the house at the meter first. Cut into the main water line and splice in a tee fitting with PVC cement and primer.
We used a 45′ coupling, added purple primer and then the blue Turf Tite glue.
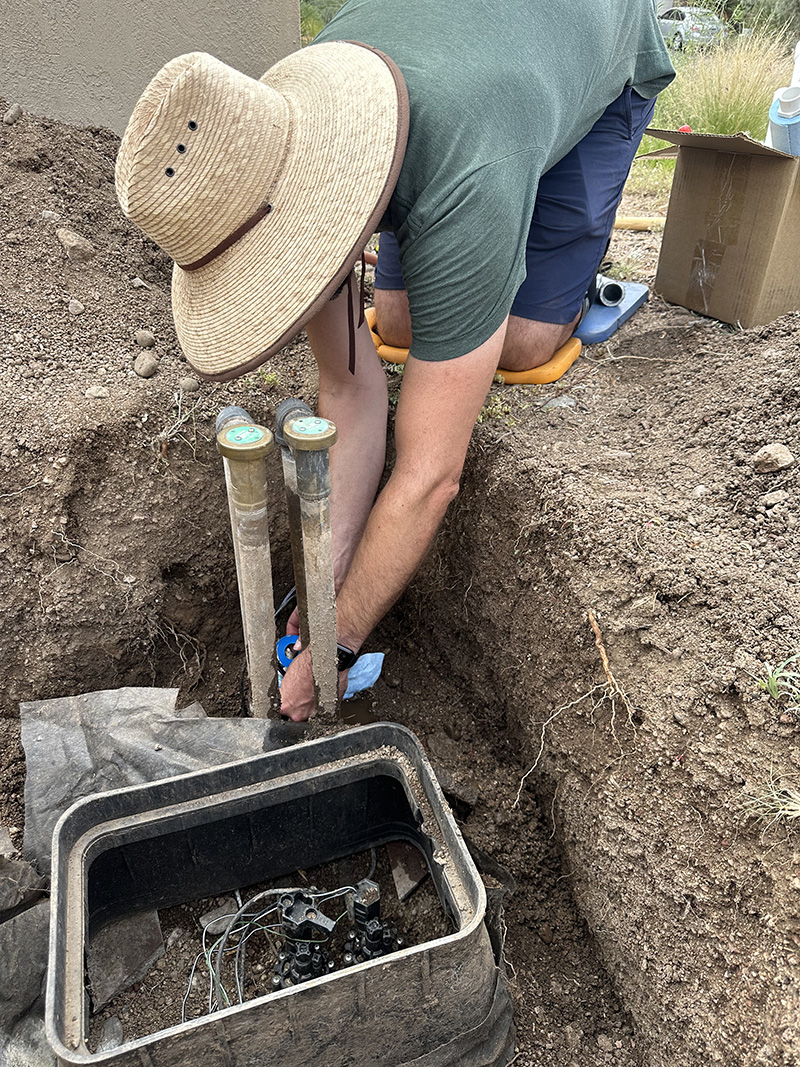
The connection to the water source is completed and now we needed to add a new control valve to our existing irrigation system.

Make sure you have room in your irrigation box for another zone valve. You may need to size up your box if not, but this is something that can be discussed when purchasing your irrigation components at your local irrigation supplier.
Connect your control valve box directly to the supply line, the water should still be turned off until all connections have been made. You can use multiple valves when controlling the water flow to various areas of your turf. Since our turf area was small, we only needed one valve for it.
Note : It’s always a good idea to have separate zones for each type of watering happening in your yard. A zone for drip irrigation for smaller plants and/or shrubs, a zone for bubblers for trees and a zone for turf pop-up spray. Instead of overextend a single zone, it’s better to add another line to keep your yard from getting overwatered and having the flexibility to water things at different times and amounts.
If you don’t have a valve box…
Dig a trench from the main water line to the valve box location, as indicated on your plan. At the end, dig a hole about 18 inches deep and 2 to 3 feet long.
Line the hole with 2 inches of gravel, then set the valve box into it. The box lid should be flush with the grass. Next, following the manufacturer’s directions, glue together the manifold and attach the zone valves. Set the manifold in the valve box.
Run 1-inch schedule 40 PVC pipe from the main water line to a backflow-prevention device and then connect it to the manifold. Dig a shallow trench from the valve box to the location for the timer, according to your plan. Lay the 24-volt underground wire in the trench and connect it to the wires leading from each valve.
A little guidelines for the valve box installation step…
- Place the valve box in a hole that’s lined with 2 inches of gravel.
- Glue the manifold together as you attach the zone valves. Be sure to place the manifold in the valve box.
- Add a 1 inch schedule 40 PVC pipe from the main water supply line to a backflow preventer before you connect it to the manifold.
- Finish off by digging a shallow trench from the valve box to the timer, as per your plan. Lay the wire in the trench and connect it to the wires of each valve.
If you are uncomfortable with this step, you can always call in a professional plumber to tap into the main line for you.
Run your irrigation system
Once your connections have been made and everything installed, it’s time to test to see if your system works correctly! Turn on the valve either manually at the box or at your irrigation controller and see how it looks!
Flush the system
This step is to ensure you clean out the irrigation system of any debris that got caught in the pipes during installation. If left unchecked, the heads can get clogged and not function properly.
Remove the nozzles from the sprinkler heads, turn on the water for a moment and let the water run until all the dirt has flowed out. FYI, this will be like wild geysers… be warned – ha.
Connect the Timer Wires
Mount the programmable timer on a nearby wall. Strip the insulation from the ends of the 24-volt wires that lead from the zone valves to the timer. Next, attach the wires to the timer terminals, as shown in the manufacturer’s instructions.
Hire a licensed electrician to run power to the timer, if necessary.
Set the timer and run a test to make sure that each zone and all the sprinklers are operating properly. Finally, adjust any nozzles that are spraying off course.
Irrigation Running Tips
Watering your yard at night can bring on fungus growth. Running your irrigation system in the morning will help.
Installing a rain shutoff device or humidity sensor to stop unnecessary watering when your yard already has enough moisture.
Make sure your sprinkler head only covers lawns and gardens. Poorly placed irrigation systems waste up to four billion gallons of water every day.
Don’t use your sprinkler when it’s raining.
Don’t let your system waste water by running into the streets or drains.
If you are looking on how to prep your soil for sod, check out this post!