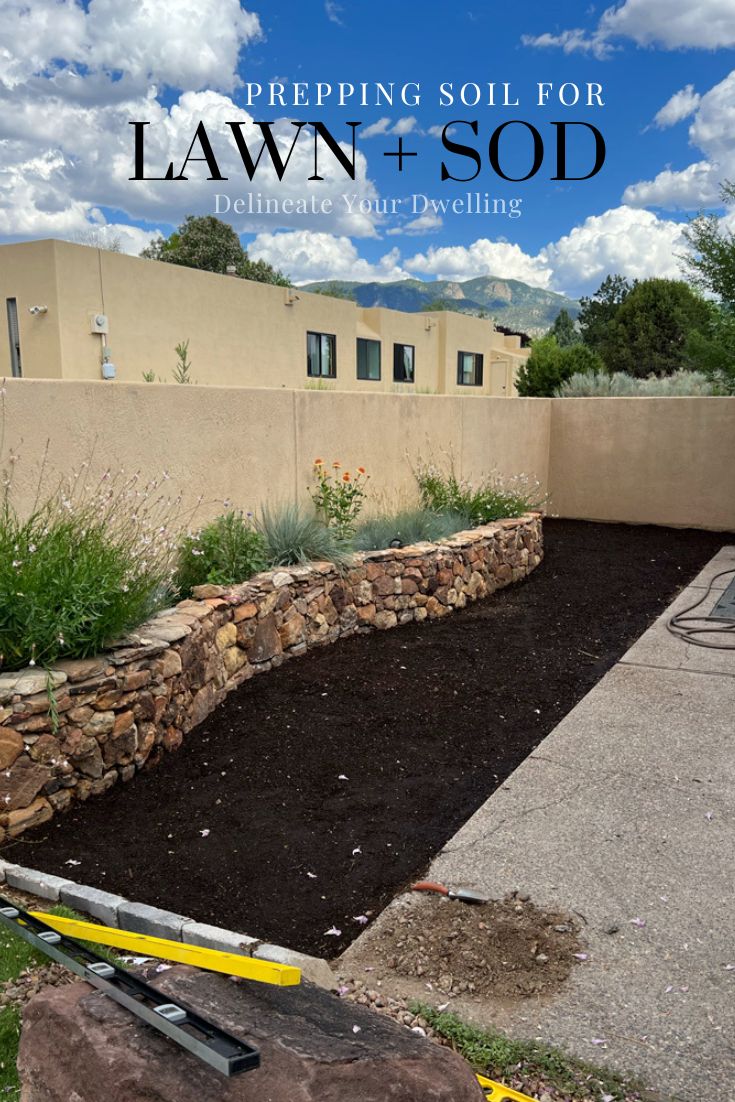
Prepping soil for Sod
INSIDE : See 10 tips for preparing and prepping soil for sod installation. Before installing turf at your home, there are a few easy steps to help get your dirt ready for new grass. Learn these soil prep practices for turf grass success!
This post may contain affiliate links. See full disclosure here.
After six years, we are finally working on improving our backyard space! Since we live in the Southwest our yard is decently sized, but we have a walled courtyard surrounding the main living outdoor space.
We have been busy this summer removing hardscape and working towards more green spaces!
You can see the entire project timeline here…
Simple Outdoor Stone Wall Repair
How to Cut Patio Concrete
Removing a Concrete Patio by Hand
Prepping Soil for Sod
Installing a Small Turf Irrigation System
Installing a Small Sod Area
Installing Bistro Lights in your Backyard

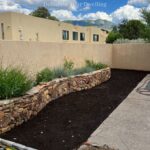
The main way we are adding more green to our yard is by installing sod. This is a landscape task that anyone can do – however it takes a bit of time and effort to accomplish.
One of the main to-do things you have to do before adding in grass to your yard, is prepping your soil. If you have poor soil quality, then you can expect your grass to fail and no one wants that.
Let’s get into what supplies you need for soil prep.
Supplies needed for soil prep
Now let’s go more in depth into the steps you should take to prep your dirt for sod.
10 steps to prepare your backyard ground for sod
Step 1 Clear your yard
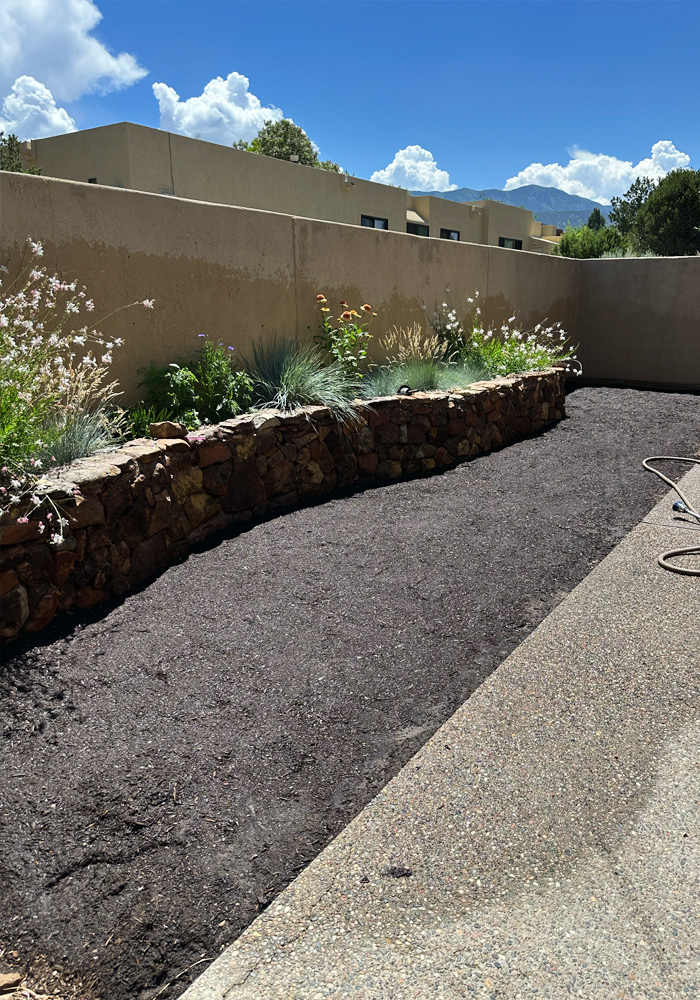
We had just removed two very large concrete patio sections (How to cut a Patio Concrete), so we first made sure to clear all concrete rubble, larger rocks and even bigger sticks.
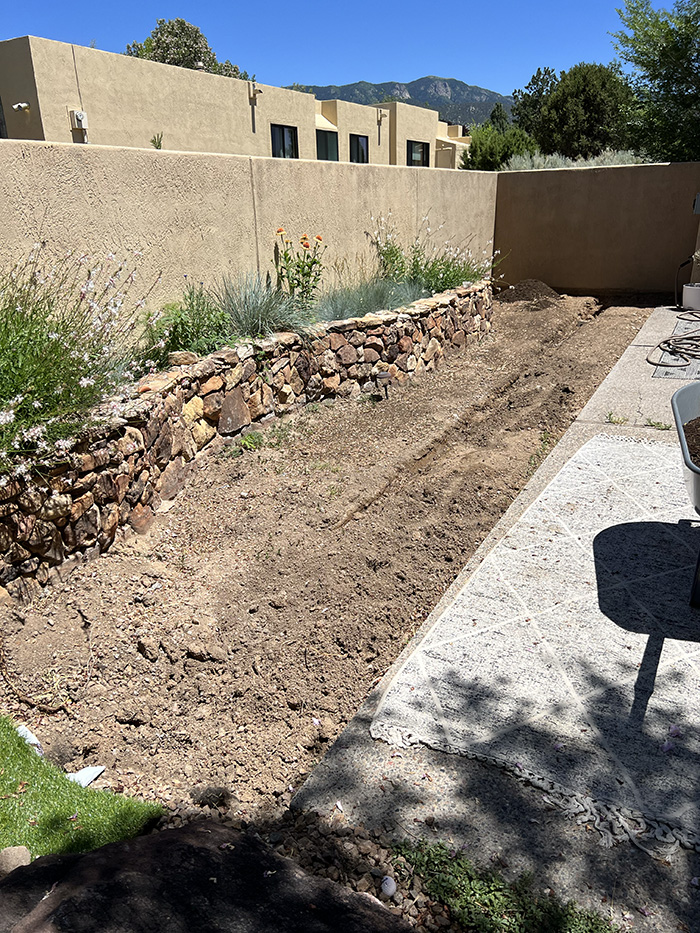
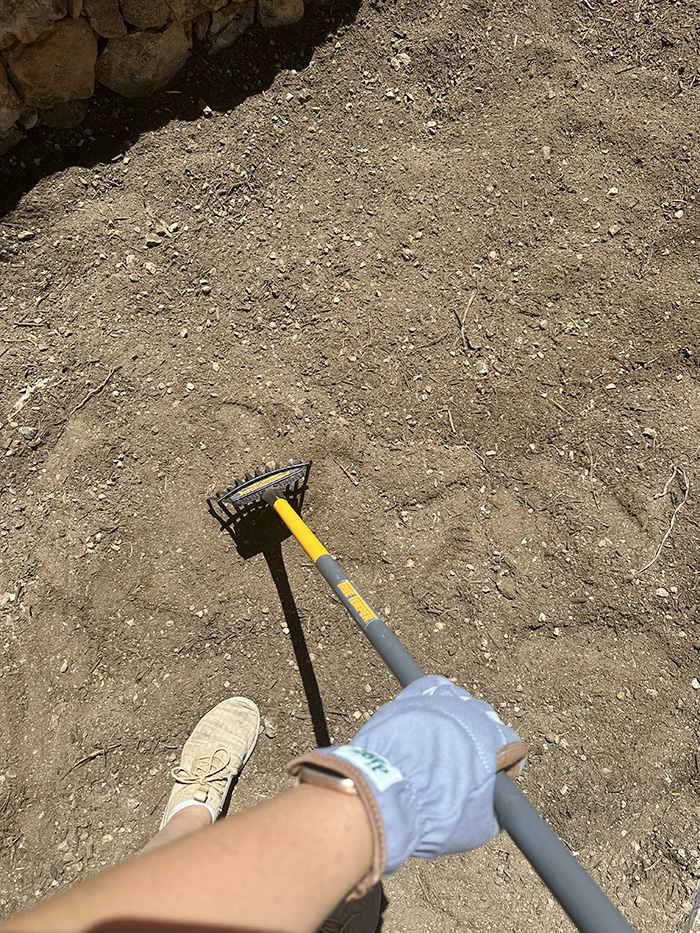
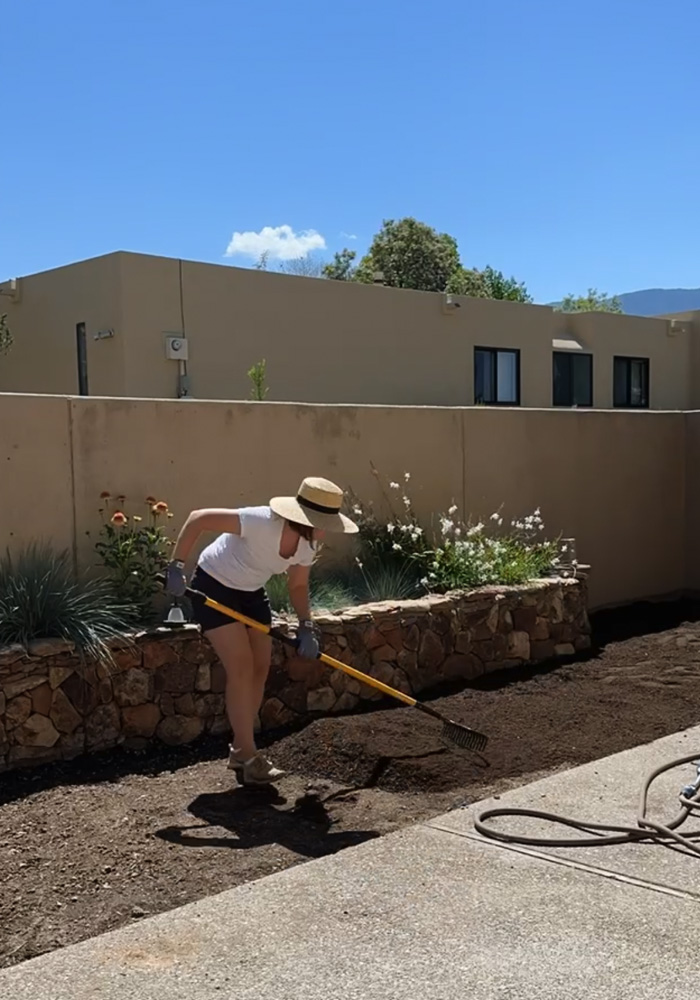
Step 2 Rough Grade
Once you have cleared your space, it’s important to rough grade next. Rough grading means eliminating any major low/high spots, as well as giving basic direction to the soil so that water runs away from your house and/or concrete sidewalks or patios.
Depending on the size of your space, rough grading can be done with a small tractor (larger yard) or with a steel edge rake (smaller yard).
Our “soon to be turf” area is roughly 6′ wide by 30′ long, so I used our smaller metal rake to do our rough grading.
Step 3 Till the Soil
The next step in preparing your soil for sod is loosening up your existing soil and ground. This process is called tilling. Tilling your soil allows for water to move easily through the dirt and soak down into the roots of your grass.
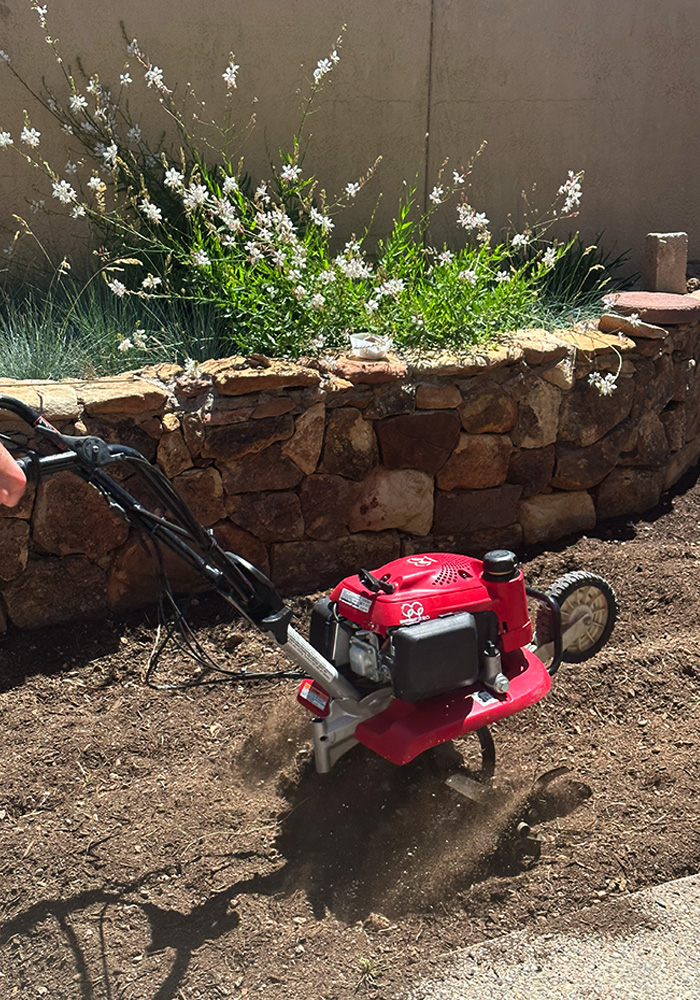
You should plan to till your soil at least four to six inches. You should till before adding topsoil.
We rented a Roto-tiller from Home Depot for half of the day. It was hard work as our southwest desert soil was as hard as a rock, but we got it done.

My husband put quite a bit of time into this step. I took a turn or two but the roto-tiller kept jumping around from our hard hard soil and it was difficult for me to manage because of that (I’m 5’3″ vs my husband 6’2″). So, be aware of this when you are working in your yard.
Step 4 Add Topsoil
Adding topsoil provides the nutrients and minerals your turf needs to flourish and grow into a healthy lawn. However, this step may or may not be necessary depending on where you live.
As mentioned before, we live in New Mexico and right near the foothills of a mountain, so our soil is composed hugely of decomposed granite. We ordered 3 cubic yard of a local enriched planting mix soil to be delivered to the house.

If you need to add topsoil to your yard, it should be a minimum of four inches in depth and you are looking for a nutrient-rich compost/soil blend.
Step 5 Test the Soil
The next step in prepping your soil is testing it’s pH levels. (We did not do this and I am hoping it doesn’t come back to bite us later.)
If you do test your soil, there are numerous resources for at home testing kits or hiring a professional to come out and test it for you.
Step 6 Install Spray Head Irrigation
This is hardly a quick easy step, however if you need irrigation where you live (we do!) then now is the time to install it.
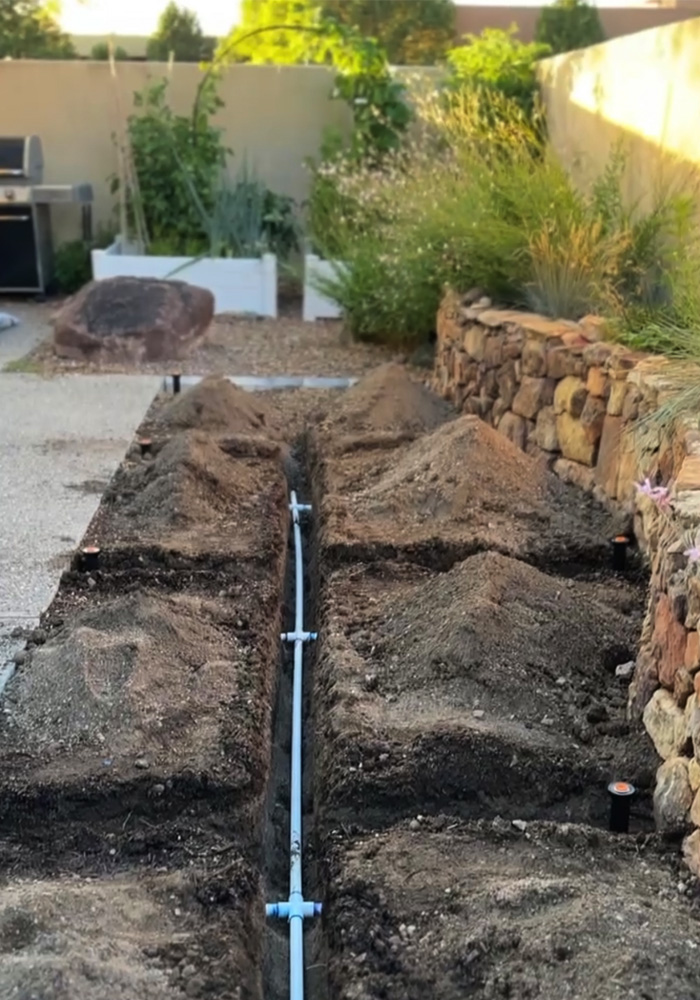
I have a “basic irrigation setup” post coming next week that will dive a little more in depth into this process.

Step 7 Apply Starter Fertilizer
Apply “starter” fertilizer, such as 18-23-12 (N-P-K), at the recommended rate. We used Pennington UltraGreen Starter Lawn Fertilizer. And ideally, you apply per the directions and rake the fertilizer into the top 1-2 inches.
Step 8 Finish Grade
Now that you’ve done your rough grading, tilled the soil, added topsoil, applied fertilizer and have your irrigation installed – it’s time to work on your finish grade!
Finish grade refers to once again removing any high or low spots on the site and really working to make sure that rain and water runoff drains where you want it to drain (away from the house and/or patio/sidewalks).
The final grade should be approximately ¾” below all concrete surfaces like patios, sidewalks and driveways.
Step 9 Compact the soil
Once final grade has been completed, it’s time to make sure your soil is no longer loose, fluffy and full of air. You want a nice flat surface for your sod’s roots to be able to grow into.
We used a rake to again fine grade as much as possible. Then, we would spray the soil many times over with a hose and place a large piece of plywood overtop. A few stomps on the wood helped to compact the soil with a larger flat surface area. (This would obviously not work if you are doing in a larger sized yard.)
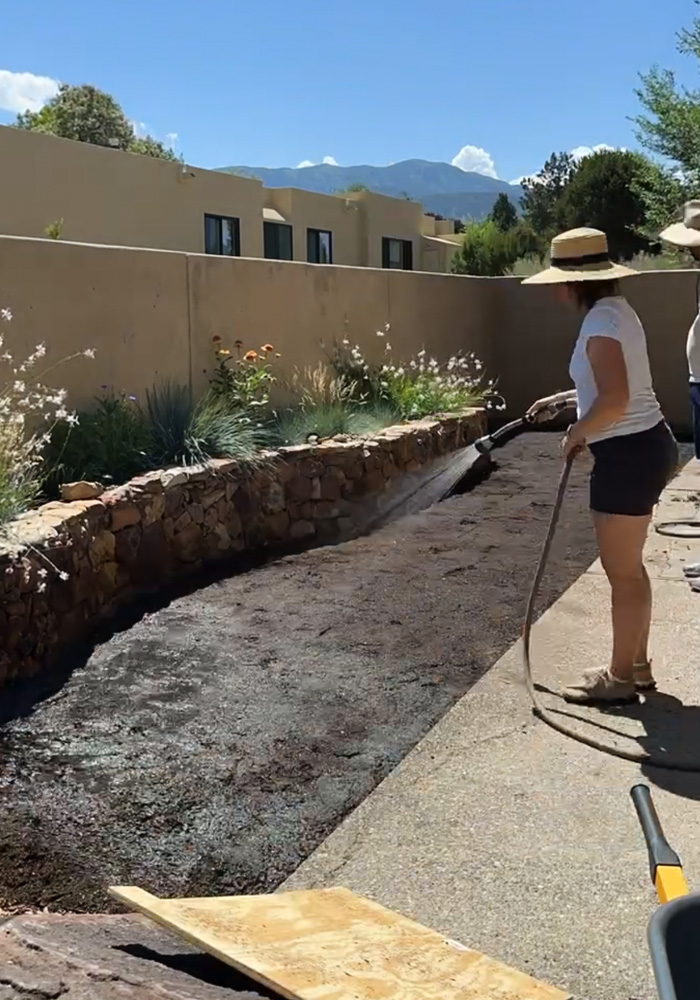
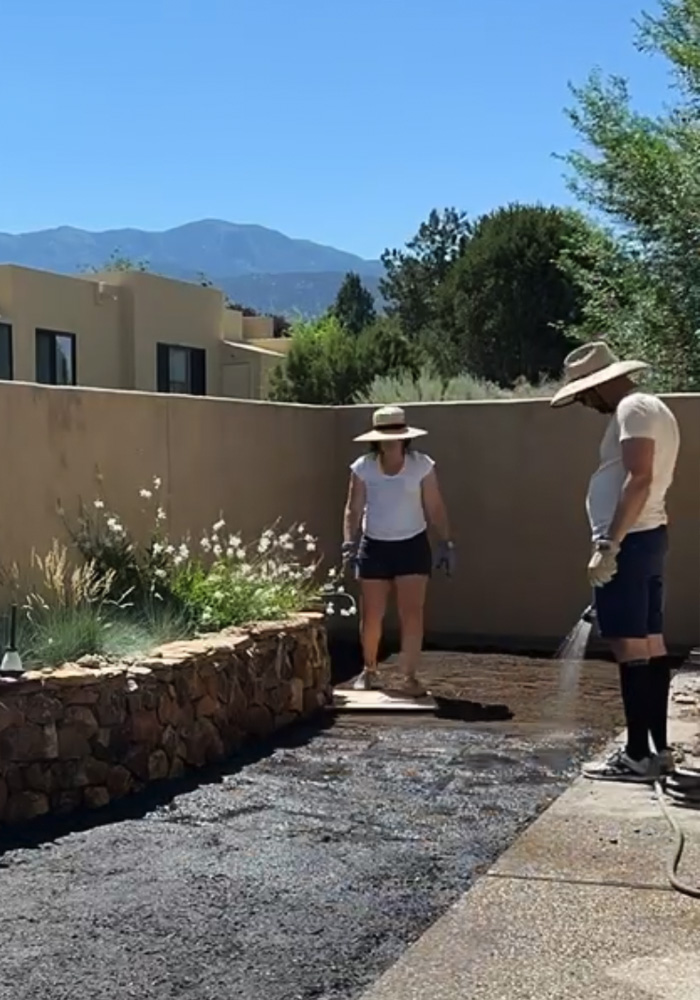
You can also rent a lawn roller to help firm and settle the soil. This is a much easier process than the water + plywood route we took.
Step 10 Ready for Sod
You made it! You have now completed all ten steps needed to prepare your soil for sod! Order your sod to be delivered early in the morning and install as quickly as possible. Be sure to water the sod as you go as it will begin to wilt on hot summer days.
Check back in as we are receiving our sod rolls this week and will install them that day!
Whew! Lot’s of work. Can’t wait to see finished project!