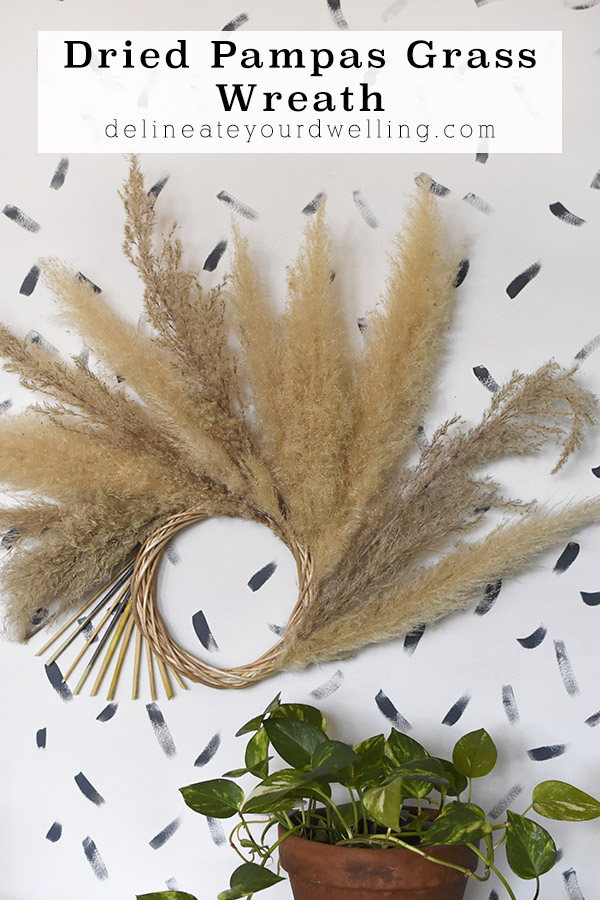
Dried Pampas Grass Wreath DIY

INSIDE : Learn how to create a Modern Dried Pampas Grass Wreath DIY to hang in your home. Follow my simple steps to make this trendy floral arrangement!
This post may contain affiliate links. See full disclosure here.
This post has been updated since it’s original publish date of January 2020.
If you didn’t know, I have been participating in a New Year, New Room Refresh Challenge hosted by Stephanie from Casa Watkins Living. Each Tuesday, 17 bloggers will be shariThe final reveal is on February 4th, so keep checking back!
So far, I have shared my -
Master Bedroom Refresh Plan
Painting + Colors
How to create an Organic Paint Accent Line (this was such a fun painting technique!)
And today I am thrilled to be sharing how to make a Modern Decorative Pampas Grass Wreath!
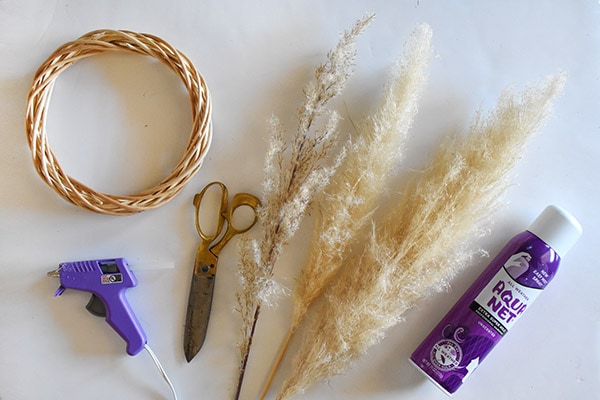
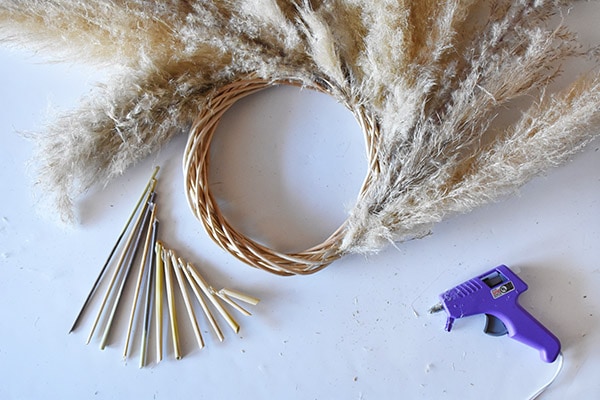
Supplies needed to make a Modern Pampas Grass Wreath
- Grapevine Wreath form
- 10-14 Pampas Grass Strands (Best places to buy Online)
- Inexpensive Hairspray
- Scissors
- Hot Glue Gun
- Floral Wire
How to make a Pampas Grass Decor Wreath
I have been loving Pampas Grass decor for a while now. There is something about using the tall pampas grass stems in my home that immediately give off a lovely Fall feel.
I even wrote a post all about the best places online to buy pampas grass.
For this project I was gifted a bucket of Pampas Grass from a local floral shop. However, you can find pink pampas grass, tall pampas grass or even find faux pampas grass for this project.
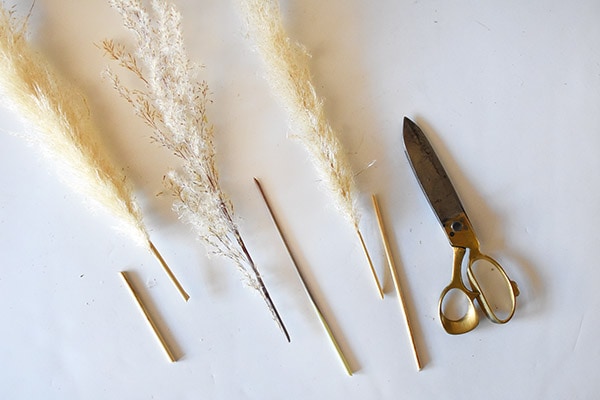
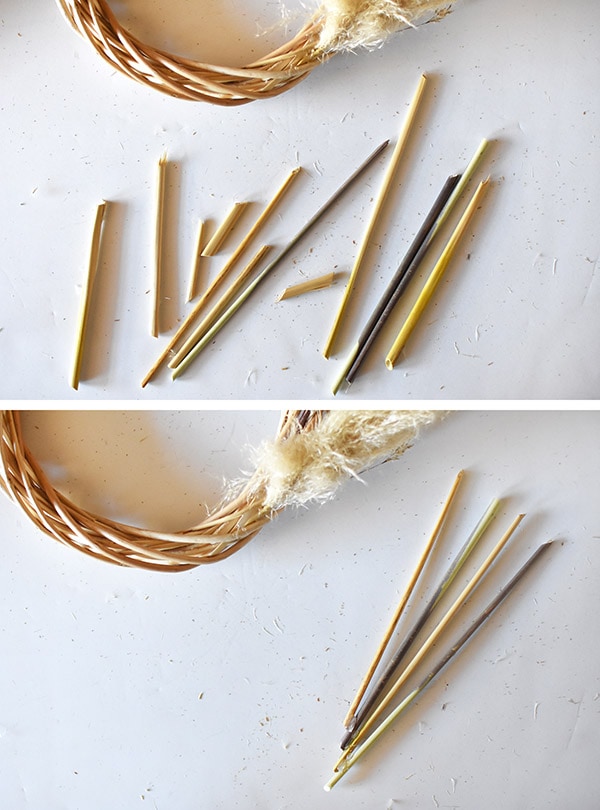
Start by cutting down the long Pampas Grass stems so there is about 3″ to 4″ of stem depending on how big your wreath form is. I only needed about 3″ of stem to tuck into my small grapevine wreath form, but be sure to keep those leftover stems for later in the project.
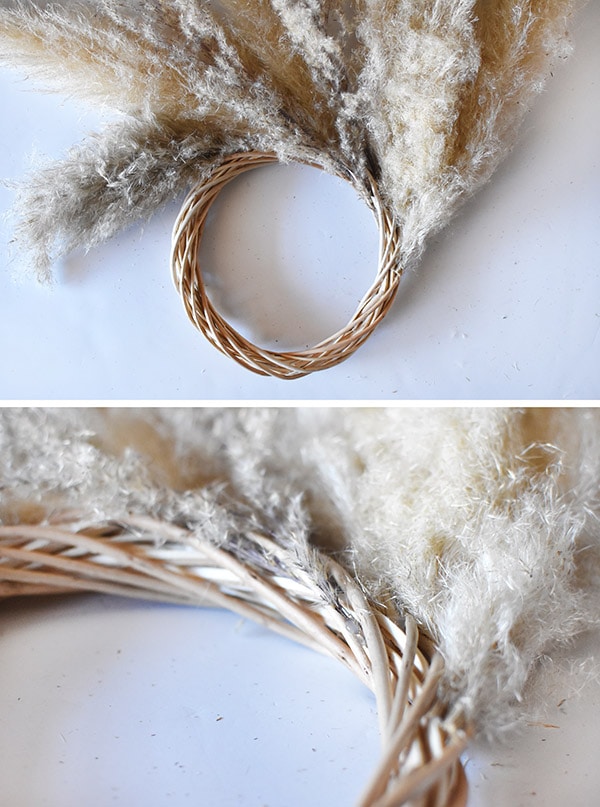
Next, I started tucking the ends of a grass strand one at a time into the wreath form.
I added just a little dab of hot glue as I went to provide extra holding power to each stem.
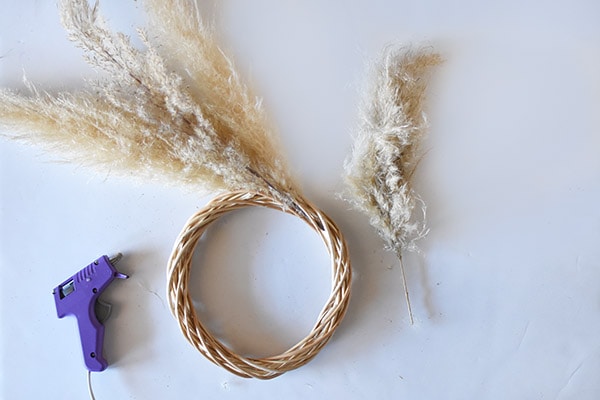
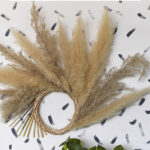
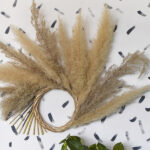
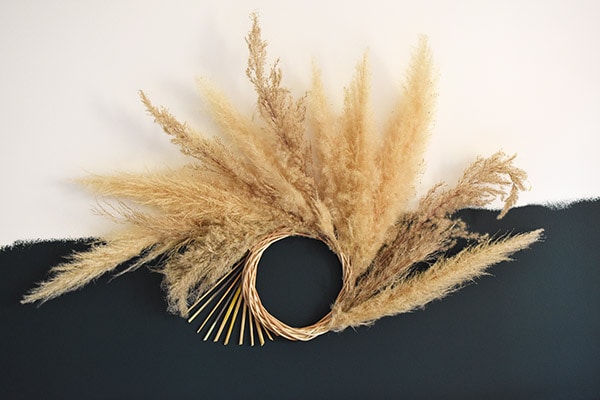
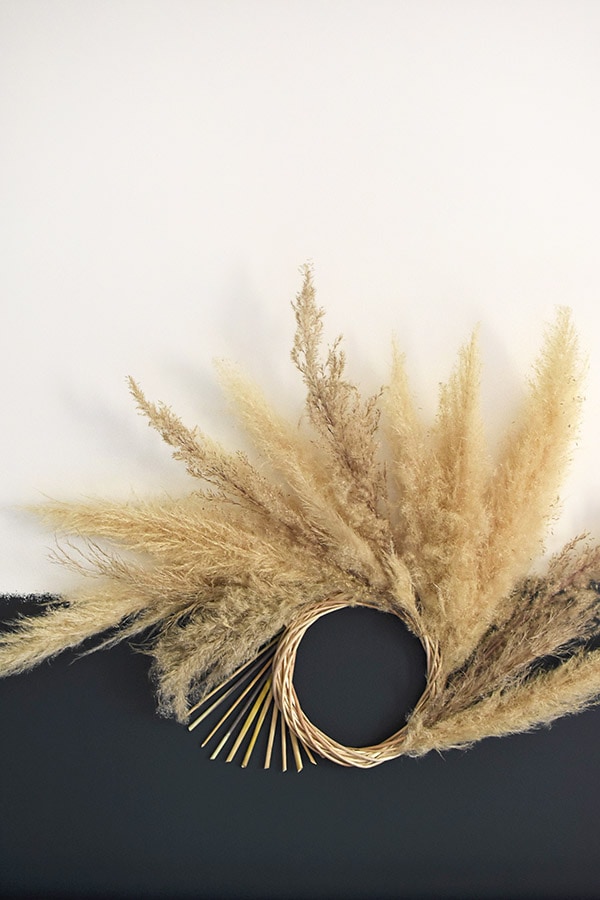
Creating a Pampas Grass Fan pattern
As you glue in each piece of dried grass, you will slowly continue around the wreath – creating a gorgeous fan like pattern.
Stop adding the grasses a little bit before you get to the halfway point, as you can see in the image below.
The next step, really added a subtle drama to my pampas arrangement and quite possibly was my favorite part!
Pampas Grass Stems
Take all the Pampas Grass stems that you had originally cut and gather them together in descending order of length.
Slowly begin to hot glue each stem end together at a slight angle. After each stem was secured, I would hold it up to my wreath form to make sure I was following a similar circular pattern as the wreath.
Once all of the stems were glued together, I added one final line of hot glue all along the glued ends and secured them as a unit to the backside of my wreath form.
Add hairspray to Pampas grass plumes
Next, it’s time to head outside and give the Pampas grasses a heavy duty coat of hairspray. Adding hairspray will help to keep the grass’s plume intact and not blow apart every time someone walks past it!
If you are using faux pampas grass, you will not need to add hairspray and can skip this step.
Decorative Pampas Grass wreath
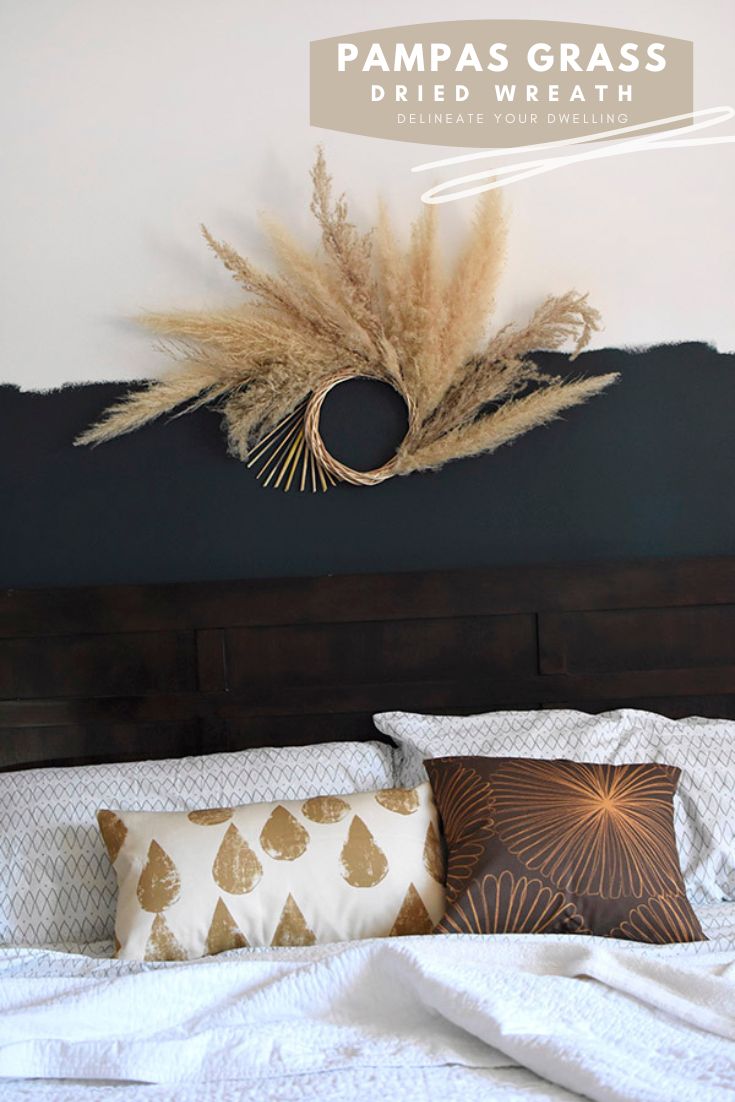
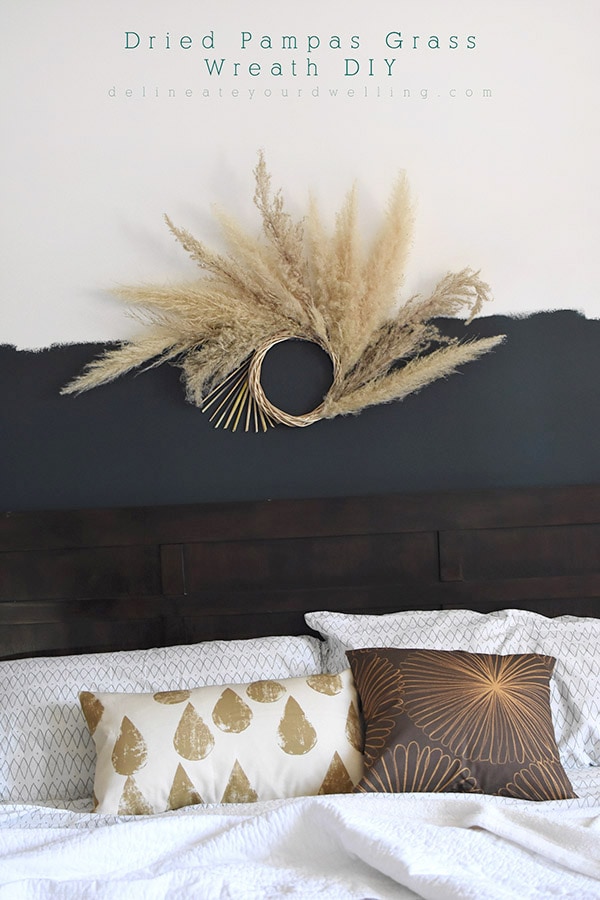
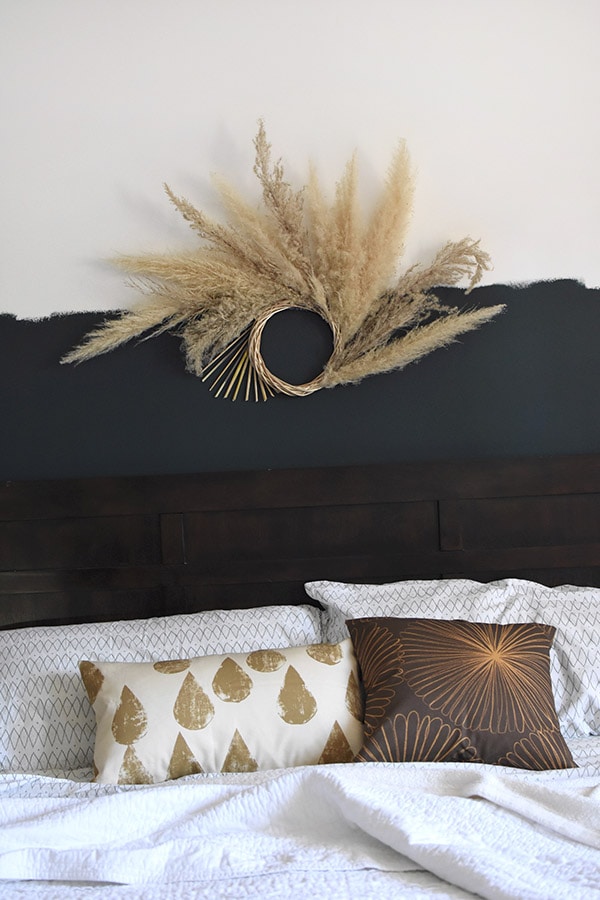
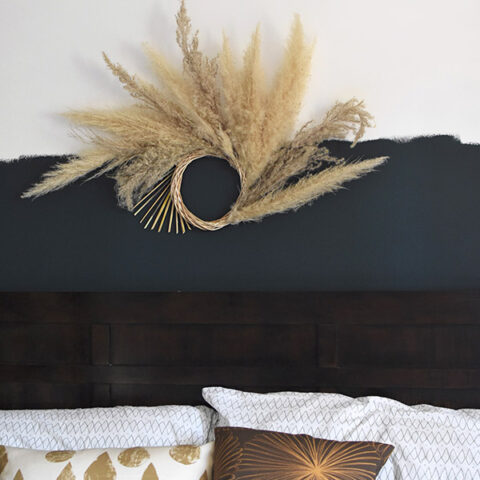
The final product is this GORGEOUS modern dried grass arrangement!
I’ve never seen anything quite like this dried grass wreath and love having such a one of a kind piece in my bedroom to enjoy every day.
I decided to hang it just below the perfectly imperfect Behr Thermal paint line and I love the way it so nicely frames the space.
To hang, I simply used a little bit of floral wire to make a loop on the backside and hung it on a nail in the wall.
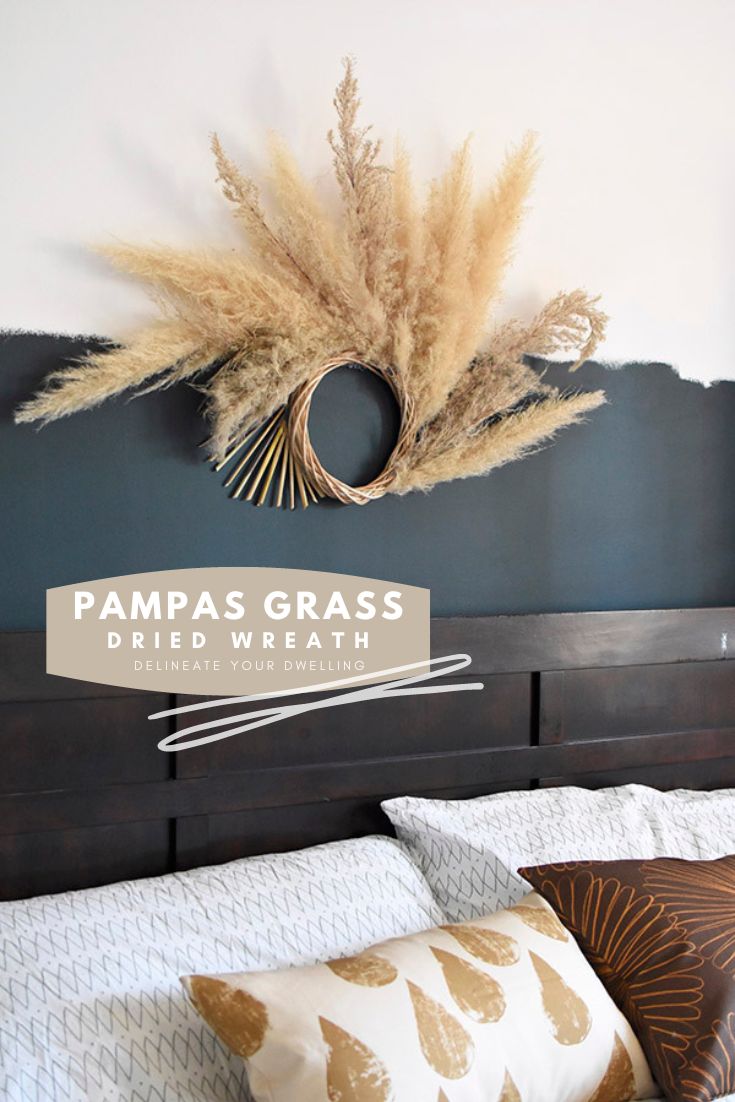
It perfectly pulls in the straw colors from my Spoonflower pillows and our existing window shutter colors.
I asked my husband what he saw when he looked at my Pampas Grass wreath and he said a woman with big hair. I see almost an abstract eye… which is a little creepy but I love this wreath so so much, that I’m okay with it – ha!
Looking for more Pampas Grass?  Check out some of these great ideas!
- Best Places to buy Pampas Grass Online
- 13 Creative Ways to Decorate with Pampas Grass
Modern Pampas Grass Wreath
Learn how to create a Modern Dried Pampas Grass Wreath DIY to hang in your home. Follow my simple steps to make this trendy floral arrangement!
Materials
- Grapevine Wreath form
- 10-14 Pampas Grass Strands (Best places to buy Online)
- Inexpensive Hairspray
- Scissors
- Hot Glue Gun
- Floral Wire
Instructions
- Start by cutting down the long Pampas Grass stems so there is about 3″ to 4″ of stem depending on how big your wreath form is. Be sure to keep those leftover stems for later in the project.
- Next, tuck the ends of a grass strand one at a time into the wreath form.
- Add a little dab of hot glue as you go along to provide extra holding power to each stem.
- As you glue in each piece of dried grass, you will slowly continue around the wreath – creating a gorgeous fan like pattern.
- Stop adding the grasses a little bit before you get to the halfway point, as you can see in the image below.
- Take all the Pampas Grass stems that you had originally cut and gather them together in descending order of length.
- Slowly begin to hot glue each stem end together at a slight angle. After each stem was secured, I would hold it up to my wreath form to make sure I was following a similar circular pattern as the wreath.
- Once all of the stems were glued together, add one final line of hot glue all along the glued ends and secured them as a unit to the backside of my wreath form.
- Next, it’s time to head outside and give the Pampas grasses a heavy duty coat of hairspray. Adding hairspray will help to keep the grass’s plume intact and not blow apart every time someone walks past it!
- To hang, simply use a little bit of floral wire to make a loop on the backside and hang it on a nail in the wall.
OTHER BRAND SPONSORED PRODUCTS that arrived this week :
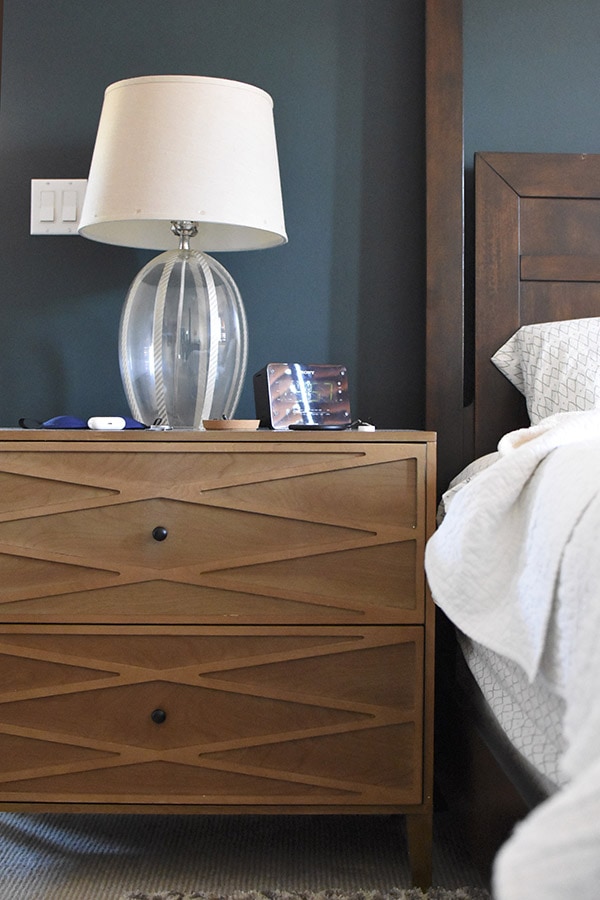
I now officially have ALL my sponsored bedroom items! This past week, I received the Home Depot leather chair, side table and floor pouf ottoman. And I finally put together the Home Depot nightstands, how dreamy are they?!!
PLAN OF ACTION THIS UPCOMING WEEK:
– Take out our old nightstands and replace with the new Home Depot ones.
– Add the new Home Depot table lamps and decor items to the nightstands.
– Install Midcentury Modern swinging light to chair corner.
– Hang miscellaneous artwork in room.
– Style both dressers and find a new home for all the odds and ends currently STILL on them!
ROOM REFRESH TO-DO LIST:
-Remove the clutter + “catch-all vibe” of the room-Paint the cream walls a fresh white-Paint a dramatic accent wall-Create a focal point on main bedroom wall
-Bring in a few new pieces of furniture/lighting to get away from the matchy/matchy feel
-Add texture, pattern and color to the room
-Create our personality in the space
Do you think I can finish it all up by next week’s reveal – I feel really good about my progress and mostly just have the fun styling part left now!!! I’m sharing daily updates on Instagram Stories and I’d love to you to follow along.
Completed Room updates :
Week 1 Master Bedroom Refresh Plan
Week 2 Painting + Colors
Week 3 How to create an Organic Paint Accent Line
Week 4 Dried Pampas Grass Wreath DIY
Week 5 Master Bedroom Refresh Reveal
And be sure to check out the 16 other amazing Room Refresh plans from the other participating bloggers! I am loving seeing their weekly progress.
Casa Watkins Living // The Boho Adobe // Delineate Your Dwelling
Haneen’s Haven // The Happy Housie // Homemade by Carmona
House by Hoff // Jewel Marlowe // Kaleidoscope Living
Our Sixth House // PMQ for Two // Rain on a Tin Roof
Southern State of Mind // Taryn Whiteaker // This is Our Bliss
Thou Swell // Up to Date Interiors

And I can’t end this post without sharing our generous sponsors! In the coming weeks you will see me sharing more about many of them.
I am specifically using : Home Depot, Spoonflower, Mohawk, Liberty Hardware and Smith Honig.

Florals are always on trend, but this dried pampas grass wreath DIY is a simple game changer. It speaks high class but with a homey, cozy vibe that adds character to the room.
Such a complement, thank you!
How brilliant! It look so good. I love the idea of using the wreath to tuck it into. I wouldn’t have thought of that! And, wow! LOVE the nightstands.
Thanks Corinna! It was fun to just make up the wreath as I went. 😉
It is absolutely beautiful!
Thanks so much mama!! xo