DIY Modern Birdhouse
INSIDE : Learn how to build the most adorable trendy DIY Modern Birdhouse! Let the birds live in style in your backyard with this easy to make, budget friendly A-frame birdhouse.
This post may contain affiliate links. See full disclosure here.
I love a good simple wood DIY project and I also love love love the great outdoors! So when HGTV approached me about building a birdhouse, it was an immediate yes from me.
There are so many types of birds and each of those birds like different types of habitats and homes. So before you build a birdhouse, make sure to look up your local bird species and research what type of home they like best.
I found it very interesting that some birds like houses with VERY small entry holes, others want a perch and some don’t. Also the type of materials you use for your bird house is very important. Many paints and even stains can be very detrimental to a bird’s health – please do your research on this as well.
Looking for other Bird houses? Check out these fun ideas…
– Spring time Birdhouse (crafty)
– Winter Birdhouse (crafty)
– Colorful Spring Birdhouse (crafty)
What types of wood are best for bird houses?
Choosing the right wood for your birdhouse is crucial not only for it’s longevity, but also for the safety of the birds who live in it.
Cedar is a popular choice due to its durability, rot resistance and pleasant aroma that can deter some pests. (This is the type of wood I choose for my DIY birdhouse project.)
Pine is another option that is easy to work with and relatively inexpensive, but may require more frequent painting or staining to prevent weathering. (If possible do not add paint or stain to your wood, as raw wood is the best for birds.)
Cypress is a long-lasting option known for its rot resistance and attractive grain, but can be more difficult to find and may be more expensive.
However, when selecting wood, it’s important to prioritize untreated options. Pressure-treated lumber often contains chemicals that can be harmful to birds. Opt for natural wood that hasn’t been treated with preservatives.
What supplies are needed for a Mid Century Modern Birdhouse?
- Cedar Fence Plank (I bought two, but only needed one)
- 3 Square wood trim pieces
- 1 Copper Birdhouse house entry plate (This REALLY added something fun to the birdhouse)
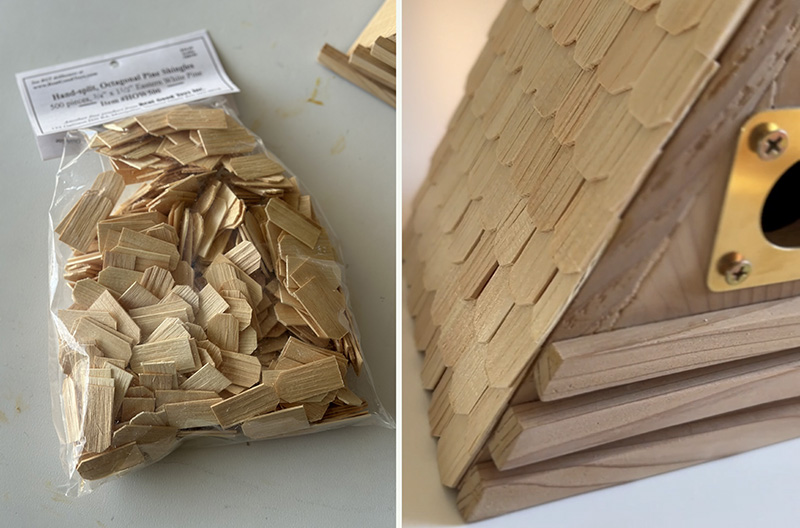
- Bag of Cedar Roof Shingles (these are similar)
- Wood Glue
- Sander (or sand paper)
- Miter Saw (or hand held saw)
- Clamps
- 1 3/8″ Spade Drill Bit + Cordless Drill

How to build an A-frame birdhouse
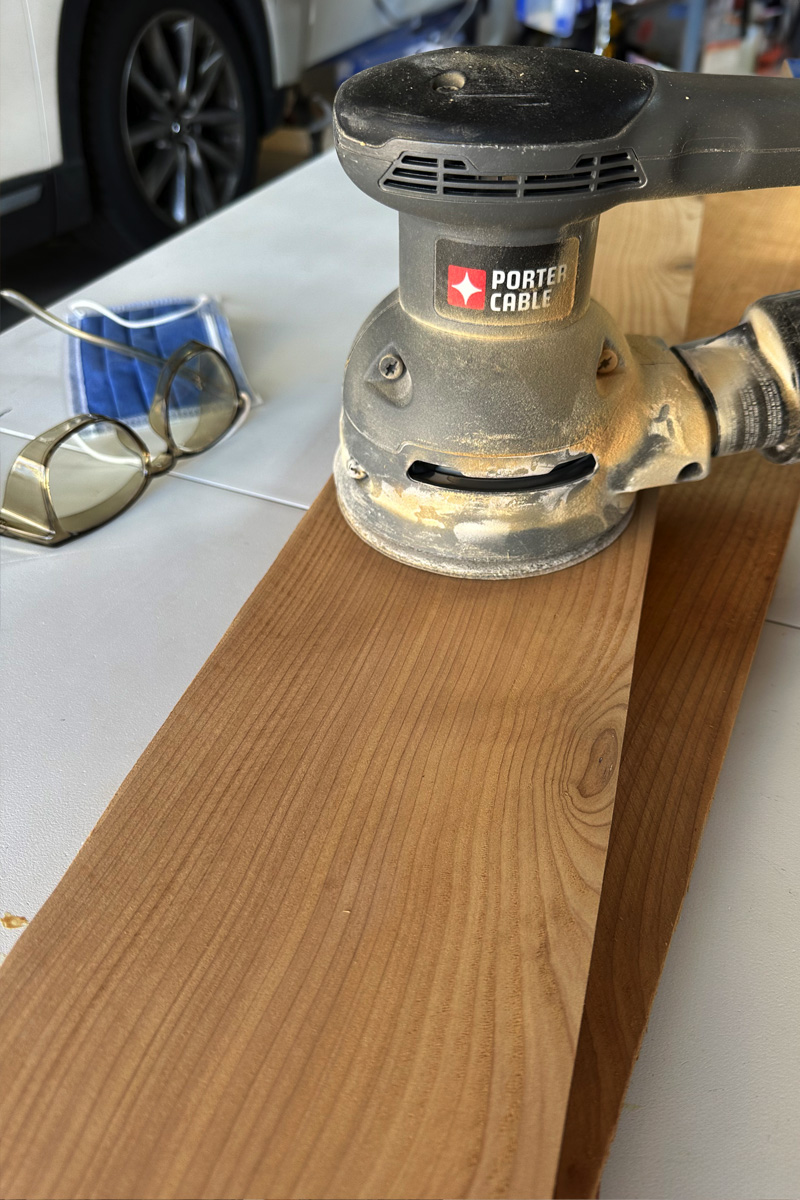
I started this cool A-frame birdhouse by sanding my cedar plank smooth. Since I bought a cedar fence post, the wood was very rough. Sanding gave it a nice smooth clean surface to work with and I would imagine would be much more pleasant for the birds who would soon be living in it.
After the wood was sanded down, it was time to cut the pieces to size.
Cut birdhouse sides
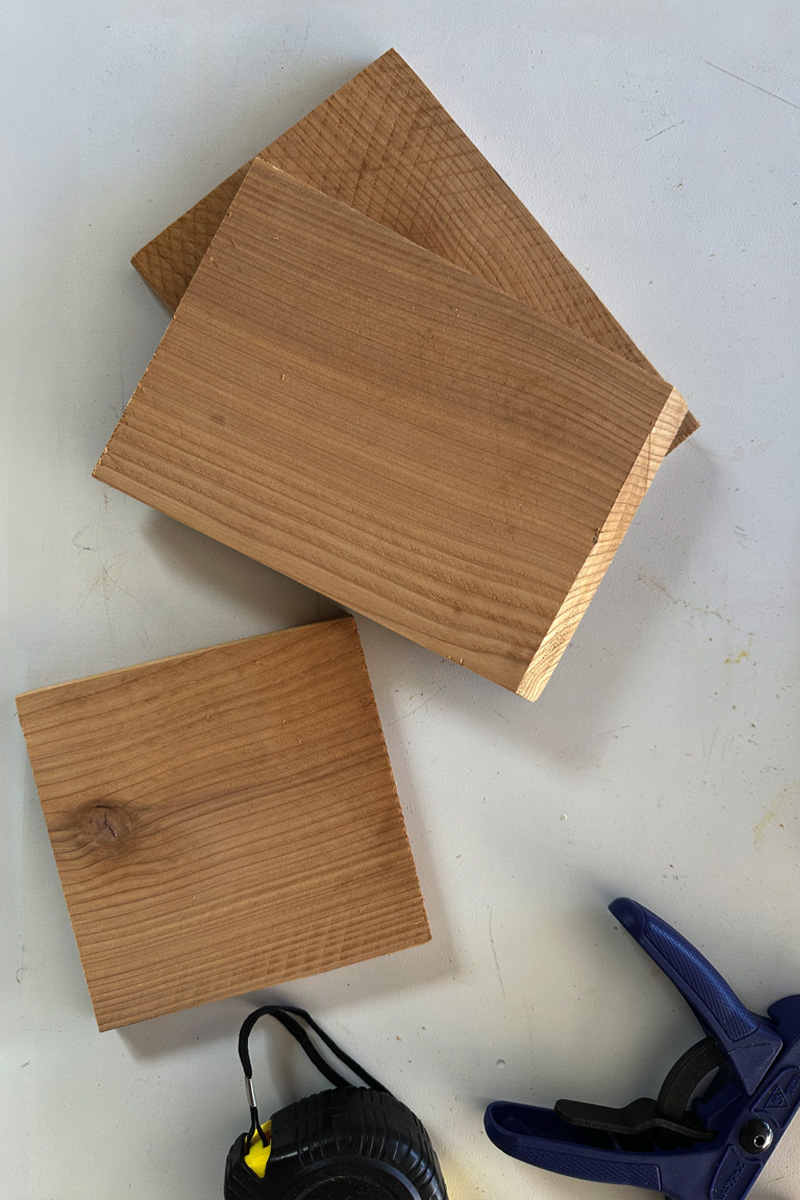
I cut two pieces for the sides to be 8″ tall and 6″ wide. Then one piece for the base as a 6″ square.
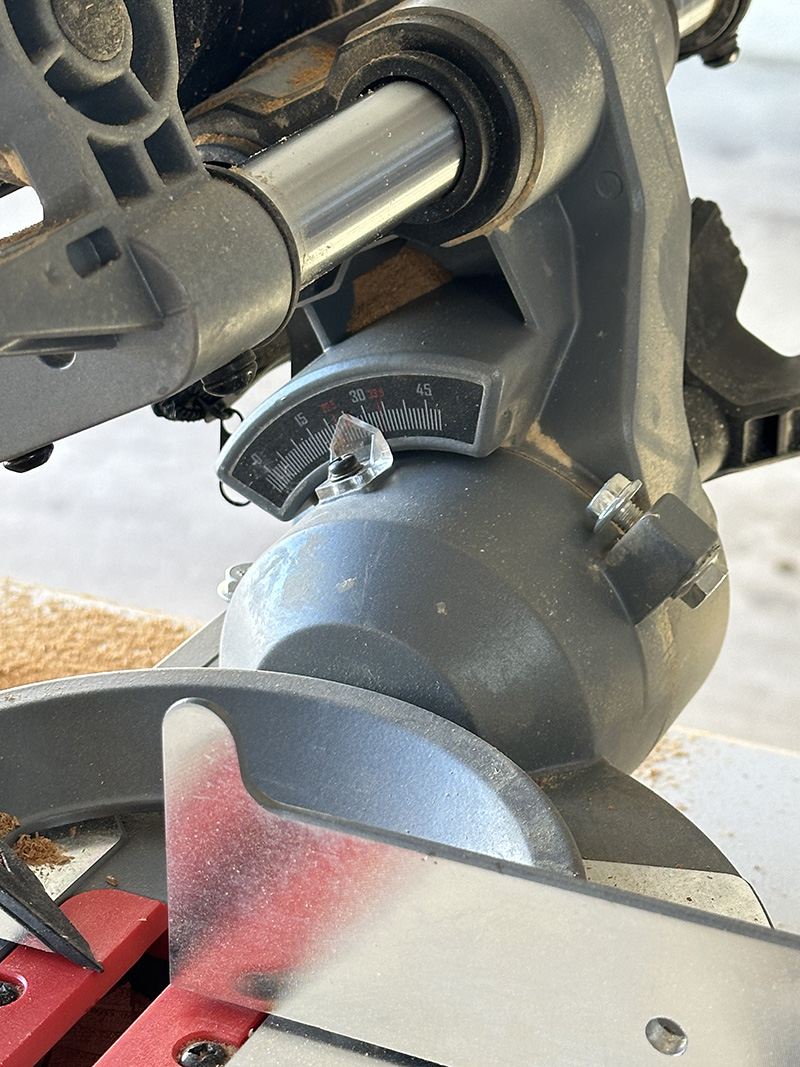
I then cut one of the wall pieces at a slight angle at the top and the base piece I cut also on an angle so they would create a lovely triangle a-frame shape when put together.
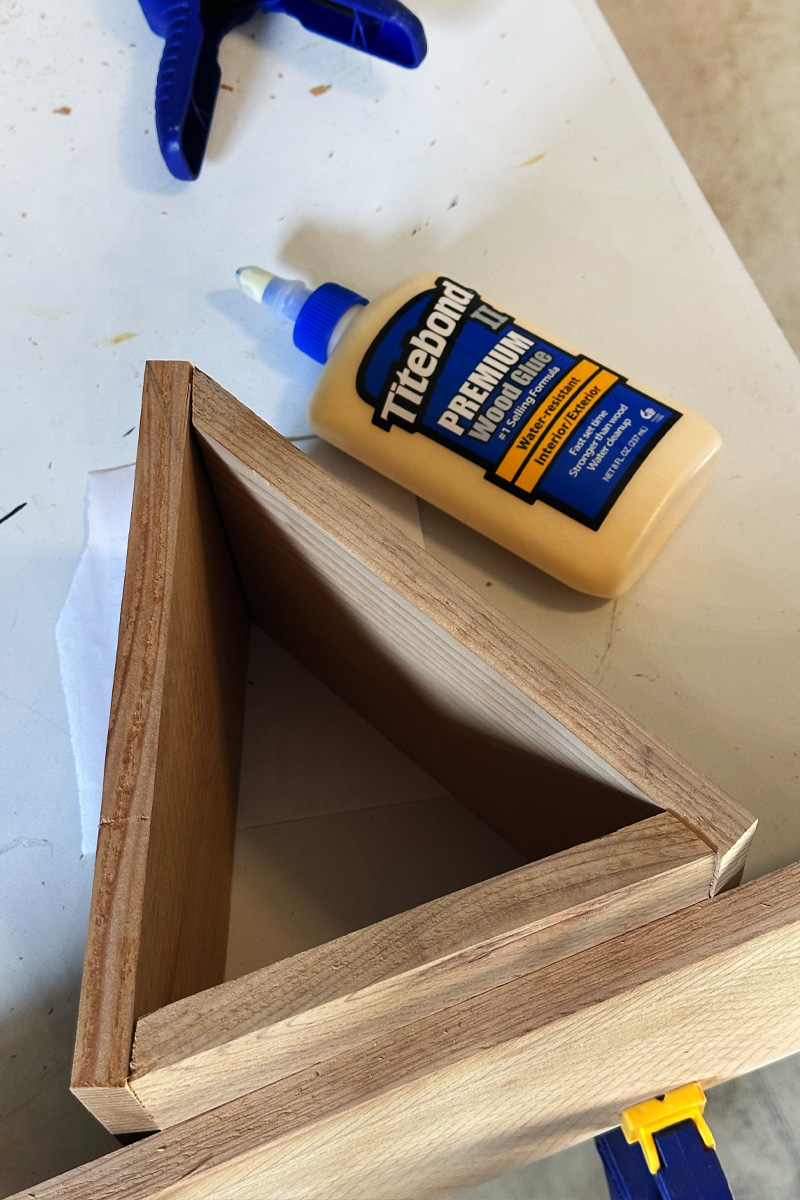
The next DIY Birdhouse plan step is the create the basic structure of your A-frame. I clamped a piece of wood to my table to act as a straight edge. Then, I used wood glue to secure the three walls together.
Once your structure is dry, trace the front and the back of the birdhouse onto another two pieces of wood. You can see the shape of mine with the white dotted line I made on the below image.
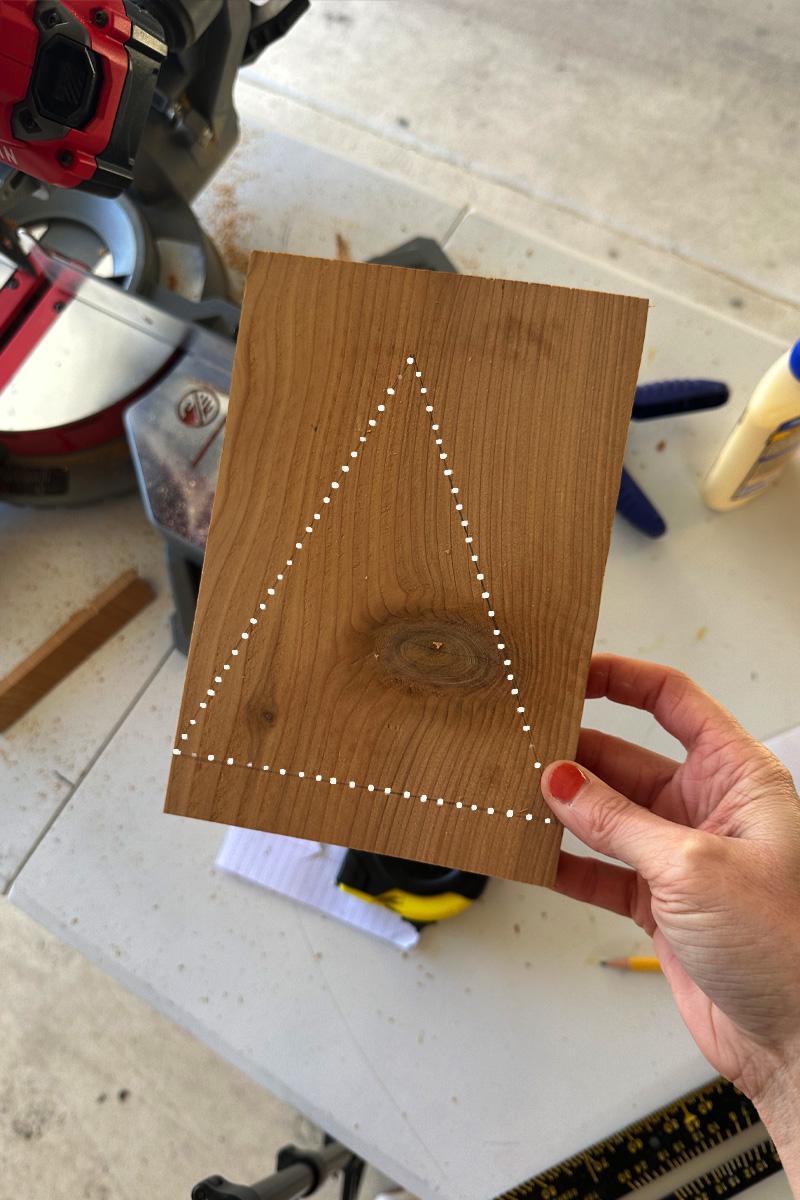
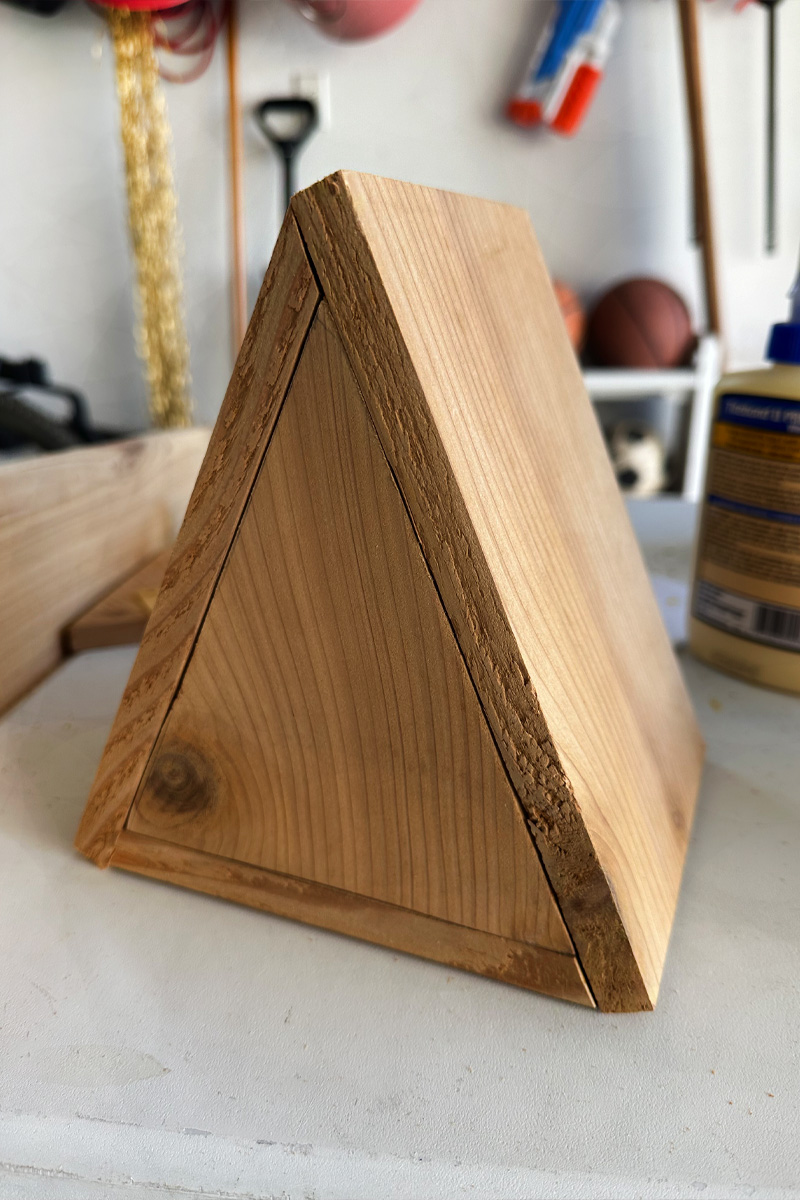
Look at the perfect fit the front made. That’s the stuff of a DIYer’s dreams!
Drill birdhouse entry hole
This next step is very important. Be sure to do some research on what type of bird you are wanting to house in your birdhouse.
The size of the entrance hole in a birdhouse is key for attracting the desired species while deterring animals like squirrels or even larger birds. I did research and for my specific location decided to design my birdhouse for (Cactus) Wrens.
Here’s a general guide –
- Smaller Birds (Chickadees, Wrens, Titmice): 1 1/8″ – 1 1/4″ diameter
- Bluebirds, Tree Swallows: 1 1/2″ diameter
- Woodpeckers (Downy, Hairy): 1 1/4″ – 1 1/2″ diameter
- Larger Woodpeckers (Red-bellied, Flicker): 2″ – 2 1/2″ diameter
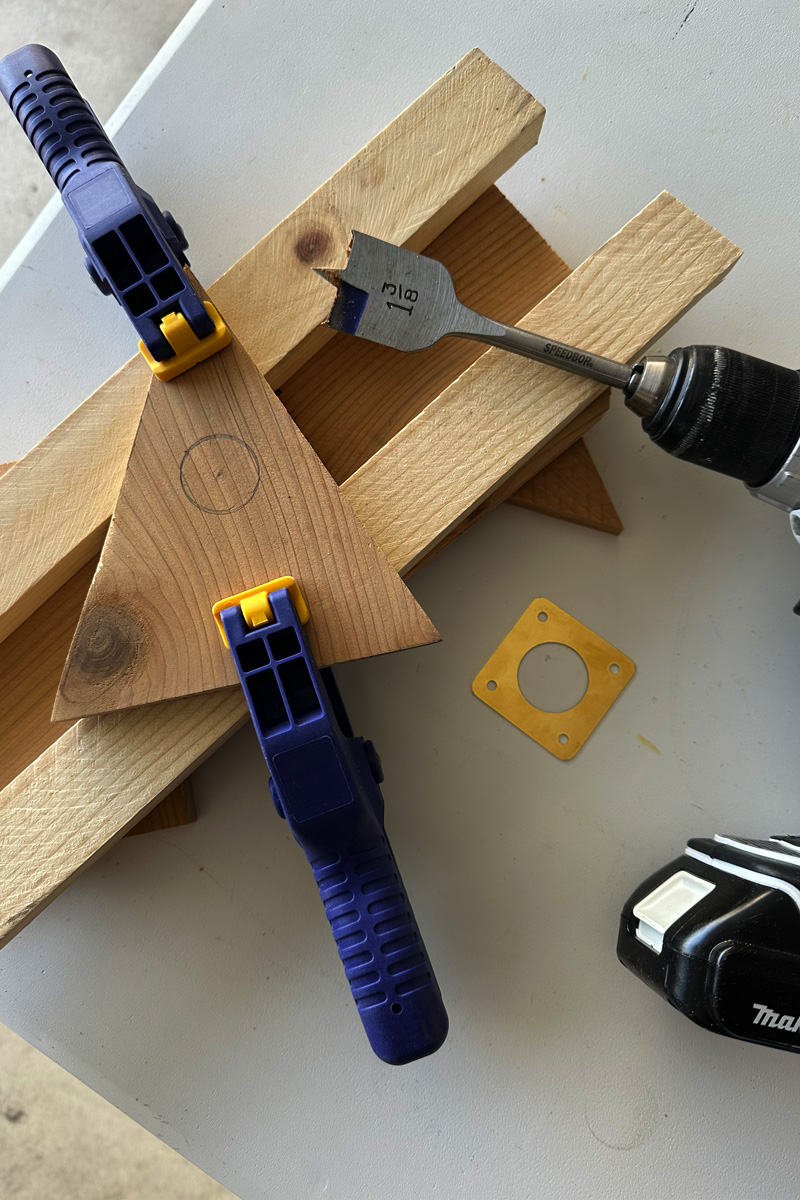
I used a 1 3/8″ spade drill bit on my cordless drill to create my hole, wanting the hole to be a bit bigger because I was going to use a metal plate to tighten up the entry size.
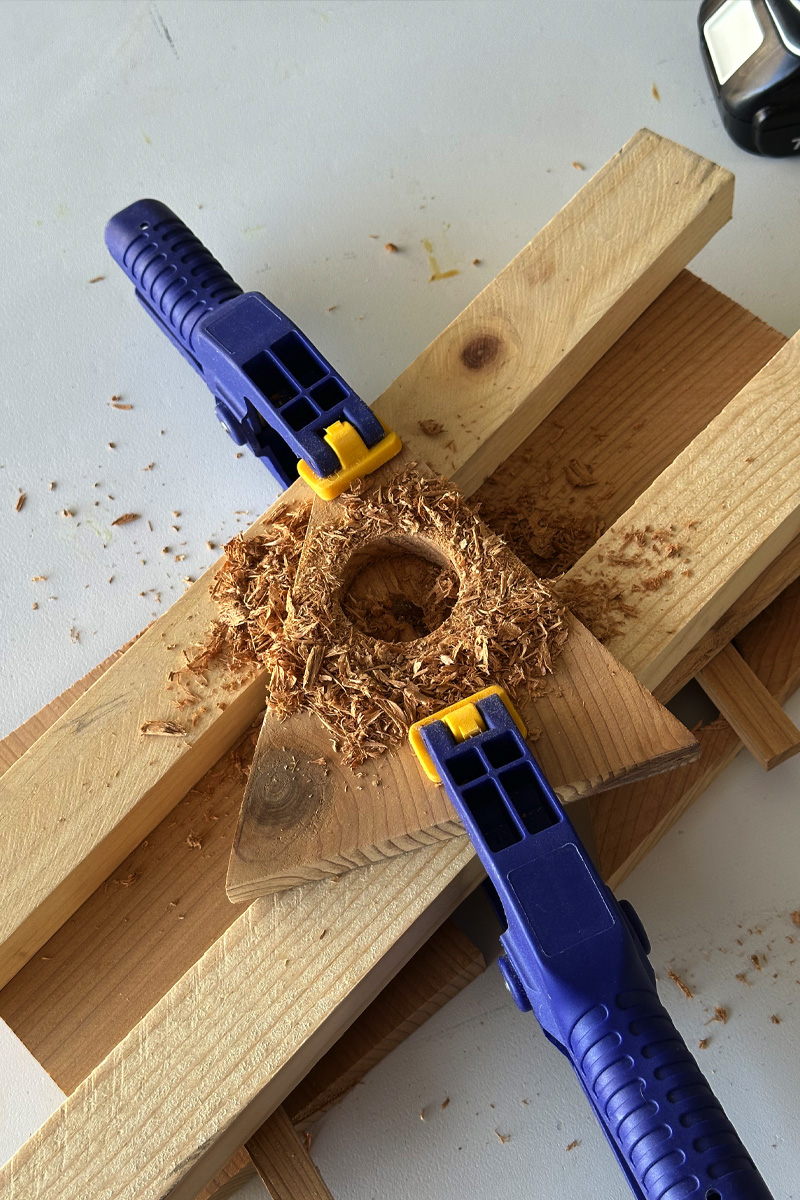
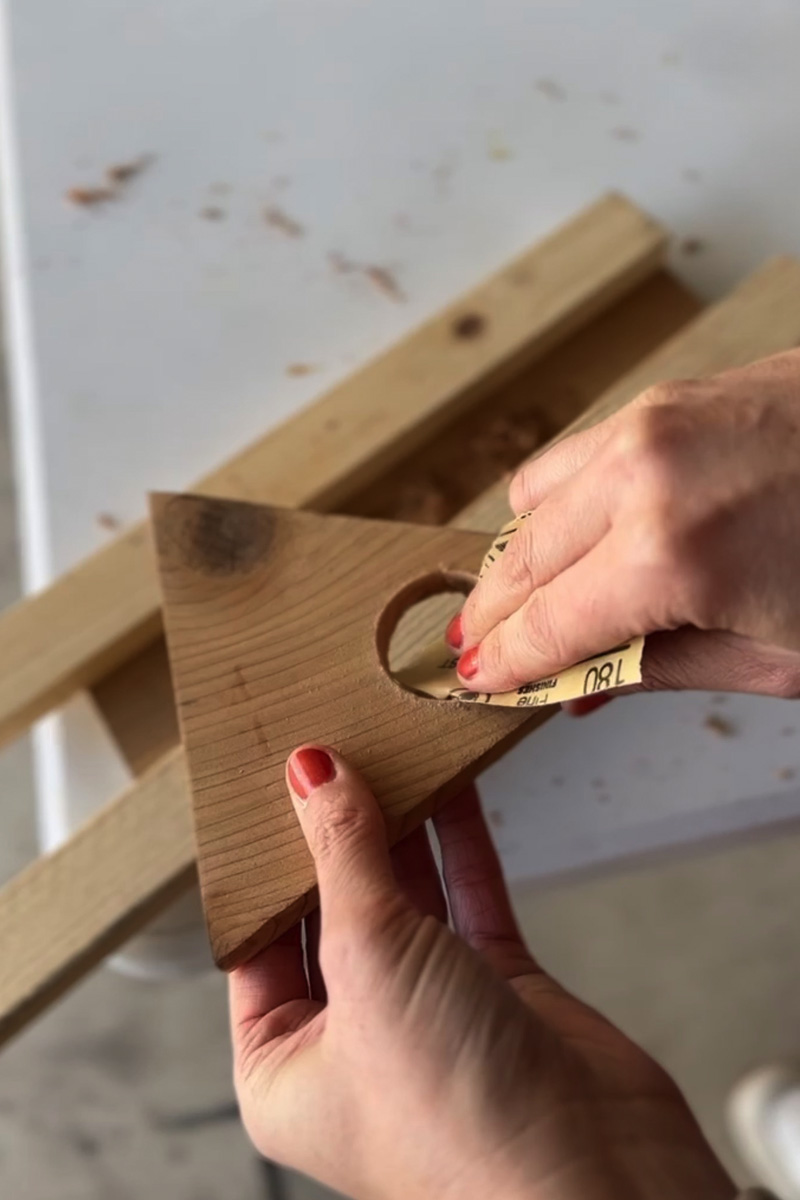
Make sure to use sand paper to clean up any rough edges so your birds don’t snag their feathers when coming home.
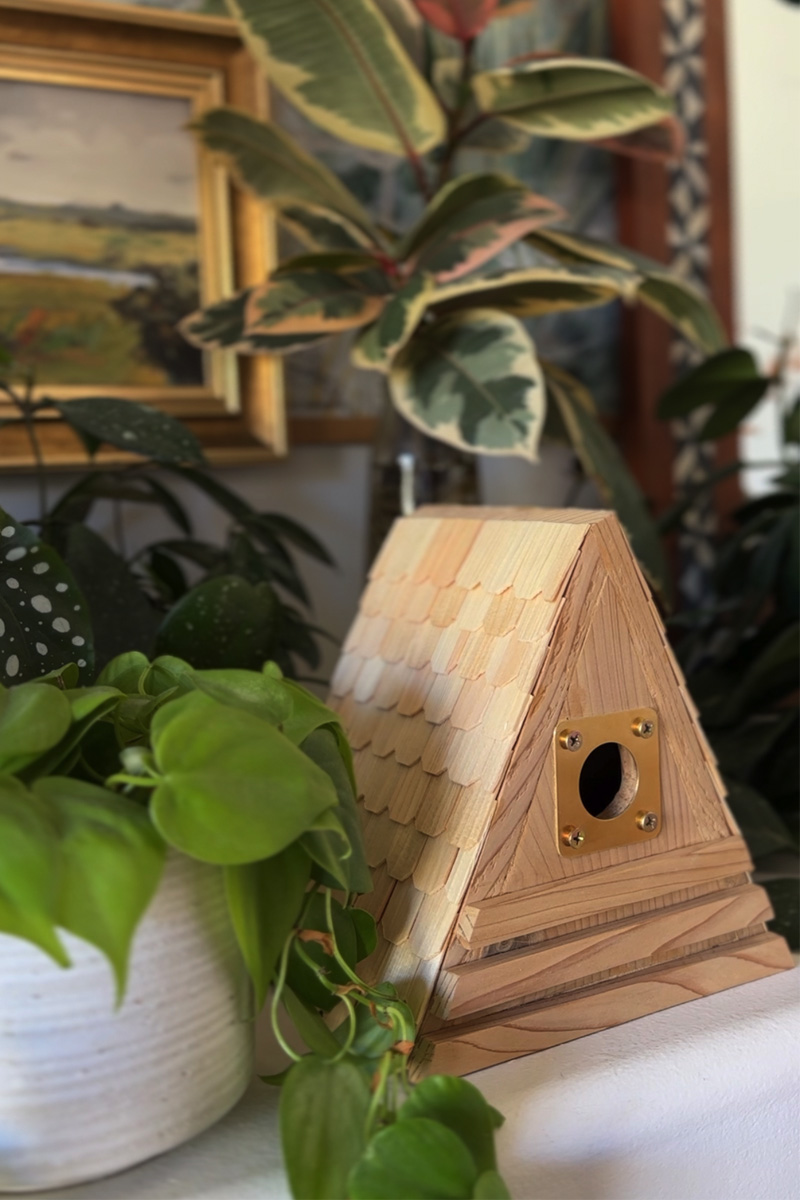
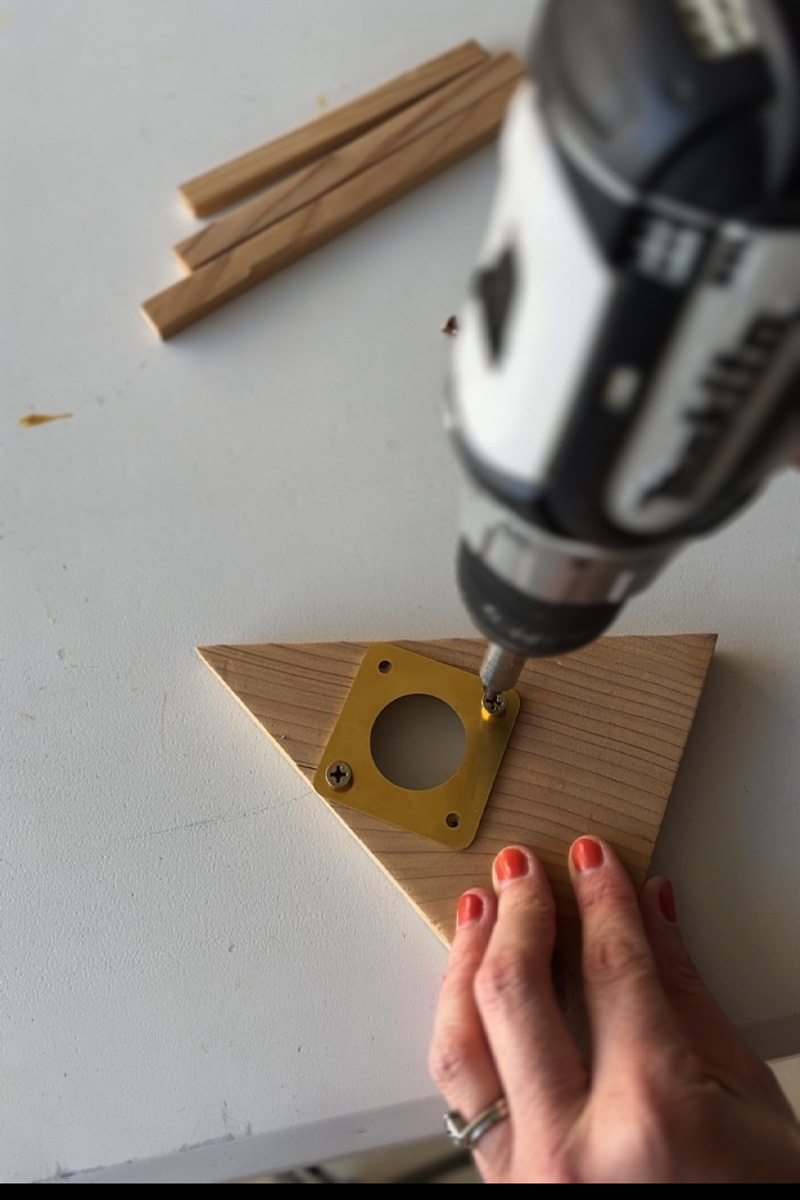
Next up is one of my favorite details… the copper plate! Make sure to pre-drill your holes and then screw in the plate into place with your cordless drill.
Do I need a perch for my birdhouse?
Wrens generally do not prefer perches on their birdhouses.
Wren houses typically have small entrance holes (around 1 1/8 inches) designed to exclude larger birds like sparrows. A perch can make it easier for larger birds to access the entrance. Perches can provide a foothold for predators like snakes or larger birds to reach into the entrance hole.
Some wrens may use a nearby branch or other natural perch to approach the birdhouse.
If you’re building a wren house, it’s generally best to omit a perch to minimize the risk of predation and competition from other birds.
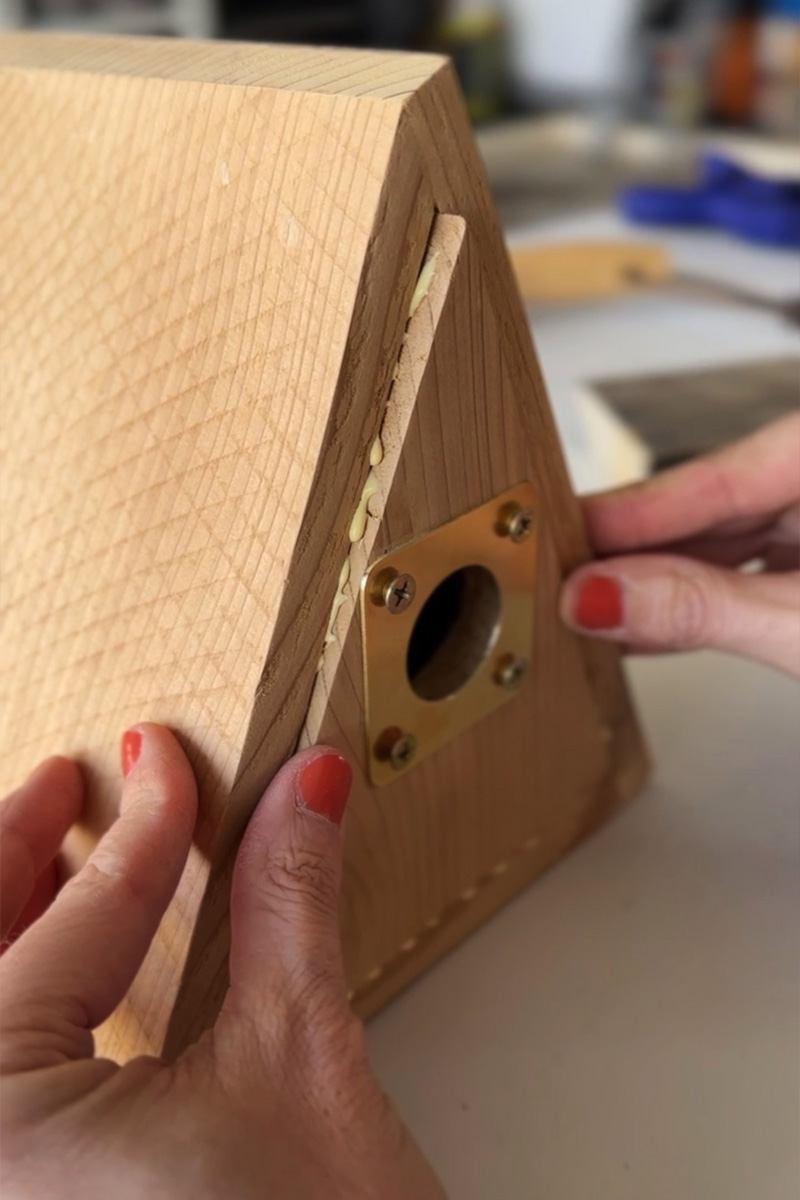
Adding the birdhouse front
Once you have the plate installed, you can go ahead and add wood glue to the edges and fit in the birdhouse front. After you have it in place, use a damp paper towel to wipe away any excess glue.
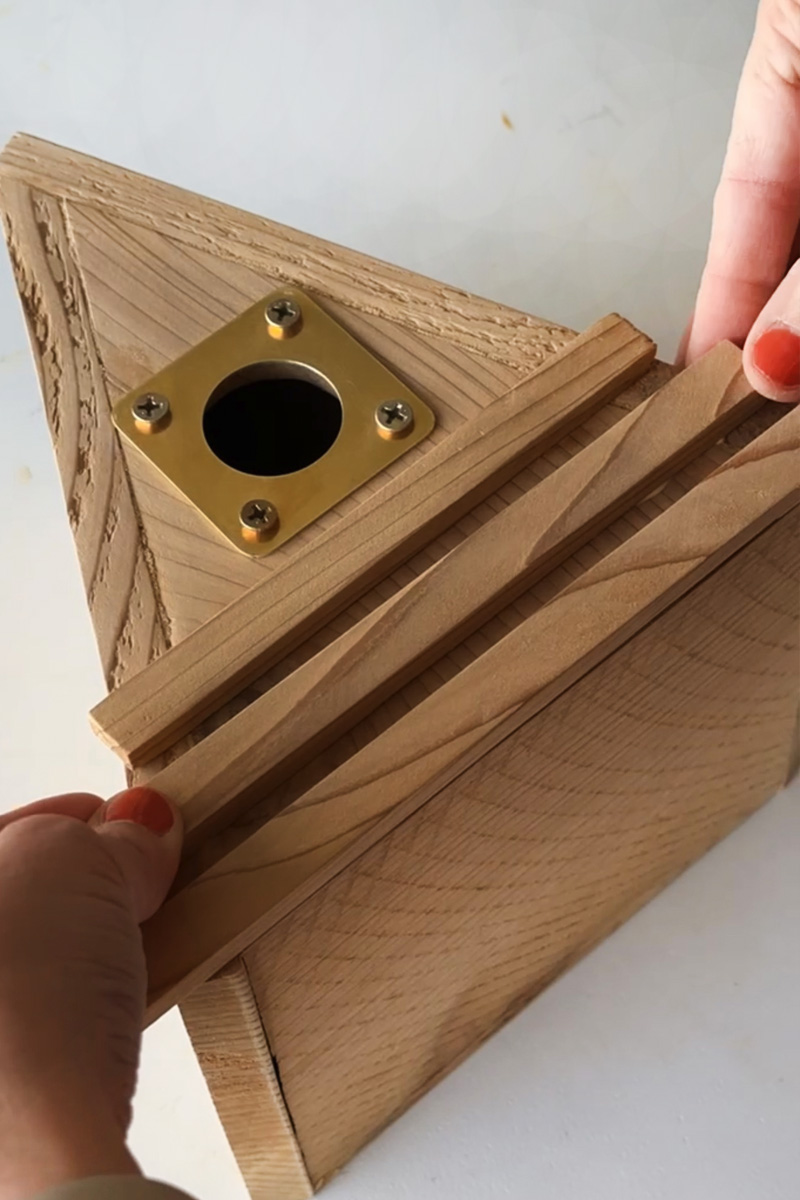
Add decorative wood trim
This step is purely decorative and not needed, if you prefer. However, I thought adding these Square wood trim pieces really gave the A-frame birdhouse a fun look!
I cut the three trim pieces close to size and then adhered with wood glue. Allow them to fully dry and then use a handheld saw to cut the edges down flush to the angled roofline.
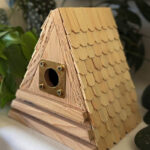
Secure Cedar Shingle Roof
The last step for this trendy DIY Modern Birdhouse is to add a roof to help keep out water!
I used a package of hobby Cedar Roof Shingles for this task. Start at the bottom of one side of your birdhouse and add a small amount of wood glue on the shingle and then place it.
Make sure once your first row of shingles are in place, that the second row starts by offsetting. I found the shingles were thin enough you could cut them in half using normal crafting scissors.
Once the first side of the roof is covered, simply turn your birdhouse around and work on the other side of the roof.
Unfinished Wood Birdhouse
As mentioned previously above, you can stain or paint your birdhouse but if you choose to do that please try to keep any materials away from the areas that birds may spend time. Keep their hole and the interior free of any paints or stains.
My unfinished wood birdhouse was complete at this point and I LOVED how it turned out! I was ready to set mine outside and invite all the neighborhood Wrens over.
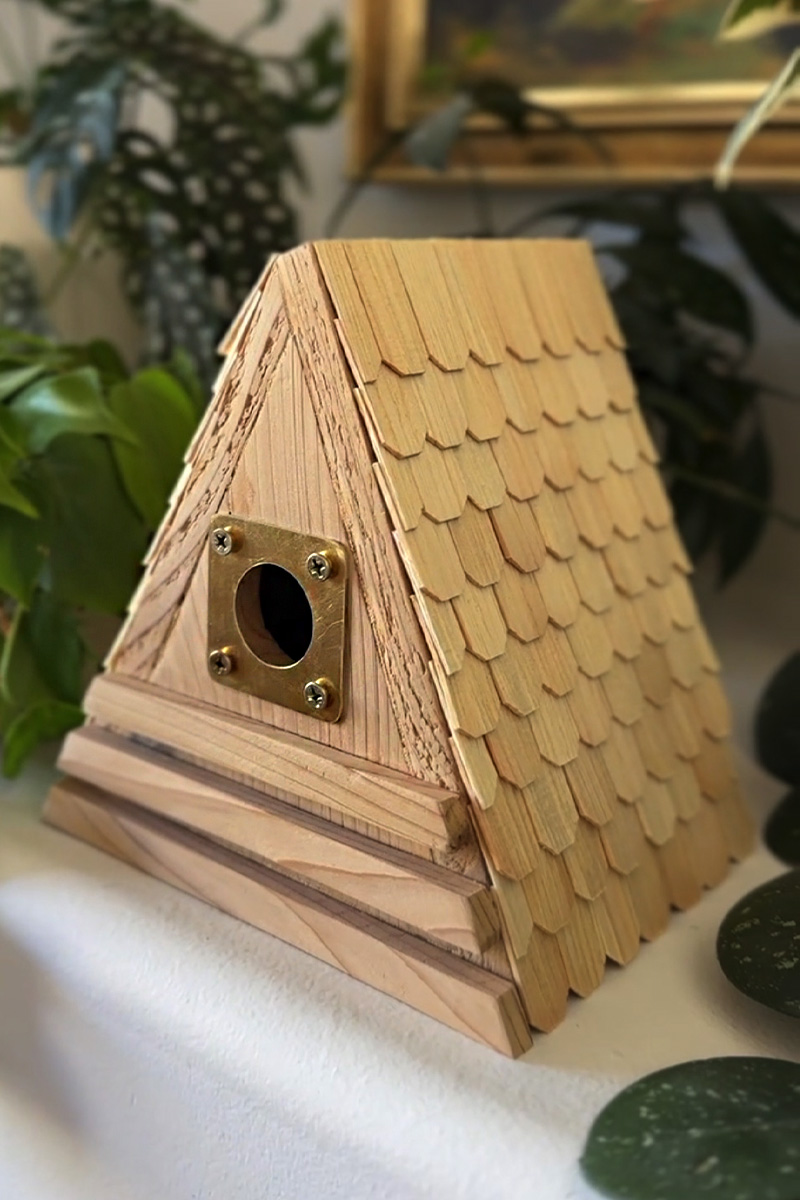
Once I was ready to install my DIY Modern Birdhouse outdoors, I simply drilled a hole in the back wall and placed it on a screw on the tree. The birdhouse was secure and ready for it’s new bird friends.

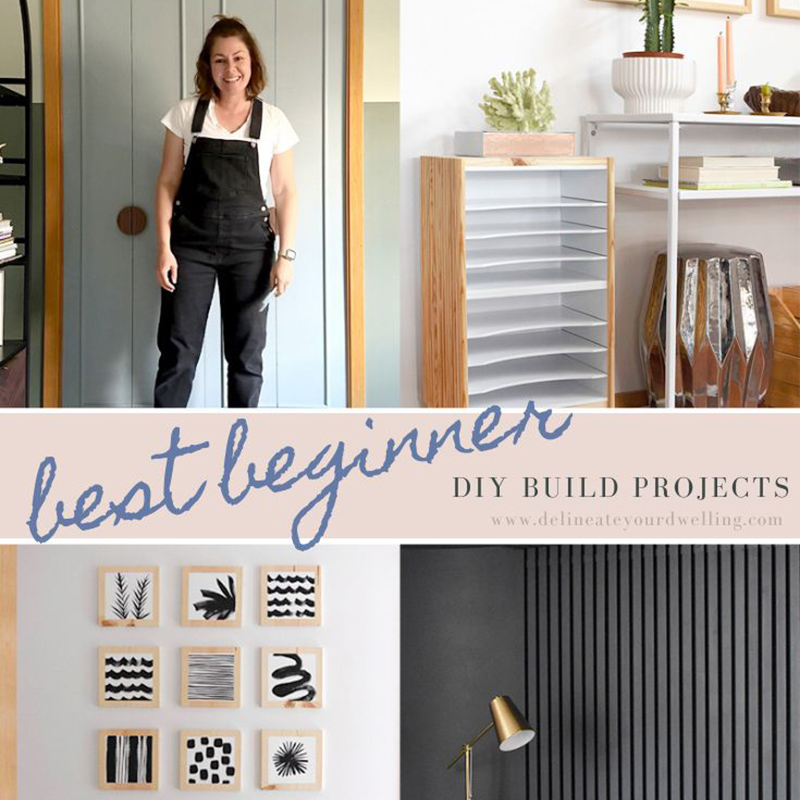
Looking for some other easy DIY project ideas? Check out some of these!