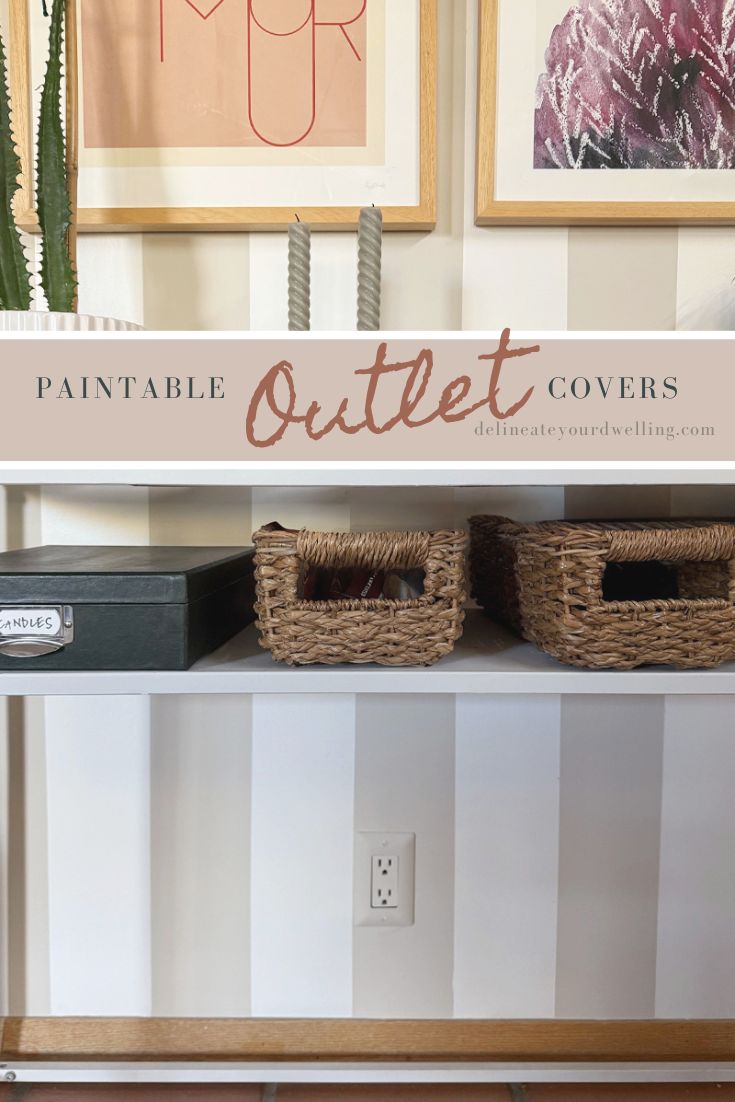
Paintable Outlet Covers

INSIDE : Tired of bright white outlet covers ruining your painted walls? Learn this easy DIY secret – paintable outlet covers help blend in seamlessly. Learn how to match your wall color and where where to buy them.
This post may contain affiliate links. See full disclosure here.
Why Paintable Outlet Covers Are Your New Favorite DIY Secret
Outlet covers paintable have become that small detail in a room that really makes or breaks the space! There is nothing worse than spending tons of time picking a paint color and then a handful of hours later, putting those bright white outlet covers back on in your dark navy room. Talk about an eye sore!
Now that there are paintable outlet covers screwless options, there is no more excuses. Let’s make those less than lovely things like outlet covers blend in and look seamless in a space.
The solution? Paintable outlet covers, the simple, cost-effective design hack that makes those necessary electrical features virtually disappear.
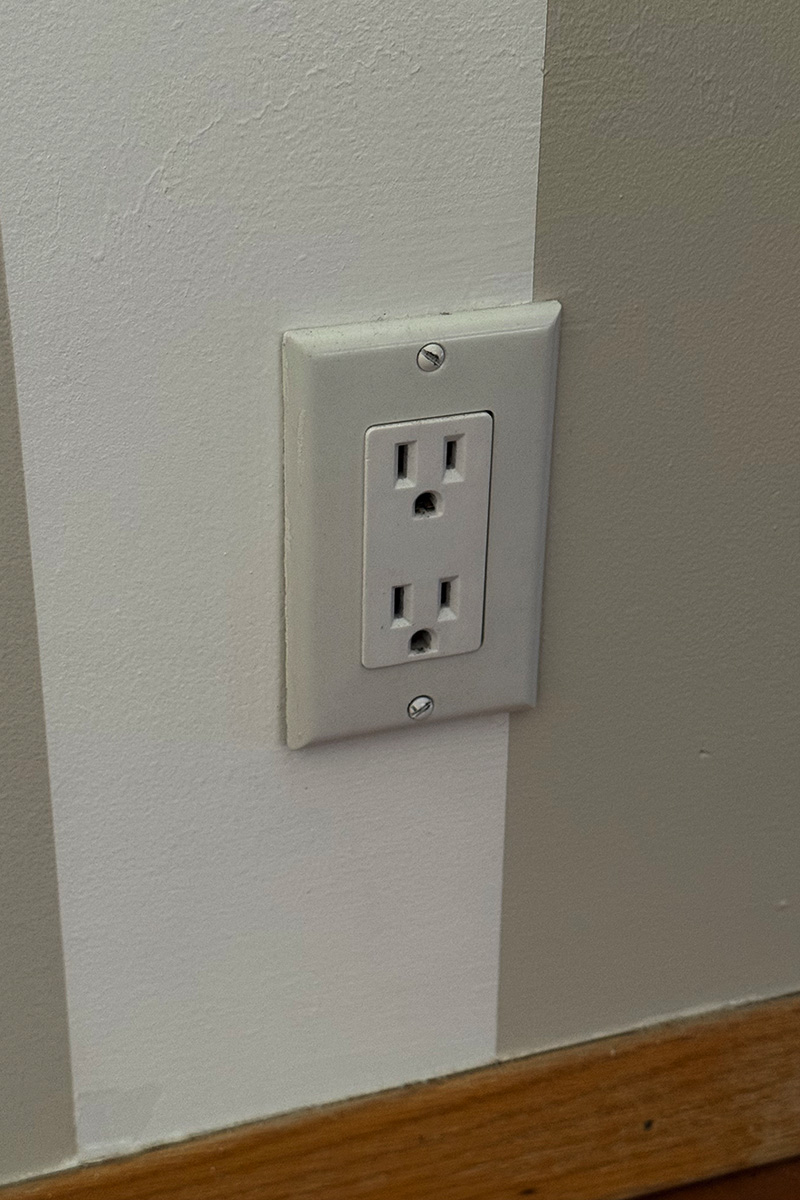
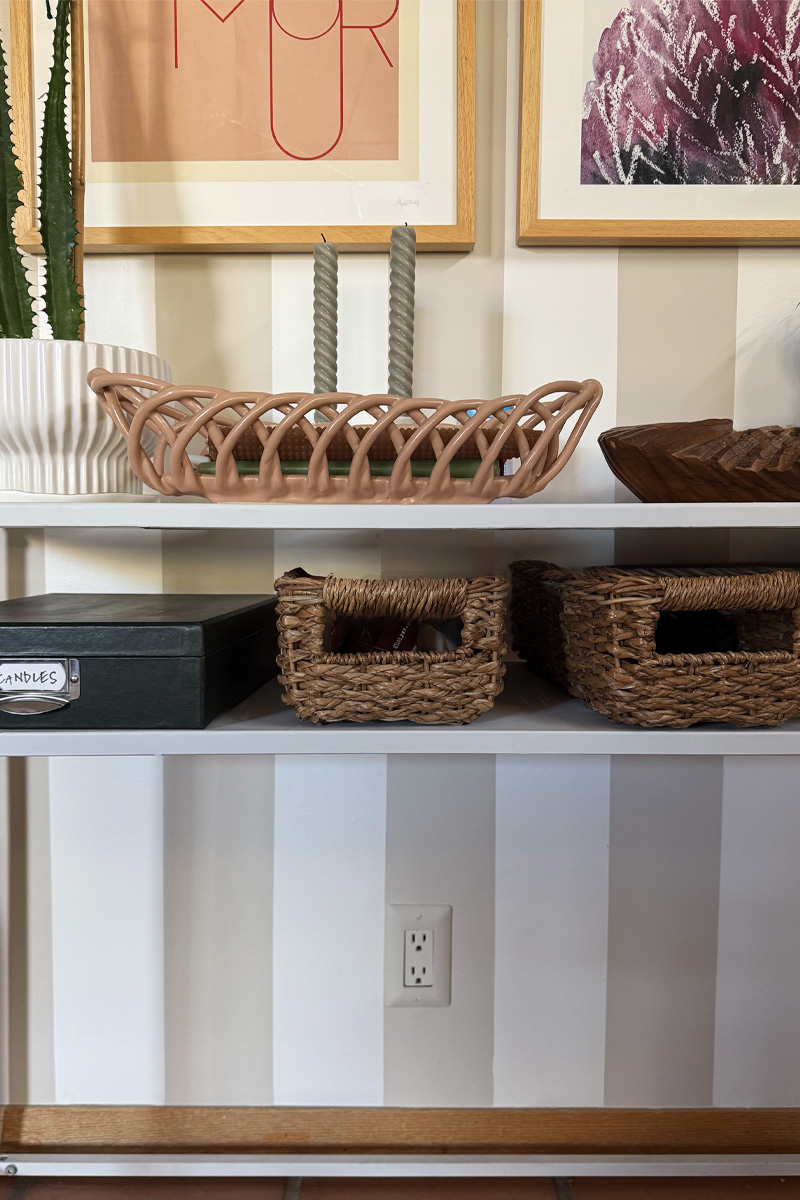
Eyesore Outlet covers
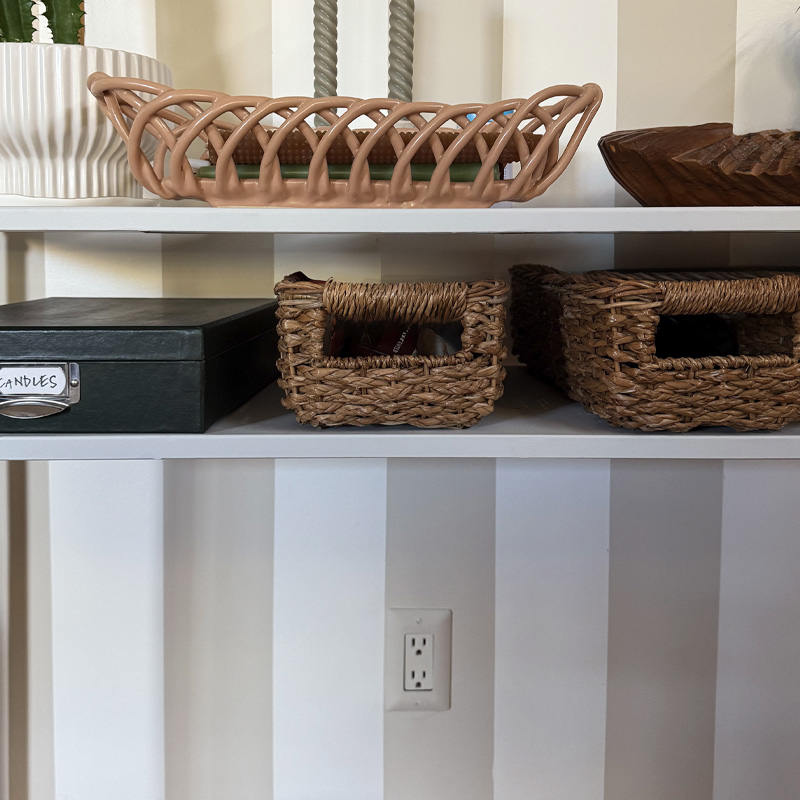
I recently painted my dining room in a beautiful cream and white stripe and loved how it turned out. But as you can see below, the outlet covers really became quite a distraction!
Some covers were in the middle of a cream stripe…
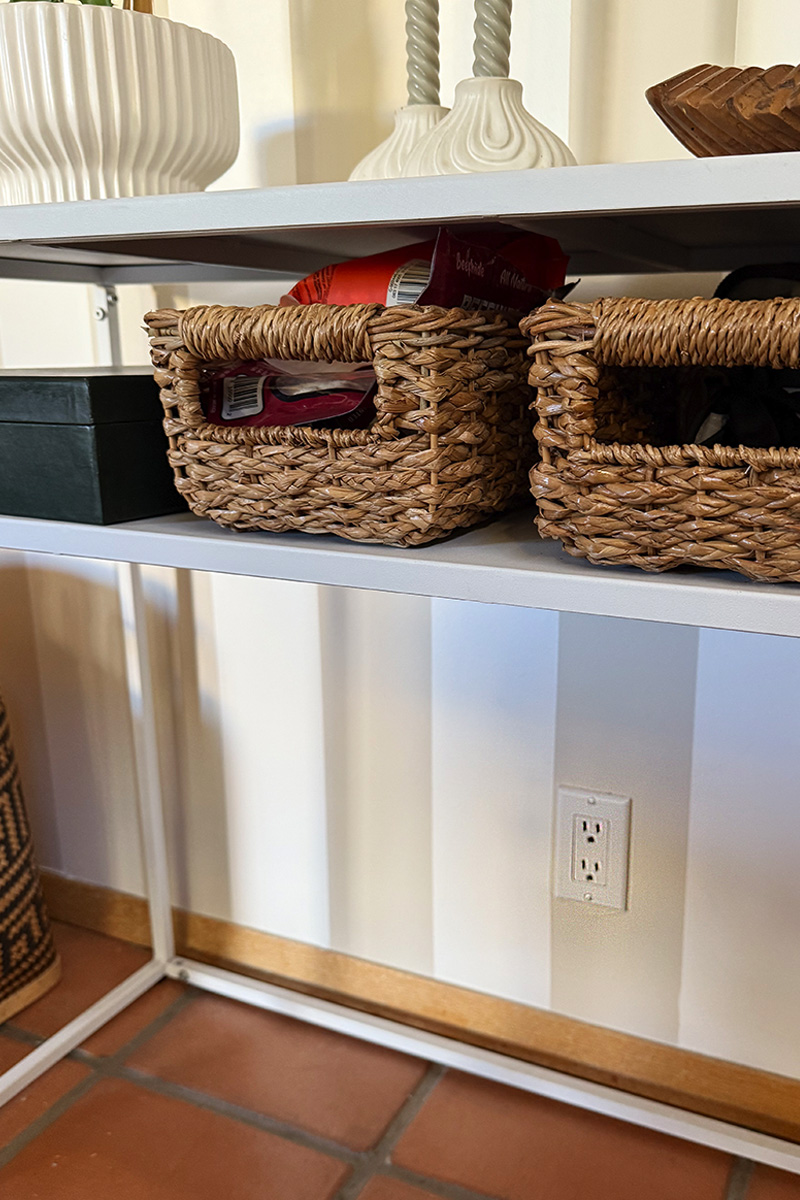
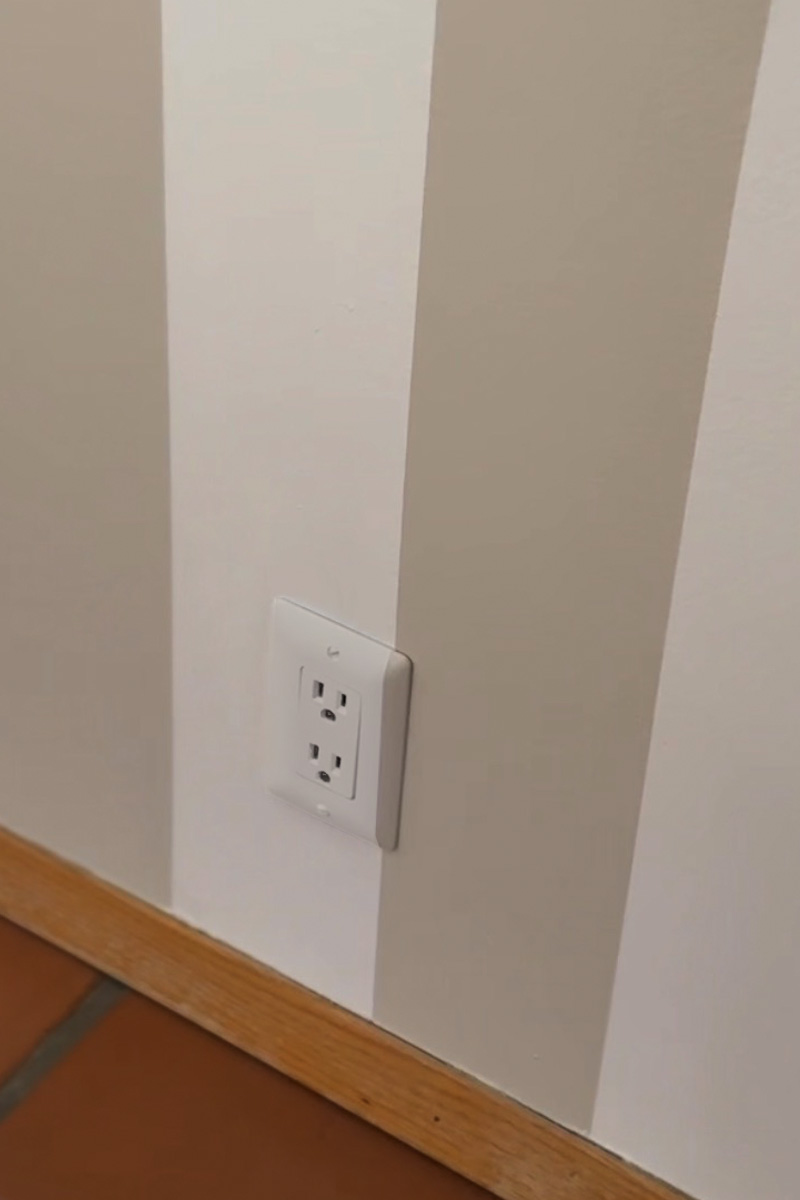
And this cover was mostly on a white stripe, but just enough of it creeped into the cream paint color that it drove me crazy to sit and look at it every day.
The Power of Blending In: A Design Upgrade
Standard plastic covers often have a glossy finish that resists paint and stands out awkwardly against a matte or satin wall.
Paintable wall plates are specifically designed to solve this problem. They typically feature a textured, pre-primed surface that is ready to accept your wall paint, creating a perfectly matched, invisible look!!
The benefit is immediate and dramatic. Instead of seeing a handful of distracting white rectangles, your eye focuses on your beautiful decor.
This small detail is a major design step offering a high-end and custom look without the high cost of specialized designer plates.
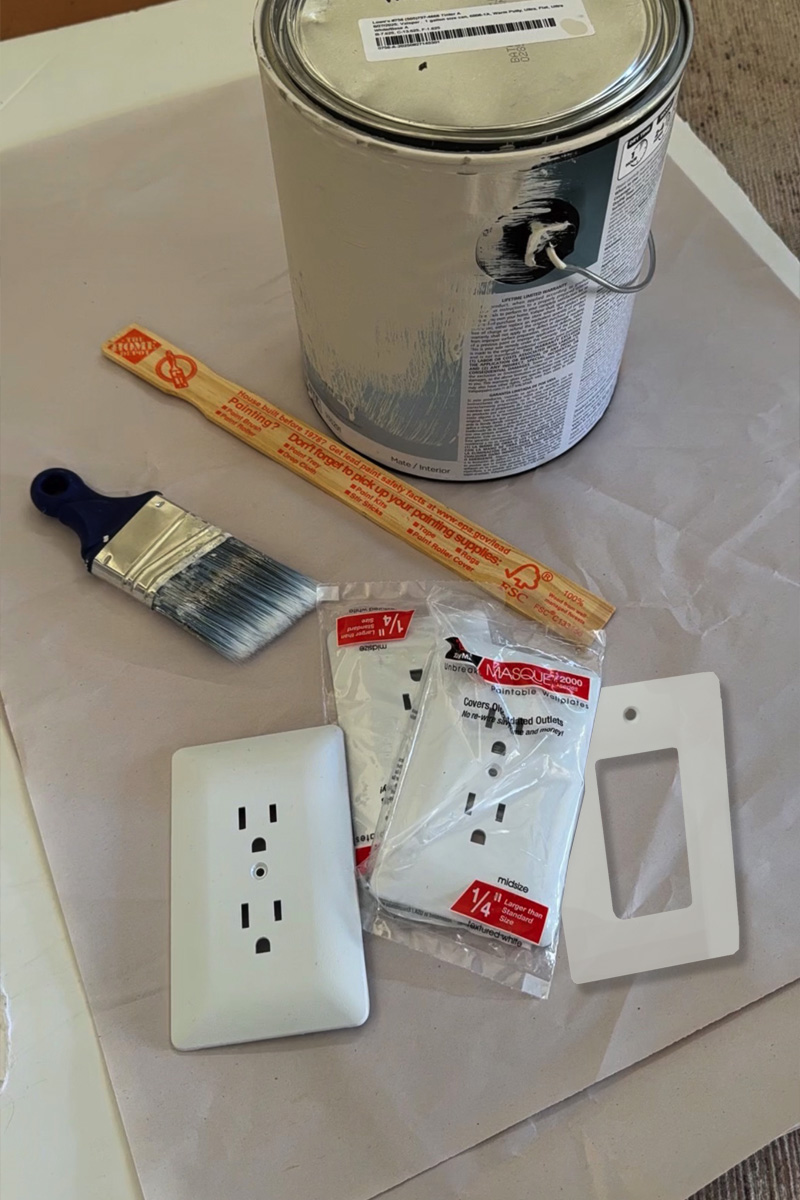
Paintable Cover supplies
- Paintable covers (make sure to see which kind you need – duplex, plate, switch)
- Paint stir
- Paint brush (Woosters are the best in my opinion!!)
- Matching wall paint color
Quick DIY Project, how to paint paintable outlet covers
Painting the covers is a straightforward process, making it an ideal afternoon DIY for anyone!
Always turn of the power in your room to any outlets at the circuit breaker before removing your cover.
Remove the covers and set them aside. I put all of the old ones in a ziplock for safe keeping, you never know when you might need to pull one out here or there in the future.
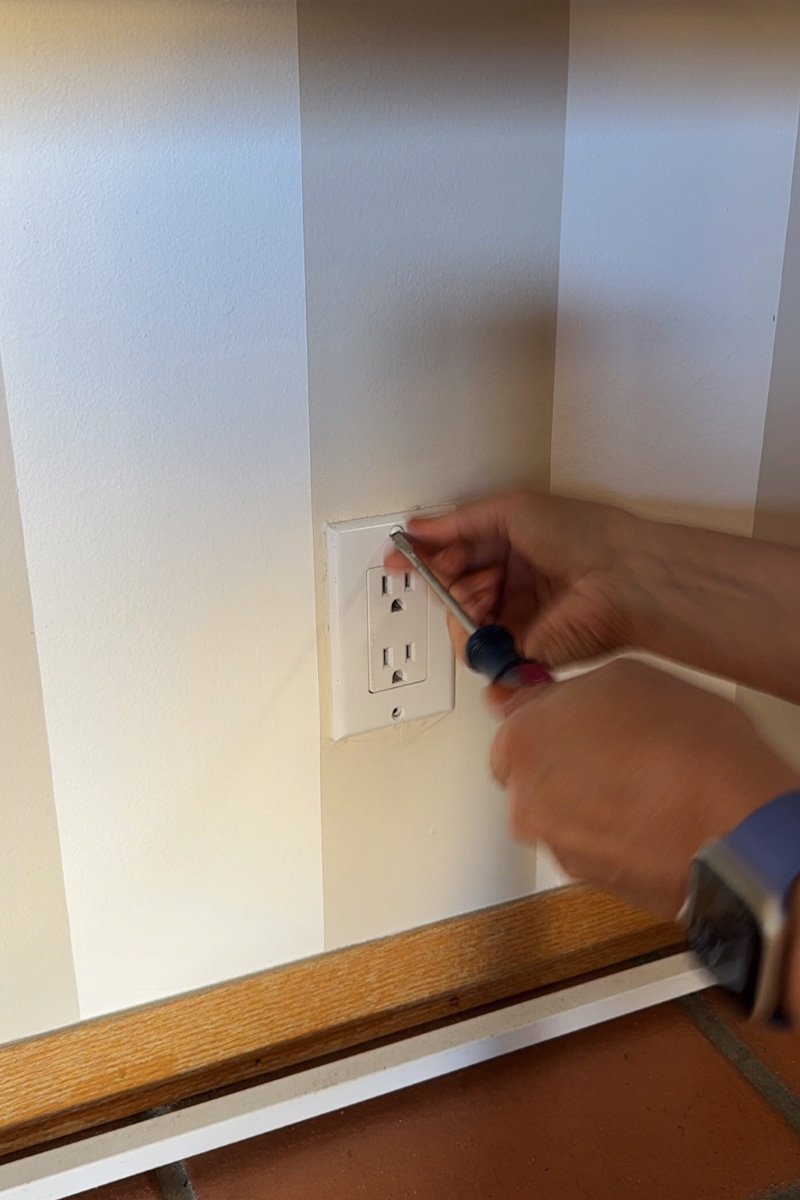
If there is any damage to the wall in that area, this is the time to sand the surface of the wall, fill any holes and wipe down any dust or debris nearby.
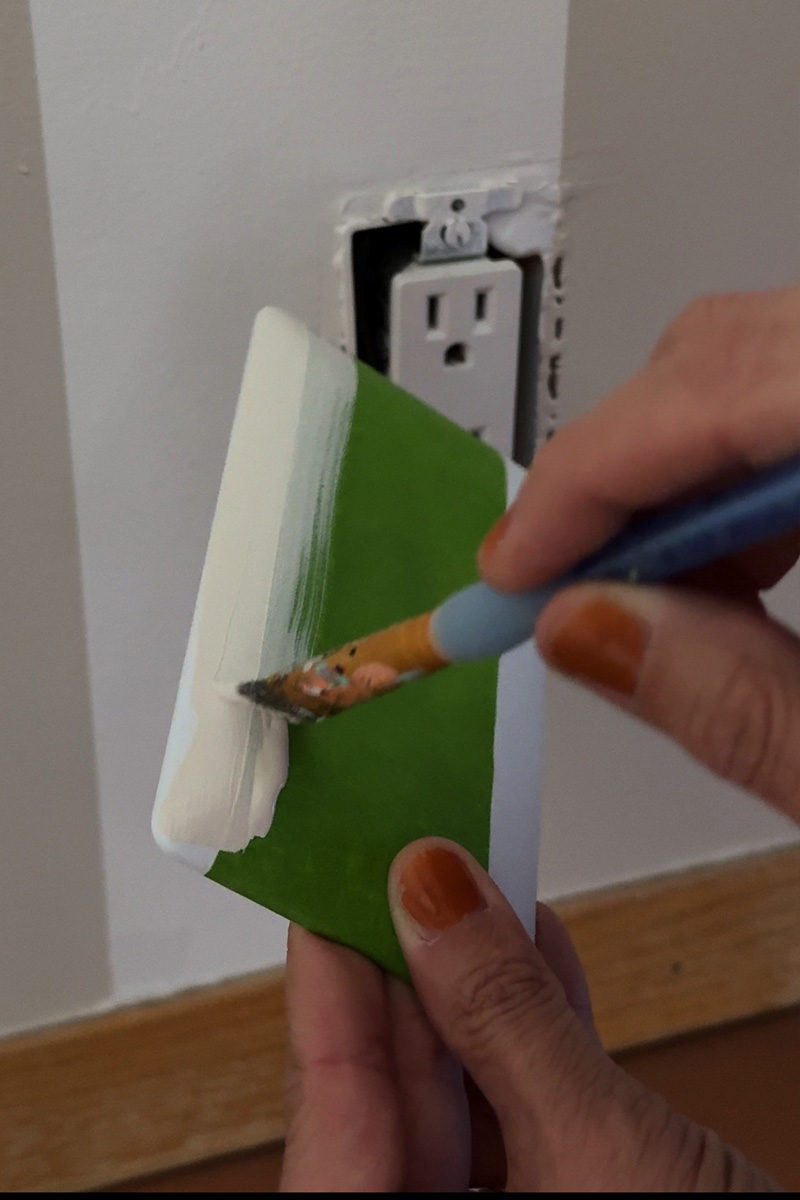
Stir your wall paint and using a small paint brush, apply thin even coats. Be sure to do at least three coats, allowing each to fully dry before painting again. And don’t forget to paint the screws!
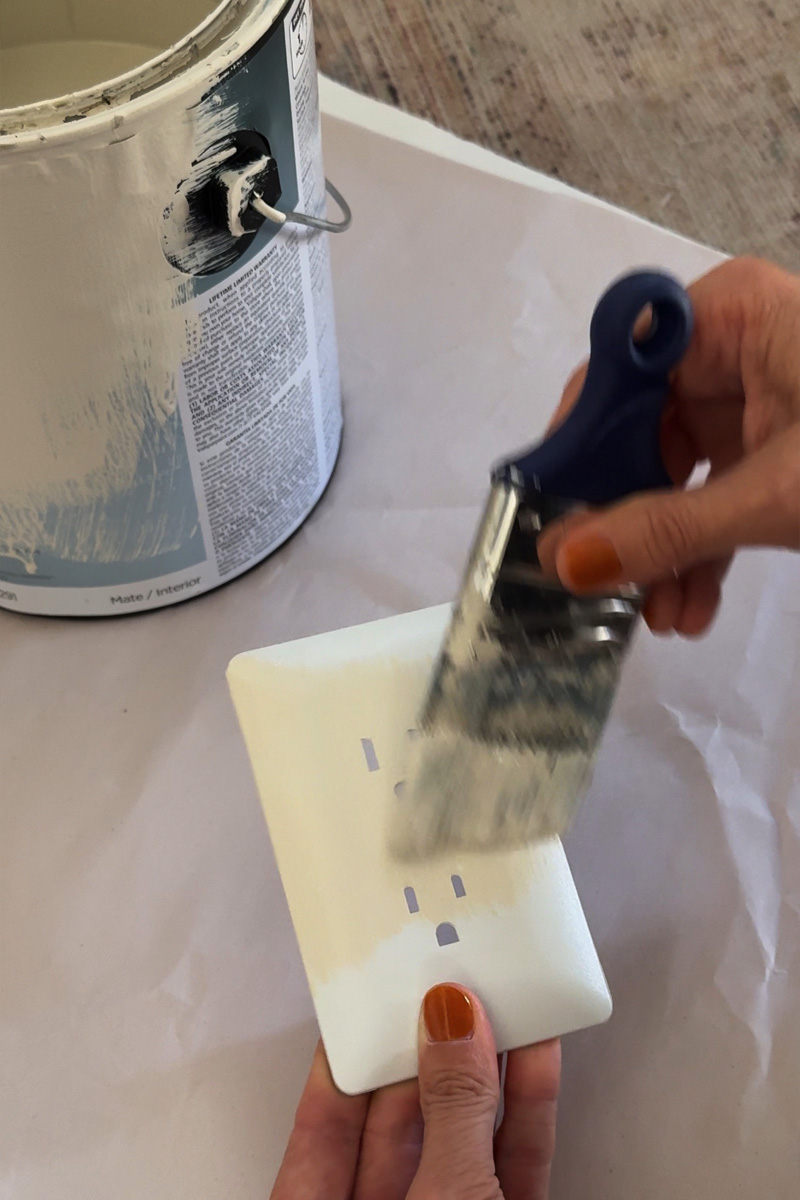
For stripes walls, apply painters tape on the outlet cover in any areas that are in the middle of a stripe. Follow the same painting instructions as above.
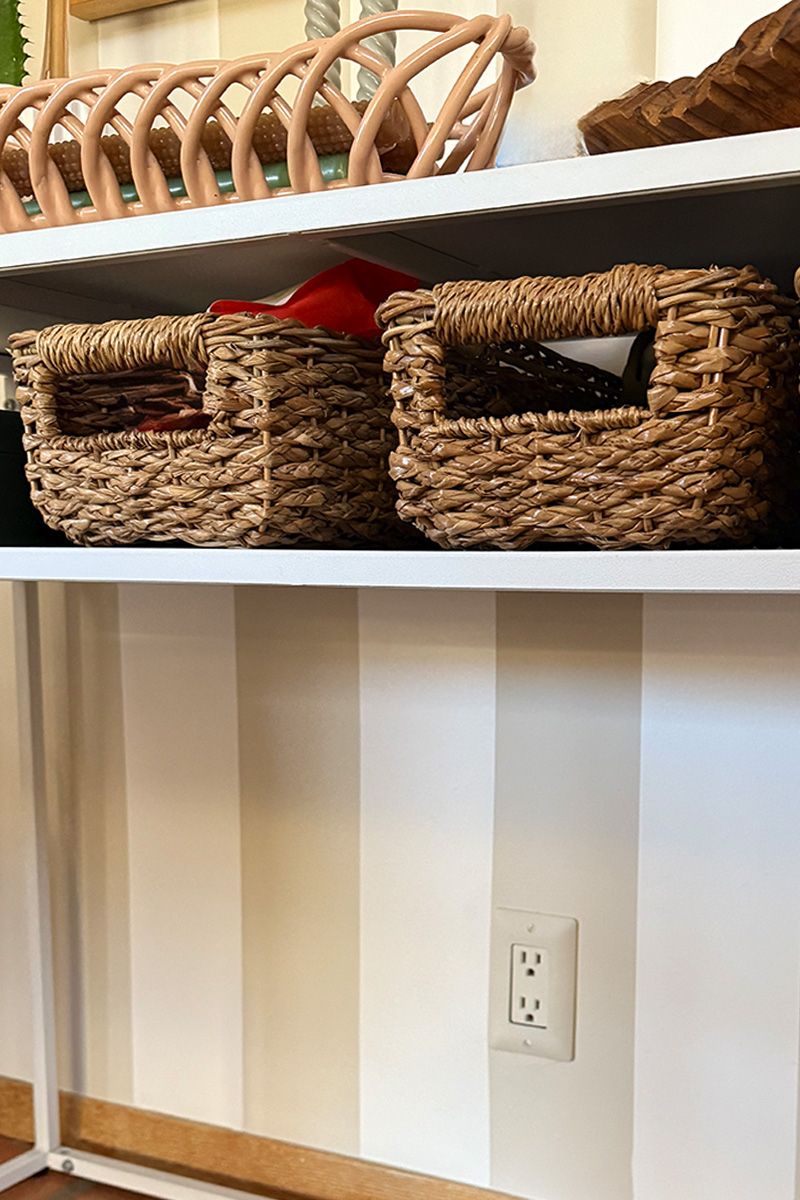
Once fully dry (give them at least 24 hours), re-install the covers on your wall and enjoy your perfectly blended walls.
Where to Find the Best Paintable Options
You don’t need to search far to find these home improvement heroes. Most of the major home improvement retailers stock a wide variety of sizes and styles, as well as Amazon.
- Home Depot: Look for their selection of metal or plastic paintable wall plates, often available in different configurations like duplex, rocker, and blank. The metal options, in particular, are known for excellent paint adhesion.
- Lowes: They also carry paintable outlet and switch covers, making it easy to grab everything you need in one trip. You’ll find options for various “gang” sizes (the number of devices on the plate) to match every outlet in your home.
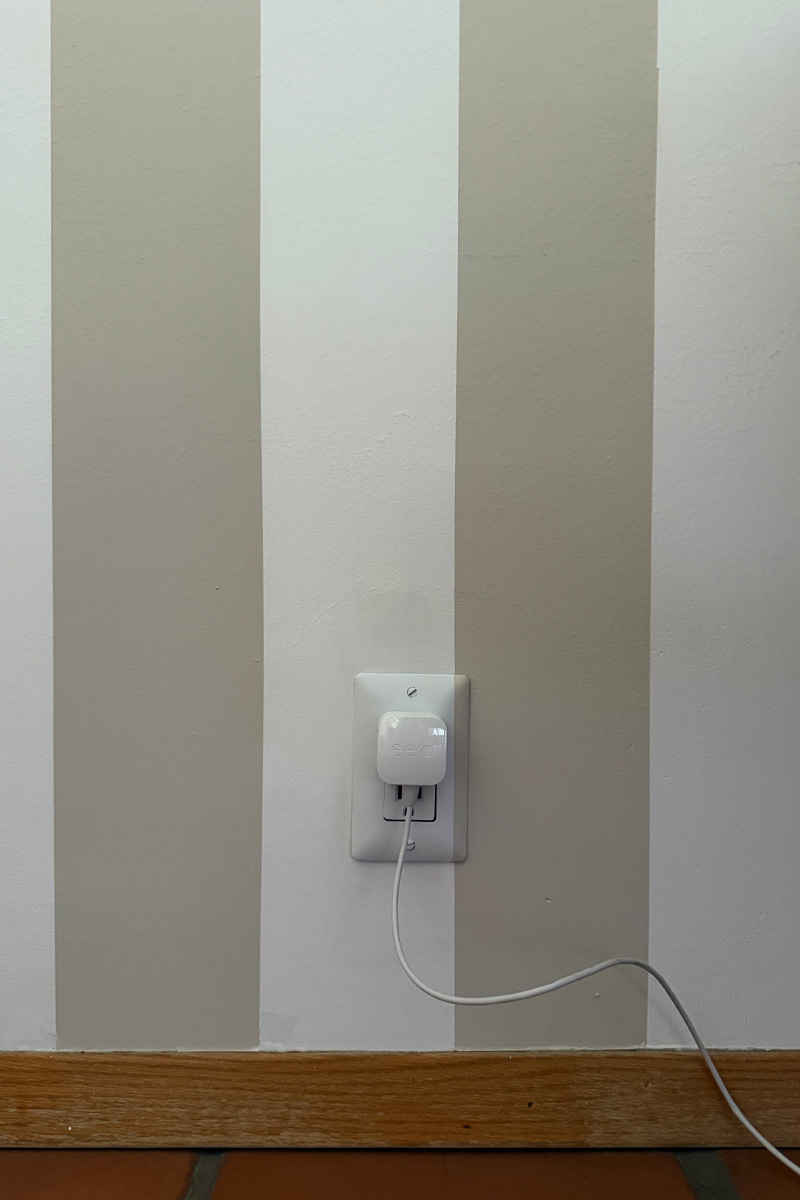
This quick, affordable upgrade is a designer’s trick that makes a massive difference in a room’s final, polished look. Say goodbye to distracting white squares and hello to seamless color!
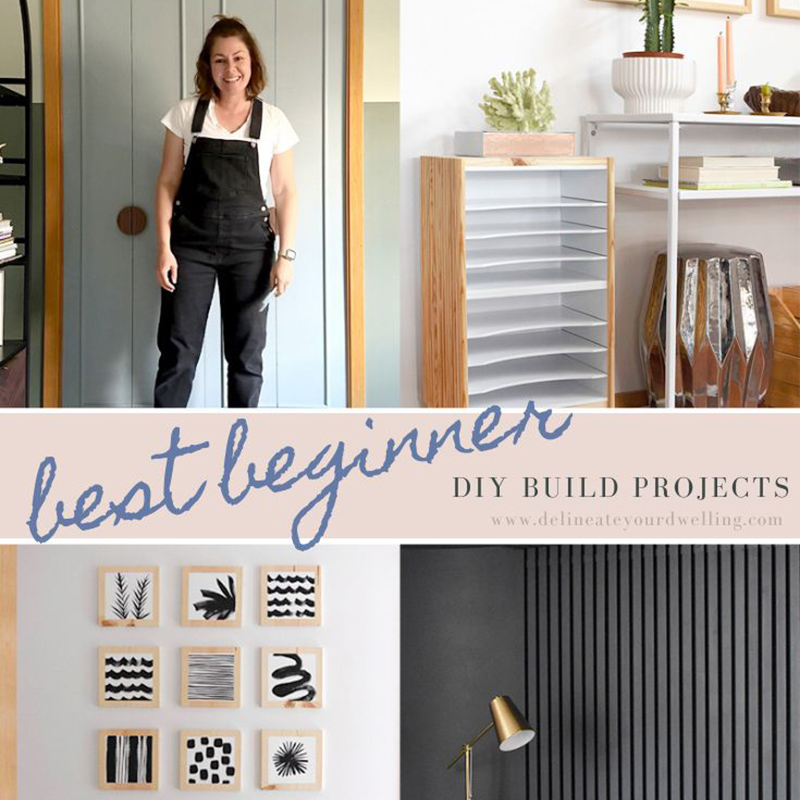
Looking for more simple DIY tips like these? Check out some of these below…