DIY Twisted Yarn Wall Art

INSIDE : Create gorgeous texture in your home with these beautiful DIY Twisted Yarn Wall Art pieces! They take an afternoon to make and there are only 3 steps. Pick yarn colors that make you happy and cozy up your home today.
This post may contain affiliate links. See full disclosure here.
Hi, my name is Amy and I love crafting with yarn apparently. HA. Just earlier this year I made a super fun Ring Yarn Art project for my front entry way. It used 8 large embroidery hoops (only the inside hoops) and a gorgeous collection of yarn. Fast forward to current day and I decided it was time to use a few of those leftover hoops and yarn.
AND If you are interested in downloading a free a print of my watercolor version of this, then scroll to the end of the post!
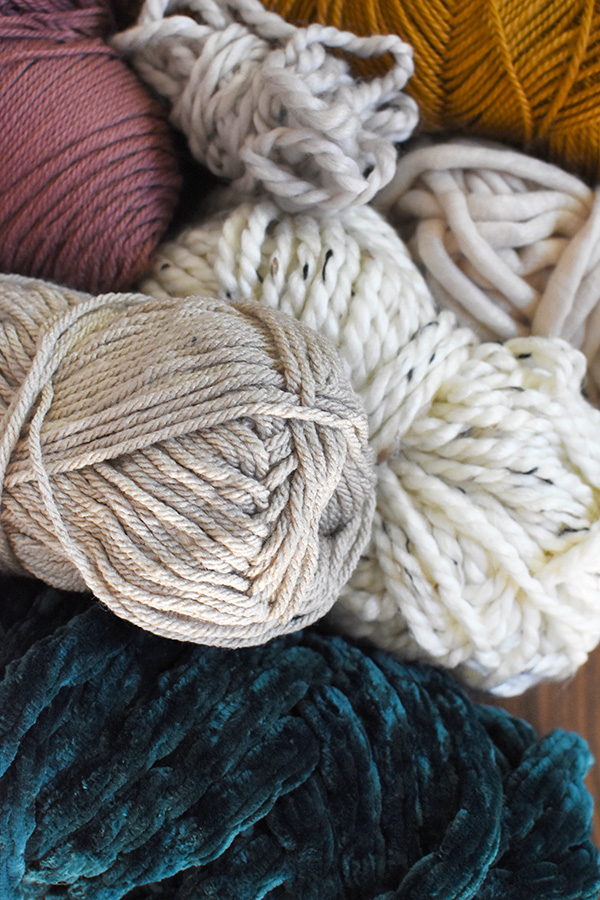
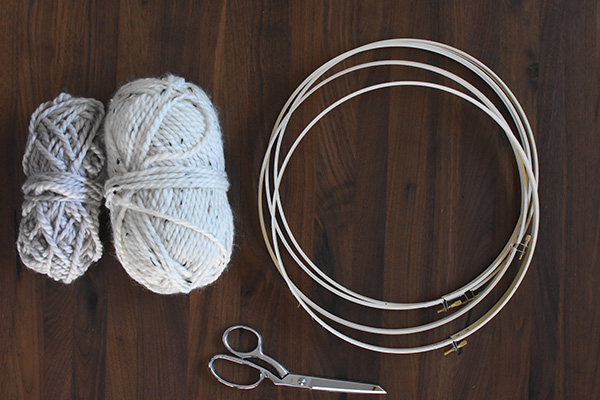
Supplies needed for a Twisted Yarn project:
Three large (12″ +) embroidery hoops
4 colors of yarn per hoop
Sewing Scissors
Hot Glue
How to twist yarn on an embroidery hoop:
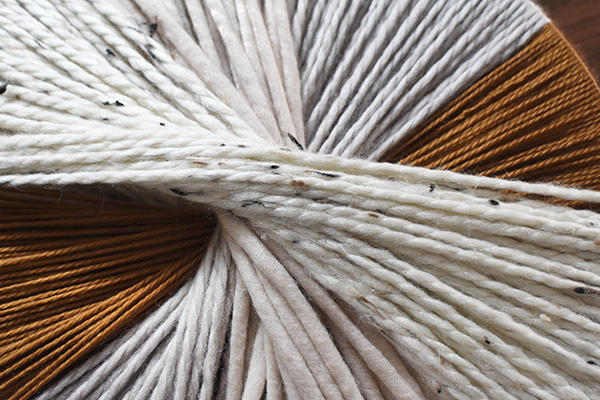
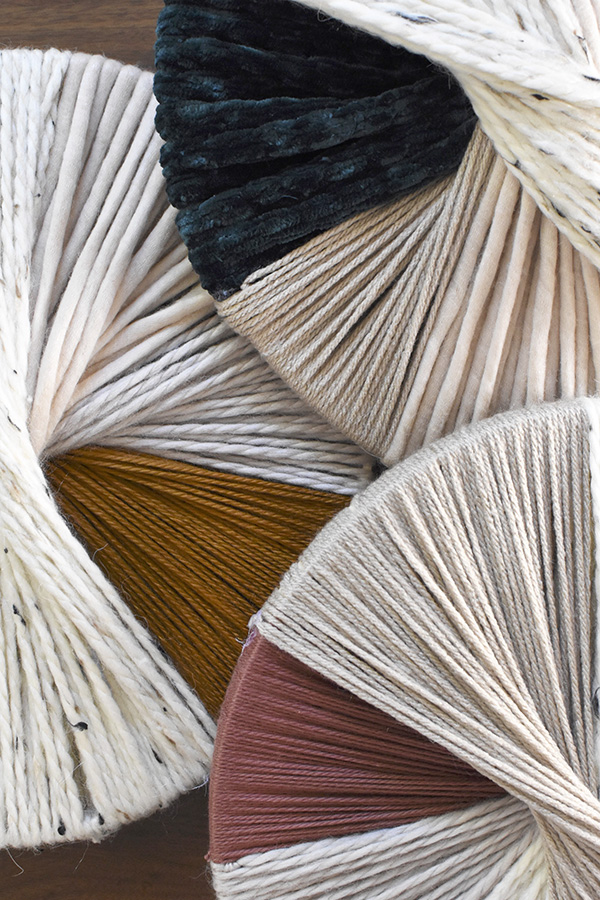
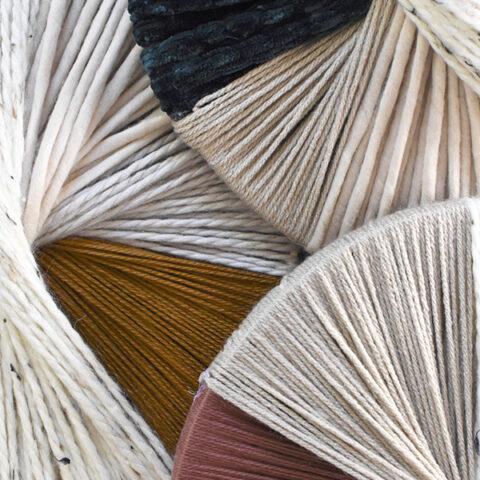
This is what three different colors of yarn look like after being wrapped in this twisted pattern. It creates such beautiful texture. I will break down how exactly to do this below.

I put together this short video to hopefully show more clearly how to wrap the yarn for this twisted look.
- Start by tying off your yarn on one side of the hoop. Wrap the yarn directly across the hoop, basically cutting it in half – this is step 1 to 2.
- Wrap 2 becomes 3 and you go in a diagonal pattern up to wrap 4. And you place the yarn to the LEFT of your step 1.
- Continue in this pattern for as long as you’d like to go. Keep wrapping the yarn diagonally back and forth each time ending just to the LEFT of where you left off.
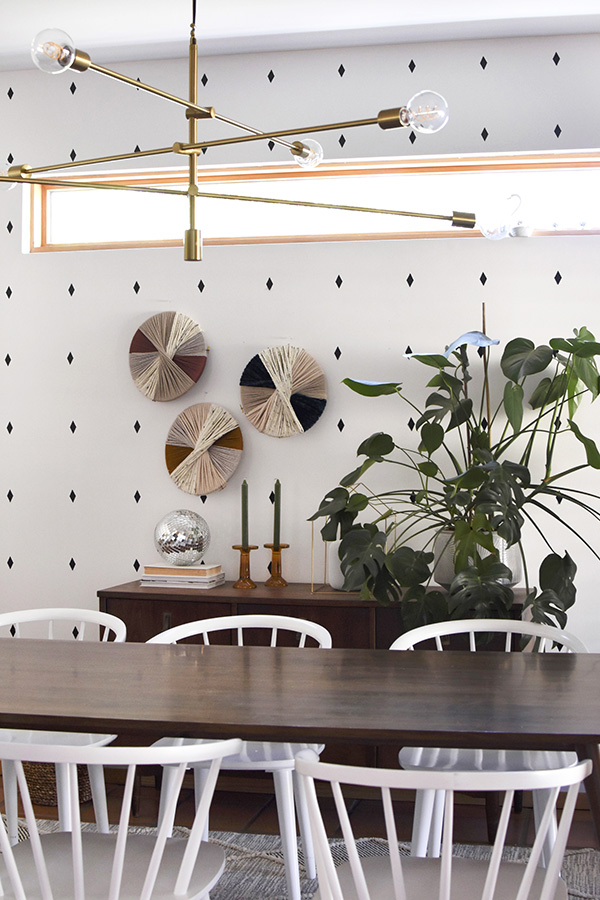
For my twisted yarn pieces, I broke the hoop into eighths and wrapped each color until it hit about that mark. Then I would tie off the yarn and add a small dab of hot glue to help keep it all secure. Then, I would use a new color of yarn, tie it off and follow the same exact pattern again.
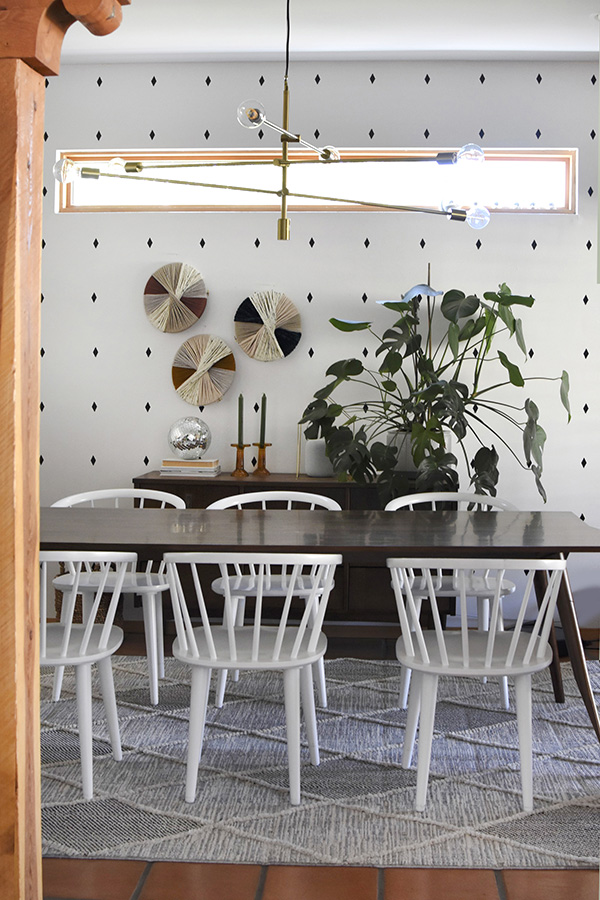
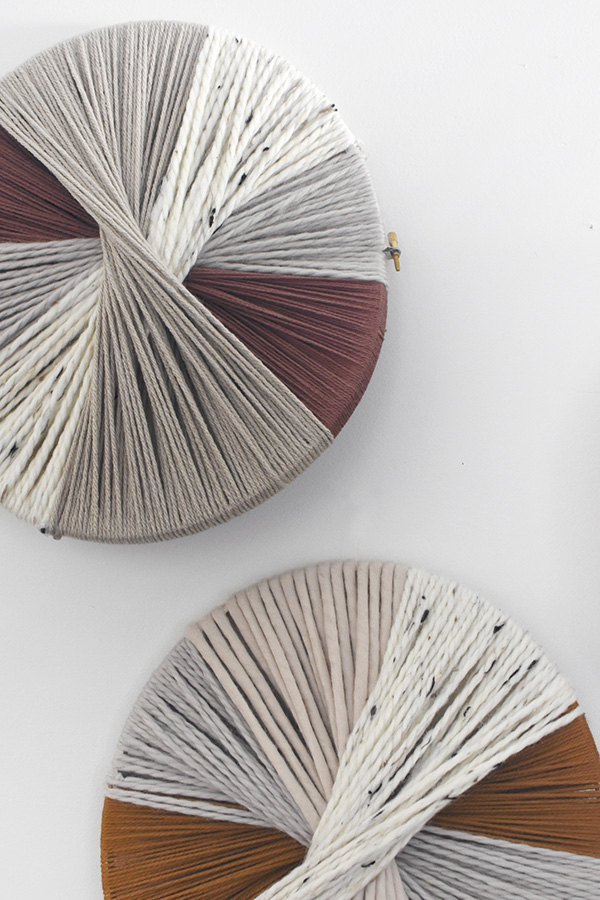
Once the embroidery hoop was completely full, I did two more in similar but different colors. I love how they match but each bring a new pop of color to the room! I have been wanting to create something more color for this spot and these yarn projects were the perfect fit for it.
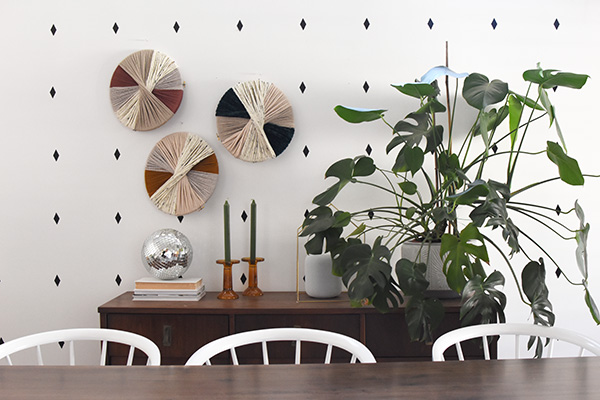
To hang them on the wall, I simply tied a thin piece of thread around the hoop edge and secured to the wall with a small pushpin.

There is so much depth to these beauties.
DIY Twisted Yarn Wall Art
Create gorgeous texture in your home with these beautiful DIY Twisted Yarn Wall Art pieces! They take an afternoon to make and there are only 3 steps. Pick yarn colors that make you happy and cozy up your home today.
Materials
- Three large (12″ +) embroidery hoops
- 4 colors of yarn per hoop
- Sewing Scissors
- Hot Glue
Instructions
- Start by marking the hoop into eighths.
- Tie off your yarn on one side of the hoop and wrap the yarn directly across the hoop, basically cutting it the hoop in half.
- Go in a diagonal pattern up to the place the yarn started. Continue wrapping until it hit about that first 1/8 mark you made.
- Continue in this pattern using the different colors of yarn you selected, wrapping the yarn diagonally back and forth each time ending just to the LEFT of where you left off.
- Add a small dab of hot glue as you go to help keep it all secure.
- To hang them on the wall, I simply tied a thin piece of thread around the hoops edge and secured them all together. They are very light weight a small nail was all that was needed to hang on the wall.
And if you love the look of these twisted yarn pieces, but don’t want to make them yourself… I just finished a watercolor version of them! You can now just down the print of them, so fun right?!! Click on the link below to get yours now.
Download my Twisted Yarn Print
Check out this blog post, Embroidery Wrapped Yarn print, to find the instructions to get your print today!
And if you want to check out a few other yarn crafts, look no further:
Ring Yarn Art
Yarn Wrapped Twig Wreaths
DIY Ombre Basket Yarn Handle
Printed Letter Tote Bag
Flower Wall Hanging with Yarn Tassle
Colorful HOME Sign
Pom Pom Throw Blanket
Lounge Tassel Pillow