Thanksgiving Menu Iron On Tote Bag
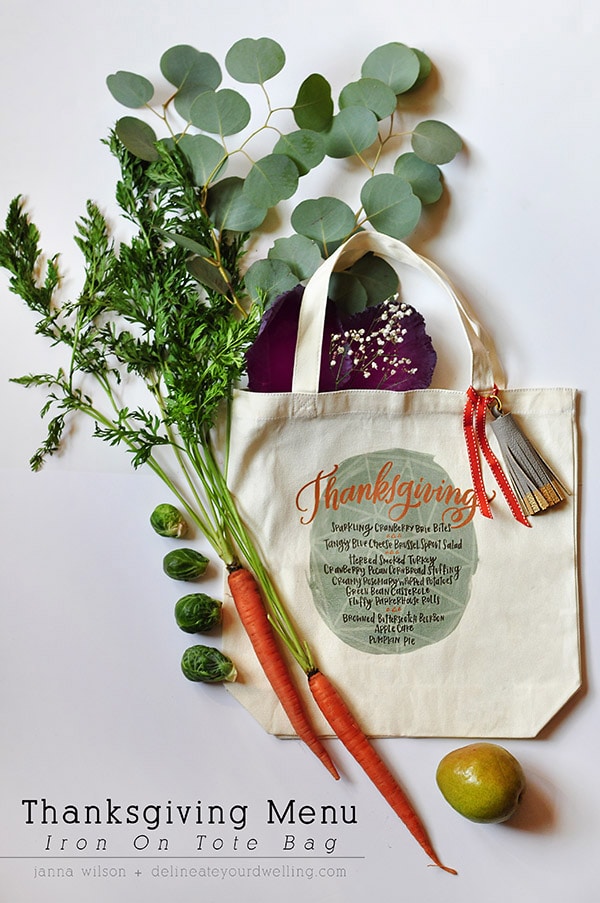
INSIDE : How to create a stunning and inexpensive canvas Thanksgiving Menu Iron On Tote Bag. The perfect accessory to carry around all your autumn goodies.
This post may contain affiliate links. See my full disclosure.
This post has been updated since it’s original publish date of October 2015.
I feel like the last few days, fall has really begun to show itself and I’m loving it.
We have been taking daily walks to collect and admire the gorgeously colored leaves. Fall is certainly here and that means Thanksgiving is almost here, too!
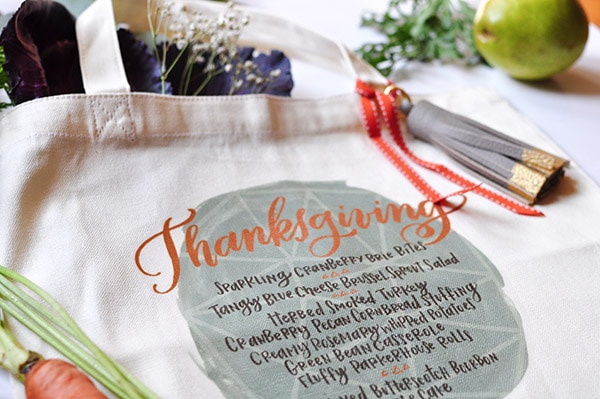
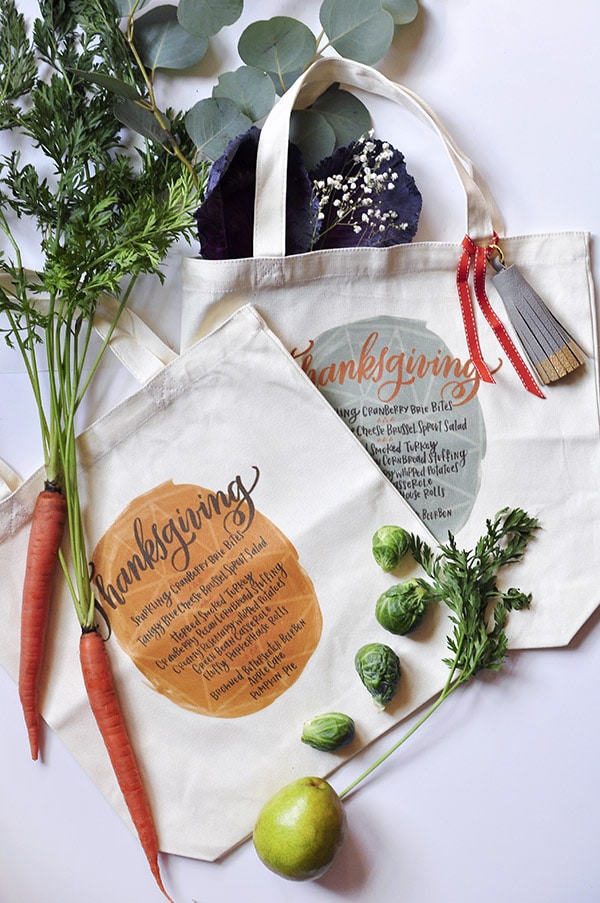
I am so excited to share this collaborative project with you all today. I had the honor of working with my friend, Janna from Janna Wilson on a stunning hand lettered Thanksgiving Menu Iron on Tote Bag.
Be sure to read to the bottom of the post where I’ll be linking to where you can download the hand lettering files.
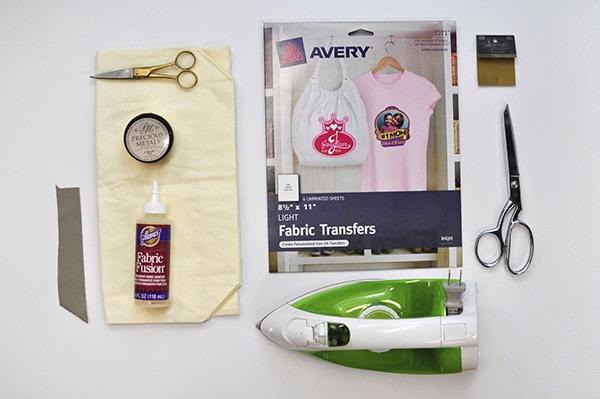
What supplies to do you need to make a Thanksgiving Tote Bag?
What supplies to do you need to make a leather tassel?
How to make a Thanksgiving Menu Iron-on Tote bag?
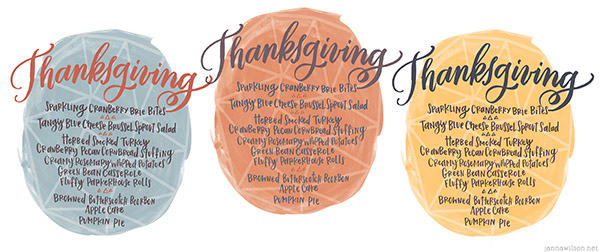
First, sign up for my newsletter to receive access to my ENTIRE digital library, which includes the gorgeous Thanksgiving Menu files from Janna (link at the bottom of post to signup). We are offering the designs in a blue, gold and orange color option.
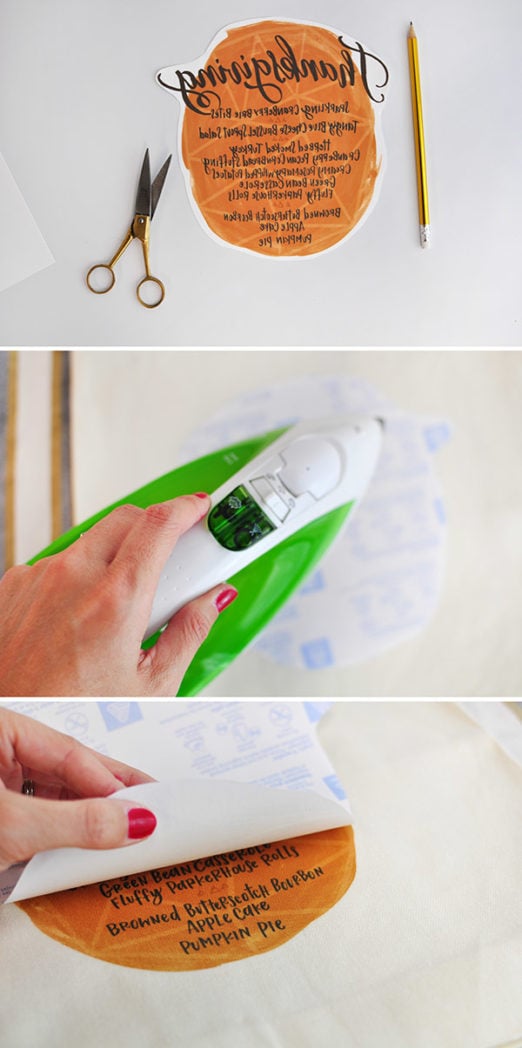
Load the Iron On Transfer paper into your INKJET printer. PLEASE NOTE, this only works on an Inkjet printers. The files you download will come with the text already flipped, so you can just push print.
Once printed, cut out the design leaving just a little white border. Follow the directions per your Iron Transfer paper. After it’s been adequately ironed, allow to cool for 2 minutes and then remove the paper backing.
How to make leather tassels
Next, I made a super easy and chic leather tassel to add to my tote.
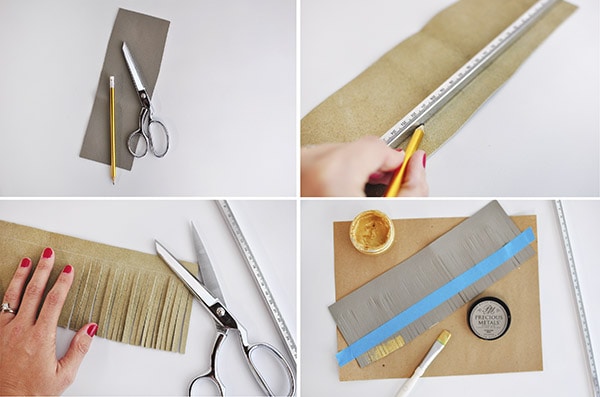
I cut a piece of gray leather to about 12″ x 5″ using sewing scissors.
Flip over your leather and draw a straight line across the back to mark how far to cut the fringe. (Some people measure out the exact cut lines, but I just eye balled my cuts and it turned out fine.)
If you want to add a little gold foil pop to your tassel, turn the leather back over and apply a piece of painter’s tape across the length of the fringe.
Press firmly on the edge, so no paint sneaks underneath. Apply two coats of your Gold Leaf paint and then remove the tape while wet. Allow paint to dry completely.
Once paint is dry, it’s time to put your tassel together!
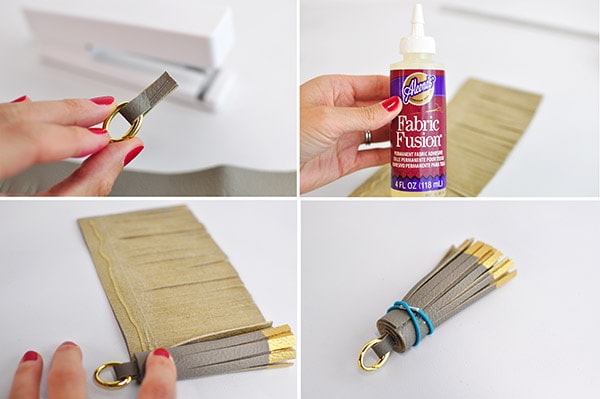
Cut a narrow piece of leather and fold it over your keychain, using a staple to hold it together. Next, apply a thin line of fabric fusion glue along the length of your leather.
Slowly start to roll your leather keychain strip around the leather tassel. Once you get to the end, add just one more dab of fabric fusion to hold and put a hair tie or rubber around until dry. I let mine dry overnight.
DIY Thanksgiving Canvas Bag
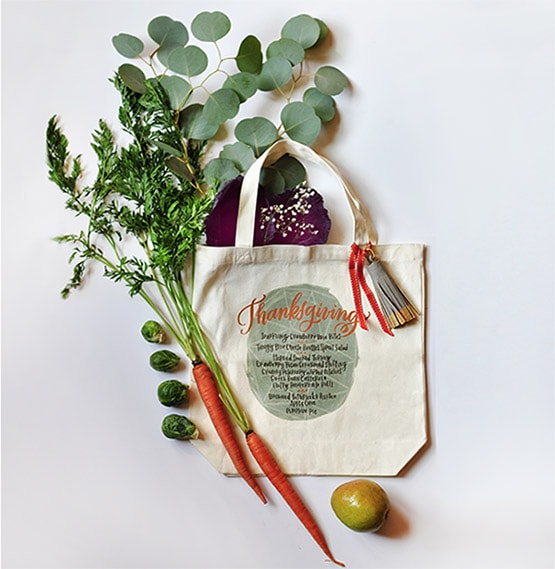
Once, the tote is completed and your tassel is completed, it’s time to fill that tote up with Thanksgiving ingredients, meal leftovers or other fun Fall goodies!
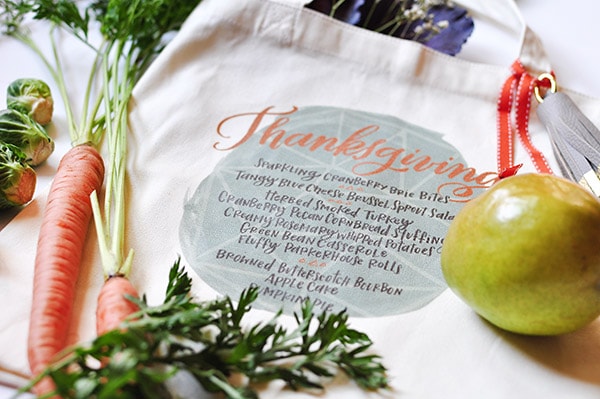
And a little sidenote, this is Janna’s ACTUAL Thanksgiving menu… so you can find me dreaming of heading down South visiting her family this year!!! #YUM
I am completely smitten with these bags and ended up making three in total, one of each color!
Ready for the Thanksgiving Menu download file? Get it by signing up for my email below.
IT’S DOWNLOAD TIME:
Sign up for the DYD Insider newsletter to receive access to my ENTIRE DYD Printable Library along with these three GORGEOUS Thanksgiving Menu printable files!!!
Already a DYD Newsletter Insider? Click on over here to access the printables library using the password found at the bottom of any email I have sent you.
Be sure to follow Janna on Instagram AND you can check out her gorgeous site, Janna Wilson Designs.
If you liked this fun Thanksgiving craft, you might like my Thanksgiving Food Centerpiece post!
Looking for other painted tote bag ideas?


YouTube has particular tracks being essentially pre-cleared and so easy to protect.
Oh my gosh, this is SUCH a cute idea, I love it!
I stopped by from Frugal Crafty Blog Hop.
Thanks for stopping over, Jessy! Iron on tranfer is my new favorite thing!! 😉
These are so fun! What a great way to go shopping for your thanksgiving dinner groceries. Thanks for the tutorial, I’m on my way over to check out Janna’s site…
Thanks Meredith! It was such a fun project to collaborate with Janna on… she has such talent, I’m so glad you’re heading her way! =)
One word. Fabulous!
YOU lady!!! This was such a fun collaboration. Thank you again for contacting me, I hope you see some traffic from it.
Oh my goodness, these are making me squeal with delight! LOVE them, I’m definitely going to need to make my own! Thank you!
Yay, I love squealing with delight over craft projects! Thanks for stopping by Kate. xo
Adorable! What a cute idea… xo
You always make the cutest things Amy! Love the idea of having the menu on the bag, it would make such a cute gift for guests! The tassel is the perfect finishing touch!
Aw, thanks for the kind words Gilly! My mama is getting the orange tote!
Oh goodness, what a gorgeous creation! Seriously beautiful, both of you! Fall is in full swing here too and I am loving it! I just wish we didn’t have Daylight Savings this Sunday!
Oh my gosh, is it Daylight Savings already??! Haha. Glad I found out in a blog comment, ha. And thanks for the tote love, I love collaborating with other creatives!
These are seriously cute and such a great idea! And I’m with you, I’m totally crashing her thanksgiving because that menu sounds delish!
Thanks Bre! We can carpool to Janna’s house and eat her dinner!! 😉
I sincerely love this so very much, I can’t quite express it adequately. So pretty and such a fun idea!
Aw, thanks girl! Such a complement from you. xo
These printables are so cute and look awesome on the canvas totes! I also love how you added the tassel 🙂
Thanks, Katie! I’m kind of loving these and it was so fun to work with a friend on a project even though long distance!