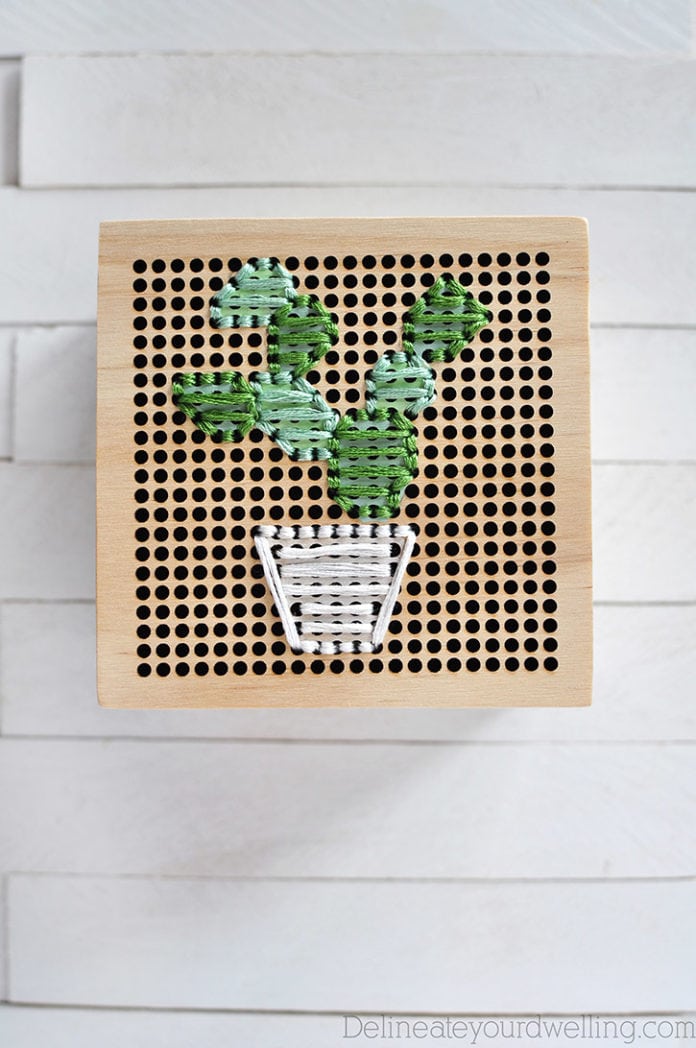
Simple Cacti Embroidery Box
INSIDE : Learn how to create a simple Box Cactus on a gorgeous small Embroidery Box with a few simple stitches.
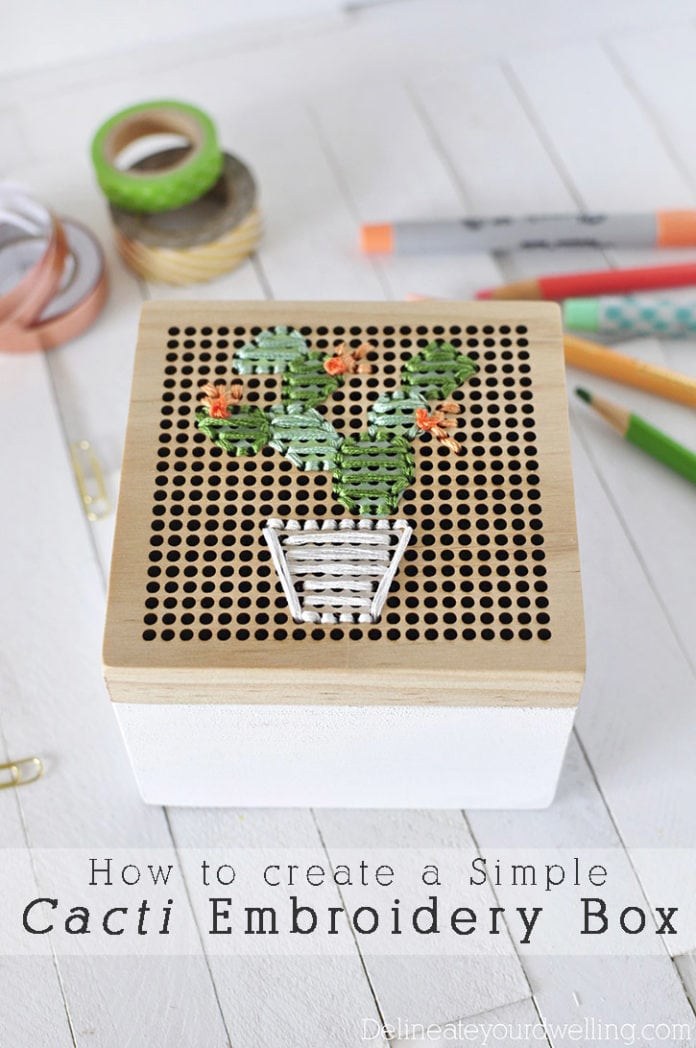
A few weeks ago I shared this project at Simple As That‘s blog. Today I am sharing a how to create a Simple Cacti Embroidery Box with you all! I actually shared that I learned how to do embroidery stitches as I went, so hopefully even if you don’t know any of these techniques, you will believe me… it’s so easy!
This post contains affiliate links. See my full disclosure.
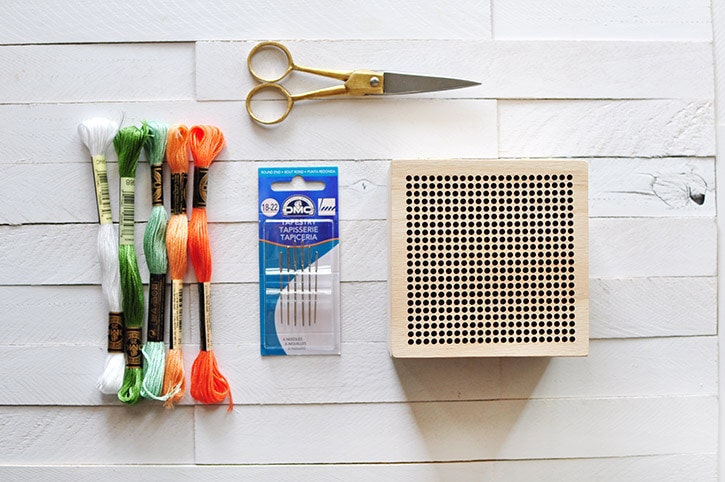
What supplies do I need to make a Box Cactus embroidery box?
Wooden Embroidery Box
Embroidery Thread or Yarn
Embroidery Hand Needles![]()
Peacock Embroidery Scissors![]()
Paint in similar colors of thread
How to make an embroidery Cactus box?
Before starting this project, I quickly drew out on the inside cover of the Embroidery box what my design would be. This helped me keep track of where my next stitch would be. (I highlighted in color for you all to see the design a little better.)
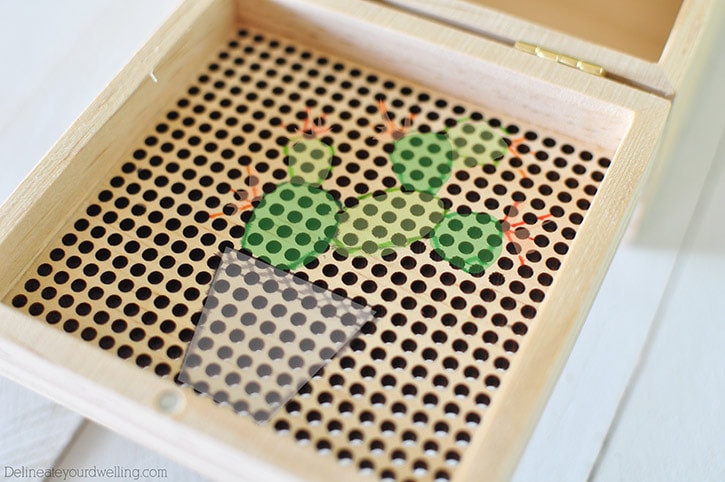
I also painted the basic colors on the front of the cover. However, if you use yarn for this project, instead of thread, it will fill in the space a bit better and this step is unnecessary.
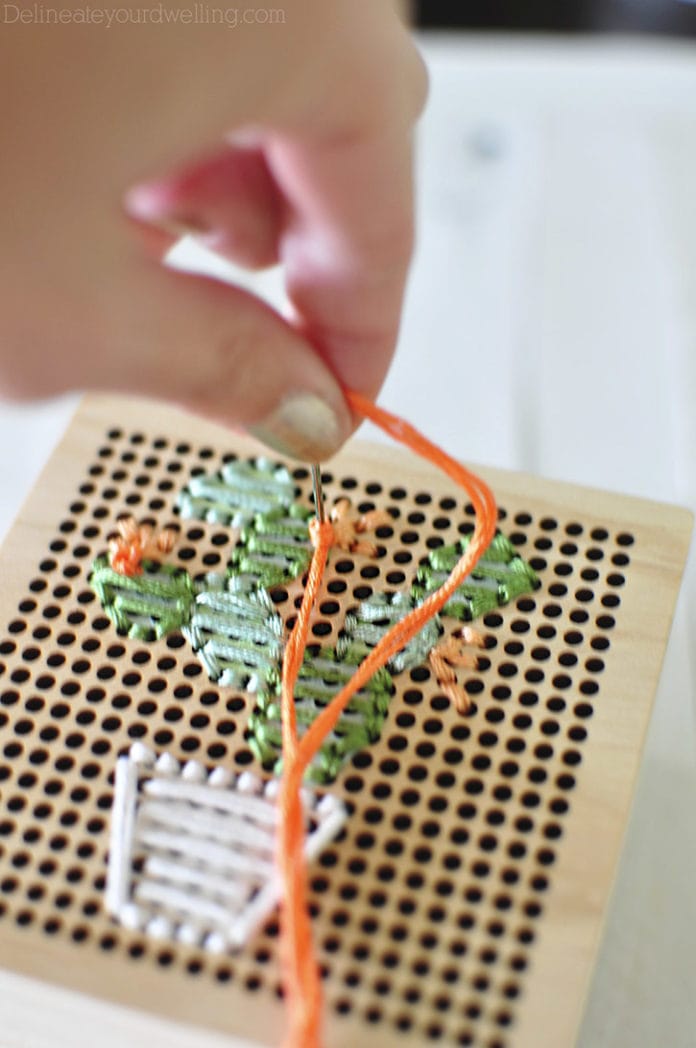
How to do a simple embroidery back stitch?
I mostly used a simple Back Stitch for the outlines of each shape. To make a back stitch you make a single straight stitch forward. It can be as long or short as you want. When you come back up a space ahead, you then put your needle back down into the same hole at the end of the last stitch you made.
So, you are bringing your stitch back to the end of the last one. It’s a bit like one step forward, two steps back if that helps you visualize it.
How to do a Satin embroidery stitch?
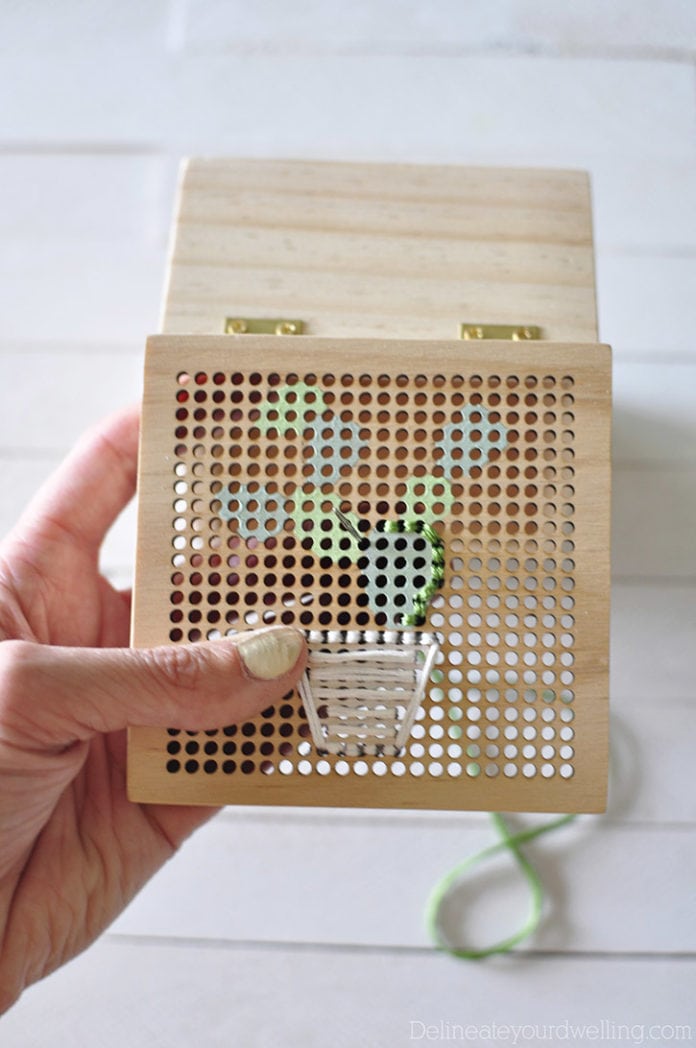
And then to fill in the spaces, I used a Satin stitch. To make a basic satin stitch, bring the needle up through the wood (or fabric in most cases) at your starting point. Put the needle again across from your original spot, on the opposite side of the shape you are filling. Bring the needle up on the side of the shape where you started and go back down on the opposite side.
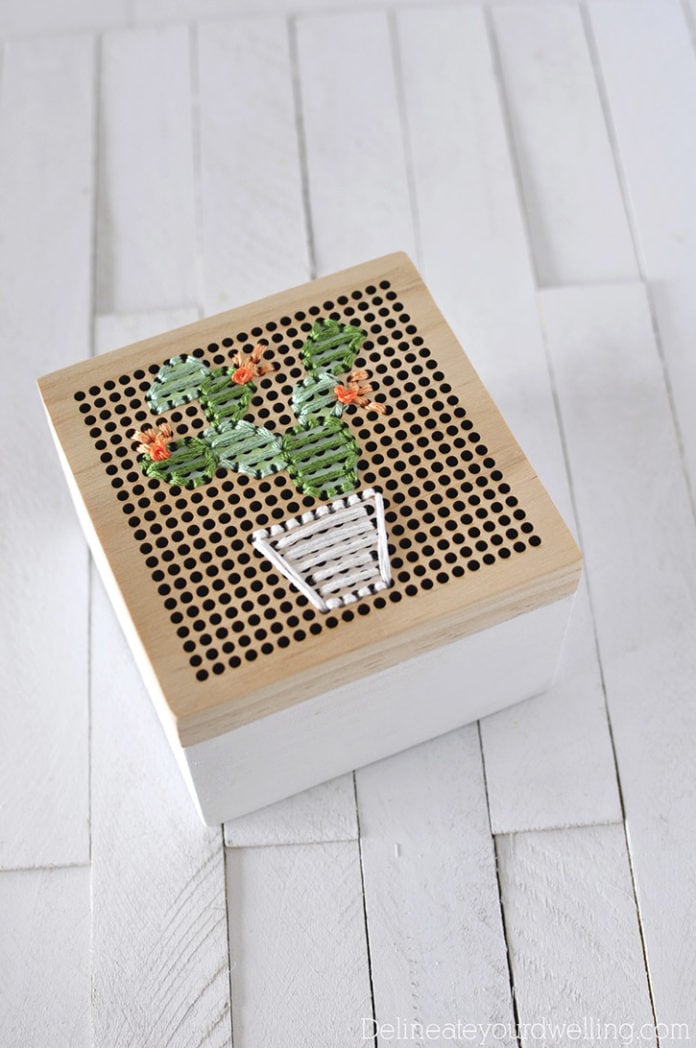
The last little detail for my Embroidery Box was to add a few orange flowers to the cacti.
I did another simple Back Stitch in a light orange for the main flower and for the center I used a French Knot.
How to do a French Knot embroidery stitch?
I found this tutorial very helpful in learning to make a french knot. I think it’s SO LOVELY of a detail and now it’s my favorite kind of embroidery stitch to make.
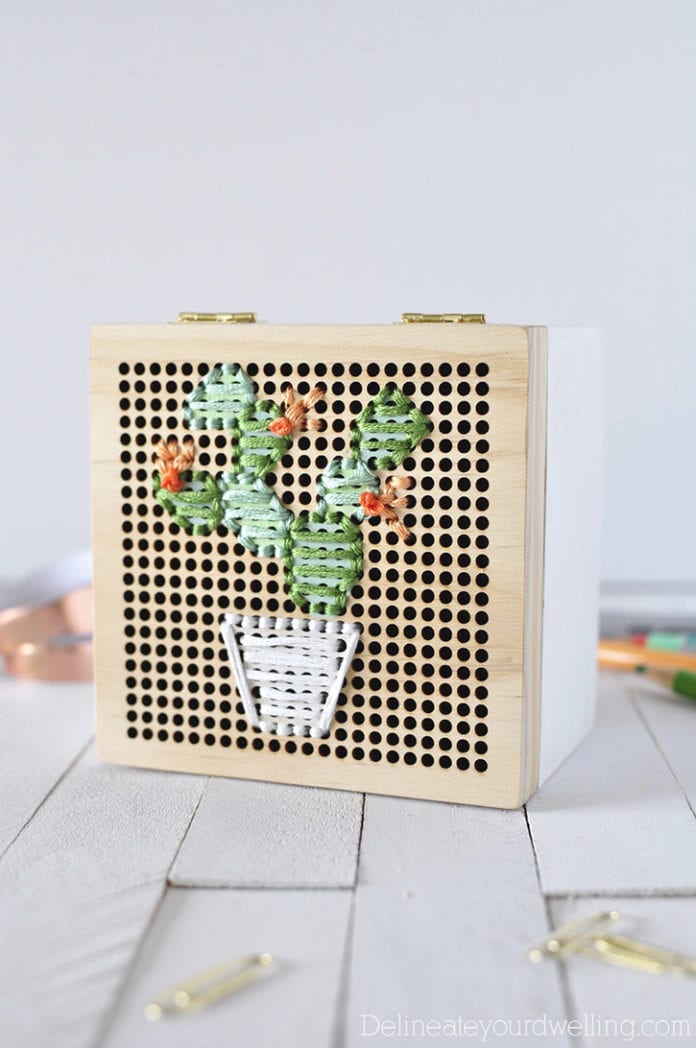
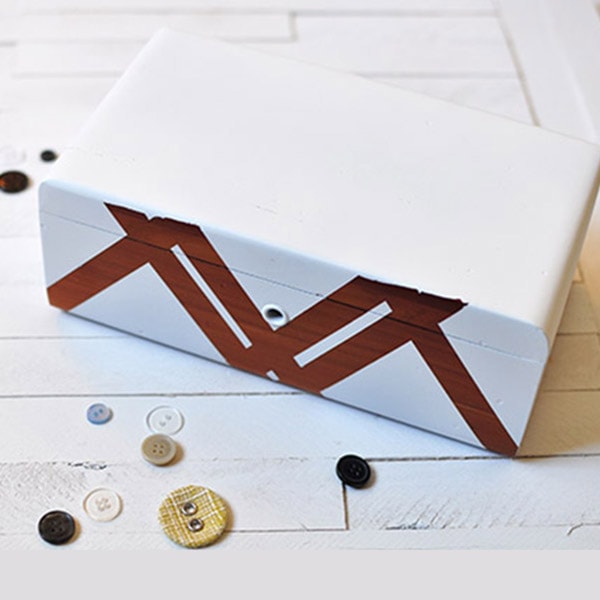
Once the embroidery cacti was completed, I painted the bottom portion of my box with white acrylic paint.
I love how this easy project turned out and already have my box put to good use in my office area!
I hope this has inspired you to dig out your embroidery thread and get started on a fun project!
I have done so many fun painted and patterned boxes over the years!
Here are a few of my favorite ones.
This is so adorable!!
Thanks so much!
Simple nice project thanks
This is such a great idea! I’m doing a palm tree for my daughter. Did you use two full strands of embroidery thread? I guess that would be 12 strands?
Thanks so much! Goodness, no… I used just a little bit of each of the color threads I got.
I didn’t mean the whole skein…I meant the floss is generally six strands and I just zoomed in and it looks like you used two pieces threaded for your stitches. Thanks! ?
Hee hee, you clearly know much more than me! 😉 I think I did actually two pieces of thread because I wanted a thicker and more full looking stitch. Thanks for checking.
Lovely project :).
Thanks so much!! 😉
cute!
This is so adorable!!
What a complement coming from you! Thank you Lindsay.
How pretty! Drawing it out first is a great idea too, especially for someone like me.
Thanks so much for linking up with #ShareTheWealthSunday!
xoxo
Lisa
This is so clever and beautiful! I especially like that you painted the bottom of the box white – I think it really just finishes the piece off! Why are cacti so awesome??
This box is so neat! I love how popular cross stitching is now – nontraditionally. I am pinning this one!
Would love if you shared it at our Yarn Fanatic Party – http://eyeloveknots.blogspot.com/2015/05/yarn-fanatic-party-37-string-theory.html.
Ah, thanks so much Alexandra!! I’ll be sure to stop by and link up.
This is one of my EyeLoveKnots Yarn Favorites, and featured in this week’s party. Great inspiration for us all! Thanks.
#38: http://eyeloveknots.blogspot.com/2015/05/yarn-fanatic-party-38-string-theory.html
Thank you for the feature, Alexandra!
How sweet, I love it!
Tania
Thanks, Tania! I appreciate your sweet comments.
This is very interesting. I have never seen an embroidery box before. I would love for you to link up your embroidery project at the Stitch It, Blog It, Share It Link Party going on now at BehindtheSeamsSewing.com.
Thanks, Bonnie! Just linked up.
Super cute Amy!
Aw, thanks so much Rachel!
So cute!