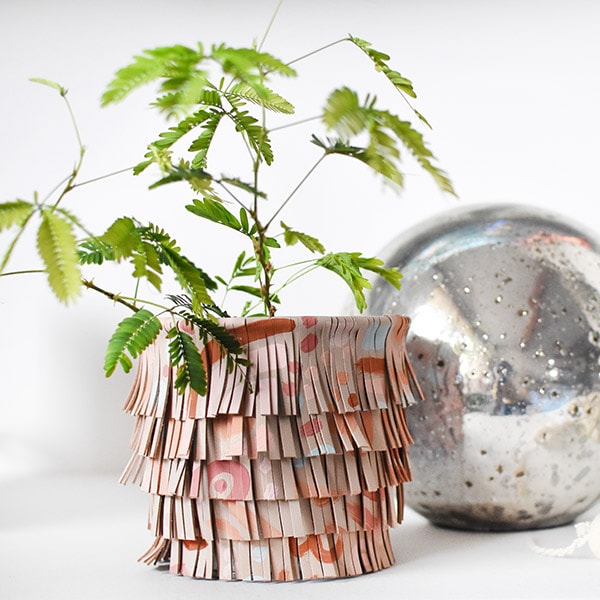
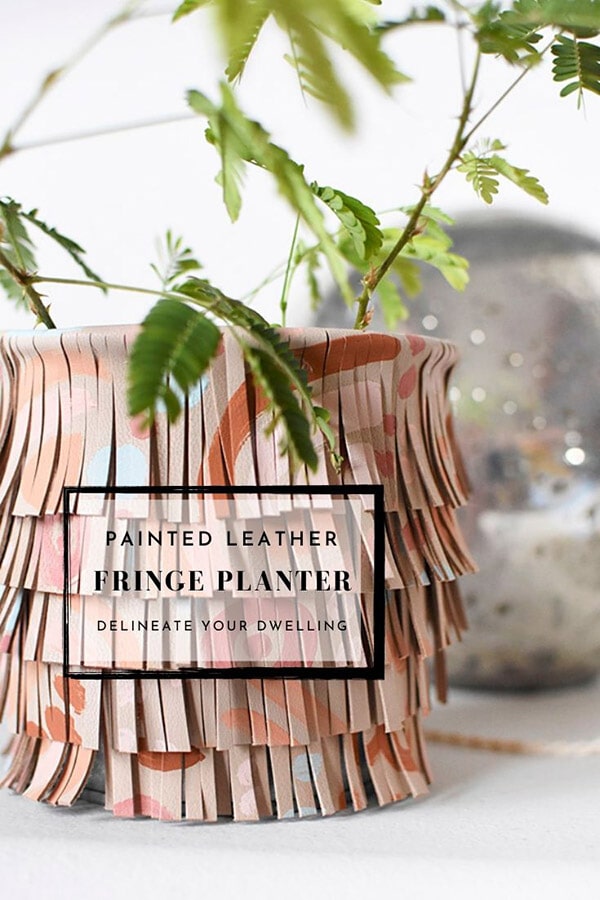
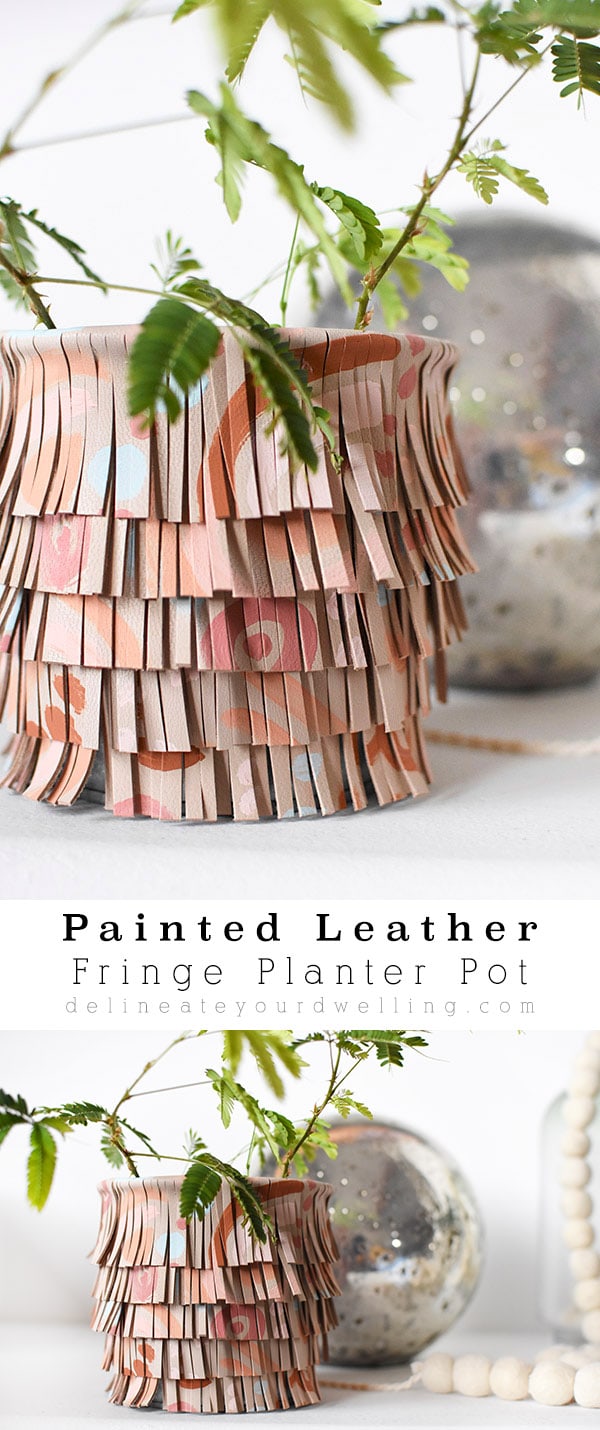
Painted Leather Fringe Planter Pot


INSIDE : Learn how to make a DIY Painted Leather Fringe Planter Pot to give movement and texture to your next plant baby! And you can use the same technique to add fringe to anything!
This post may contain affiliate links. See full disclosure here.
This post has been updated since it’s original April 2020 publish date.
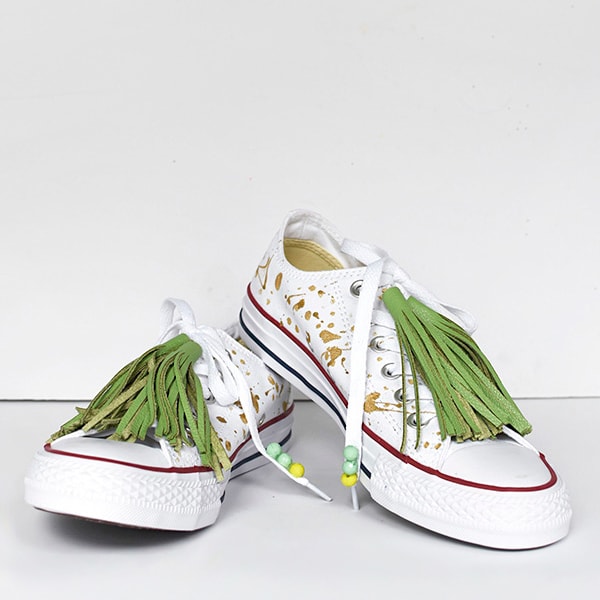
I have a large supply of simple tooling leather and the other day I was sitting there curious what to use it for. The idea came to me… I wonder if I could paint the leather and then make a leather tassel with it. I still may do that because I love me some leather tassels, check out the green tassel Chuck Taylors ones I made a few years ago!
After playing around a bit, I decided a tassel was too expected and decided to put it onto an old IKEA metal plant bucket I had! Welcome to my fun Painted Leather Fringe Planter Pot project.
If you like this plant craft project, be sure to check out all my other Plant Crafts!
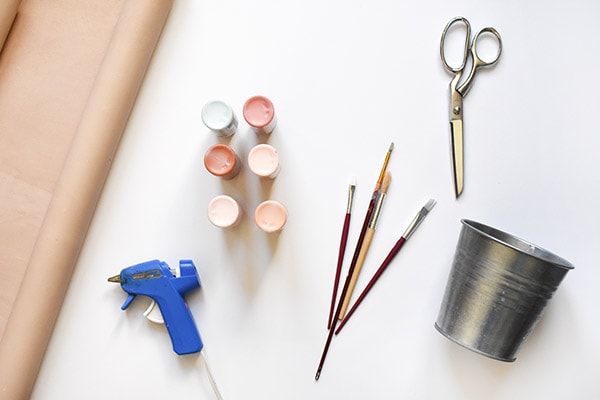
What supplies do I need to make a Leather Fringe Pot?
- Tooling Leather (any leather will do)
- Sewing Scissors (this is a must for crisp cut lines)
- Acrylic Paint + Paint Brushes
- Metal Bucket or Pot
- Hot Glue Gun
Creating painted leather fringe
Painting leather transforms simple plain goods into personalized masterpieces! If you are painting a leather jacket that will bend and move many times over the course of time, painting leather requires careful preparation. The leather must be cleaned and often deglazed to ensure paint adhesion.
You can use specialized acrylic leather paints to help the paint stay flexible and not crack when the leather bends.
However since my painted leather would be fringed and more or less not really messed with after it is applied to the pot, it is a much more straight forward project with minimal steps.
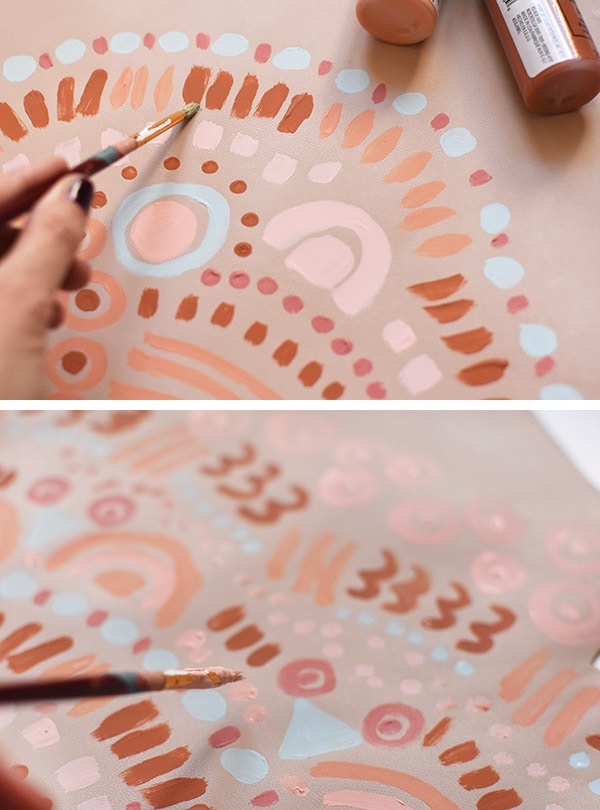
Paint leather
I grabbed a handful of regular acrylic paints and a few short bristled paint brushes.
The leather I used was tooling leather and although it was a smooth leather and had some bend to it. However, it was not a “soft leather”, but I don’t think that was an issue when painting it.
I painted a lot of patterns and shapes, but nothing too detailed. I think if you used a thin small brush, you could have really had some lovely detailed painting.
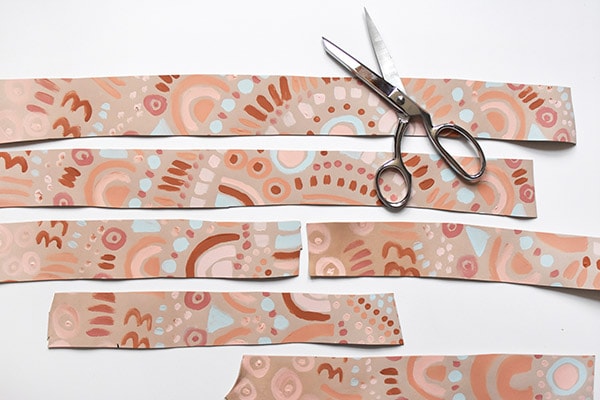
Cut leather into strips
After my paint dried, which was surprisingly quick on the leather, it was time to cut the fringe strips.
I did some test cuts of a few different heights on paper first to see which would fit best on my height of pot. In the end, I found 3″ strips fit the best.
The very top “fringe” I planned to fold over and secure into the inside of the pot for a finished look – so that piece I cut a half inch taller in height than the others.
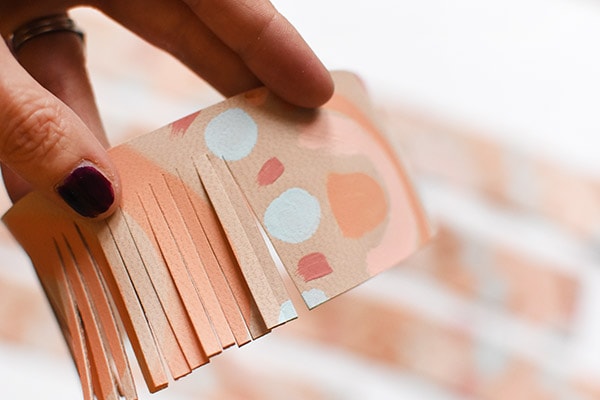
Cutting leather fringe
I made sure to use my sharp sewing scissors. If you use regular paper scissors, unless they are brand new and really sharp, they will most likely shred and tear the leather. However, I was going for crisp clean lines.
I measured out roughly a 1/4″ and marked that in pencil on the backside of my leather strip. This is your NO CUT zone. Then, using your sewing scissors begin the process of slowly cutting fringe into it. You could also use a rotary blade and cutting board for this, but I found since it was fairly small cuts I was making (about 2 1/4″ cuts) scissors seemed to work the best for this step.
If you were making fringe in leather that was wider, using a rotary blade might be a better choice.
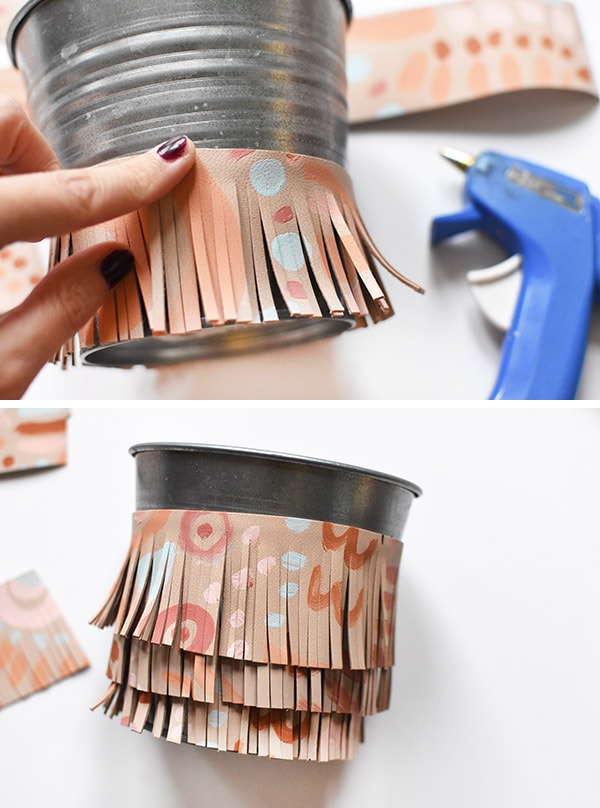
Glue Leather Fringe to your Pot
Starting at the bottom of the pail and on the back side, I started hot gluing the leather to the pot.
Make sure that the bottom of your first fringe layer sits perfectly along the bottom of your container/pot. You don’t want to be able to see the pot when you have completed this project.
After you get one row of fringed leather adhered to your pot, decide where you want your next row of fringe to go and start gluing. I had five layers of leather fringe when I was all done.
Wrap the top layer of fringe
For a clean finished look, when you get to the very top wrap the leather over and INTO the inside of the pot. You could also add some leather cording or rope to finish your top.
I simply folded the leather over the top of the pot and secured it with hot glue. I held it there for a moment to make sure it had dried completely.

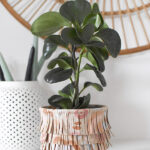
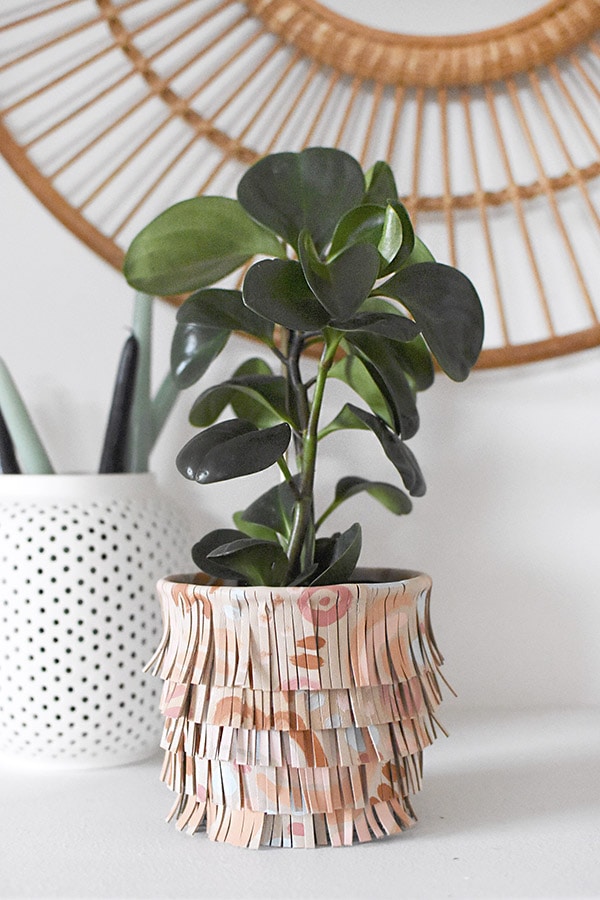
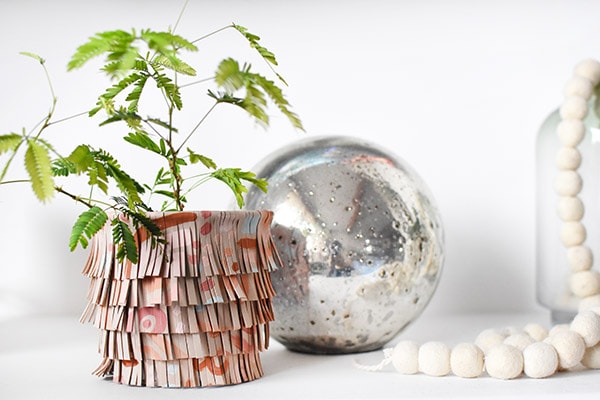
Fringe Leather Planter
I could not be more pleased with how my fringe leather pot turned out!! I bent a few of the fringe pieces out just a bit to give it a more natural look since my leather was pretty hard.
And now I love the look of movement it has!
And now I am looking for the perfect purse or clutch because HOW COOL would this technique be on a clutch!
Be sure to pin this fun project for the next time you are ready to get crafty!
Ready for some other fun leather projects ideas? Check these out below.