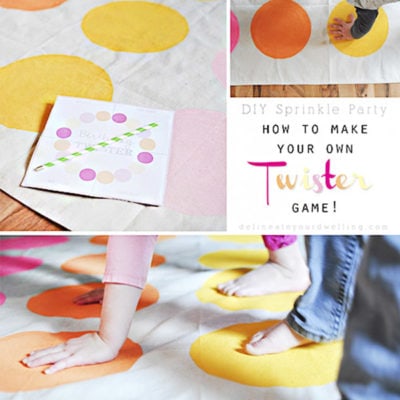
How to make a custom DIY Twister mat and game
INSIDE : Learn how to make a custom homemade DIY Twister mat and board game for your next birthday party. Plan to have loads of good ole’ fashioned family fun with your kids!
This post may contain affiliate links. See full disclosure here.
This post has been updated since it’s original January 2015 publish date.
My big girl just celebrated her 4th birthday!
We went with a Sprinkle Party theme and today I am excited to kick off a ‘Monday mini series’ of Sprinkle Birthday Party DIYs. I am sharing how to make a homemade DIY Twister game, including a fun Twister mat and a DIY Twister Spinner!
I adore celebrating my babies on their birthdays and making them feel special. However, birthday parties can quickly get out of control and you can spend hundreds of dollars on decor, favors, cake, activities, etc. So, I went the DIY route this year and without spending much at all, I think this was one of my favorite kid’s parties to date!
This Twister Game was such an easy project and took only a quick afternoon to complete. Even though the “Sprinkle” party turned out to be more “polka dots” creating this DIY Twister game added a lot of fun to the party. And I loved that it was in the same colors as all the other decor. Looking for how to DIY your own games?
You might also be interested in my more elevated Modern Twister DIY game post that I made also as my kids got a little older!
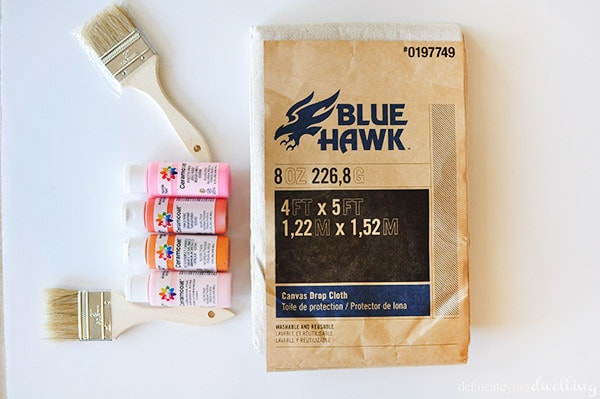
What supplies do you need to make a DIY Twister Game?
- 4’x5′ Canvas Drop Cloth
- Four Acrylic Paint colors
- Textile Medium
- Brad
- Four Paint Brushes
- Paper Plate
- Pencil
- Game Spinner
- Hot Glue
And if you want to get extra fancy!!
Simple Laminator
Laminating Pouches
How big is a Twister game mat?
A traditional Twister game mat is approximately 67 inches by 55 inches (roughly 5′ x 4′). This gives you plenty of room to twist and turn without bumping into anything or anyone else.
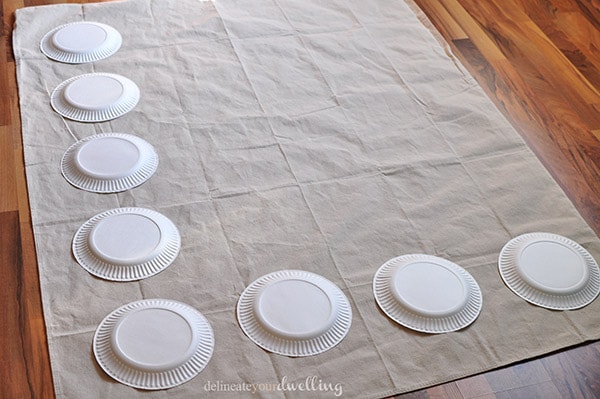
How to make a DIY Twister mat
To make a twister game board or mat, I went the easy route. I grabbed eight paper plates to create the outer grid. Then, I traced them onto the canvas with a pencil.
Then, I drew big “T”s or crosses on each plate to register the center lines for making the other lines and traced the remaining circles onto the canvas.
If you prefer, you could certainly use a ruler or tape measure and mark out the centerline for each of your Twister polka dot spaces.
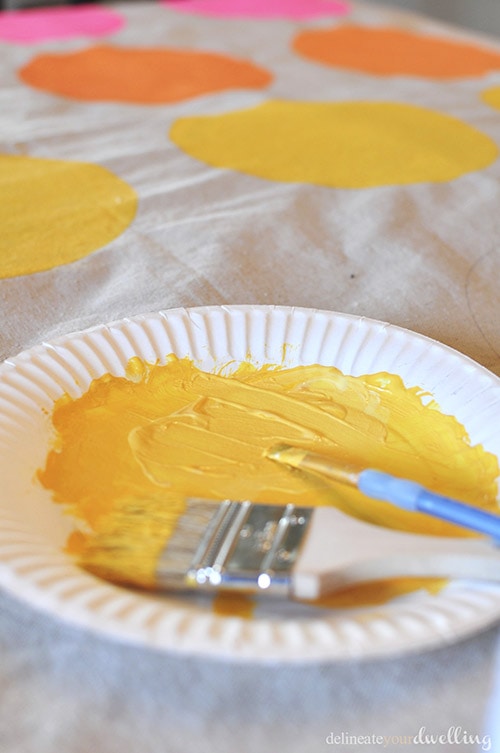
Adding paint to your Twister mat
I then added some paint medium to a cup with my acrylic paint. It’s important to use four different colors to play the game correctly. The paint medium helps the paint not crack when the canvas is folded or bent.
NOTE: We have kept this painted canvas for 5+ years now and it looks just as great as the day I made it!! I think a huge reason is the paint medium.
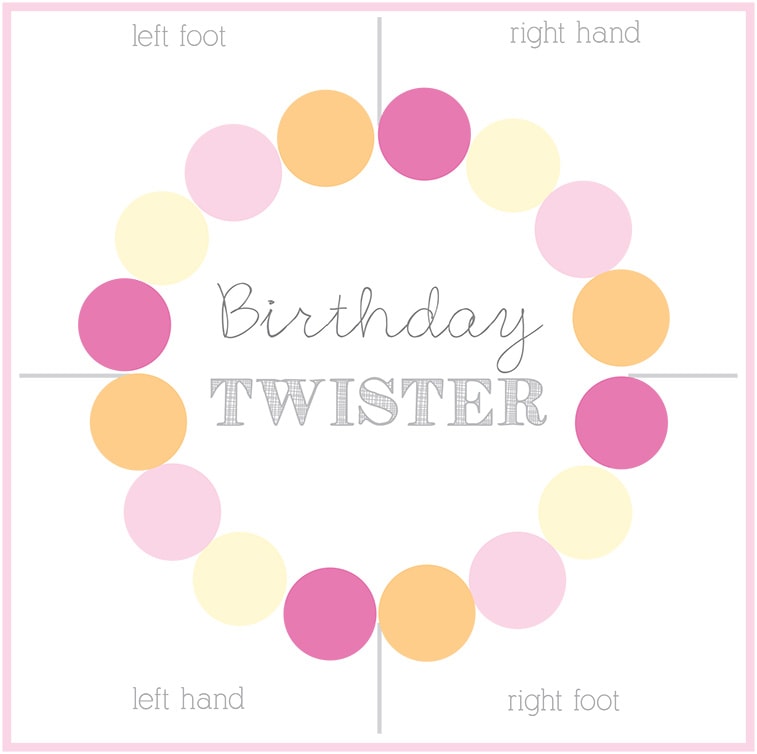
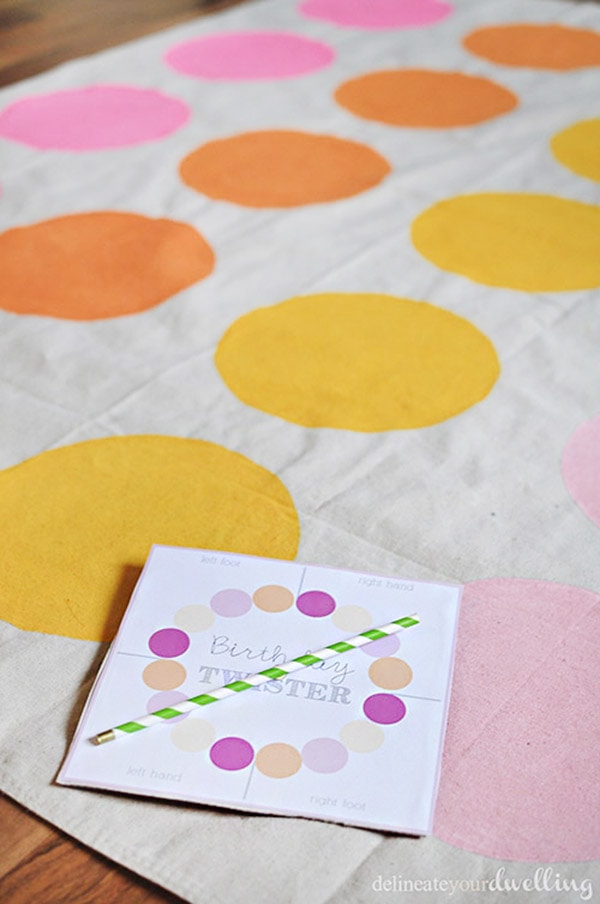
How to make a DIY Twister Game Board
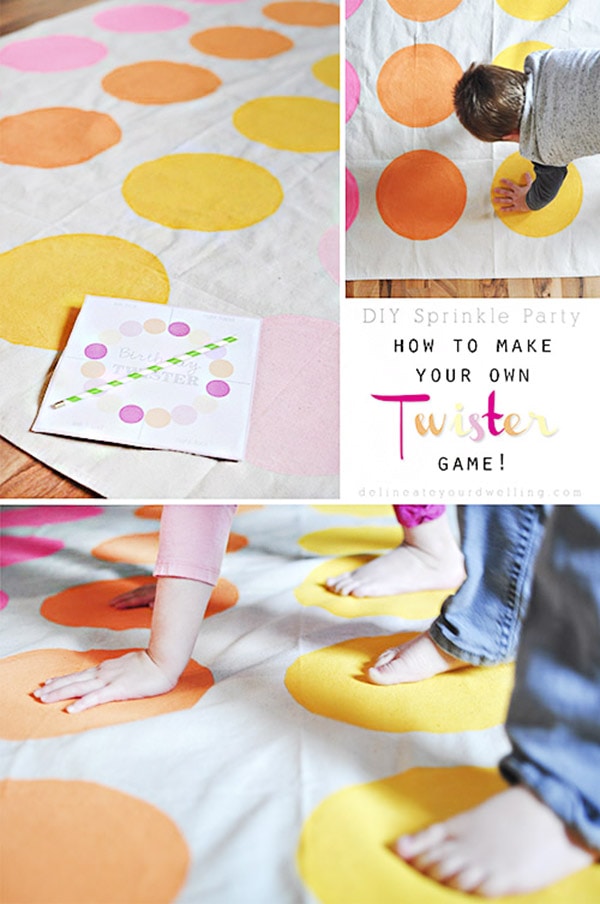
I designed a Birthday Twister board in Illustrator per the colors of my daughter’s party (pinks, oranges and yellows). I also saved a black and white version that you can fill in with your own color preferences. Keep reading below on how to download my two versions.
It was so simple to make this fun homemade DIY twister game board. I simply printed out a color version of the game board and cut it down to fit on a piece of cardstock (spare cardboard would also work). Once cut down to size, I used a gluestick to secure the printed board to my cardstock.
PRO TIP –
I wish I would have known about this simple laminator and laminating pouches when I made mine because our painted canvas has lasted so long and it would have been nice to still have the original spinner I made to go with it. For such a reasonable price, this laminator would have really extended the lifespan of our spinner.
How to make a DIY Twister Spinner
To make my Twister board spinner, I went easy and punched a hole through the center of the cardstock and inserted a brad.
Then, I hot glued a colorful straw to the top of the brad and you have yourself a DIY twister spinner.
PRO TIP –
I’ve since found these amazing game spinners that make it so much easier and give the game a more polished look!
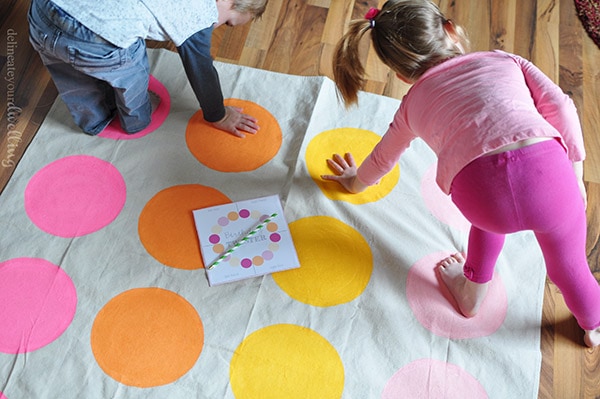
Non slip Twister game
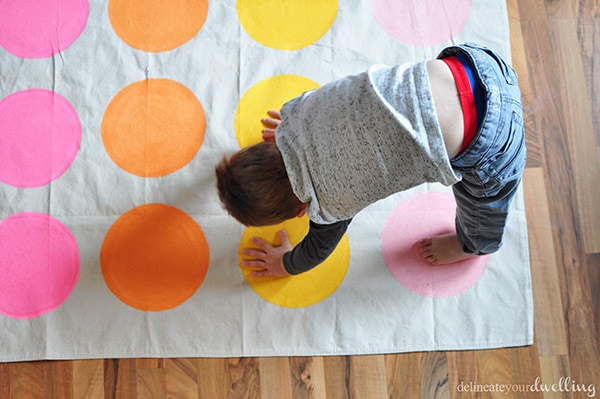
I was so happy with how this DIY Twister game turned out. And for my younger kids using a canvas mat is the perfect non-slip game because I remember playing when I was little, the plastic mat NEVER stayed where it was supposed to – ha!
This game is a fun pop of color and loads of fun!
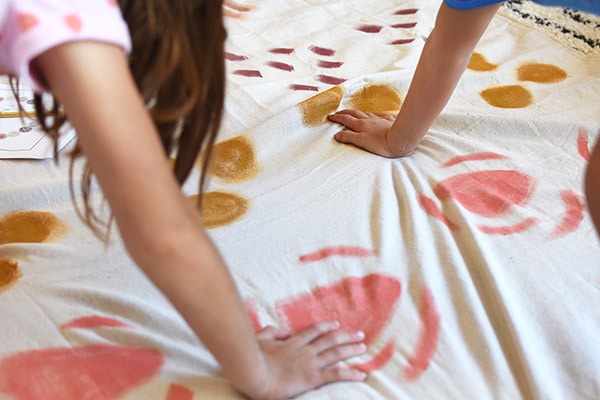
Colorful Painted Polka Dots
Another bonus of making this game is that you can pick any colors for your painted polka dots. It really adds a lot to your party to have a color theme throughout and painting the polka dots really was such a simple project.
I think my son just liked doing downward dog, ha.
This was such a memorable party game and we’ve loved continuing to play with it for years afterward. A definite win in my mind!
How to play the game of Twister
Hopefully if you have gotten this far in the post, you know how to play Twister. However, if you are loving the idea of making the game, but need a quick refresh on the rules – read on below!
Twister is a classic game that requires flexibility, balance and a bit of luck. Here’s a basic breakdown of how to play –
Players:
The game can be played with any number of players, best to have at least two players however.
Setup:
- Unfold and lay the Twister mat flat on a smooth surface.
- Place the game spinner in the center of the mat.
Gameplay:
- First player spins the spinner to tell them which body party to put on which color. For example, “right hand on blue” means the player must place their right hand on a blue circle.
- Players continue to spin and follow the instructions until someone loses their balance and touches the floor with any part of their body other than their feet or hands on the circles.
- The last player remaining on the mat without falling to the floor is the winner.
Additional rules:
- If a player cannot follow the instructions without touching the floor, they are out.
- Players cannot move their feet once they’re placed on a circle.
Enjoy playing Twister!
IT’S DOWNLOAD TIME:
Sign up for my DYD Insider newsletter to receive access to my ENTIRE DYD Printable Library + this DIY ‘Twister Spinner’ printable!!!
Already a DYD Newsletter Insider? Click on over here to access the printables library using the password found at the bottom of any email I’ve sent you.
Games similar to Twister
Twister is a classic party game that is known for its fun and physical challenges. Players take turns spinning a spinner and placing their hands or feet on the corresponding color and body part. The first player to fall off the mat loses the game.
If you are looking for games that have a similar look or style that Twister has, these might be games for you!
- Hula Twist: This game is similar to Twister, but with a hula hoop. Players take turns spinning the hula hoop and passing it over their body.
- Yoga Spinner This game is a mix of yoga and Twister. Players take turns spinning a spinner and following the yoga poses on the mat.
- Duck Duck Dance This is a musical game where players dance until the music stops. When the music stops, the player who is standing on the designated spot is out.
- Throw Throw Burrito This is a fast-paced game where players try to hit each other with foam burritos.
- KerPlunk This game is all about hand-eye coordination. Players take turns removing sticks from a tube without letting the marbles fall out.
How to make a custom DIY Twister mat and game
Learn how to make a custom homemade DIY Twister mat and board game for your next birthday party. Plan to have loads of good ole’ fashioned family fun with your kids!
Materials
- 4’x5′ Canvas Drop Cloth
- Four Acrylic Paint colors
- Textile Medium
- Brad
- Four Paint Brushes
- Paper Plate
- Pencil
- Straw OR Game Spinner
- Hot Glue
- Simple Laminator
- Laminating Pouches
Instructions
- Take a few paper plates to create the outer grid placement and trace them onto the canvas with a pencil.
- Draw crosses on each plate to register the center lines and trace the remaining circles onto the canvas.
- Add in some paint medium to help with paint cracking and begin to fill in each circle with your different shades of paint.
- Download and print out my color or black + white version of the Twister Spinner board. You can laminate the board if you would like to make it last longer.
- Next, adhere it to a piece of cardstock or spare cardboard piece.
- Punch a hole through the center of the board and insert a brad and a colorful paper straw. You can also use these pre-made plastic game spinners that make it even easier!
Notes
We have kept this painted canvas for 3+ years now and it looks just as great as the day I made it! I think a huge reason is the paint medium.
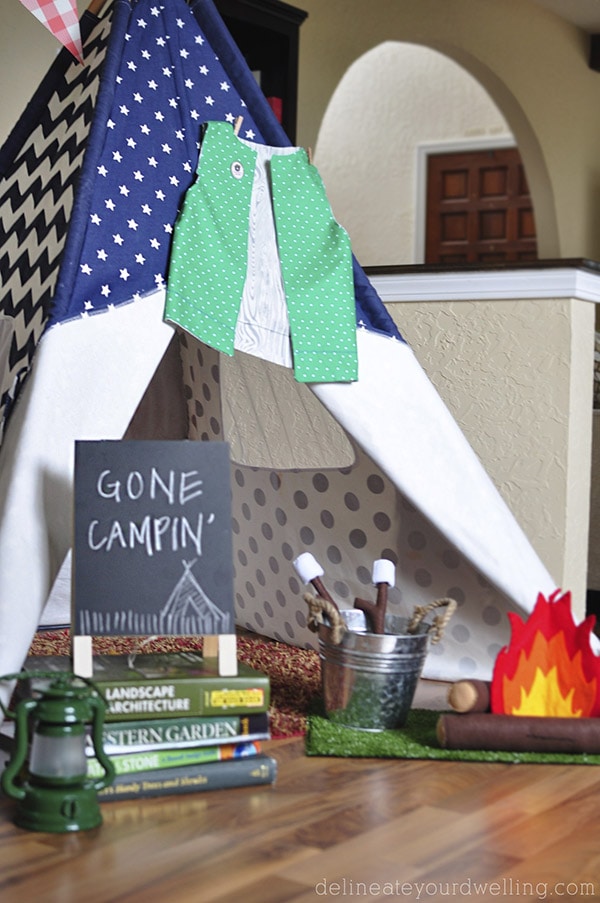
Head over to the Sprinkle, 4th Birthday Party DIY post for details on
the party hats, Sprinkle Cake tips and the final reveal!

And if you are just looking for more fun party ideas, I’ve got you covered!
Modern Woodland themed Baby Shower
This is such a fun idea! I love how you made it easy to create a DIY Twister mat. Can’t wait to try this with my friends at our next game night. Thanks for sharing!
This is such a fun and creative idea! I love the thought of making my own Twister mat and game at home. Can’t wait to try out your tips—thanks for sharing!
This DIY Twister mat idea is fantastic! I love how creative and fun it is to make your own game. Can’t wait to try it out at our next family gathering! Thanks for the detailed steps!
This DIY Twister mat is such a fantastic idea! I love how creative and fun it is to make games at home. Can’t wait to try this out with my friends at our next game night! Thanks for sharing the detailed steps!
This DIY Twister mat idea is fantastic! I love how you broke down the steps so clearly. Can’t wait to try making my own for our next game night—I’m sure it will be a hit! Thanks for sharing!
This is such a fantastic idea! I love how you’ve provided all the steps for making a DIY Twister mat and the game board. Can’t wait to try this out for our next game night. Thanks for sharing!
This is such a fun and creative idea! I love the thought of making my own Twister mat and board at home. Can’t wait to try it out with friends and family! Thanks for sharing the detailed instructions!
This DIY Twister mat idea is fantastic! I love how simple and creative it is. I can’t wait to try making my own and hosting a game night with friends. Thanks for sharing such fun instructions!
This DIY Twister mat idea is fantastic! I’m excited to try making my own version for our next game night. Thanks for the detailed instructions and tips! Can’t wait to see everyone tangled up! 🎉
This DIY Twister mat and game idea is fantastic! I love how easy you made it seem, and it’s perfect for family game nights. I can’t wait to try it out and customize the colors! Thanks for sharing such a fun project!
This DIY Twister mat idea is fantastic! I love that you included detailed instructions and materials needed—definitely going to give it a try for our next game night. Thanks for sharing!
What a fun and creative idea! I love the idea of making a DIY Twister mat at home. Can’t wait to try this out at our next game night. Thanks for the detailed instructions!
This DIY Twister mat is such a fun and creative idea! I love how you broke down the steps so clearly. I can’t wait to try making it for our next game night. Thanks for sharing!
This is such a fun and creative idea! I love the idea of making my own Twister mat and board. Can’t wait to try this out for our next game night—thanks for sharing the steps!
This DIY Twister mat idea is amazing! I love how creative and fun it is to make something like this at home. Can’t wait to try it out at our next game night! Thanks for sharing such a great project!
This is such a fun idea! I love the step-by-step instructions you’ve provided, especially the DIY mat design. Can’t wait to try this out at my next game night. Thanks for sharing!
This is such a fun and creative idea! I love the step-by-step instructions, and I can’t wait to try making my own Twister mat and board. Perfect for game night with friends! Thanks for sharing!
This is such a fun idea! I never thought about making a DIY Twister mat. I’m excited to try this out with my friends at our next game night. Thanks for the detailed instructions!
This is such a fun idea! I love the creativity behind making a DIY Twister game. Can’t wait to try this out at our next family gathering! Thanks for the step-by-step guide!
This is such a fun idea! I love the creativity behind making a DIY Twister mat and board. Can’t wait to try it out at my next game night! Thanks for sharing these detailed steps!
This DIY Twister mat sounds like such a fun project! I can’t wait to try making it for our game night. Thanks for the step-by-step instructions!
This is such a fun and creative idea! I love the thought of making my own Twister mat and getting the whole family involved. Can’t wait to try it out with some bright colors and patterns. Thanks for sharing such a great DIY project!
This DIY Twister mat and game idea is fantastic! I love how you broke down the steps and made it seem so easy to create at home. Can’t wait to gather some friends and try it out—perfect for a fun game night! Thanks for sharing!
This DIY Twister mat idea is fantastic! I love how creative and fun it is to make something so classic at home. Can’t wait to try it out with my friends at our next game night! Thanks for sharing the detailed instructions!
This is such a fun idea! I love how easy you made the DIY Twister mat and board sound. I can’t wait to try this out with my friends at our next game night! Thanks for the detailed instructions!
This DIY Twister mat idea is fantastic! I love how you broke down the process step by step. Can’t wait to try it out with my family this weekend. Thanks for the great tips!
Hi! Thank you so much for sharing this! I am wanting to try this but to make the mat bigger, as there are 7 people who would be playing. I am wondering if I made more circles on a bigger drop cloth if that would work in your opinion?
Love your idea! Thank you!
Hi, great question! Yes, I think adding more circles to a bigger cloth would be the perfect solution. Have fun!
Hi, I really like the concept here, especially getting to custom color combos. The first purchase link takes me to a two-pack of canvas drop cloths costing $15. The original version of the game only costs $10. Not really a money-saver project.
I made a simple online spinner for the game, if you feel fit, it’s a good (and free) alternative. Thanks for your tutorial!
I made an Alice in Wonderland version
I saw your pictures and that looks so fun! THANK YOU for sharing them with me!!
how did you?
Did you have any trouble with the paint coming off or getting on the clothing? Adorable project.
We’ve now had this game for a full year and not a single spec of paint has come off! It’s held up remarkably well!
Great colors and awesome job! How did you do the spinner? What did you attach it with? It looks like maybe a pencil or a paper straw? Love this idea!
Thanks so much, Olivia! For the spinner, I simply hot.glued a paper straw (with a colored tip) to a metal brad. Then I made a small hole in the twister board and inserted the brad. Done and done!
This is adorable, love the color scheme with it. I think this would work great with any party theme. Great job!
love that you can use what ever color you want it would be so fun
come see us at http://shopannies.blogspot.com
So freaking adorable! We love twister, but not once did I think to make my own and to make it match my themes. Than you so much for this idea. Pinning and sharing with my mommy friends.
Oh thank you, Natasha! It was so easy and really made a big difference for party decor!
LOVE this idea! Such fun!
So fun and pretty, too! Later down the line I could see it working as some sort of rug or curtain even (I made drop cloth curtains before and they worked great!).
Thanks, Jennifer! It would be so adorable as a rug, great idea!!
This is so cute! Great idea!
Thanks, Christine! It was so fun to make, too.