DIY Wooden Candlestick Holders
INSIDE : Learn how to create your very own DIY Wooden Candlestick Holders! They have a gorgeous Mid-Century Modern geometric feel that will elevate any space in your home.
This post may contain affiliate links. See full disclosure here.
I can not really express how much I love these wooden candlestick holders. I had the idea a few months ago and have just been waiting for the right time to sit down and make them.
Well the time was finally right and I was able to stain and create these unique beauties in a day. I’m sure it would take you much less time if you weren’t stopping to take pictures and make time lapse videos of each step, ha.
What supplies do I need to make DIY Wooden Candle Holders?
There are so many fun wooden shaped pieces at your local craft stores and even more fun shapes and sizes when you look online.
I had a few cone shapes from a previous project and had used them as legs to a plant stand.
And wooden rings come in all sizes for macrame projects, wooden necklaces and more.
Have fun seeking out unique shapes that can be stacked on each other for this project!
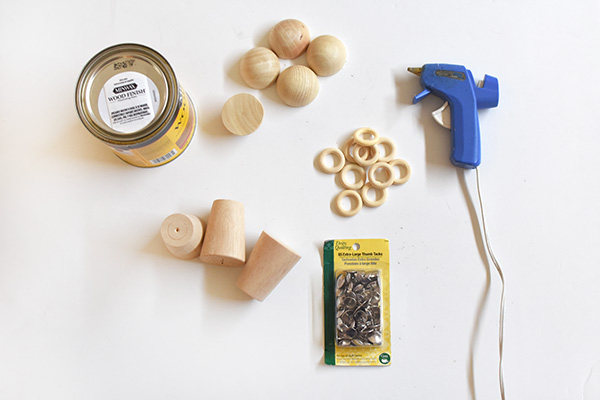
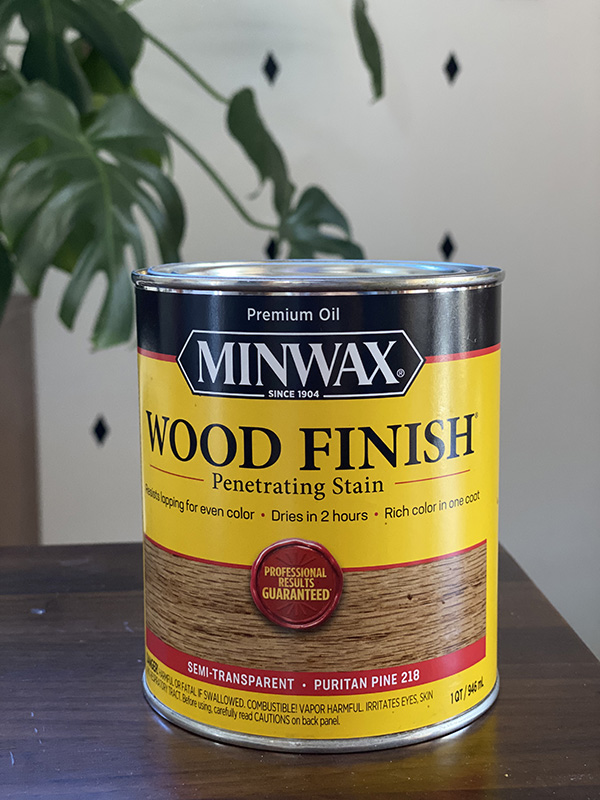
MixWax Wood Stain, Puritan Pine
Half Circle Wood pieces
Small Wooden Cone Shape Legs
Small Wooden Rings
Quilter’s Thumb Tacks with Extra Large Heads (also an option is candle inserts)
Hot Glue
Taper Candles
Rag + Cardboard for staining
Small piece of Sand Paper
Looking for a beautiful pre-made Wooden Candle Holder? Check these great ones.
How to Stain Candlestick Wood
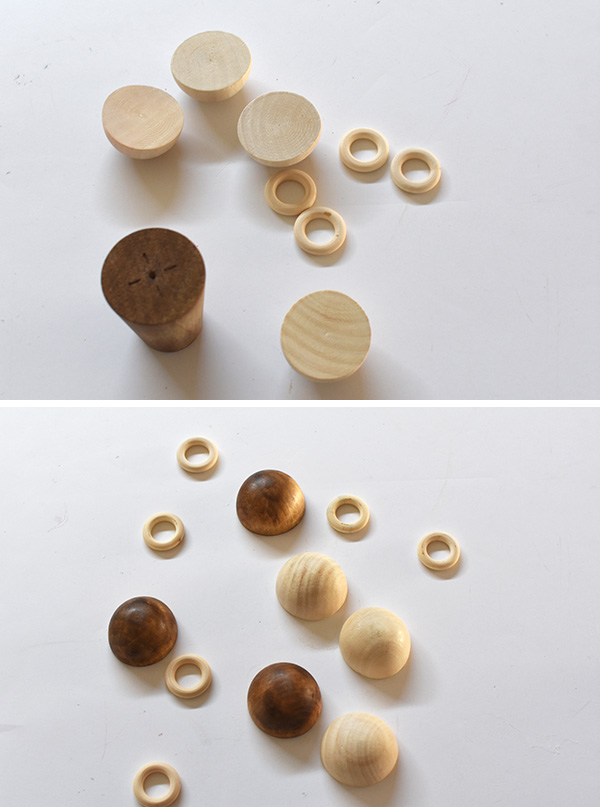
I choose to use MinWax Wood Finish stain in Puritan Pine to stain my wood. The first thing I did was to decide which pieces I wanted to stain. I choose to only stain the half round circles.
Next, I took my wood, stain, a piece of cardboard and a rag outside to the backyard. Following the directions on the can, simply paint on the stain and then wipe off. Depending on how dark you want the color, you can leave the stain on longer.
How to DIY Mid-Century Modern Candlestick Holders
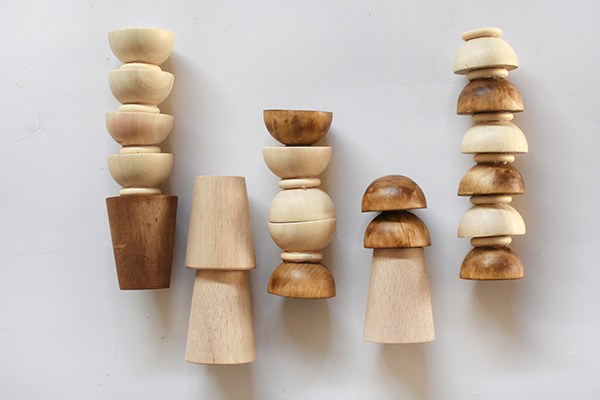
It was so helpful to sketch out a few ideas for how all the wooden pieces would fit together. There are obviously endless ways to create your patterns. Once I had a few sketched out ideas, I began to play around with groups of shapes, patterns and stained versus raw wood.
Using your hot glue, start with the bottom pieces and start to create your candlestick holders.
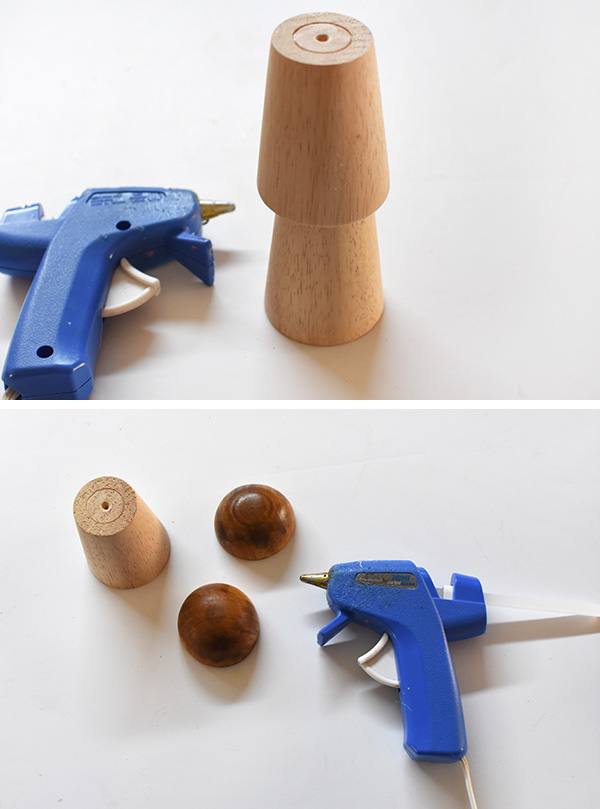
A very helpful note is on the pieces with stain, you might find the hot glue not sticking quite as well. If you lightly sand just the area you will be adding hot glue with a small piece of sand paper, it makes all the difference when adhering!
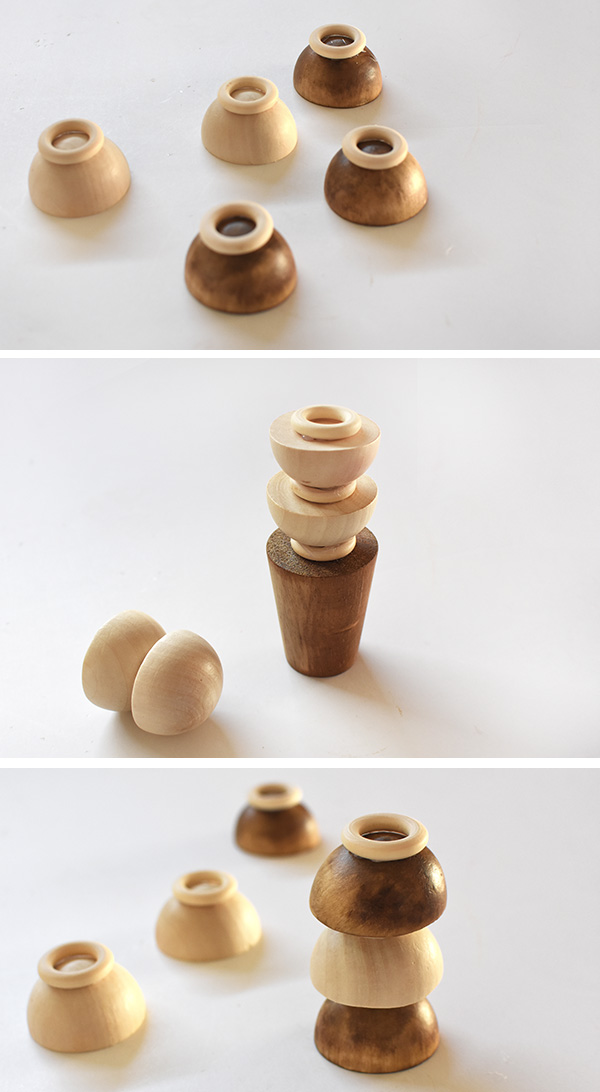
Also important as you create these wooden candle holders is to hold up a taper candle to them. Make sure the proportions are right and you don’t have an elegant 12″ candlestick holder that may not be very strong and will topple over when a candle is placed on it.
Secure your candle to the candlestick holder
Next up is being able to secure your candle to the new candlestick holder! I searched all over for some kind of candle tack and really had a hard time finding anything like that. I’m sure it’s out there, but I couldn’t easily find them.
I did however find Wax Dots Candle Adapter and Fox Fun Stick-Um Candle Adhesive. I don’t really know much about either product, but they both seem to keep your candles in place. I was worried however without having any kind of container around the candle base that it wouldn’t be enough.
So, I used Quilter’s Thumb Tacks with Extra Large Heads. They are typically used for mounting tacking strips to quilt frames, but I bought them because they are almost the exact size as the bottom of a taper candle and not quite flat on the bottom, but pretty close to it.
You can see on the second picture below, they do sit up a bit from the wood, but once the candle is on it’s not too noticeable. I simply used hot glue to attach the tacks.
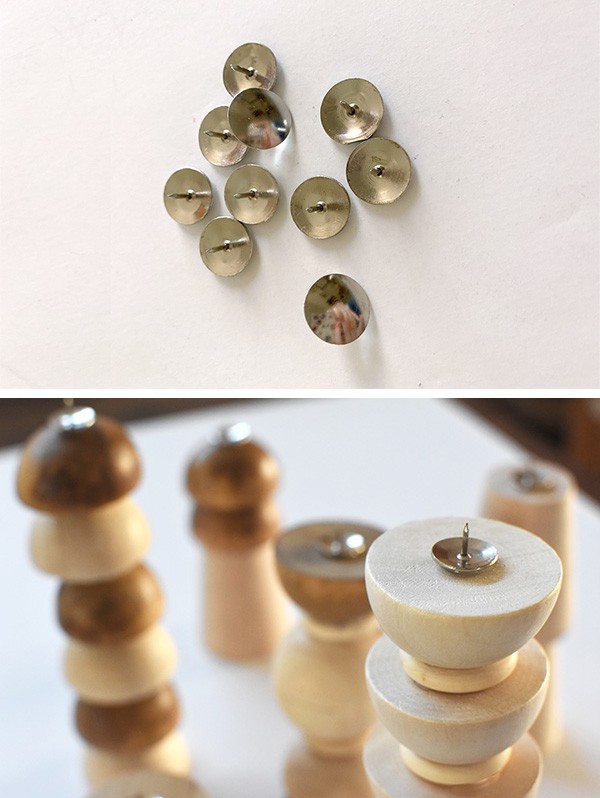
One final tip was before I placed the candles onto the tacks… I first took a spare tack and made a hole on the candle bottom. This ensured that I wasn’t pushing really hard on the candlestick holder to get the candle on there. It simply slid right on with ease!
DIY Candle Holders
I was pleasantly surprised how sturdy these candles felt. I was worried they may topple over or fall off with the slightest breeze, but no not at all. However, as with any candle, I would not recommend lighting them and leaving the room for long. Be cautious, as you would with any lit fire.
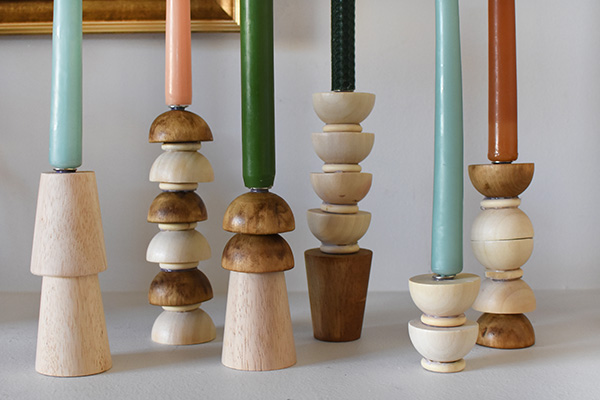
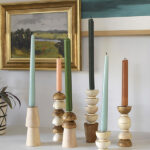
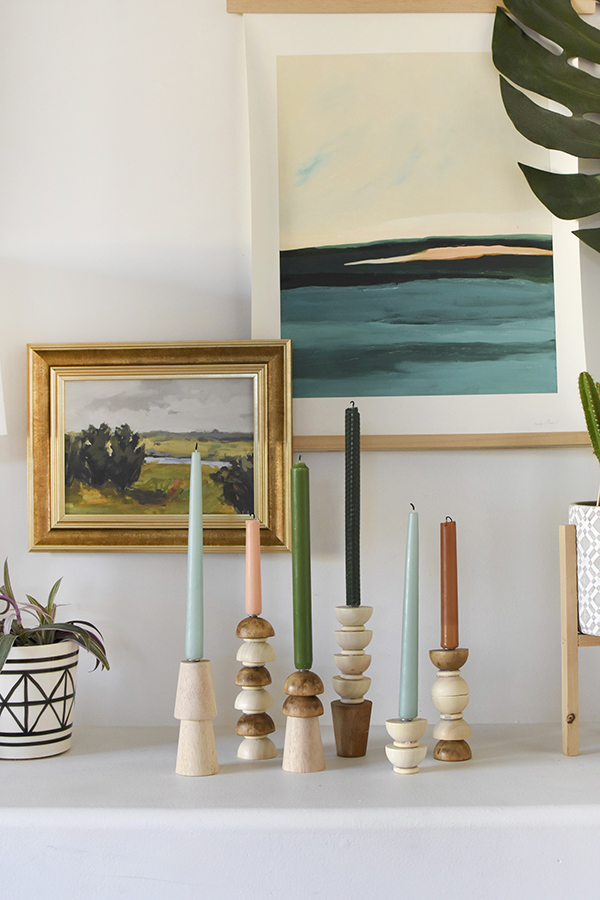
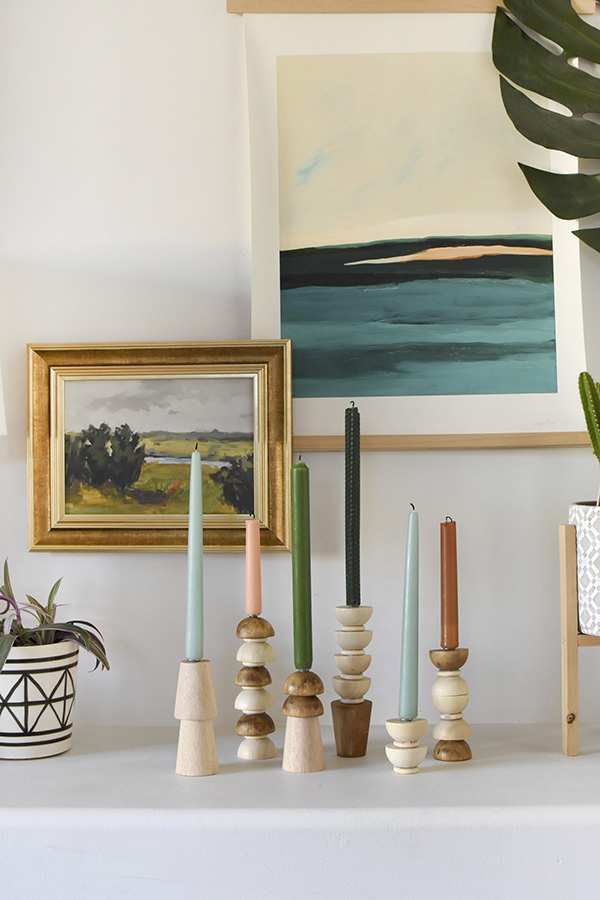
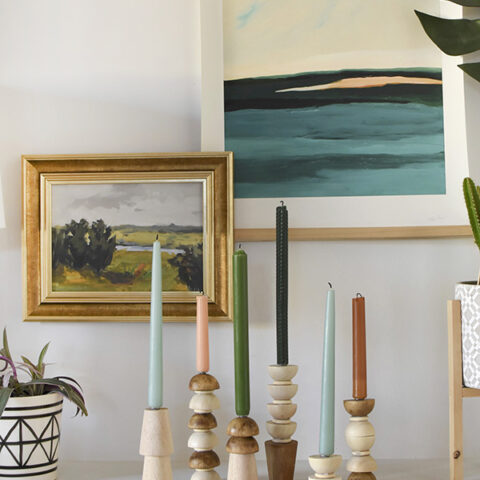
Geometric Candlesticks
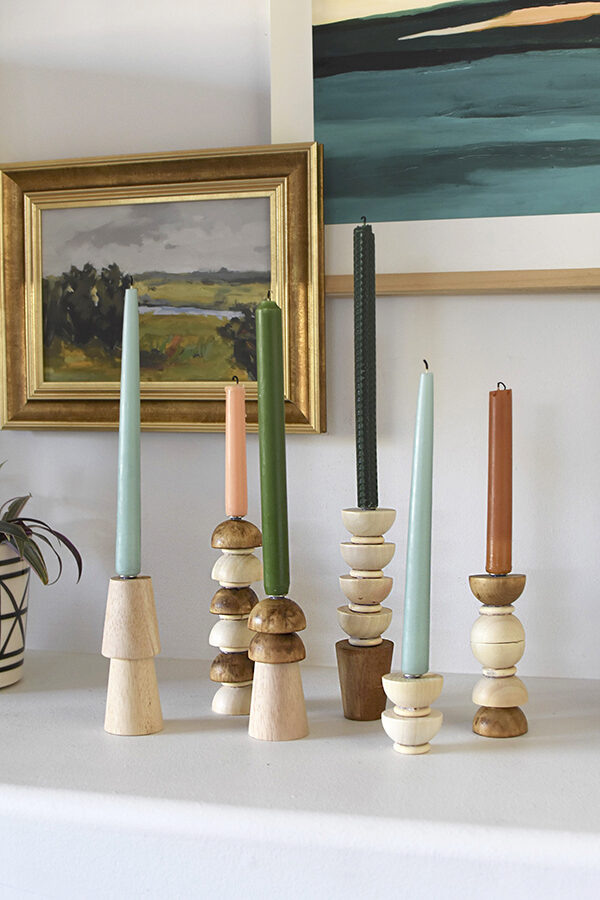
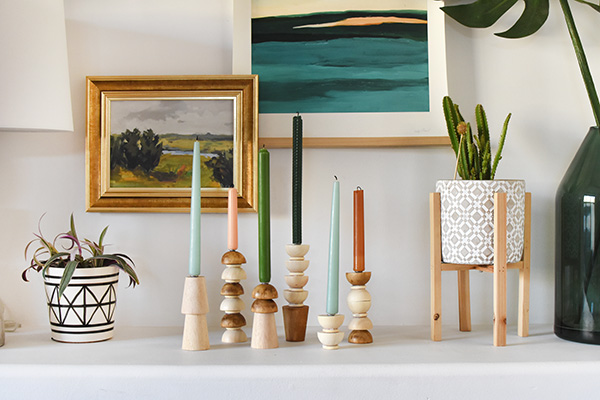
I really was so thrilled with how these lovely candles turned out! I adore the variation of shapes, patterns and stained wood.
Shop the supplies :

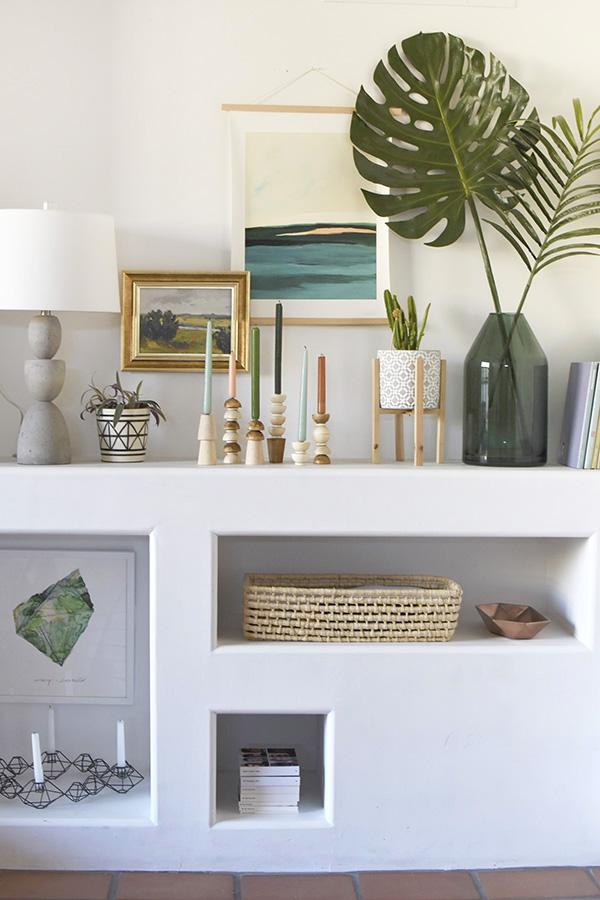
We’ve been having Friday night dinners by candlelight for almost a year now and I am so excited to add these candles into my rotation!
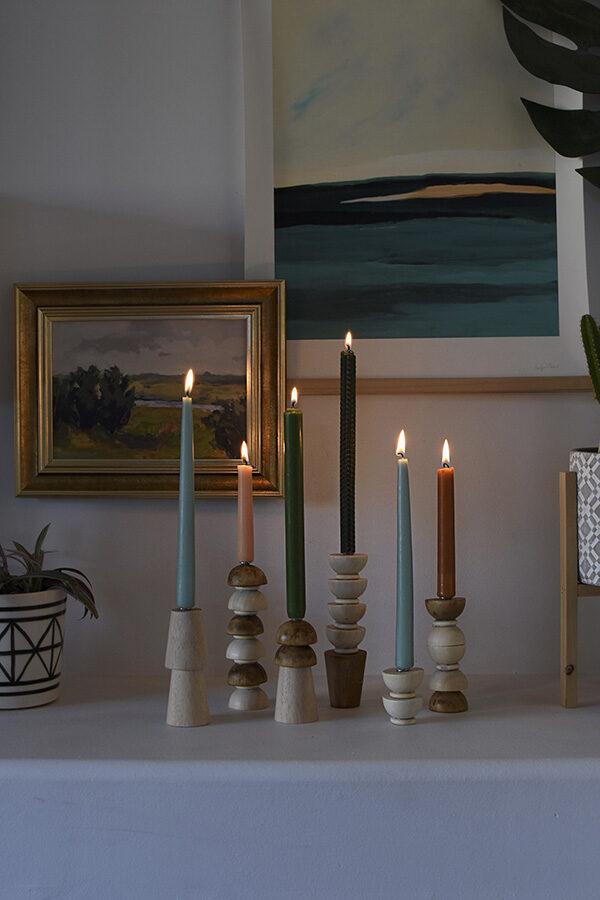
And how magical do they look lit in the evening! Ahhhhh.
Be sure to pin these beauties for the next time to get the home decor crafty itch! They will bring you SUCH joy.
Want to see all the supplies and awesome candles?
DIY Wood Candle Holders
Learn how to create your very own DIY Wooden Candlestick Holders! They have a gorgeous Mid-Century Modern geometric feel that will elevate any space in your home.
Materials
- MixWax Wood Stain, Puritan Pine
- Half Circle Wood pieces
- Small Wooden Cone Shape Legs
- Small Wooden Rings
- Quilter’s Thumb Tacks with Extra Large Heads (also an option is candle inserts)
- Hot Glue
- Taper Candles
- Rag + Cardboard for staining
- Small piece of Sand Paper
Instructions
- I choose to use MinWax Wood Finish stain in Puritan Pine to stain my wood. The first thing I did was to decide which pieces I wanted to stain. I choose to only stain the half round circles.
- Next, I took my wood, stain, a piece of cardboard and a rag outside to the backyard. Following the directions on the can, simply paint on the stain and then wipe off. Depending on how dark you want the color, you can leave the stain on longer.
- It was so helpful to sketch out a few ideas for how all the wooden pieces would fit together. There are obviously endless ways to create your patterns. Once I had a few sketched out ideas, I began to play around with groups of shapes, patterns and stained versus raw wood.
- Using your hot glue, start with the bottom pieces and start to create your candlestick holders.
- Also important as you create these wooden candle holders is to hold up a taper candle to them. Make sure the proportions are right and you don’t have an elegant 12″ candlestick holder that may not be very strong and will topple over when a candle is placed on it.
- Next up is being able to secure your candle to the new candlestick holder! I searched all over for some kind of candle tack and really had a hard time finding anything like that. I’m sure it’s out there, but I couldn’t easily find them.
- I did however find Wax Dots Candle Adapter and Fox Fun Stick-Um Candle Adhesive. I don’t really know much about either product, but they both seem to keep your candles in place. I was worried however without having any kind of container around the candle base that it wouldn’t be enough.
- So, I used Quilter’s Thumb Tacks with Extra Large Heads. They are typically used for mounting tacking strips to quilt frames, but I bought them because they are almost the exact size as the bottom of a taper candle and not quite flat on the bottom, but pretty close to it.
- You can see on the second picture below, they do sit up a bit from the wood, but once the candle is on it’s not too noticeable. I simply used hot glue to attach the tacks.
Notes
- A very helpful note is on the pieces with stain, you might find the hot glue not sticking quite as well. If you lightly sand just the area you will be adding hot glue with a small piece of sand paper, it makes all the difference when adhering!
- One final tip was before I placed the candles onto the tacks… I first took a spare tack and made a hole on the candle bottom. This ensured that I wasn’t pushing really hard on the candlestick holder to get the candle on there. It simply slid right on with ease!
Looking for other awesome home decor projects? You will definitely enjoy these!
How to add Leather Tassels to your Pillows