Trendy DIY Paper Organizer Hack
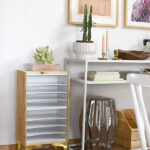
INSIDE : Learn how to contain and organize your notebooks and papers with this Trendy DIY Paper Organizer Hack project! Simple, functional and you will love this gorgeous half rounds piece sitting out in your home.
This post may contain affiliate links. See full disclosure here.
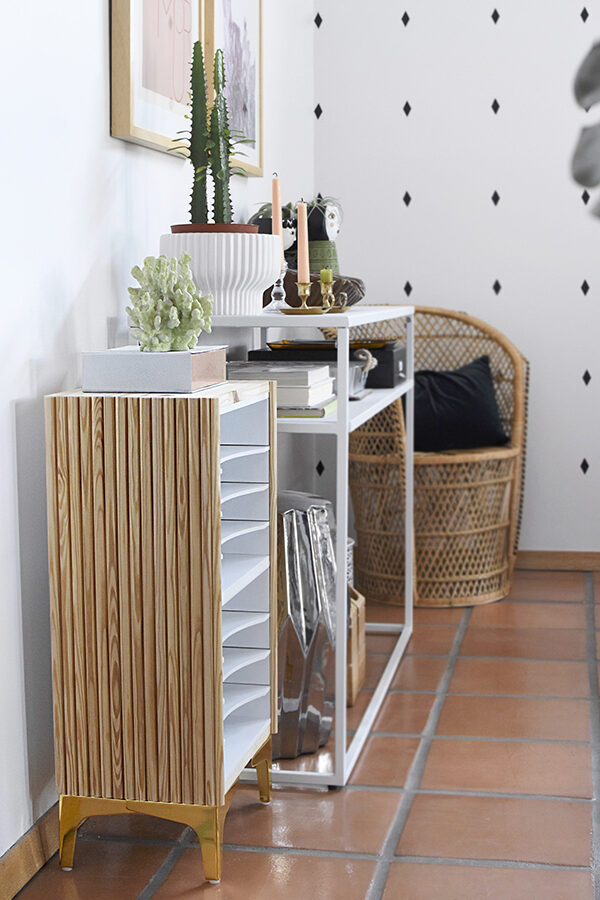
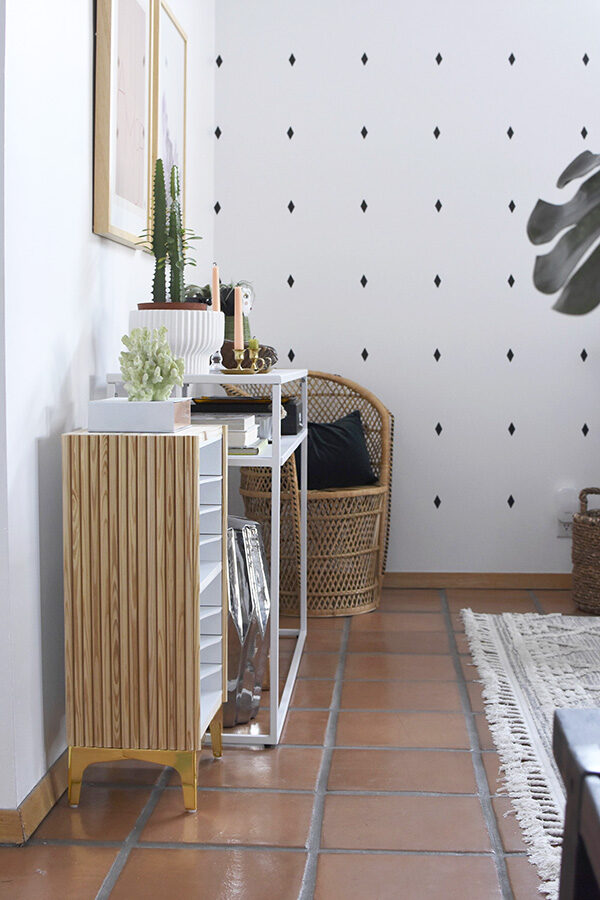
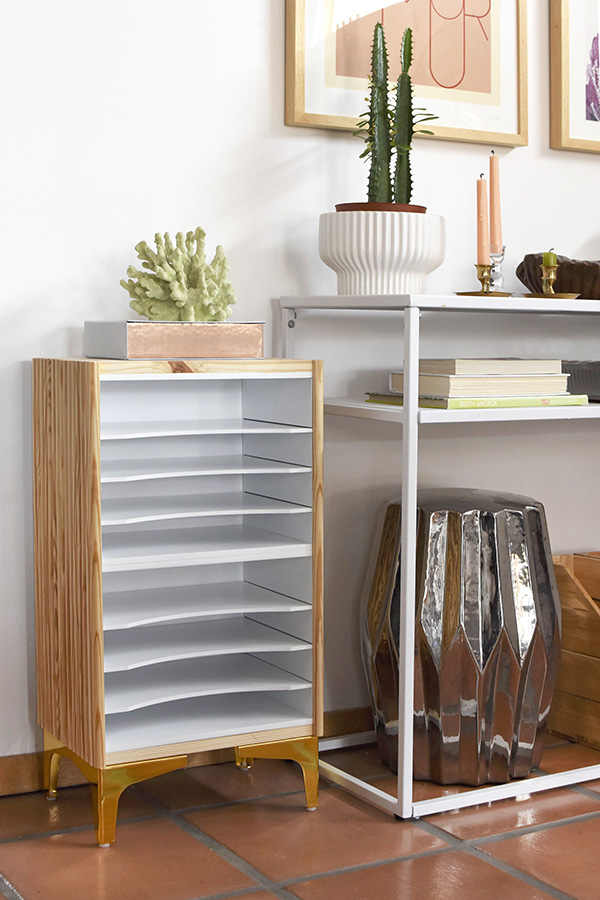
Any parent knows there are endless papers that are brought home from school. At some point, I knew we needed to get a better handle on keeping things organized in your home. I decided to build a desk paper organizer, but make it look like a piece of furniture I actually wanted to have out in my home!
This fun project took a few twists and turns as it went from an idea in my imagination to reality. I bought these gorgeous long skinny legs and tee-nuts to content them to my piece and then they ended up not working out due to me not thinking through the steps properly.
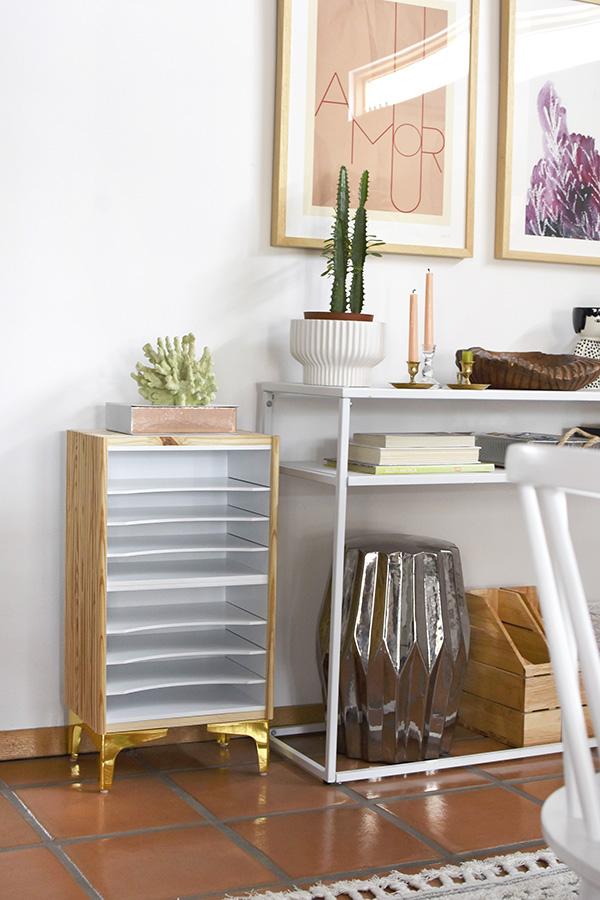
Supplies to build a Modern Paper Organizer
- White Paper Storage Letter Tray File ( Here is a similar one )
- (4) Gold Furniture Legs
- Titebond Wood Glue (go with the translucent, unlike what I used)
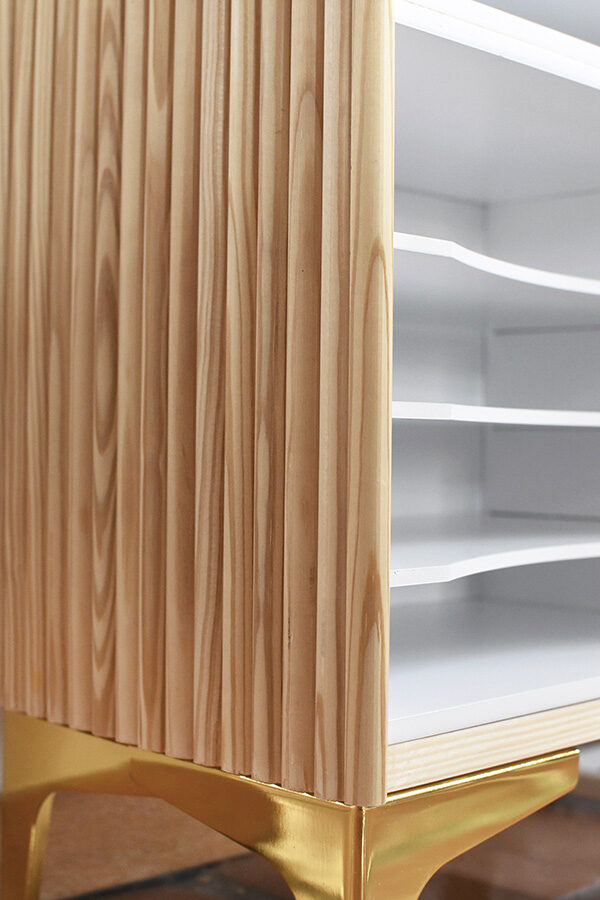
- (8) Half Round Trim Pieces (roughly 1/2″ x 8′)
- (1) 1 in. x 12 in. x 6 ft. Whitewood Common Board
- Painter’s Tape
DIY Tools Needed:

How to put together a Paper Tray Organizer
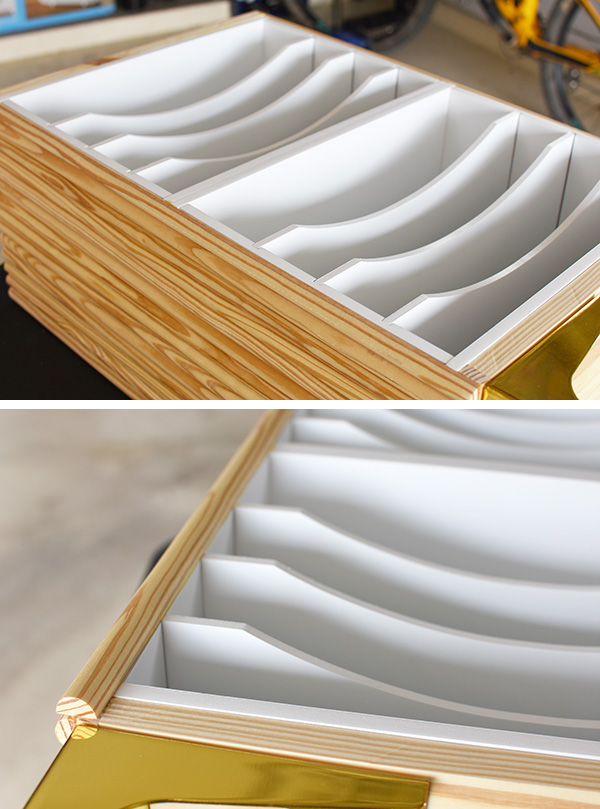
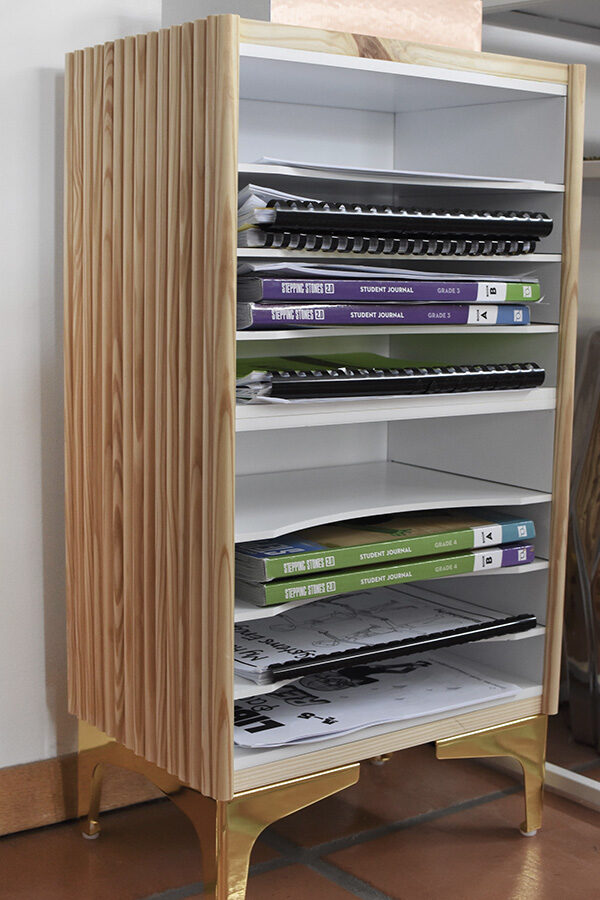
Start this project by assembling the two paper tray holders per the directions that came with them. This should just take 15 minutes or so per paper tray.

Make a paper tray look cool
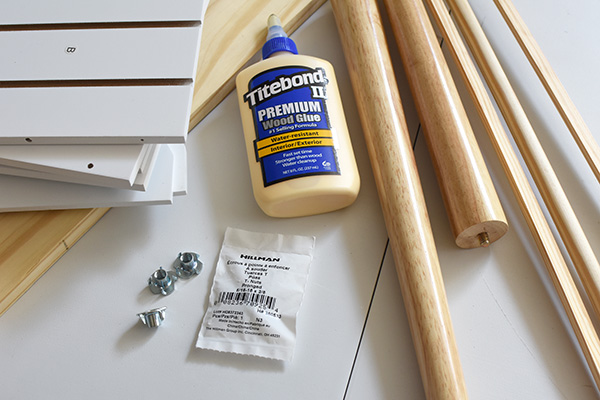
Next, measure the top AND bottom of your paper organizers. Using a pencil and measuring tape, draw out your cut lines so that the wood piece will fit perfectly.
Mine was roughly 9″ x 13″. And I used my sliding miter saw to make the cuts.
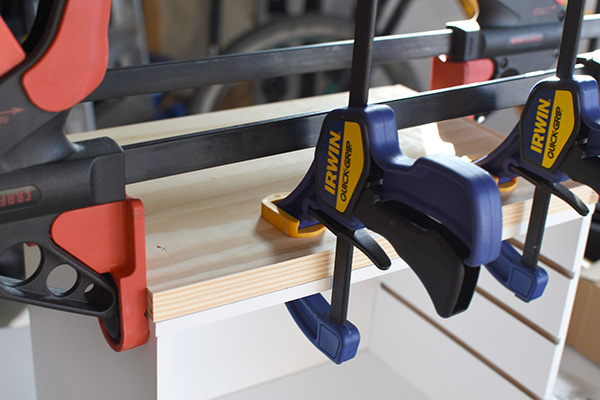
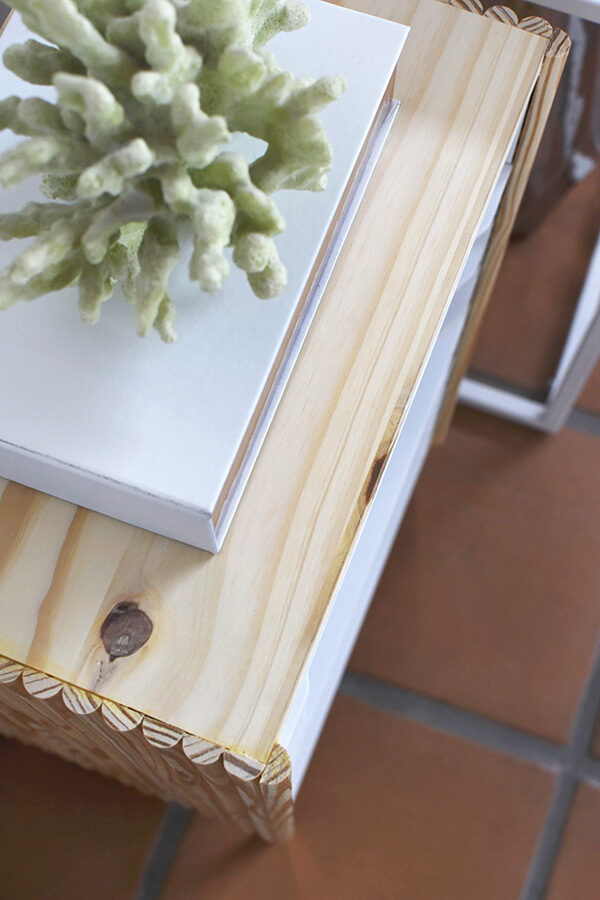
Once the cuts were made, I sanded down the edges to get any rough spots gone. Apply glue to the top of your paper organizer and clamp the wood down and allow to dry.
While the top is drying, you can also glue together the two individual paper organizers. You will be adding the half round trim later, which helps to secure the two pieces together, but glueing them together is for added structure to the piece.
Once the top and middle has completely dried, adhere the bottom piece of wood to your paper tray, also.
Measure your total height now that the two trays are glued together and you have your top and bottom piece of wood adhered. Next, use your miter saw again and cut your half round pieces down to a close size.
Do not worry about making the cuts perfect. I cut mine slightly bigger so I could use a hand saw and make it peeeerfect later.
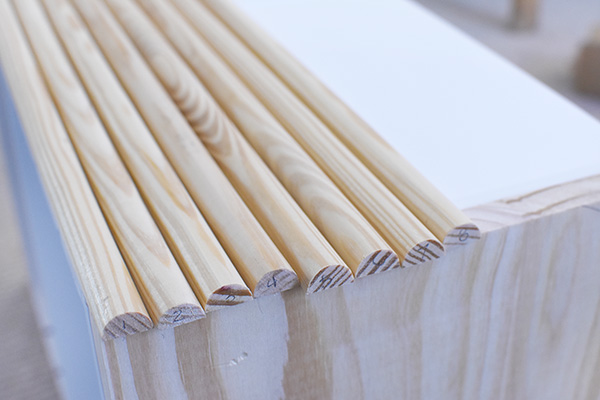
Start at the very front face of your piece and slowly add wood glue while placing the half rounds. Once you have placed half rounds to cover the entire surface, put something heavy on top and clamp the sides to keep them in place.
Once they are dry, repeat this process on the other side as well and allow to fully dry.
Cutting off excess wood from your tray
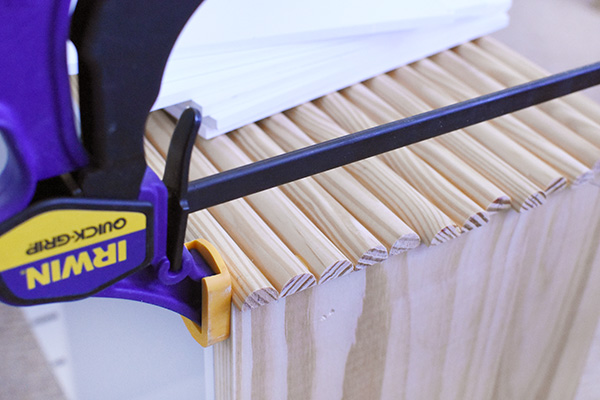
Now that you have all the pieces attached, it’s time to trim off the excess wood and really make your paper organizer look polished!
Start by adding painter’s tape along the top line where you plan to cut. I then laid the shelf on it’s side so that the weight of the piece helped to keep the trim pieces in place while I cut.
I found the best solution for cutting these more delicate half rounds was using a dovetail saw. Since there is a nice wide surface on the saw, you can keep it flush with your piece and cut almost a PERFECTLY smooth cut.
Using the painter’s tape insured no splintering either. I lightly sanded once done.

Interested in learning more about the Best Beginner DIY Tools? Check out this post!
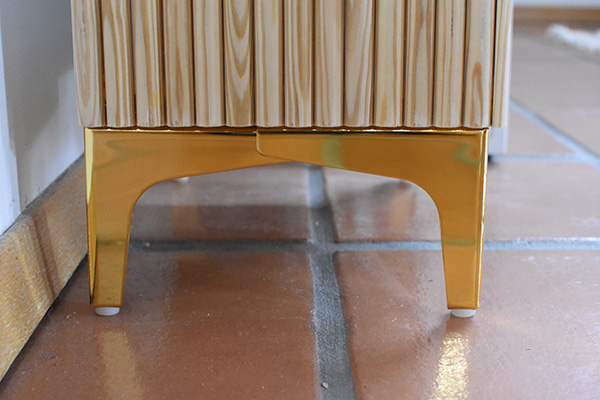
Next up was attaching the legs to hold up your trendy new DIY paper organizer! I had originally planned to use tall skinny legs, but ran into a few issues.
I really love these gold furniture legs, however please note I did run into some problems with them also.
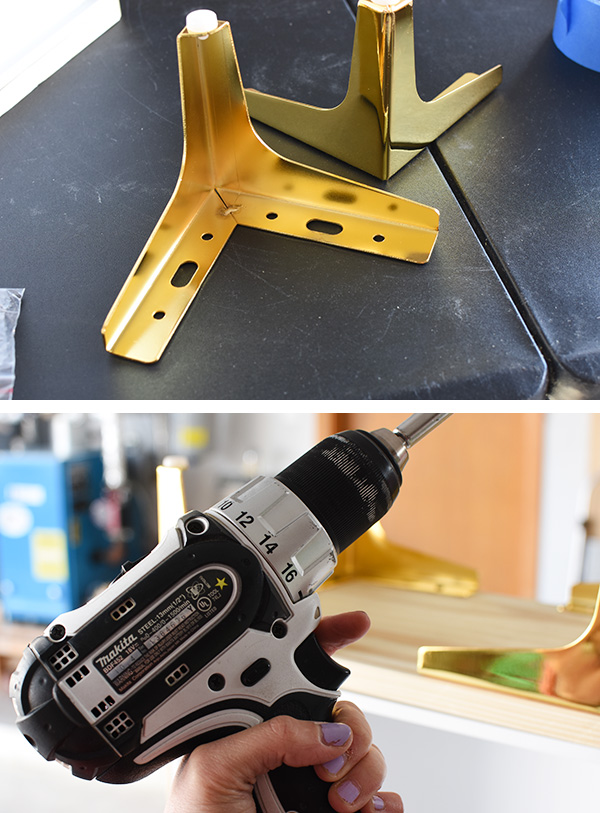
I had to install the legs slightly overlapping on the wood piece because they didn’t quite fit otherwise. If you select a larger paper tray organizer, you may not run into this issue.
However, I was still able to use three screws for each leg, so I felt it was adequately secure for simply holding my kid’s school notebooks and papers.

The very last step on this project was a front half round. Be sure to put in all your shelf pieces first and then add wood glue to the front edge and place your half rounds on top.
Adding this final piece helped cover any gaps and made for a more clean look. I placed heavy boards onto while it dried.
I really could not be MORE pleased with how this project turned out! Ready to check out some more Beginner DIY Build Projects? Check these out.
How to organize paper clutter
Now that we have this great organizer, it was time to sort and go through all of my children’s notebooks, books, pamphlets and school papers and really focus on how to organize paper files. My kids had currently been jamming them into a desk shelf and it wasn’t a pleasant sight for anyone to make sense of.
The first step to organizing papers was purging all old school papers and miscellaneous junk that we could easily toss. I sorted the papers into each kiddo’s class subjects and am happy to report that we still have extra shelf space!
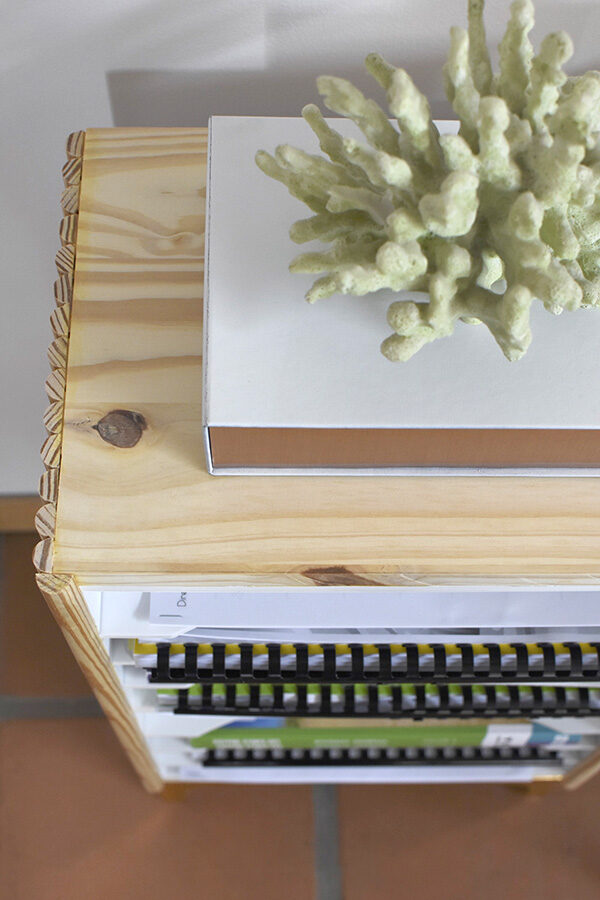
Simple, elegant, functional – this is about a million times easier to find what we need in a short amount of time. So I am counting this as a win, win, win win!!
How to organize kid’s school work
Creating this DIY paper organizer hack has given my kids the freedom to find what they need for school, but we aren’t adding another random plastic bin to our house.
I secretly can’t wait to steal this piece and put it in my office because I think it’s so beautiful!
Check out here for the full supply list :
Looking for other great DIY ideas? You might like some of these.
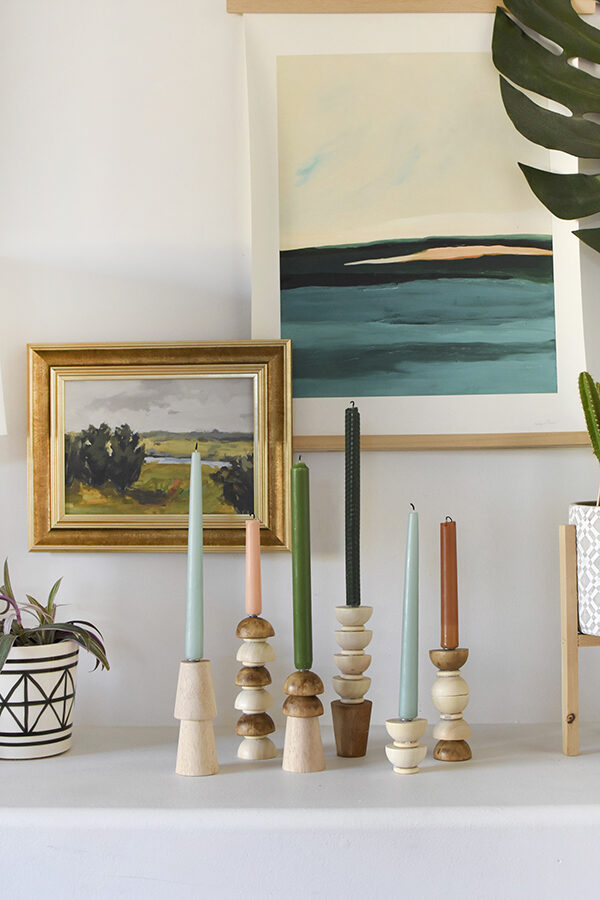
DIY Wooden Candlestick Holders
I love this so much! So pretty and functional!
Thank you so much!
Wow!! This is really stunning – what a great addition!!! I love the look of the half rounds on the sides.
Ah, thank you so much!! I am really happy with how it turned out. 😉