How to paint a Checker Pattern Accent Wall
INSIDE : Learn how to paint a checker pattern accent wall! For a fun DIY twist, add stripes to the bottom of the checkerboard design to give your space a modern take on this 1970’s checkered trend. Watch the step by step tutorial video for extra help on creating this pattern on your wall.
This post may contain affiliate links. See full disclosure here.
I am joining as a guest participant in the Spring 2024 One Room Challenge and have decided to take on my son’s bedroom! Now, what is the ORC you might be asking? Well, let me tell you.

Over the next eight weeks, I will be slowly transforming my son’s bedroom along with numerous other bloggers and content creators on Instagram. Every Wednesday I will be sharing an update on his room. It should be fun, but also eight weeks isn’t much time for all I have planned.
So, let’s get to the good stuff.
Tween Boys Bedroom Schedule
Week 1 Tween Boy Bedroom Plan
Week 2 Checkerboard + Stripe Accent Wall
Week 3 DIY Mobile
Week 4 Styling an Arched bookcase
Week 5 DIY Wall Hanging
Week 6 DIY Closet Doors
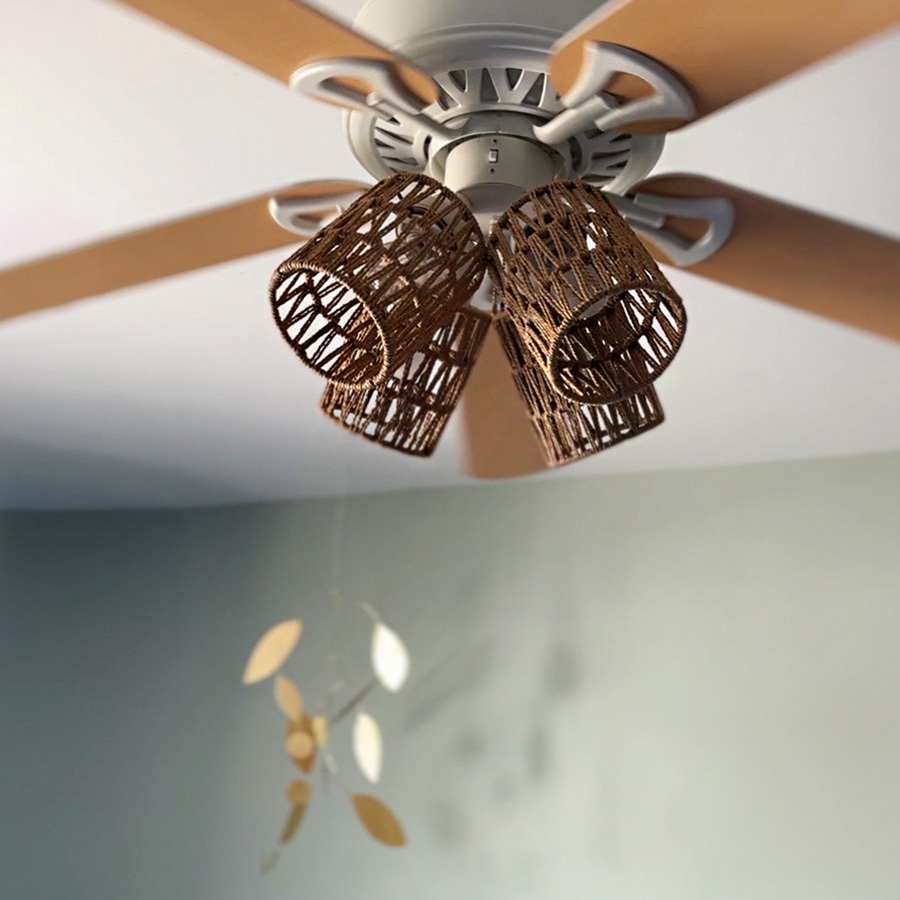
Week 7 Update an Old Ceiling Fan
Week 8 Modern Teen Boy Bedroom Reveal
I can not tell you how many times, out in real life, people comment on my entire family’s shoes. We are a Vans shoe family and not just any Vans, but the Vans checkerboard shoes. All four of us OFTEN ALL wear our checkered shoes at the same time – it’s so embarrassing. We all have different colors, but still – ha.
Favorite Checker Vans
We have these four colors…
So I knew without a shadow of a doubt that I wanted to create a checkered accent wall in my son’s tween bedroom makeover! And it wasn’t going to be just any checkerboard… it was going to be a checker pattern that transitions to a stripe because why be ordinary when you could be extra.
Looking to paint PERFECTLY STRAIGHT stripes? Check out my How to Paint Stripes on your wall post.
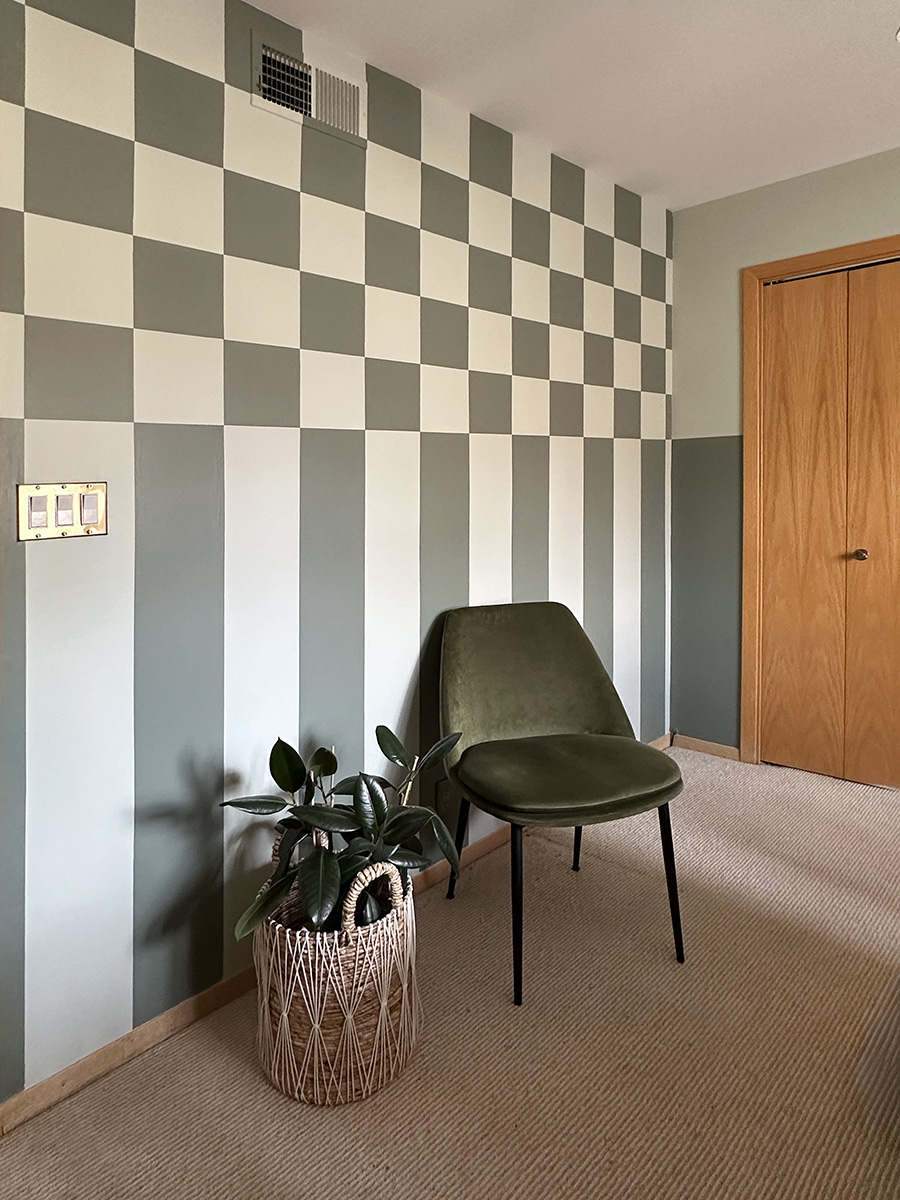
What do I need to create a checkerboard accent wall?
- Contented SW 6191 Sherwin Williams Interior Paint
- Retreat HGSW6207 HGTV Home by Sherwin Williams Interior Paint
- Painter’s tape
- Laser level (normal level)
- Wooster hand brush
- Roller Brush + Roller tray
- Xacto Knife and/or Scissors
- Measuring tape
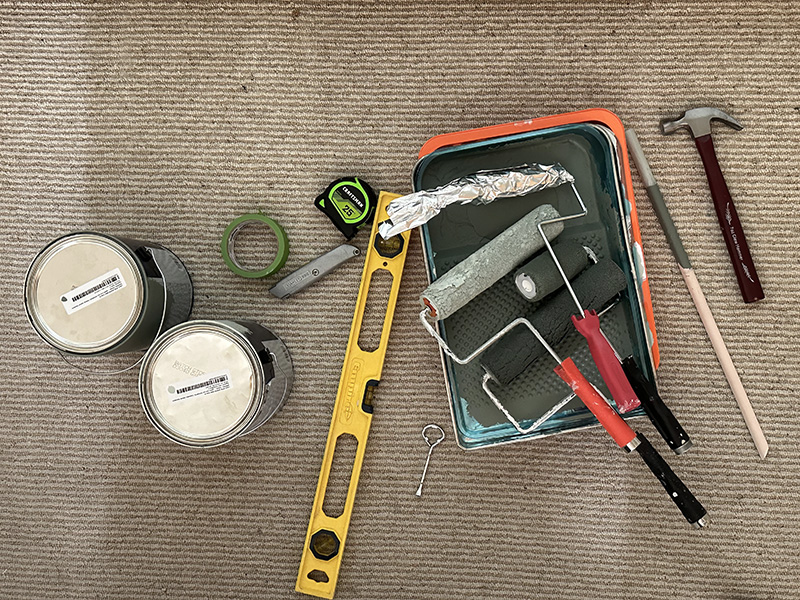
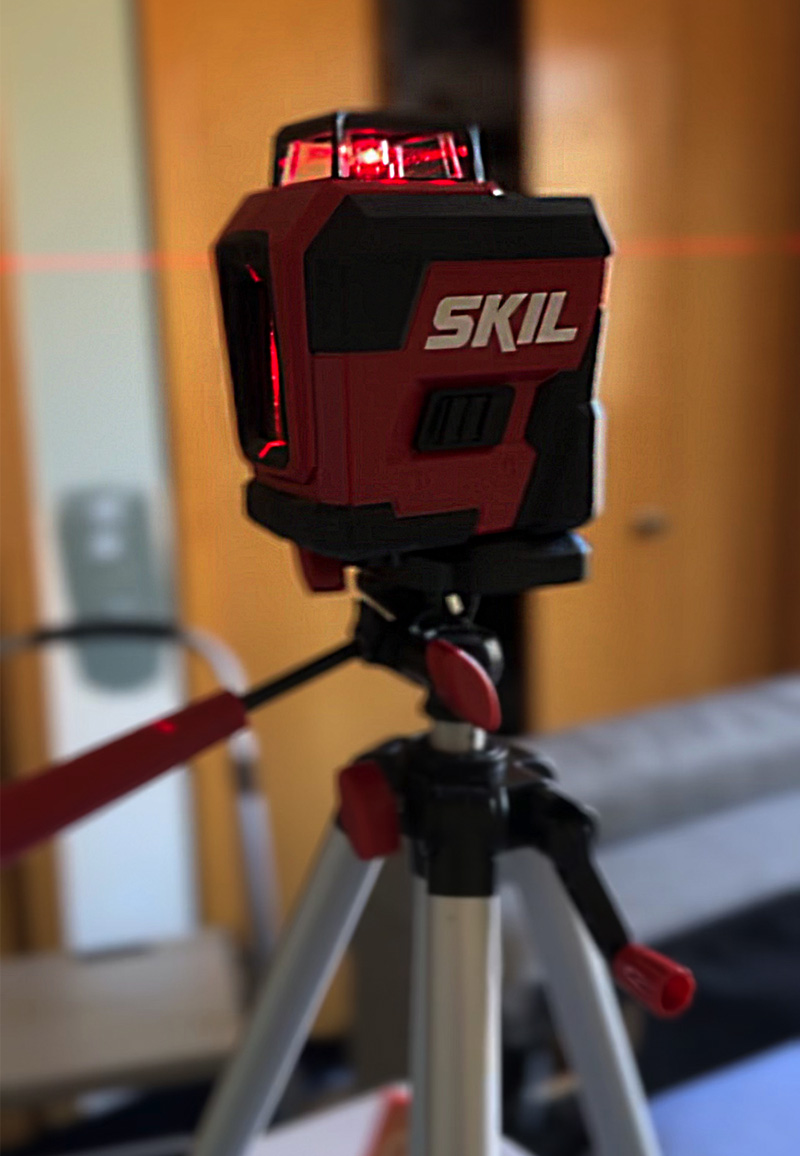
Is a laser level necessary to paint a checkerboard wall?
No, a laser level is not necessary to paint a checkerboard wall. While it can help to ensure that your lines are perfectly straight, you can get the same results with a traditional level and some measuring tape. However, a laser level REALLY does make the entire process go so much faster.
Here are the tools you will need to paint a checkerboard wall without a laser level:
- Measuring tape
- Level
- Pencil
- Straightedge
- Painter’s tape
- Chalk line
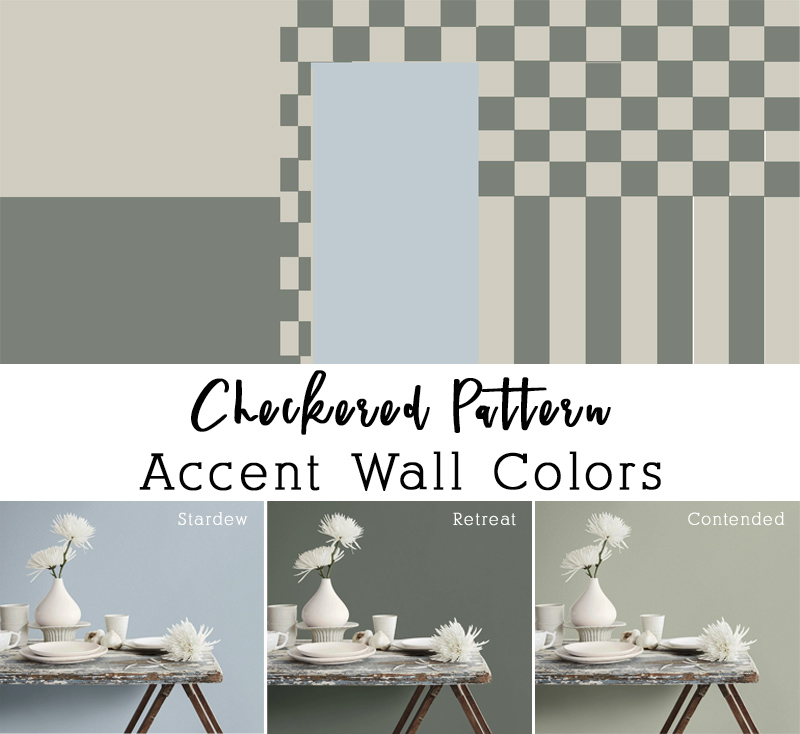
What colors to use on a checker pattern?
You can use any colors you’d like for a checker pattern wall.
If you want a less busy look, using more subtle color combinations like cream and tan are a great choice. If you are wanting a bit more contrast, then going with a lighter and darker paint color is the way to go.
I used Contented and Retreat paint colors for my checkerboard accent wall.
Check out the other paint colors I've used in my home here, Interior Paint Colors.
How to paint a Checkerboard Wall
Creating a checkerboard wall is a fun DIY project that can add a graphic punch to any room. Creating a checker pattern can be as easy or complex as you want it to be. There are two methods I saw and one was very simple, but in my opinion it creates more painter’s tape waste and takes more time. The other method takes more prep time, but once you have everything taped off, the actual painting process is a cinch!
Let’s do a quick chat first about the basic layout steps needed for both methods.
It seems most people do either 6″ or 8″ checkered squares. I choose to do the larger 8″ size.
Once you have your square size, divide the wall’s width and height by the square size to see how many squares will fit. You may need to adjust the square size slightly to ensure a full row of squares fits on the wall, but I think as long as the center section of your pattern looks good – it’s okay to have the edge squares cut off.
Simple checker pattern paint method
Using a level and pencil, lightly mark straight lines across the wall to create the rows of squares. Double-check your lines are level as you go.
Apply painter’s tape following your pencil marks to create your grid. Remember to factor in the width of the painter’s tape when making your measurements.
Begin to fill in the squares of your checkered board pattern with one color only. Once you have done two coats of paint, carefully remove the painter’s tape. Re-apply tape to create the borders for the remaining squares you’ll paint the second color. Apply the second paint color to the remaining squares.
This method works, but it feels wasteful and time consuming to me.
Checkerboard pattern on a wall
This second method may take a bit more time laying out, but I think it provides a better finished product.
Start this method by painting the entire wall the lighter of your paint colors (Contented). Do two coats and allow to fully dry.
Horizontal lines first
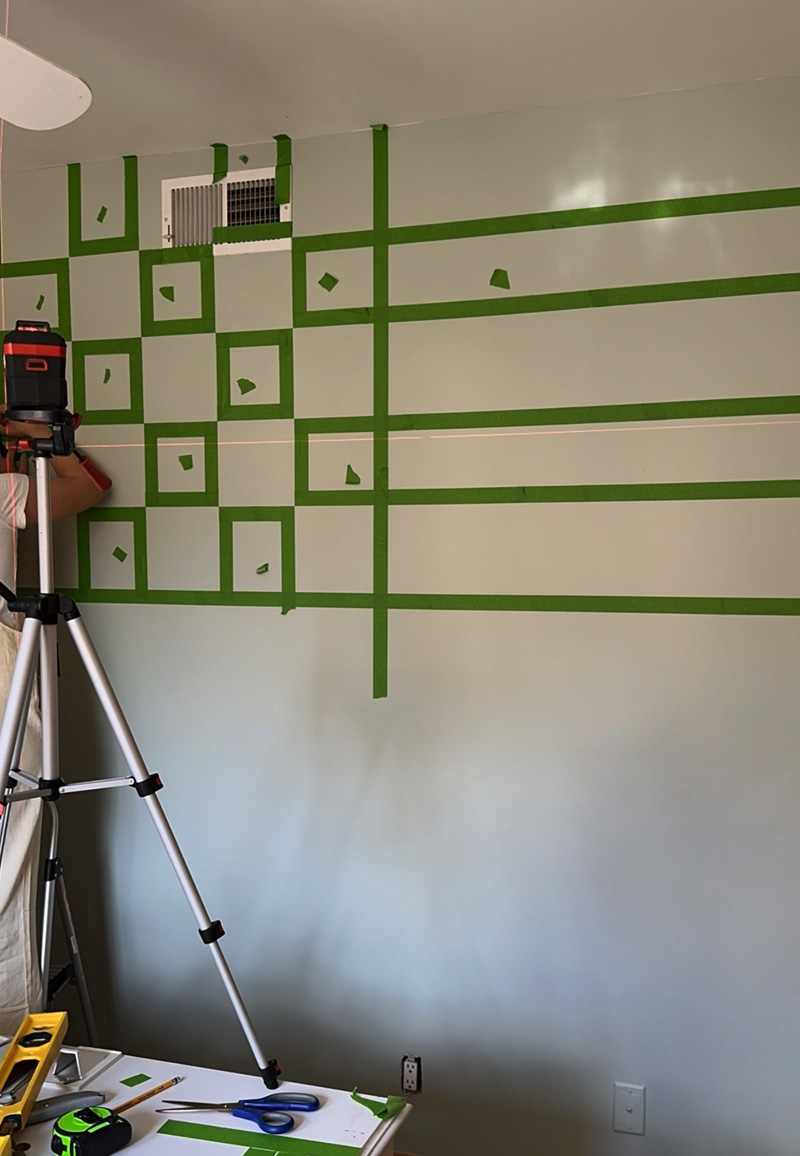
Using a laser level, create first your straight horizontal line across the wall. (I started in the middle of the wall with my lines.).
Using painter’s tape following the laser mark to start your lines.
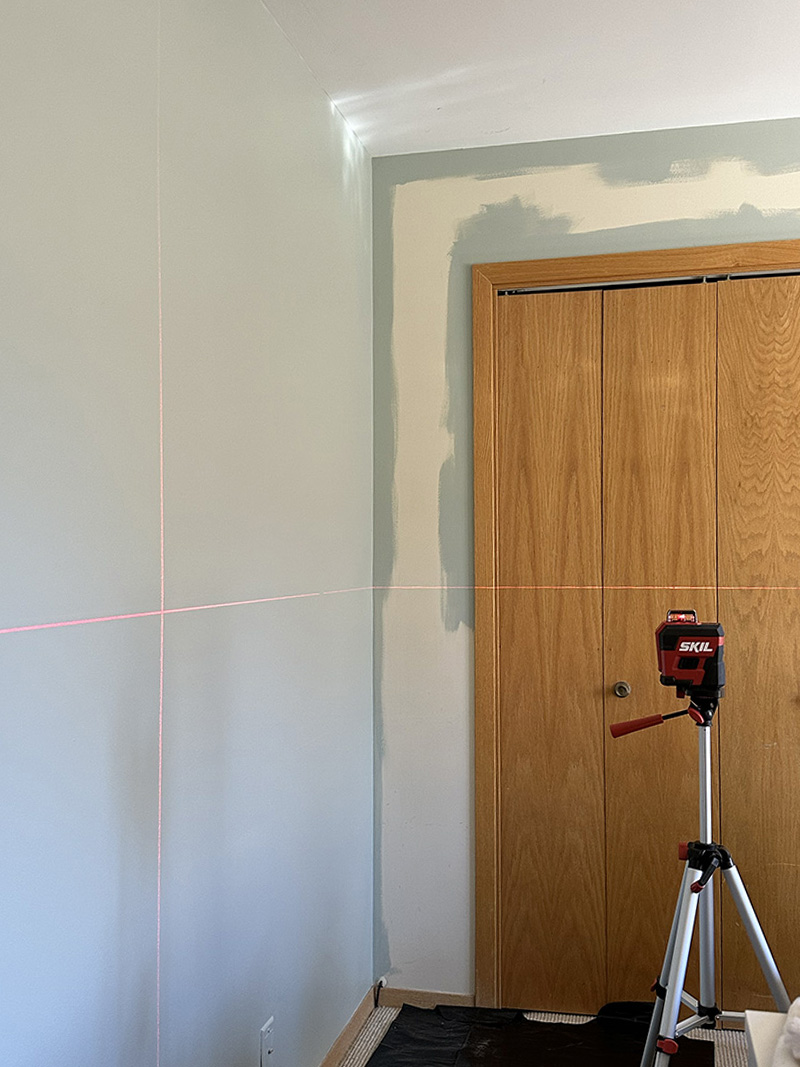
Once that line is made, using a measuring tape, measure up 8″ and make a small pencil mark. Move the laser level to this new 8″ mark. IMPORTANT – be sure to place your next line of tape ABOVE the 8″ mark line so you have a full 8″ between your two rows of tape.
NOTE – I found it helpful to place a small piece of tape on the “off sized” lines. These will be the squares that stay the lighter paint color.
From the bottom of your tape, right at the 8″ line, measure up another 8″ and make a slight pencil mark. Move your laser level to that point and then IMPORTANT – place your tape right UNDER the 8″ line. Visually it will look off right now. It will look like your squares are not the same size (and they aren’t right now!) but when you paint and remove the tape… they will be.
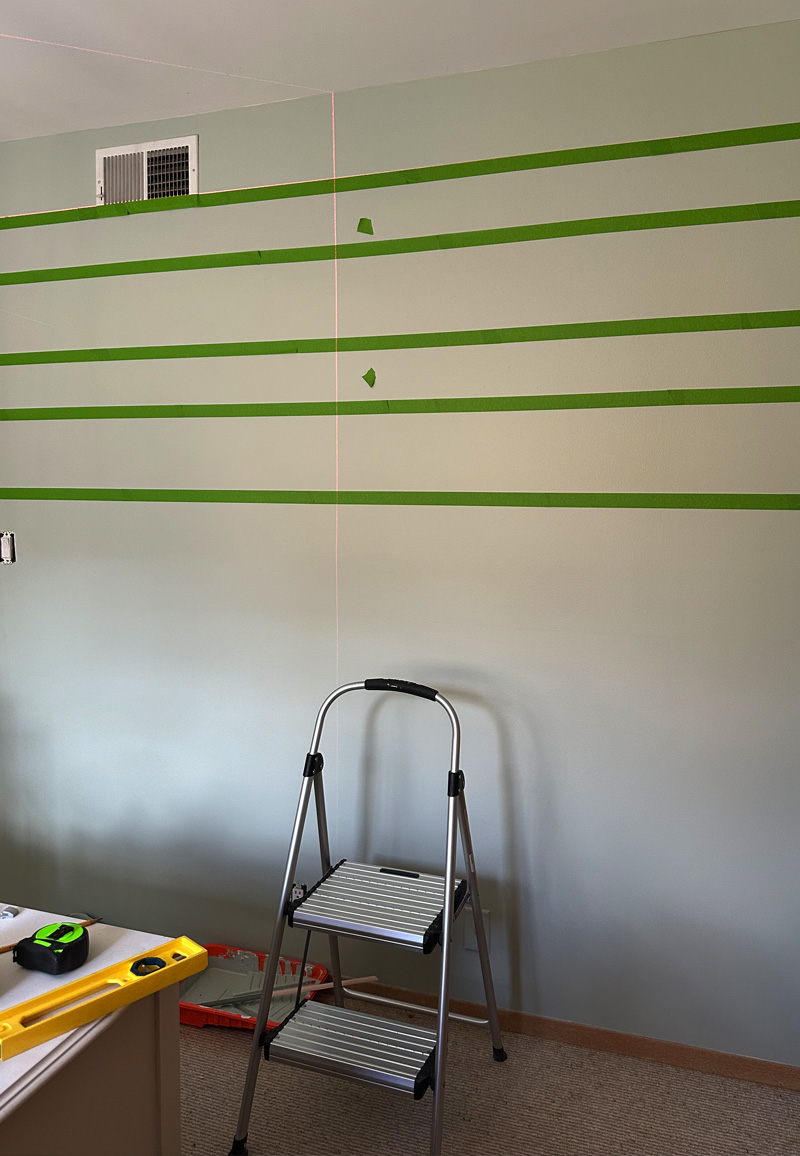
Repeat this process of making your tape above and below the 8″ marked line until the whole wall has been completed.
Vertical Lines next
Using the laser level again, switch to making your first vertical line across the wall. (I started in the middle of the wall with my lines.). Using painter’s tape following the laser mark to start your grid.

Once that line is made, get ready to have your mind twist and turn for a bit. Things get a little confusing here, but stick with me, look at the pictures I’ve included and the video I made… you totally can do this!
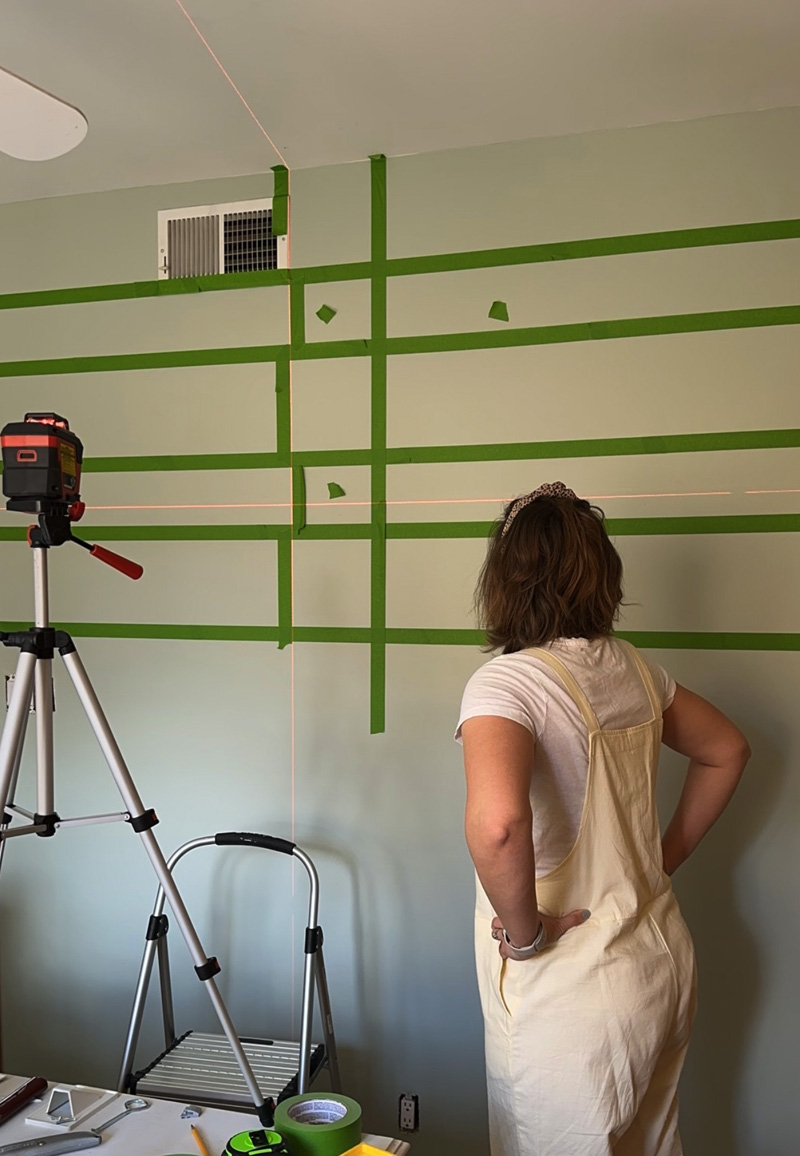
Using a measuring tape, measure over 8″ to the left and make a small pencil mark. Move the laser level to this new 8″ mark.
KEY – On a nearby table, make a tape template. Measure out 8″ and place two pieces of tape on the zero mark and the 8″ mark. Now using scissors, pre-cut a handful of 8″ painter’s tape pieces. (You can see on the image below, I have my tape template on the desk.)
With your pre-cut tape pieces, begin to place them TO THE LEFT of the 8″ laser line so you have a full 8″ between your two rows of tape and then TO THE RIGHT on the square above.
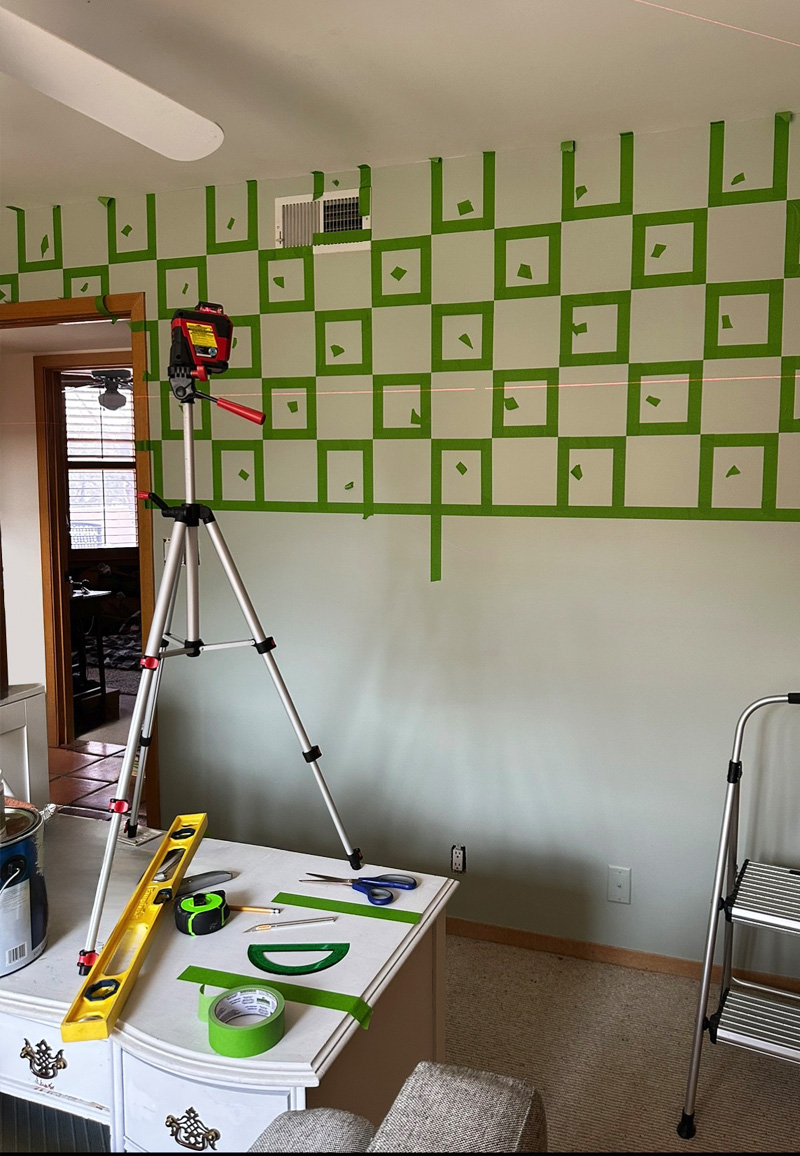
You will also need to adjust the horizontal lines slightly as your squares begin to take shape. Don’t lose your mind, you’ve got this. Repeat this pattern (it’s slow going) until the entire wall has been laid out.
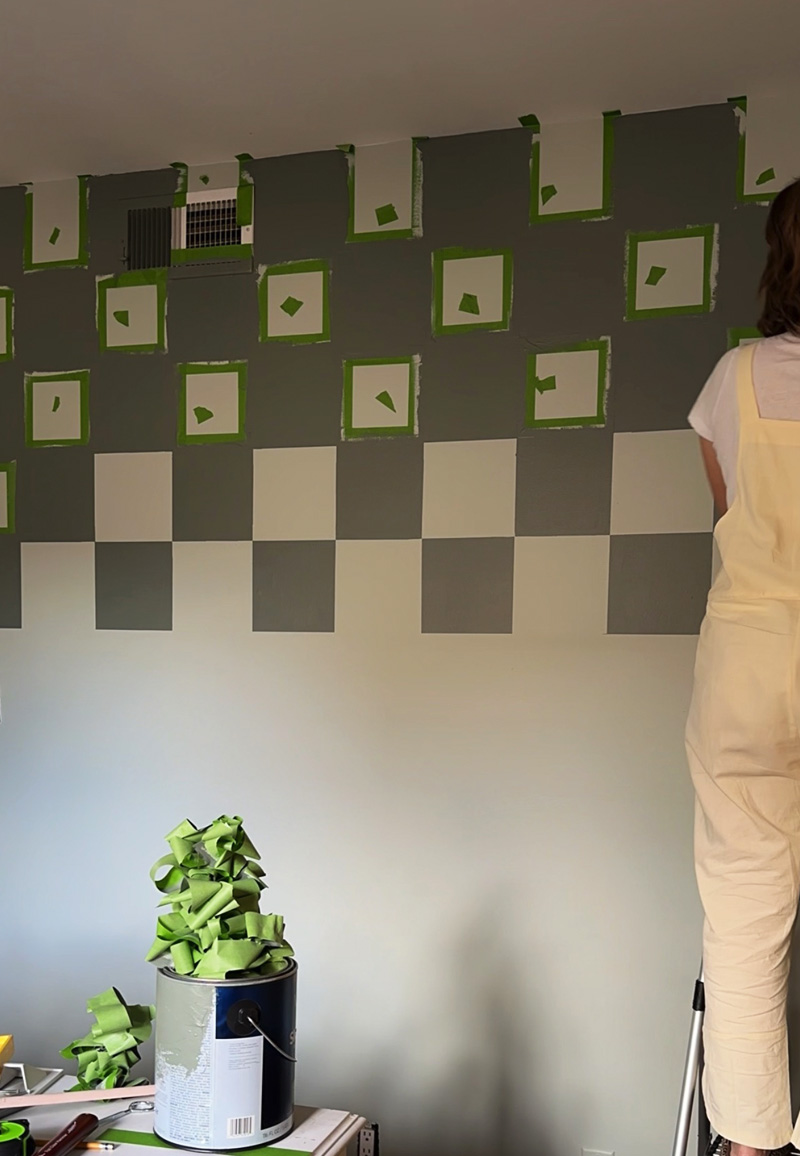
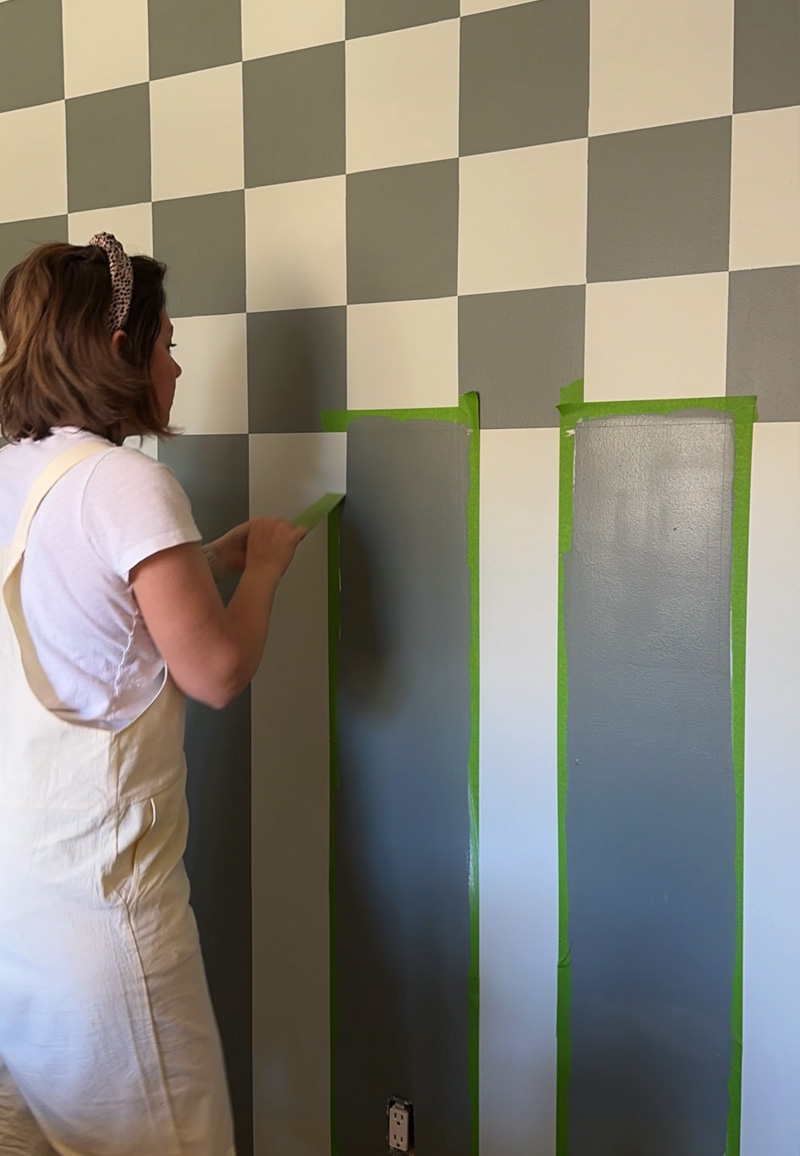
Painting a Checkered pattern on a wall
Now that the taped pattern is all set, paint the edges without the tape in the center – the full squares, on the edge of your painter’s tape with the LIGHT PAINT COLOR again. This will ensure that if there is any bleeding, it will be your base coat and you will end up with perfect crisp lines.
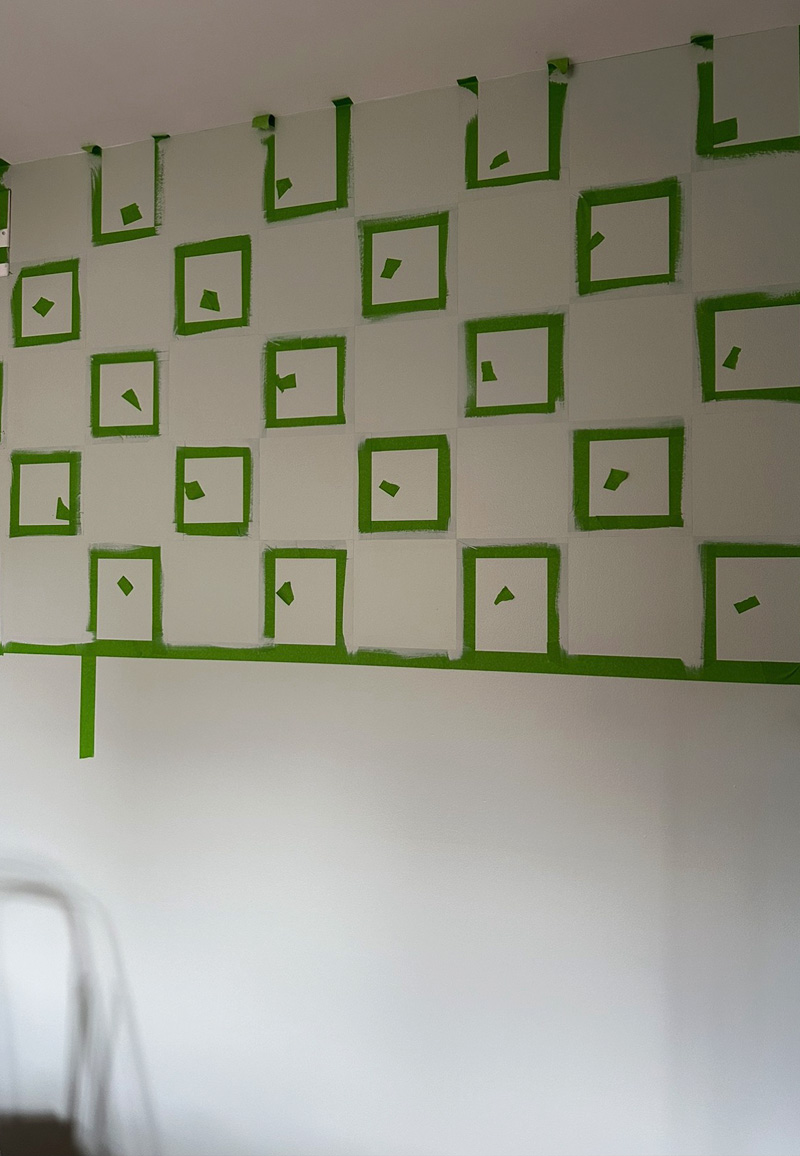
Once the trim base coat paint is dry, paint your darker (Retreat) colored paint on the trim and in the squares. I did two coats of paint.
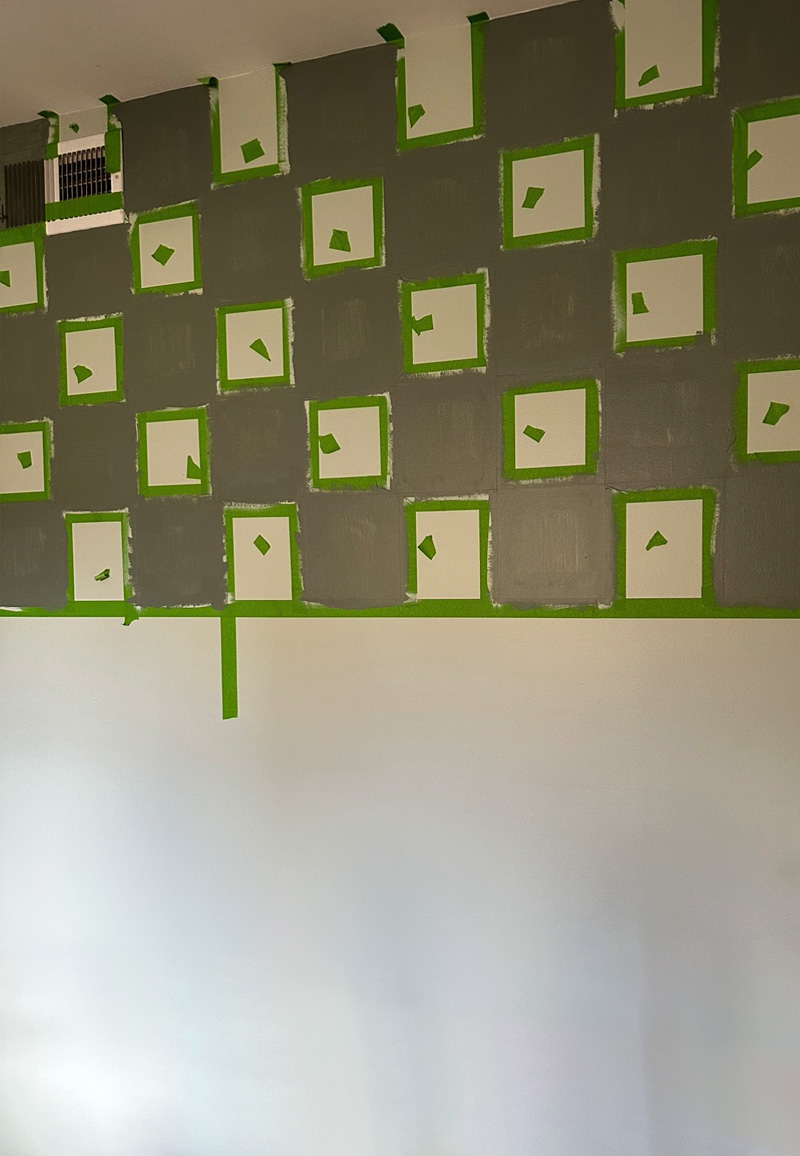
Before the paint is fully dry, remove the painter’s tape to reveal your completed beautiful checkerboard pattern wall!
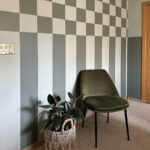
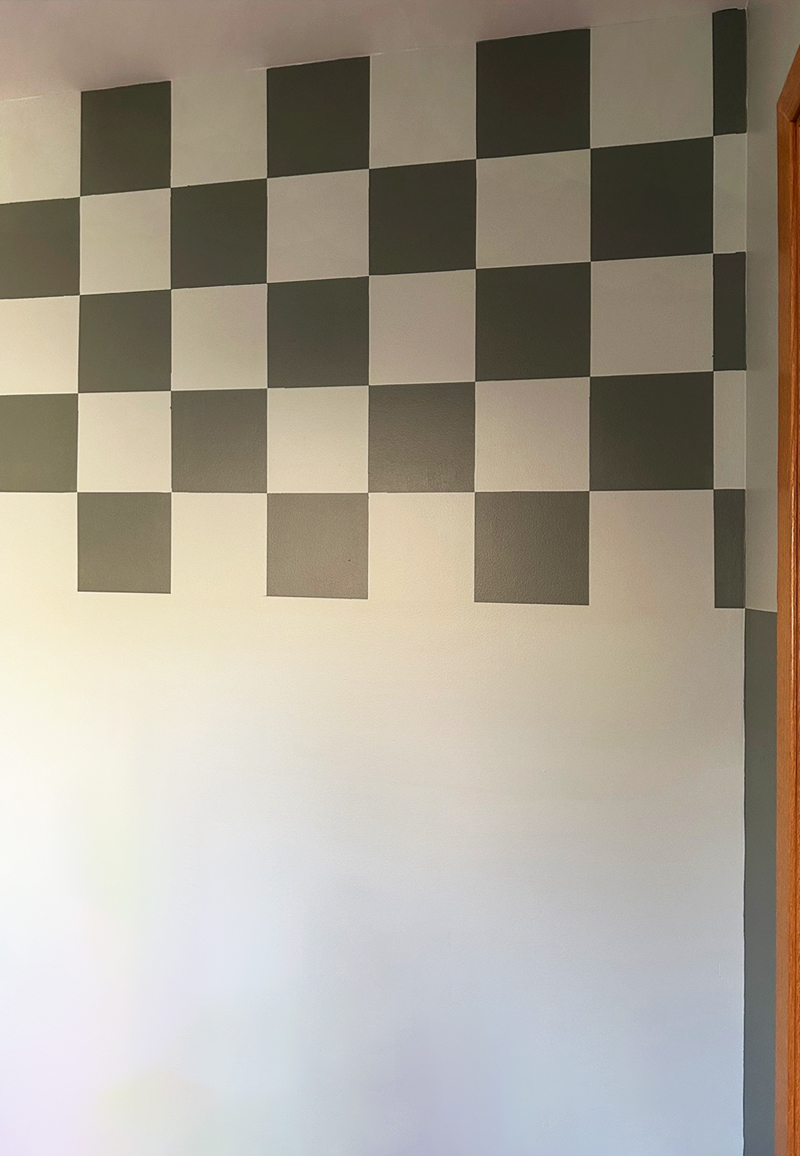
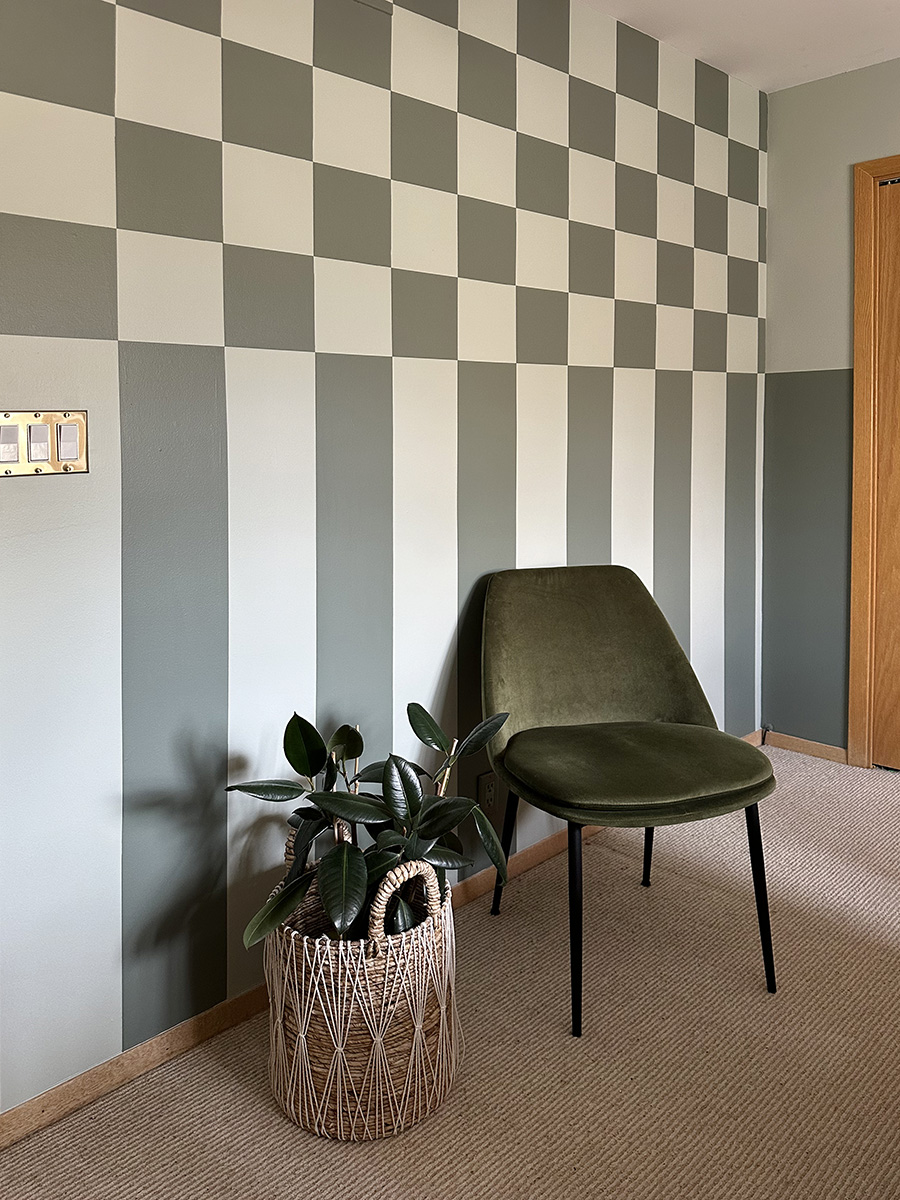
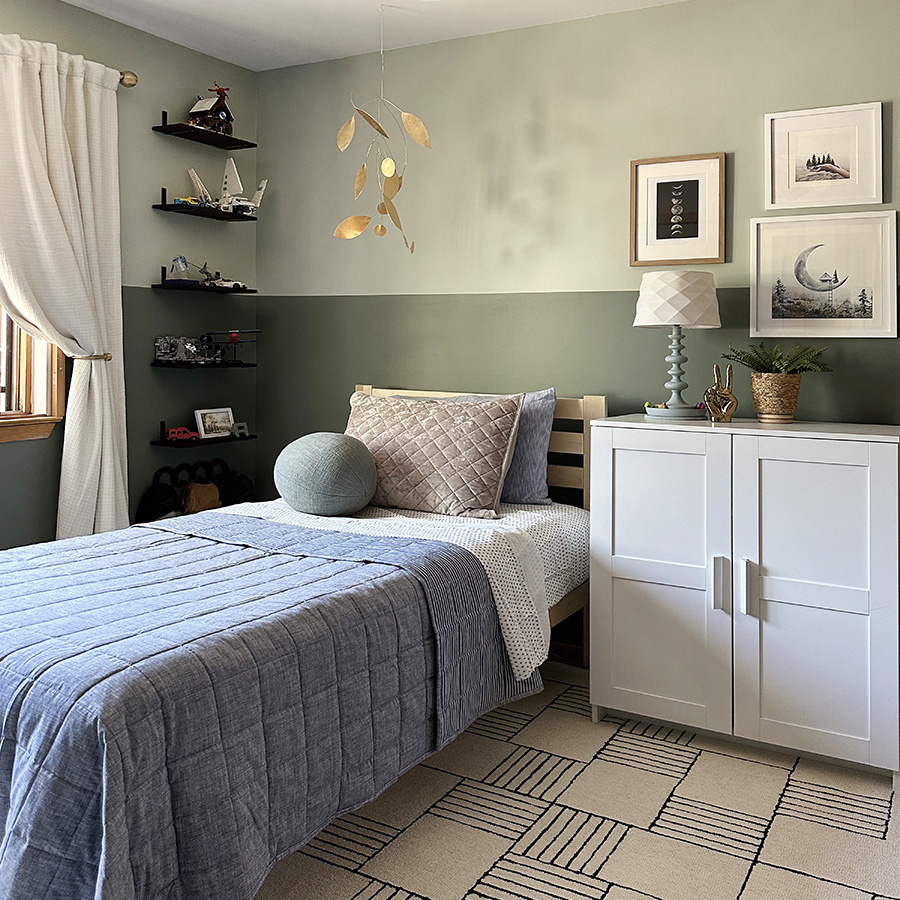
Sage Green and Olive Green checkerboard pattern
I could not be more pleased with this green two toned checkerboard patterned wall! It’s fun and trendy, but the pattern almost gives a classic look. I think this accent wall design will grow so well with my son!
Don’t feel like painting a checked wall? Check out my Best Checked Wallpapers post!
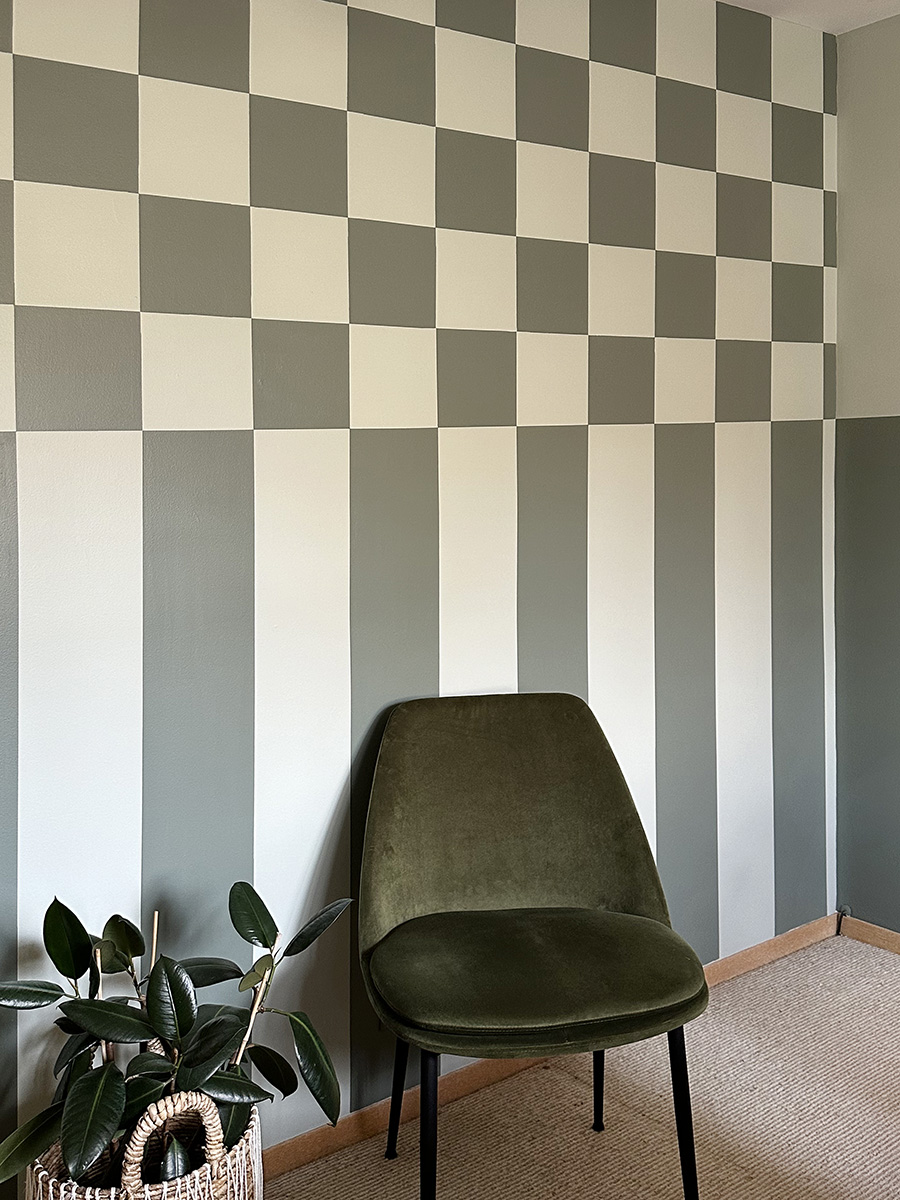
Stripes and Checkered pattern wall
If you are extra like me, it’s fun to carry the checker pattern down to a stripe. I thought it was a creative way to add pattern, but not make it wildly busy.
Allow your checkered pattern to completely dry and then add painter’s tape along the bottom edge of your lighter square (in my case the light green, contented color) – from the darker color’s corner (retreat color) to the next darker color’s corner.
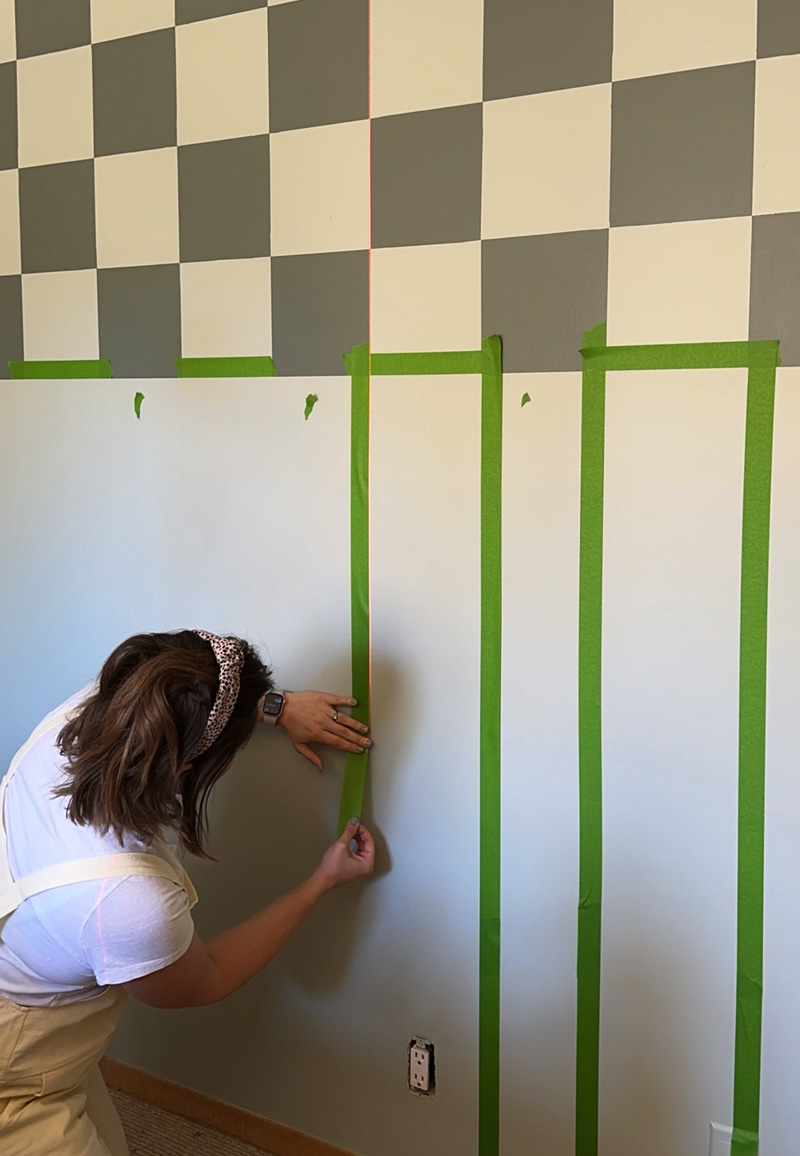
Next, line up your laser level again right at the corner and place the painter’s tape along the outside of the line. Repeat the laser line on the other corner and place your painter’s tape again on the outside of the line. You are creating an 8″ wide stripe space for your darker paint color.
Once all the stripes are laid out, paint the edge of the tape with your lighter paint and allow to dry. Then go over with the darker paint and two coats of paint.
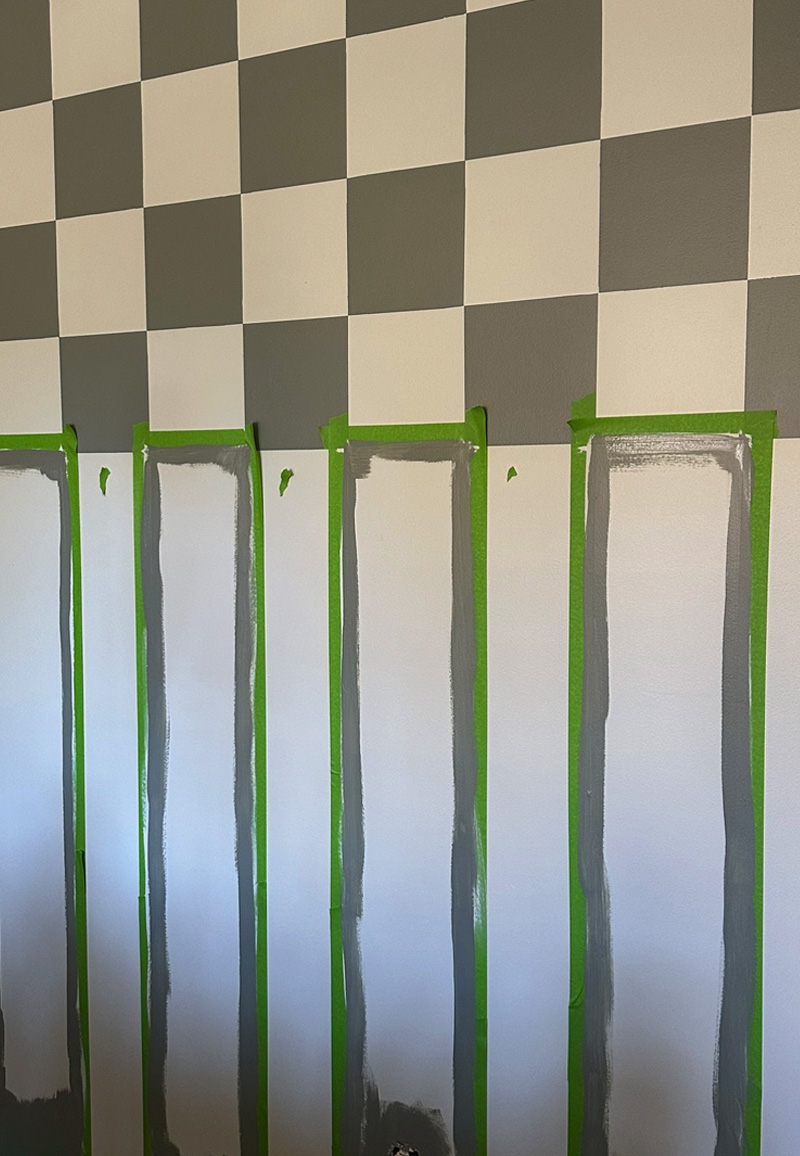
Remove the tape and presto… a stripe and checker wall!
I am completely obsessed with this completed look for my son’s bedroom.
I am ready to move into his space and claim it for my OWN!
Here are some of my favorite accent walls in our home…
- How to paint an Arch Accent Wall
- How to Stencil a Wall with Acrylic Paint (Laundry Room)
- DIY Organic Paint Line Accent Wall
- Tween Modern Stripe Bedroom Accent Wall
The checker and stripe combination wall is just my favorite way to add bold pattern without completely overtaking the wall with checkerboard from top to bottom.
This was a doozy of a week two project and I am happy to report that most of the other 6 weeks should be still wildly creative, but a little less time consuming – phew! Check out what all I still have on my to-do list.
TO DO LIST over next 8 weeks –
Paint Walls basic colorsCreate + Paint Checkerboard / Stripe accent wall- Remove wooden shutters
- DIY Mobile over bed
- Storage and style an Arched bookcase
- Install Mini Shelf Railing
- DIY Lego Storage cabinet
- Update + repair closet doors
- Assemble new furniture
- DIY rug art
- Bulletin board install
- Style room with new rug, curtains, chair + accessories
Here are a few items I have already picked up for my son’s room :

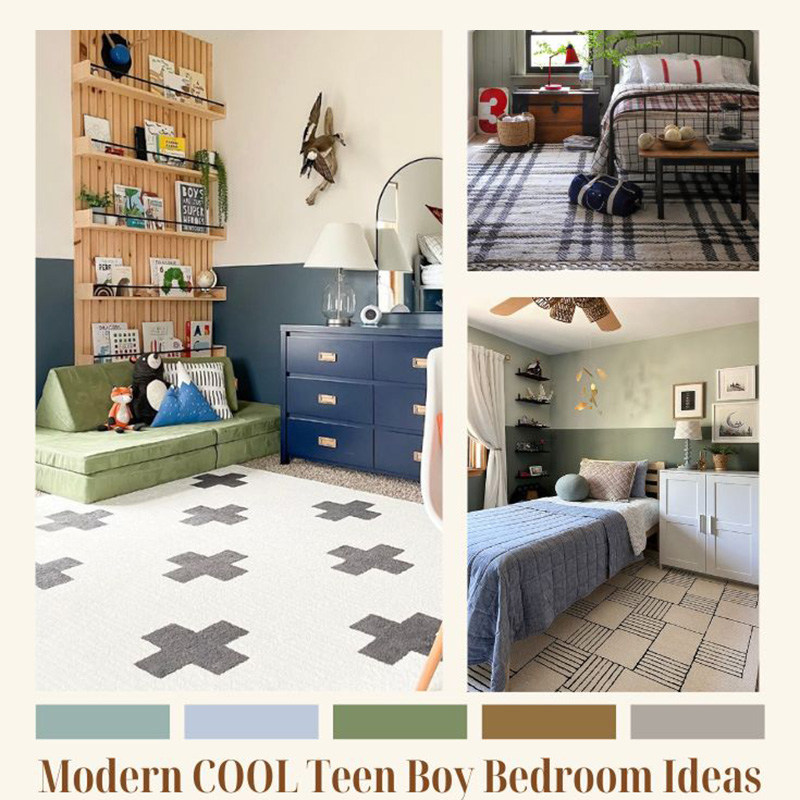
And if you are looking for even more kiddo themed bedroom ideas, check out these below…
I absolutely loved this tutorial! The step-by-step instructions made it so easy to follow, and your tips on color combinations really inspired me. I can’t wait to try this in my living room! Thank you for sharing such a creative idea!
I absolutely loved this tutorial! The step-by-step instructions were super helpful, and your tips on tape application really made the process easier. I can’t wait to try this checker pattern in my own living room. Thanks for the inspiration!
I absolutely loved this post! The step-by-step instructions are so clear, and the tips on color combinations really inspired me. I can’t wait to try this checker pattern in my own living room. Thanks for sharing such a creative idea!
I love the step-by-step guide in this post! The tips on measuring and taping really help simplify the process. Can’t wait to try this out in my living room! Thanks for the inspiration!
I absolutely love this idea! The step-by-step instructions are super helpful, and I can’t wait to try it out in my living room. Do you have any tips for choosing colors that work well together for the checker pattern? Thanks for sharing!
I love this guide! The step-by-step instructions are super helpful, and the tips on color combinations really sparked my creativity. I can’t wait to try this out in my living room—thanks for sharing such a fun project!
I absolutely loved this tutorial! The step-by-step instructions made it so easy to follow, and your tips for getting clean lines were super helpful. I can’t wait to try this checker pattern in my own space! Thanks for the inspiration!
I absolutely loved this post! The step-by-step instructions made it so easy to follow, and your tips on choosing colors were really helpful. I can’t wait to try this technique in my living room! Thank you for the inspiration!
I absolutely loved this tutorial! The step-by-step instructions were super easy to follow, and the tips on tape placement made a huge difference. My living room looks so vibrant now with the checker pattern accent wall. Thank you for the inspiration!
I loved this tutorial! The step-by-step instructions made it easy to follow, and your tips on color combinations really helped me choose the perfect palette for my space. Can’t wait to try this out! Thank you!
I love this idea! The checker pattern looks so bold and fun, and your step-by-step instructions make it seem achievable. Can’t wait to try this in my living room! Thanks for sharing such an inspiring and creative post!
I absolutely loved your step-by-step guide on painting a checker pattern accent wall! The tips on prep work were super helpful, and I can’t wait to try this in my living room. Your color suggestions are spot on too—so excited to see how it turns out! Thanks for sharing!
I absolutely love this idea! The step-by-step guide makes it seem so doable, and I can already picture how much character a checker pattern would add to my living room. Can’t wait to try it out! Thanks for the inspiration!
This post was super helpful! I love the step-by-step instructions and the tips on choosing colors. I can’t wait to try painting a checker pattern accent wall in my living room. Thanks for sharing your expert advice!
I loved this tutorial! The step-by-step instructions made it so easy to follow. The checker pattern adds such a fun pop to my living room. Can’t wait to try this out! Thank you for the inspiration!
I absolutely love this tutorial! The step-by-step instructions are super clear, and the tips for getting clean lines are so helpful. I can’t wait to try this checker pattern in my living room! Thanks for sharing such an inspiring idea!
I absolutely loved your post on painting a checker pattern accent wall! The step-by-step instructions and tips were super helpful. I can’t wait to try this in my living room! Thanks for the inspiration!
I absolutely loved this tutorial! The step-by-step instructions made the checker pattern look so approachable. I can’t wait to try it in my living room – the contrast will really add some flair! Thanks for sharing such a creative idea!
I loved this tutorial! The step-by-step instructions made the checker pattern look so achievable. Can’t wait to try this in my living room! Thanks for the inspiration!
I love how the checkerboard-to-stripe wall brings bold character without feeling chaotic—such a smart twist on a classic design. The step-by-step layout advice (especially measuring out 8-inch squares) transforms what could be intimidating into something truly doable and fun. Thanks for showing how graphic flair can be stylish and approachable!
Your “How to paint a Checker Pattern Accent Wall” guide strikes a lovely balance—fun, clear, and actually achievable. The checkerboard-into-stripe twist adds playful personality without overwhelming the room. The step-by-step advice, paired with visual flair, really makes this DIY seem both stylish and doable—thanks for making bold design feel so approachable!
I’m glad you enjoyed it! That checker-to-stripe twist is my favorite part too—it’s amazing how small changes can transform a space without feeling overdone.
I absolutely loved this tutorial! The step-by-step instructions made the process so much easier, and the tips on choosing colors were super helpful. I can’t wait to try this in my living room! Thanks for sharing your creative ideas!
I absolutely love the detailed steps you provided for painting a checker pattern accent wall! The tips on measuring and taping really made the process seem less intimidating. Can’t wait to try this in my living room—thanks for the inspiration!
I absolutely love the idea of a checker pattern accent wall! Your step-by-step instructions make it seem so manageable, even for a DIY novice like me. The tips on choosing colors really helped me visualize what would work in my space. Can’t wait to try this out! Thank you for the inspiration!
Where can I see the video for this? I started with the horizontal lines but I’m completely confused on the vertical lines. The video might help me but it’s not in this post?! Thank you!
Kelsey, thank you for bringing to my attention that I never ended up making a video to help explain this! This was not a simple layout and I 100% understand your confusion. Until I get the video made and loaded, you can check out my Instagram stories highlight that slightly showed more detail. I tried finding the video right about where you currently are. Hopefully seeing the visual a bit along with my blog post will help!! Best best of luck. IG Stories for Checkered Wall
Thank you!! This was the a-ha moment I needed! 🙂
LOVE that shoes were the inspiration!!! And it turned out great! Looking forward to seeing the final reveal.
WOW, I love how it turned out.
Thank you so much!!
!What a great hack to use the laser level, if only I knew about that before my sister painted the stripes on her wall! I hope you don’t mind that I gave your blog a shout-out this week as we’re both doing a tween bedroom makeover. The checkerboard wall is so original and a show-stopper!
The laser level really did help speed things along… it was still a very slow going project though, ha! And goodness, thank you for the shout out… heading over to your blog now to check it out.
This is amazing! I love the pattern you did with different size checks. So cute and fun for their room. Our boys also love Vans! Can’t wait to see your space come together. I hopped over from the ORC page, I’m working on my office but my next home project is our boys’ shared bathroom.
Thank you so much! We are a Vans family, through and through – ha. Heading over to see your office now!