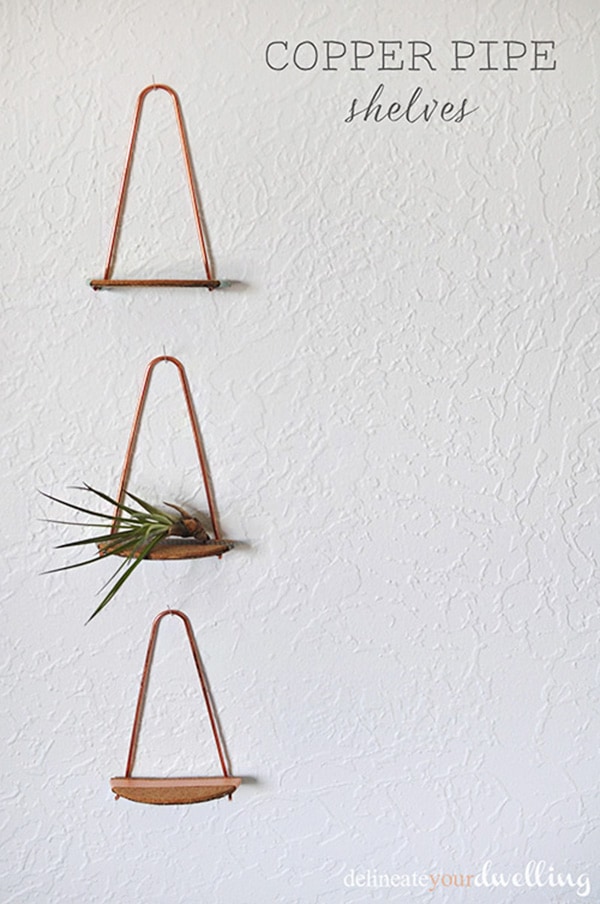
Mini Copper Pipe Shelves
INSIDE : Learn how to create simple but gorgeous Miniature Copper Pipe Shelves using just a few easy materials! You can DIY these small shelves in under an hour. Fun to make and perfect to hold small decor on your wall.
Sometimes ideas pop in your head at the least expected time. I had bought these awesome Copper Pipe Hooks and they sat in my garage for weeks or months. Suddenly yesterday I was like, “SHELF!” And that my friends, is how the creative craziness starts in my head. Today I am really excited to share my Copper Pipe Shelves with you.
Looking for other cool shelf projects I have made? Check out my office shelves.
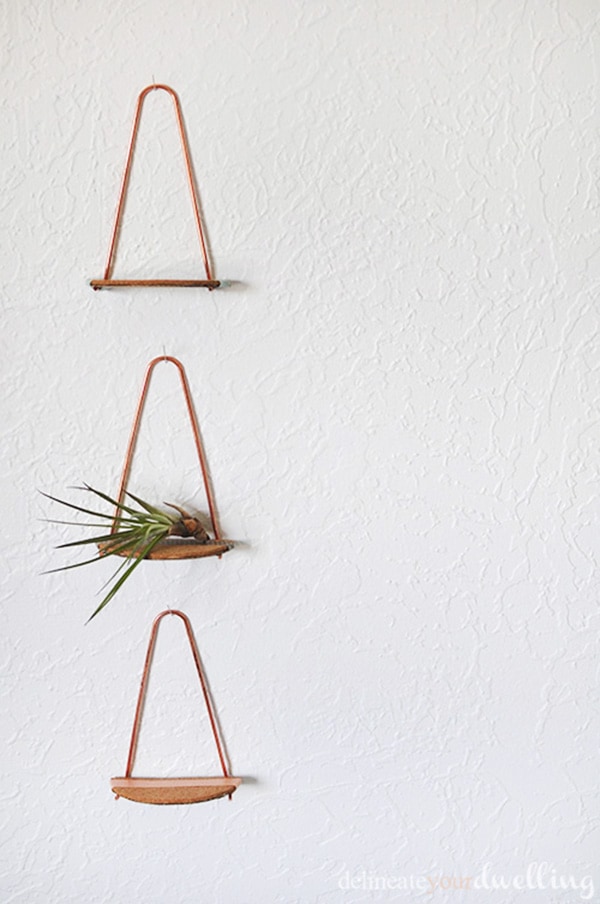
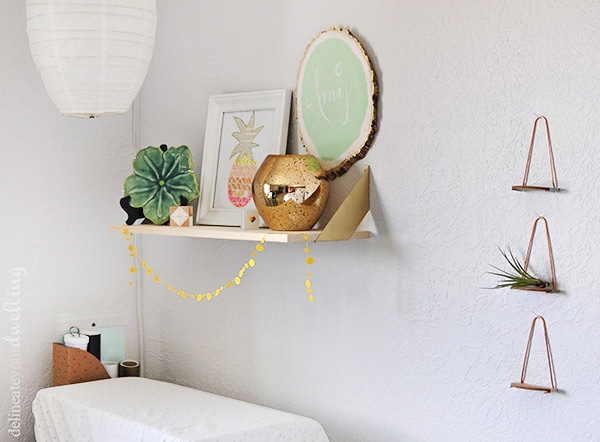
I hung them in my office, which now is so full of fun, it’s like Delineate Your Dwelling craft explosion in there.
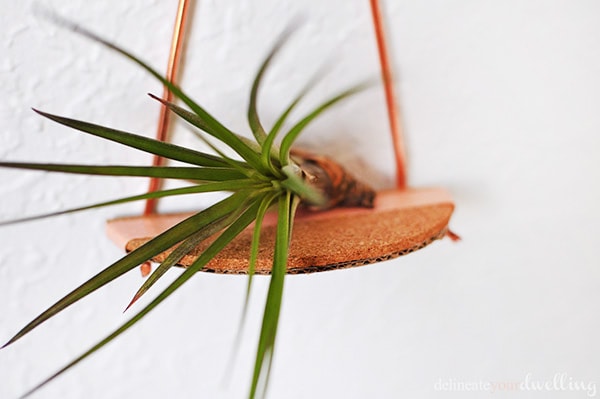
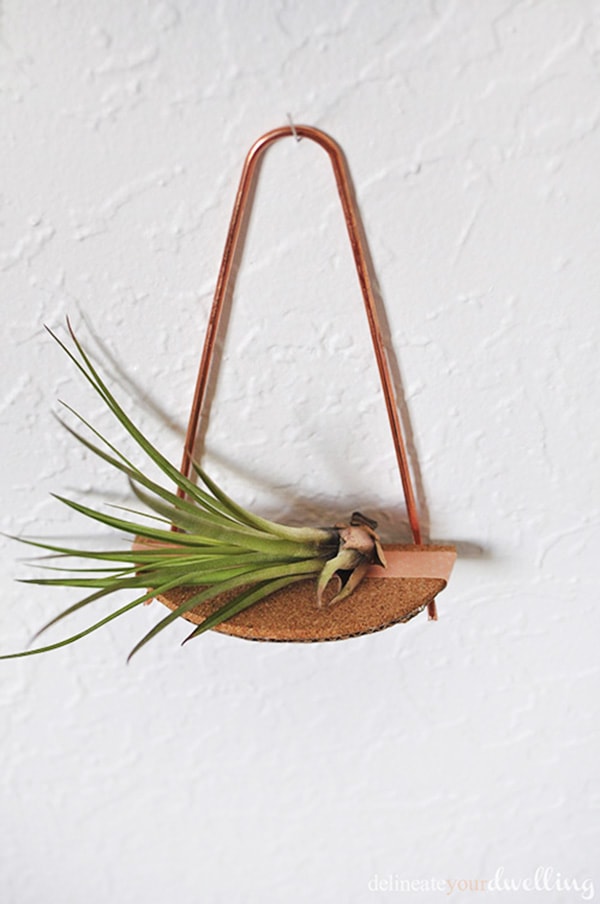
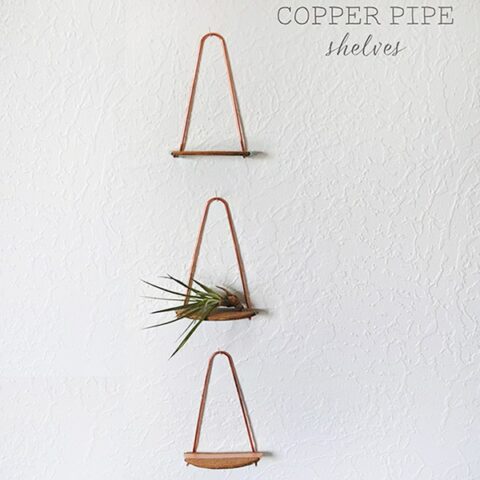
These are small little mini copper pipe shelves, only 6″ in height, so they can’t hold a ton of weight but I thought they were a perfect little air plant holder!
What Supplies are needed for Mini Copper Pipe Shelves?
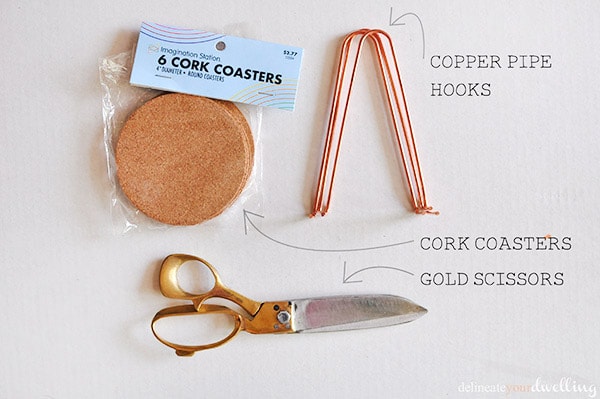
Copper Pipe Hooks 1/2″ x 6″
Cork Coasters
Gold Scissors
Pencil
Washi Tape
Acrylic Paint
How to make Mini Copper Pipe Shelves?
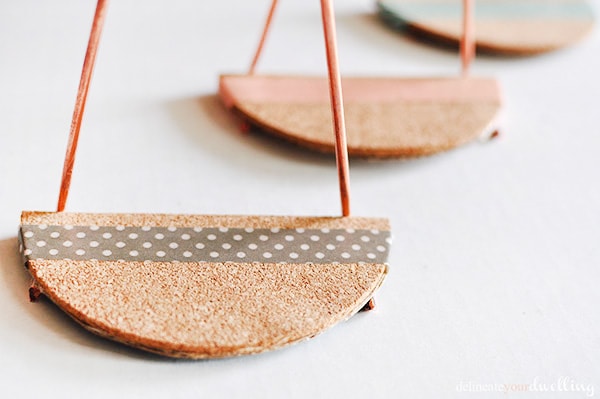
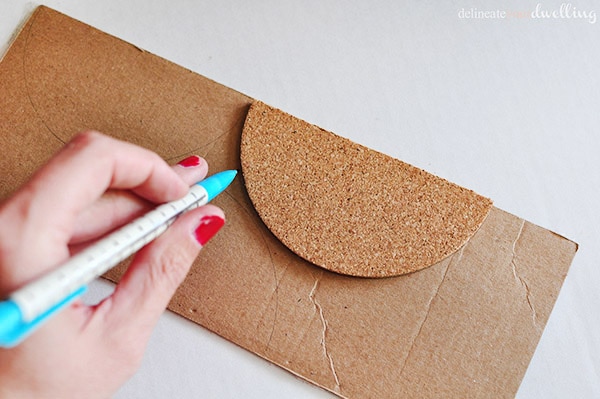
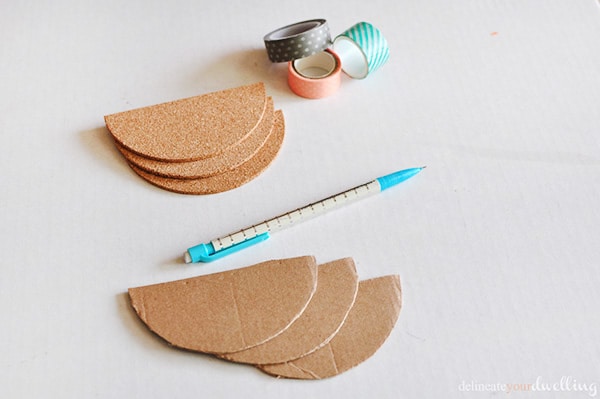
The first thing I did was cut my cork coasters in half. They were a little flimsy, so I traced the coaster onto some cardboard to act as a more durable support backing.
Here are my cut coasters and the cardboard backing ready for assembly.
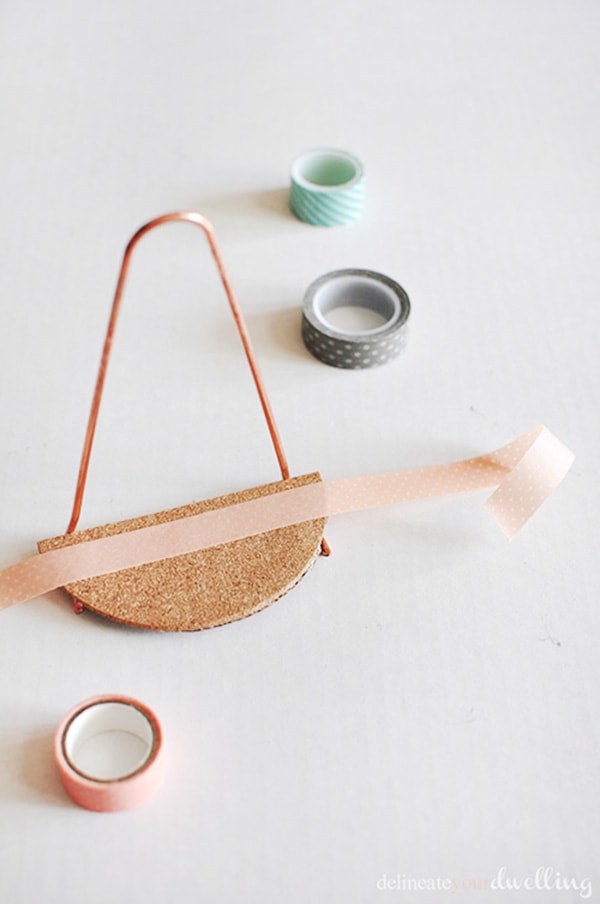
I then used hot glue to secure the cork and cardboard. Then, I made a little mark on the under side as to where my copper pipe bends would sit. A little hot glue was applied.

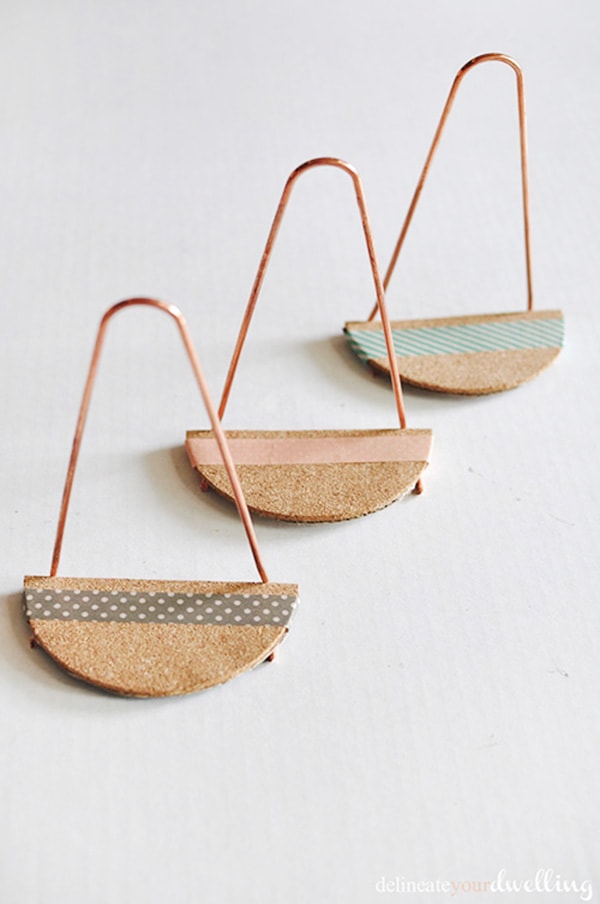
I decided I wanted a little bit of color, so I added some washi tape to the top of each shelf.
My oh my, I quickly fell in love with these three little shelves.
Mini Copper Pipe Shelves
Learn how to create simple but gorgeous Mini Copper Pipe Shelves using just a few easy materials! You can DIY these small shelves in under an hour. Fun to make and perfect to hold small decor on your wall.
Materials
- Copper Pipe Hooks 1/2″ x 6″
- Cork Coasters
- Gold Scissors
- Pencil
- Washi Tape
- Acrylic Paint
Instructions
- Start by cutting your circular cork coasters in half. They may be a little flimsy, so you can then trace the coaster onto some cardboard to act as supportive backing.
- Using a hot glue gun, secure the cork and cardboard together. Then, make a little mark on the under side (on the cardboard) as to where your copper pipe bends would sit. A little hot glue was applied to hold copper in place.
- If you want a little bit of color, you may add some washi tape to the top of each shelf.
- Hang your completed Mini Copper Shelves in your home and enjoy!