Gold Foil Placemats
INSIDE : Learn how to create the most lovely burlap Gold Foil Placemats for setting your table in a fun elegant way!
This post may contain affiliate links. See full disclosure here.
This post has been updated since it’s original publish date of February 2015.
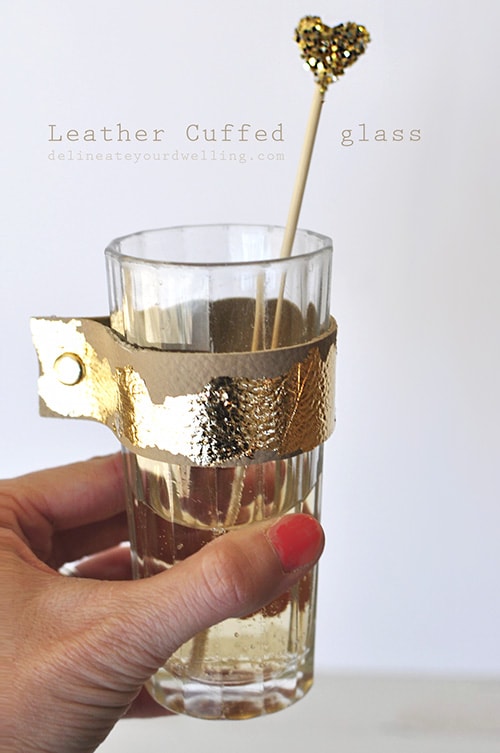
Well, it’s official. I’m in love with gold foil in a big way. After making my gold foiled leather glass cuffs, I knew I was in love and I knew I need to try other materials to gold foil. Today I am so excited to share how to Gold Foil Placemats.
Gold Placemats
Looking for beautiful gold placemats? Check out some of these…
- Checkerboard Vinyl Rectangle Placemat
- Monstera Leaf Gold Placemat
- Lydiah No Pattern Rectangle Placemat
- Gold trim Embroidered placemat
- Pure gold rectangle placemat
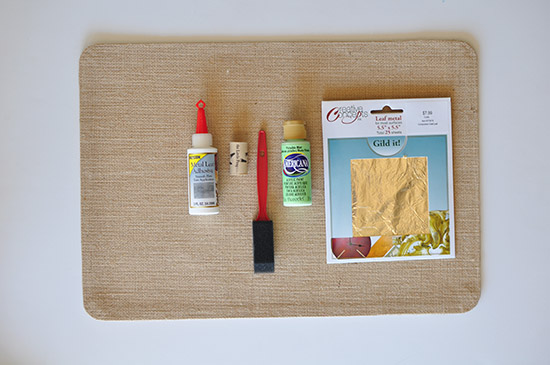
What supplies do I need for Gold Foil Placemats?
Burlap Placemat
Gold Leaf, 18 Sheet Pack![]()
Metal Leaf Adhesive![]()
Wine Cork
Green Acrylic Paint
Sponge Brush
How do I make Gold Foil Placemats?
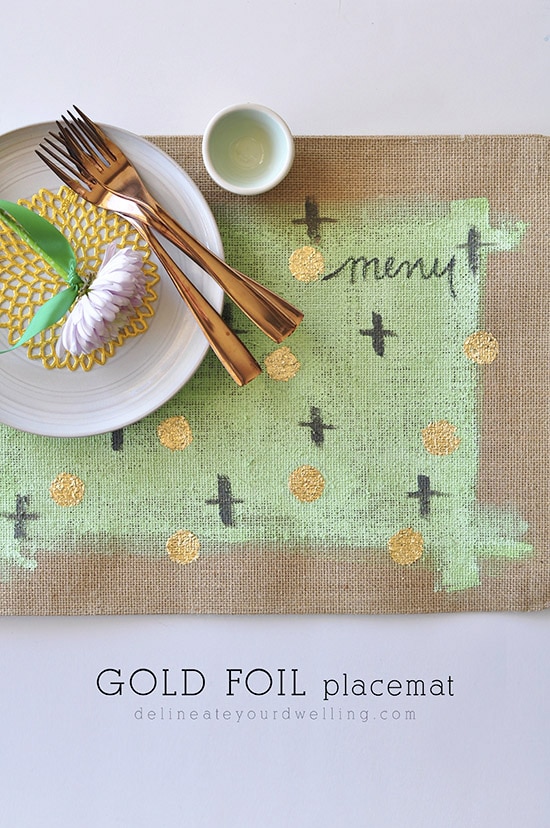
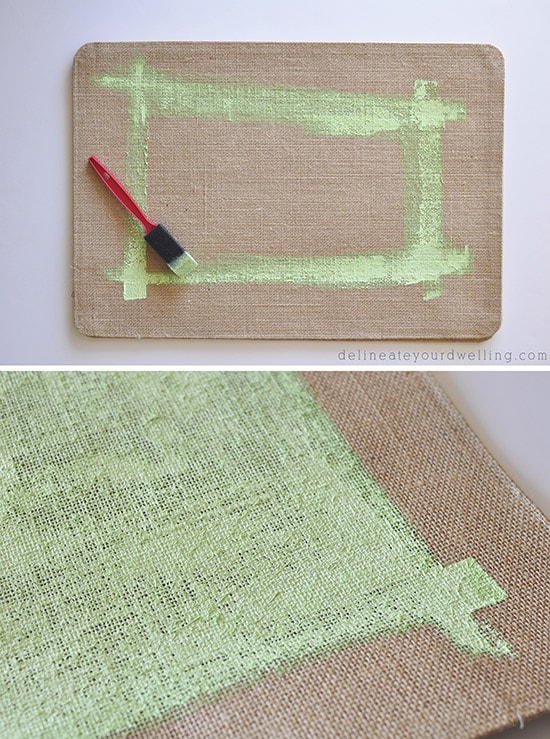
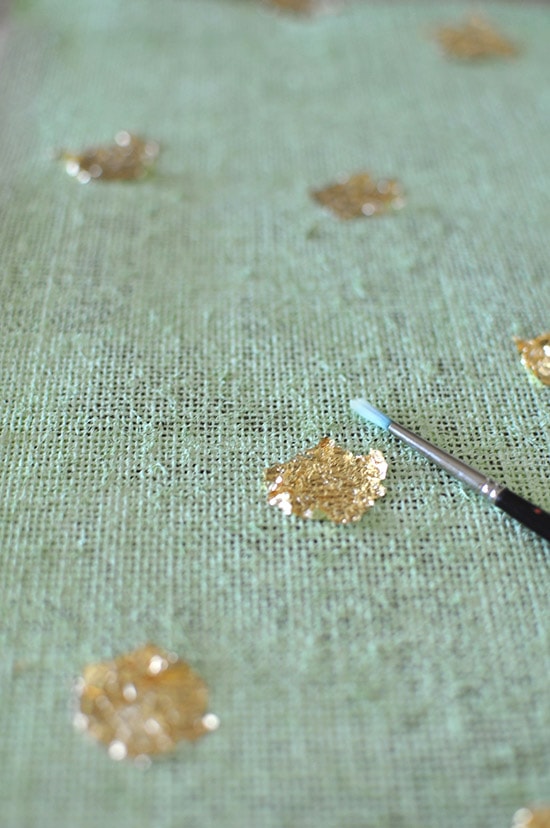
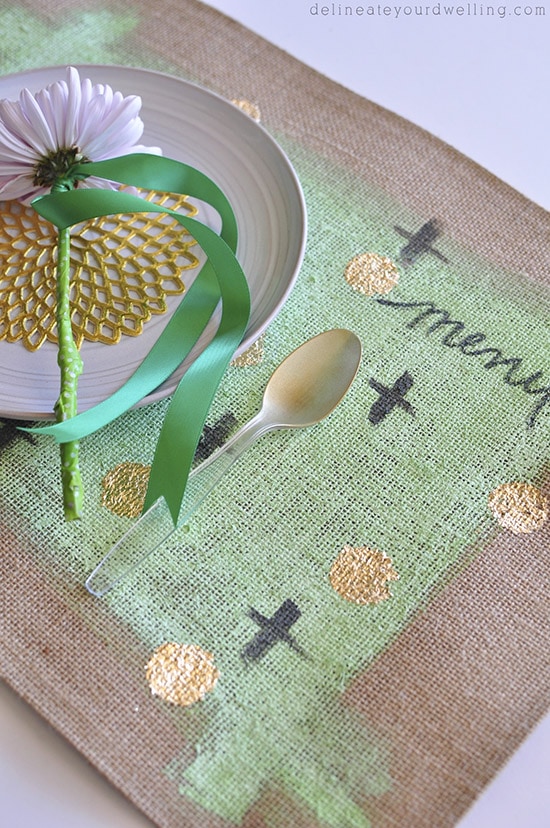
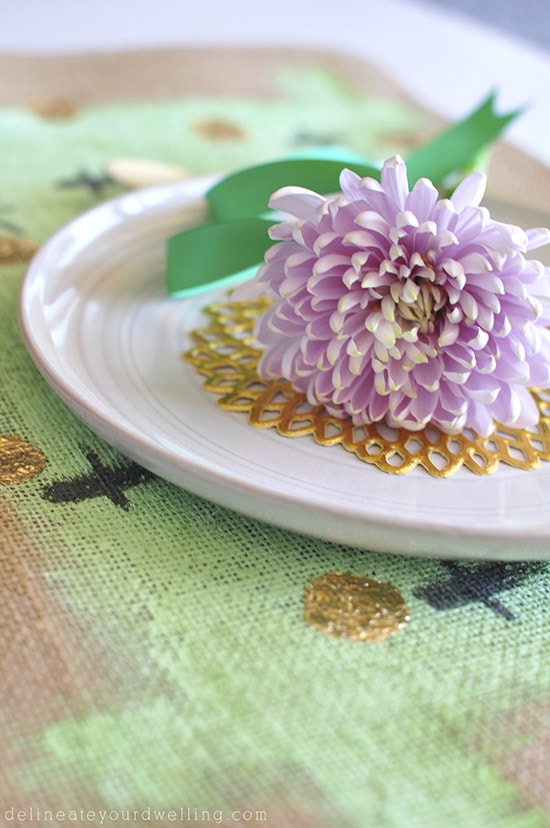
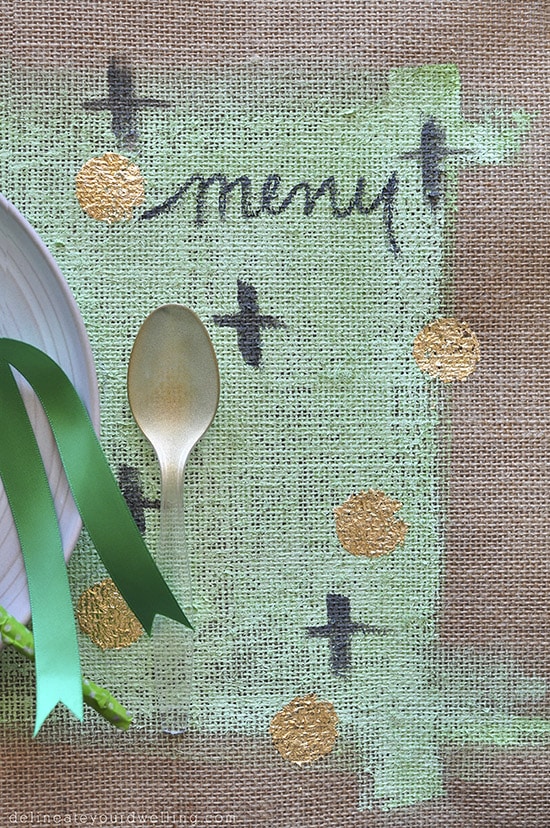
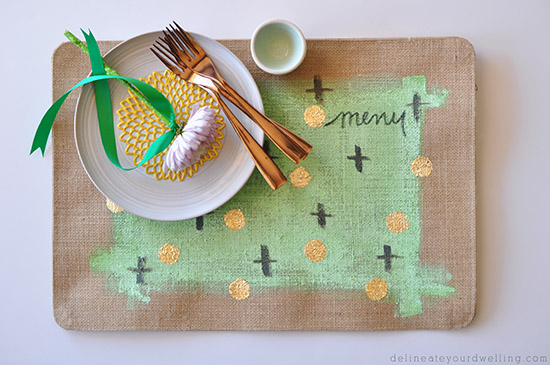
Start by painting a basic rectangle shape with your green paint. I wanted mine to have a messy look, so I purposely painted it the way I did. Allow to fully dry.
Then, I poured a small amount of the metal adhesive onto a plate and used a wine cork to create my polka dots. All the adhesive to become tacky, as per the directions on the bottle.
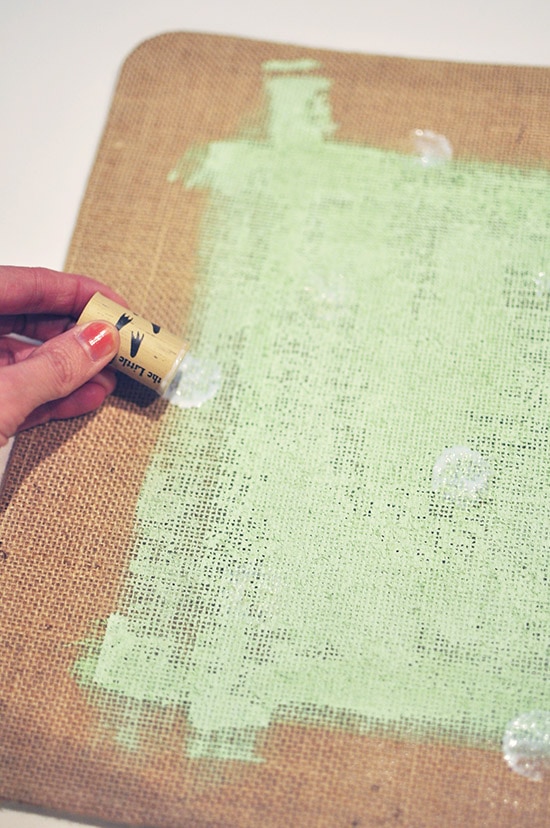
Then, place your gold foil ontop. Since my surface was not a clean smooth surface, brushing away the excess gold foil was a bit more of a task that typically. It kept getting stuck in the burlap crevices, but all in all it wasn’t too bad.
Then, using a dark gray paint, I added a few crosses and painted on the word ‘menu’. I could not be more pleased with how these turned out!
I had just hosted a girl’s dinner club at my home a few days prior to making these… so now I will have to have another party so I can use these beauties!
And if you liked this project, you might like these other Gold Foil Projects I’ve done!


Adorable!!
Love the way these turned out! I tried gold leafing on fabric a little while ago but the foil refused to stick to the adhesive. Any tips?
Hm… interesting. It doesn’t sound like it’s a fabric problem, but maybe a adhesive problem. Did you wait long enough for the adhesive material to get tacky? Sometimes I get impatient and it’s not fully sticky yet.
So cool, unique and original…LOVE this idea!! I would like to invite you to come link up to my party every Wednesday to share your awesome ideas http://thestylesisters.blogspot.com/2015/02/centerpiece-wednesday-little-of-this.html hope to see you there!
Karin
These turned out great. Love those burlap placemats, the possibilities are endless! Thanks for linking up to the Pretty Preppy Party!
OH MY I love these!! Truly madly deeply love these!! I am going to have to make a set for my home! Thanks for sharing with us! Pinned and shared 🙂
Jess
Ha, oh goodness. Thanks for all the love Jessica! =)
I’ve never tried gold leaf, but I really might have to try it out. This turned out great! Thank you for sharing on Found & Foraged!
I could not love these any more if I tried!! AMAZING!! I have to try this sometime soon 🙂
Aw, thanks Anne!! You’re too kind.
You are so creative. Love the colors you chose.I adore this project! I’d be thrilled if you shared it at the Creative Ways party. Hope to see you there!
Blessings,
Nici
Wow, this looks stunning. I love combination of the grey, mint and gold!
Thanks so much, Carmia! It was a fun project to create!!
This is amazing Amy! I absolutely freaking adore this project!
Ha, thanks Brynne! I’m kind of in love, too! HA.
These are so pretty!! I’ve never used gold leaf on anything yet; but all these projects I keep seeing with it are totally inspiring me to try it out! 🙂
Love, love! I’m addicted to gold foil and trying to figure out what else I can use it on!
I’m with you, Gwen. I’m ready to gold foil everything in sight!