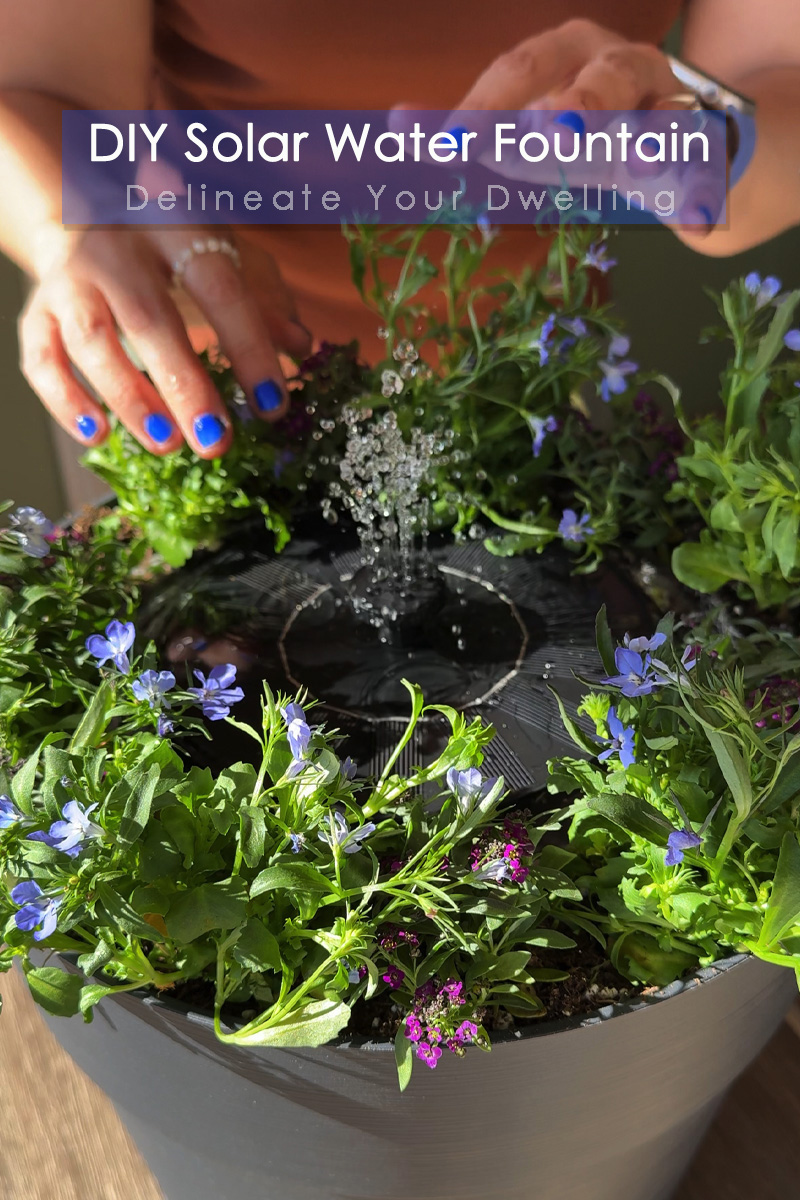
DIY Solar Water Fountain

INSIDE : Learn how to create a beautiful DIY Solar Water Fountain that also acts as a pot for your summer flowers! This is a very simple and budget friendly afternoon project for all ages to make. The perfect cordless oasis for your garden!
This post may contain affiliate links. See full disclosure here.
If you are like me, the sound of running water is the most lovely soothing thing. When I saw this cordless solar powered water feature sold on Amazon, I was like yes and yes!!
Today I will be sharing how to build your own beautiful water fountain this summer. There are so many cool ways to configure this fountain – so read to the bottom for a big list of other fun ideas on how to use it.
If you follow me on Instagram you may have seen how my DIY solar-powered water fountain turned out, it’s easier than you think!

Why go solar and cordless? The Benefits!
Whenever I can “go off grid” I like to! We have solar panels on our roof and it’s a giant savings each month on our electricity bill. Every little bit of using renewable energy and reducing your carbon footprint helps from large solar panels on your home to small ways like a solar water fountain.
Another huge perk of this solar powered fountain is there are no cords and that means you can place your fountain wherever you like (that gets sunlight).
Solar fountains often require less upkeep than traditional ones because there are less mechanics to need to tweak and fiddle with.
Having a water feature in your yard also creates a fresh water source for birds and can deter mosquitoes by keeping water moving. Wins all around!
Now lets get to what materials you need to make this cool fountain.
Supplies for a DIY Solar Water fountain
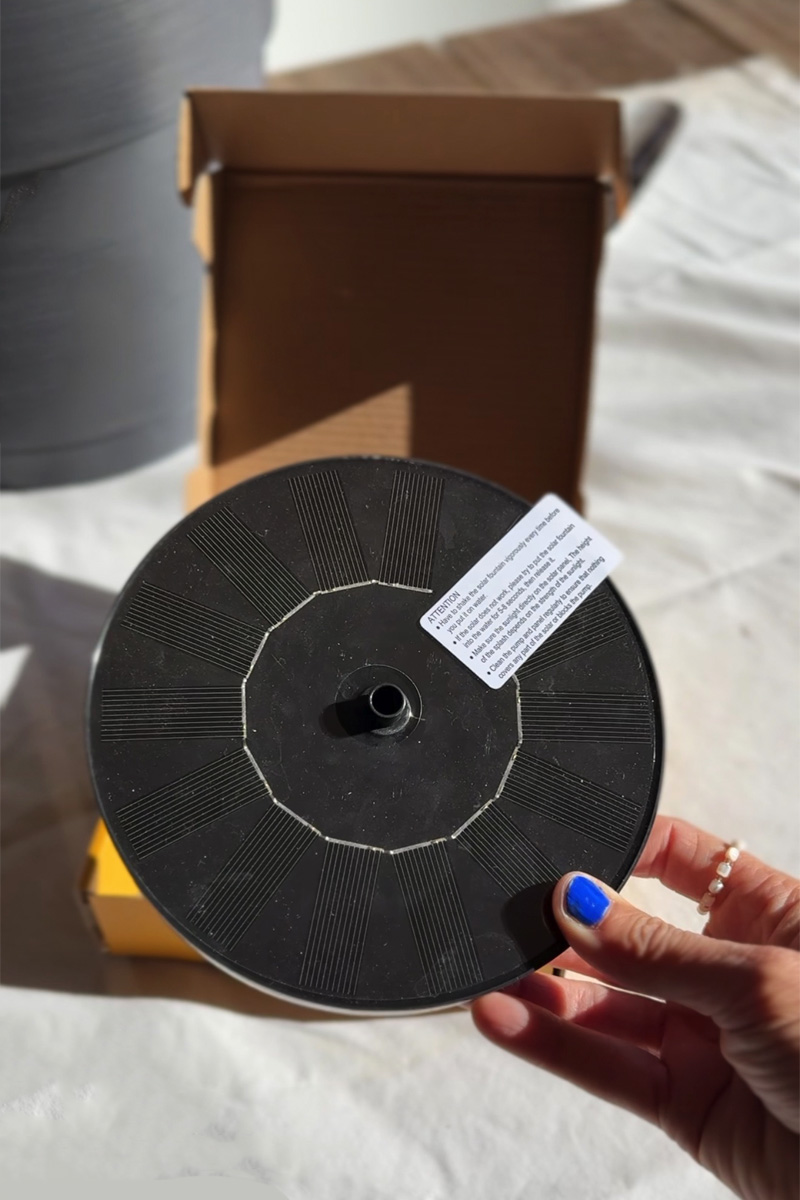
- Fountain Solar Panel with 6 nozzles
- Large pot at least 10″ wide
- Deep plastic plant saucer at least 8″ wide
- Soil
- Low growing flowers or ground cover
NOTE – Make sure to buy your pot and saucer a few inches BIGGER than the size of your fountain. My fountain was 6″ wide, so I bought an 8″ wide saucer and a 10″ pot.
How to make a simple water fountain
I was so excited to give this super budget friendly DIY fountain a try and it’s been such a fun addition to our backyard ever since!
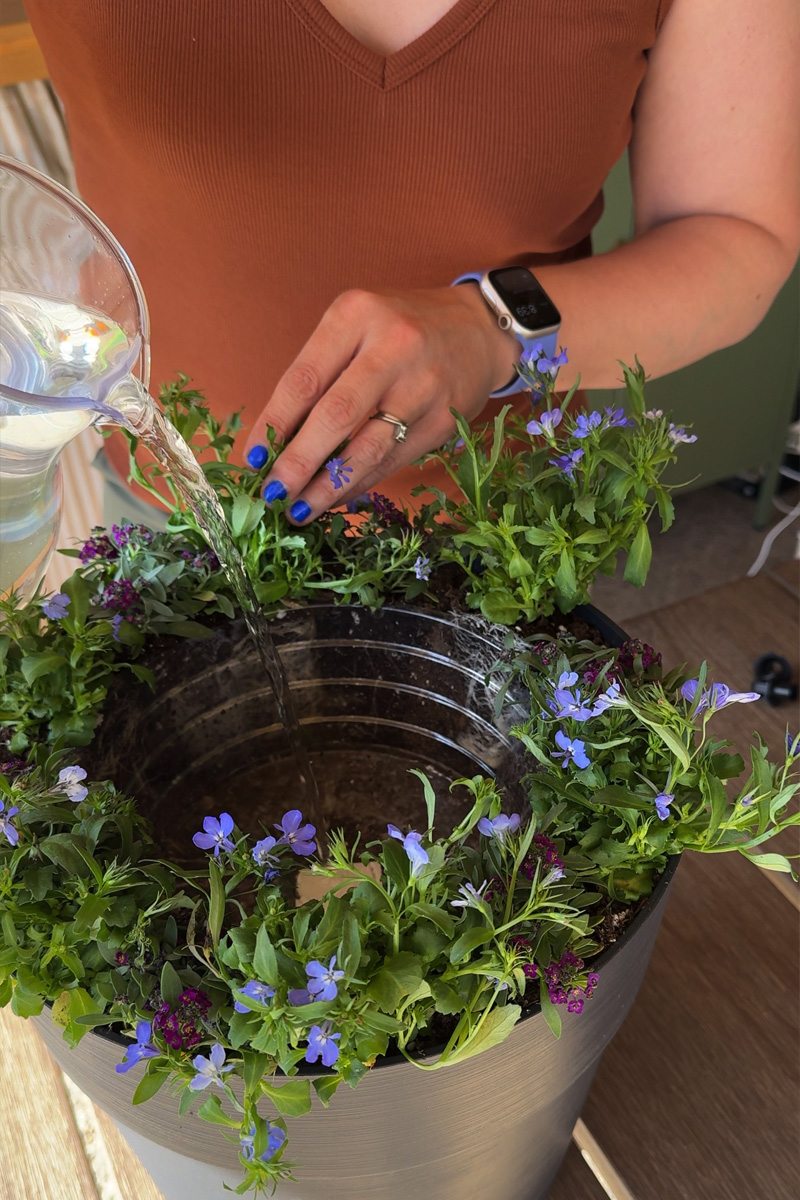
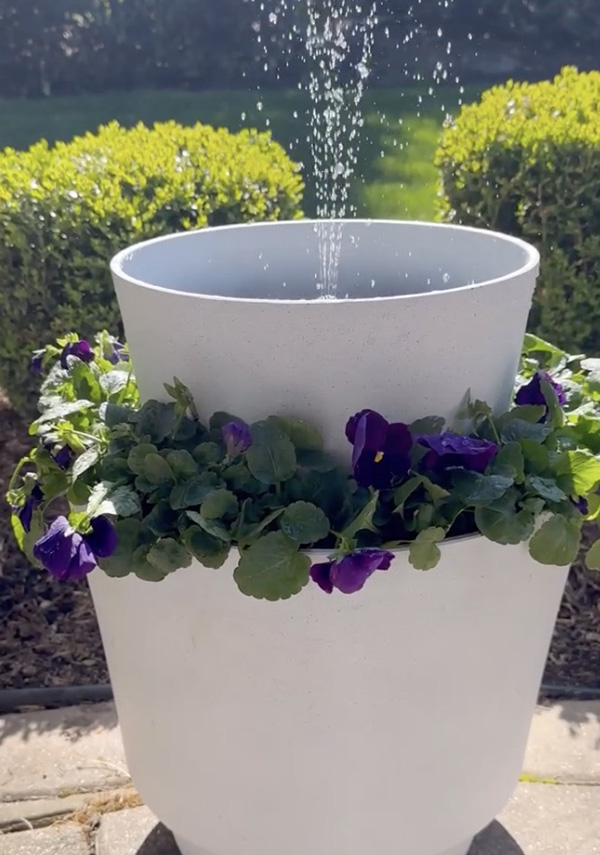
Start by filling a large pot with garden soil.

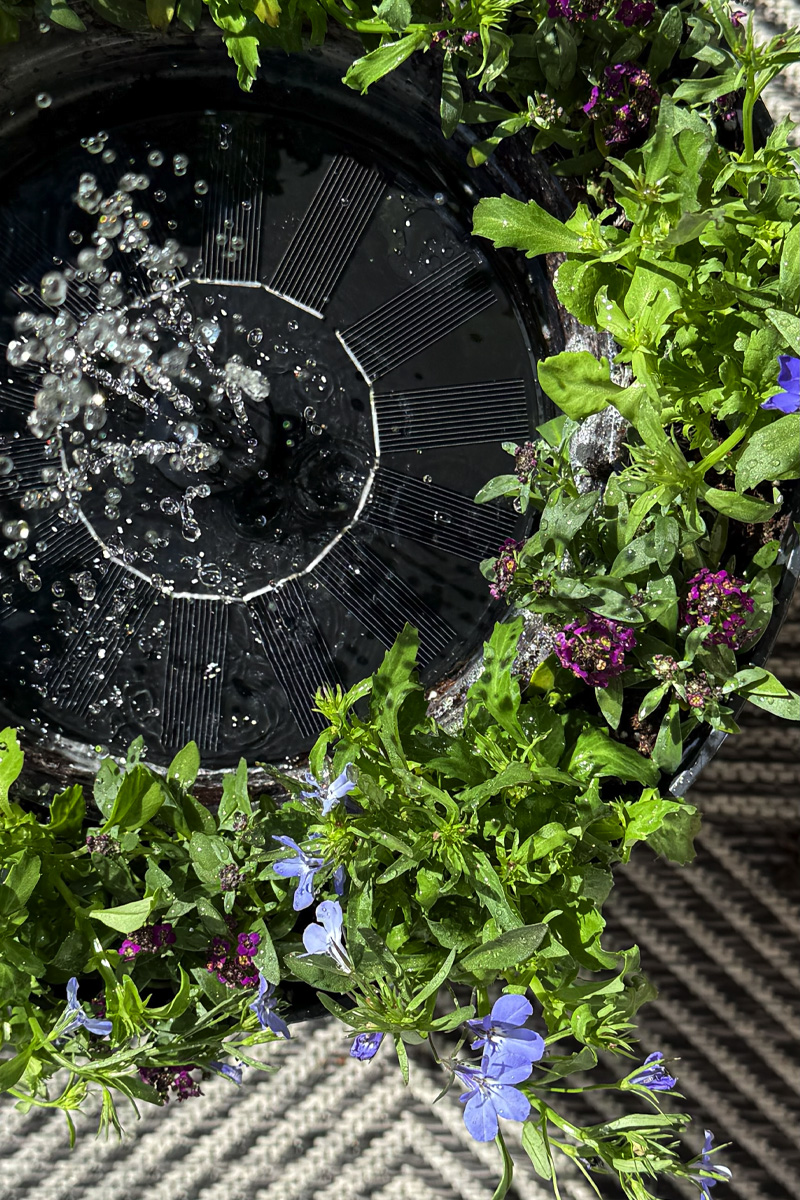
When the soil is about 4″ from the top, start to slow down on filling and place your deep plastic plant saucer in the middle. Make sure the saucer is flush with the top of your pot and the soil underneath it is properly compacted and flat.
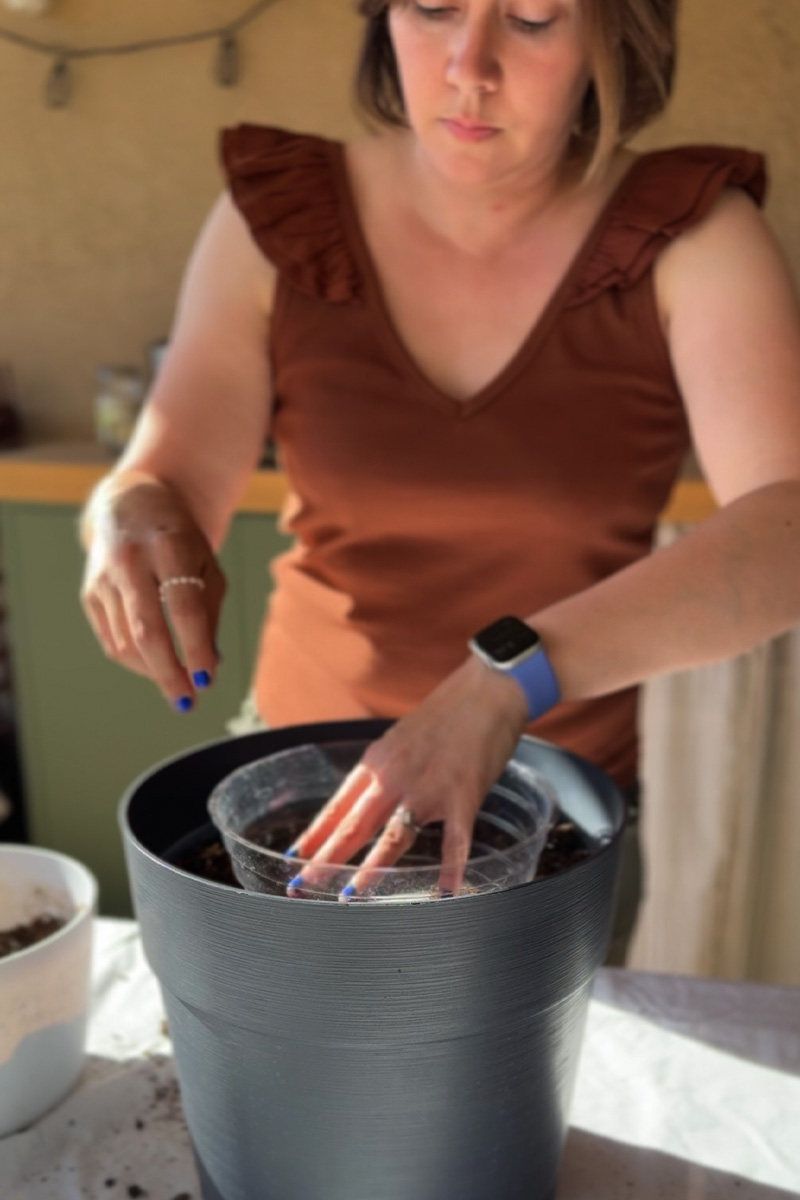
In the space you have between the saucer and the pot, add your lowing growing flowers or ground cover. Make sure the plants you choose are not high growers as their flowers could cover the solar panel and it may not work as well.
Note – If you are using a MUCH larger pot than your saucer and fountain panel, this is not as much of an issue.
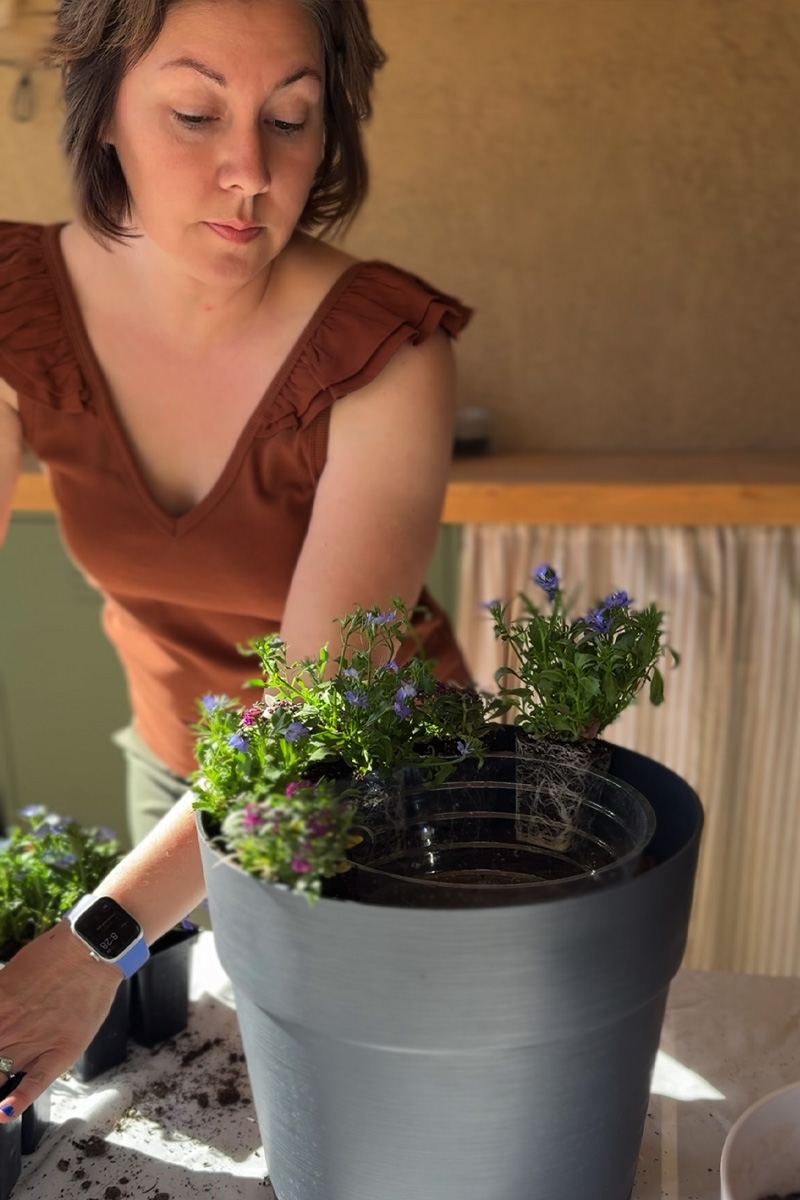
I used periwinkle and another small delicate purple flower I forget the name of.
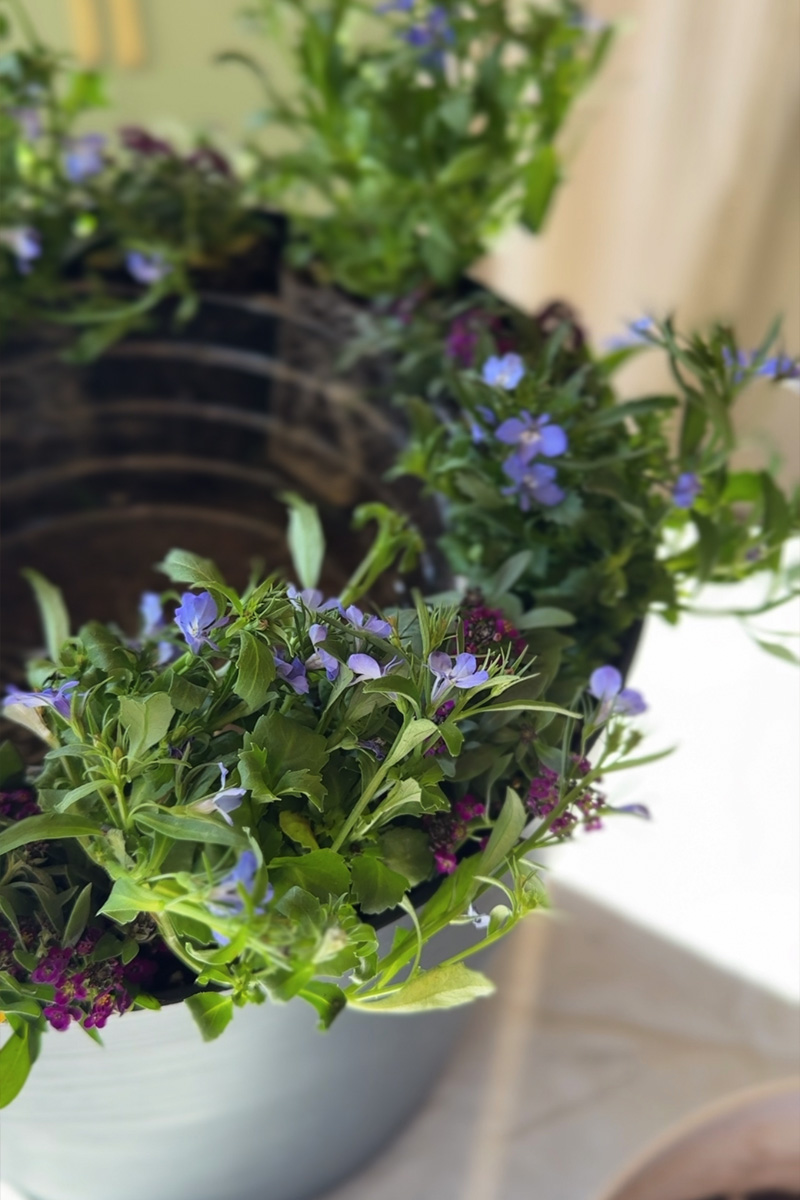
Once your plants are in and it’s time to fill your deep plastic saucer. Also make sure to give your newly planted flowers a good deep drink!
I filled my saucer nearly to the top as the water does evaporate with time.
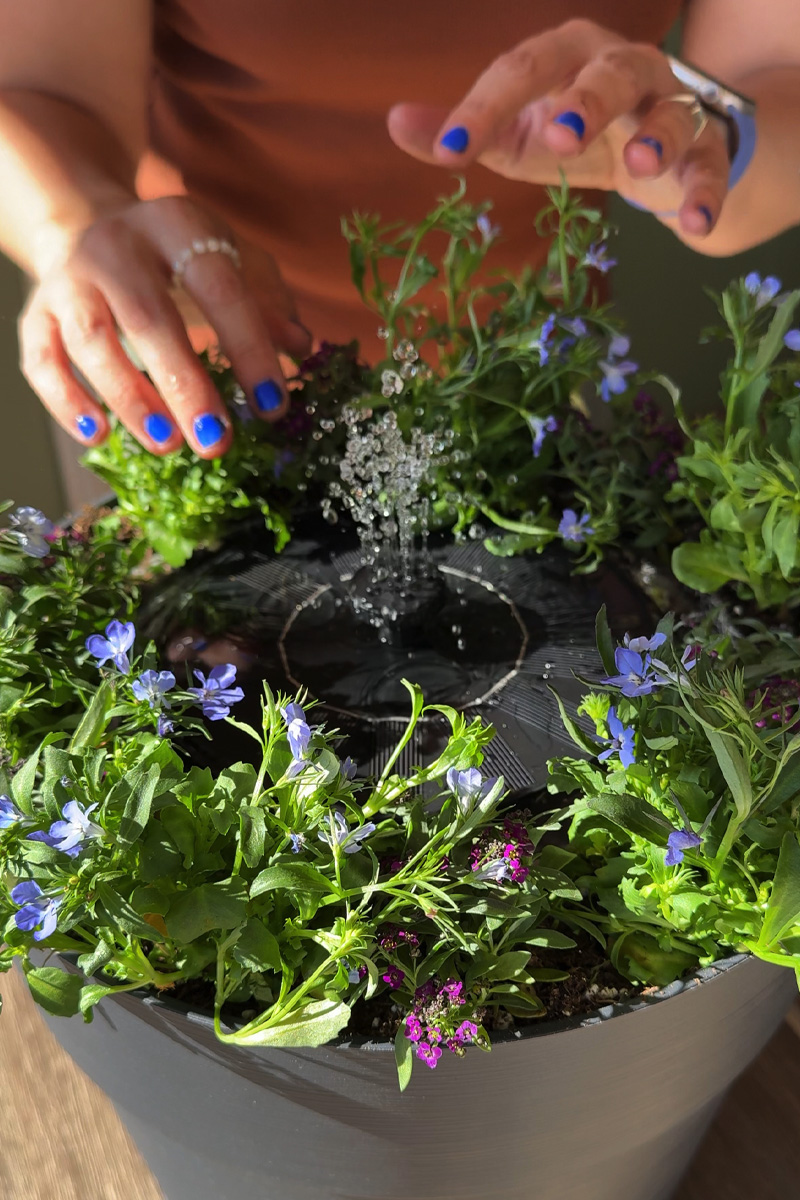
Next, follow the directions on your solar fountain. I had to remove a plastic cover over the top and then select which nozzle I wanted to use. I liked a lower dribble of water over a super tall fountain spray.
However, please know the fountain’s water height is dependent on how much direct sunlight it gets. If you have your fountain in shade, it won’t work.

You need to slightly submerge your fountain in the water to get the air bubbles out from the underneath and touching the water. The directions were a little confusing, but with a few shakes, direct sunshine and submerged water moments, your fountain should work like a dream!
Also note, the fountain comes with little side arms with I did not use. Those are only if you are placing the fountain panel in a huge water source where it will move and shift around. Since my saucer was only a few inches larger, I had no need for those attachments.
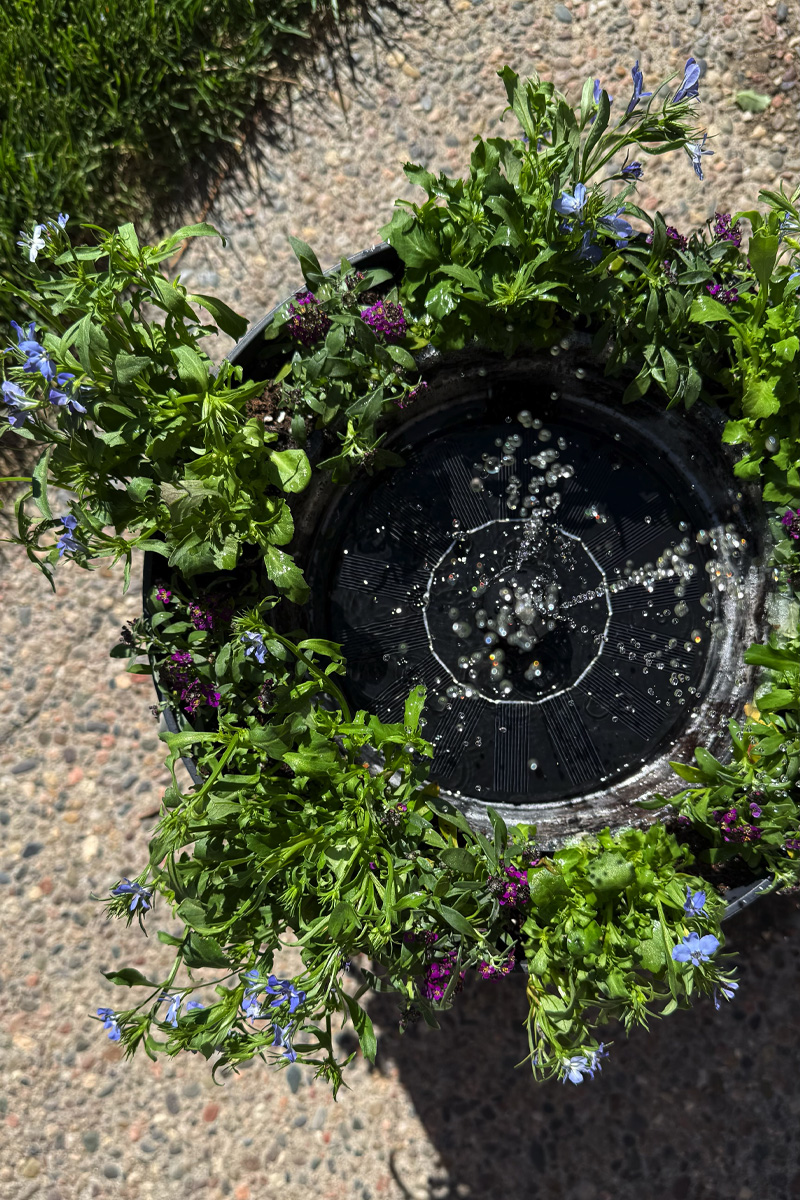
Backyard Flower Pot Water Fountain
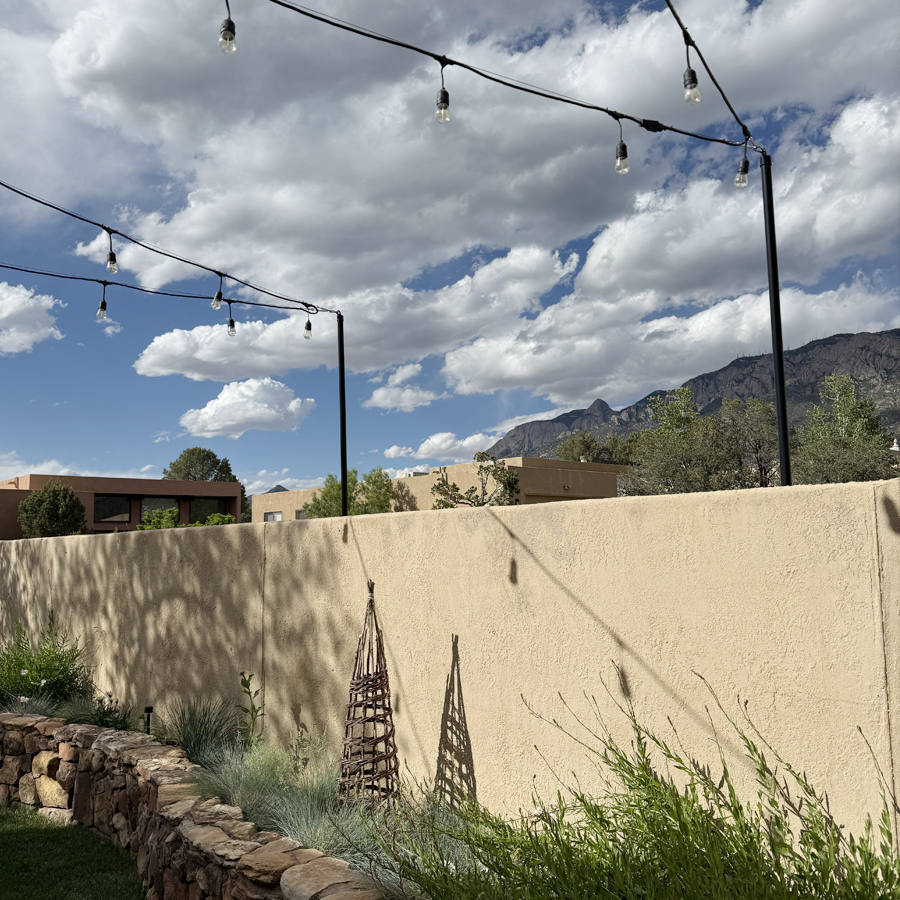
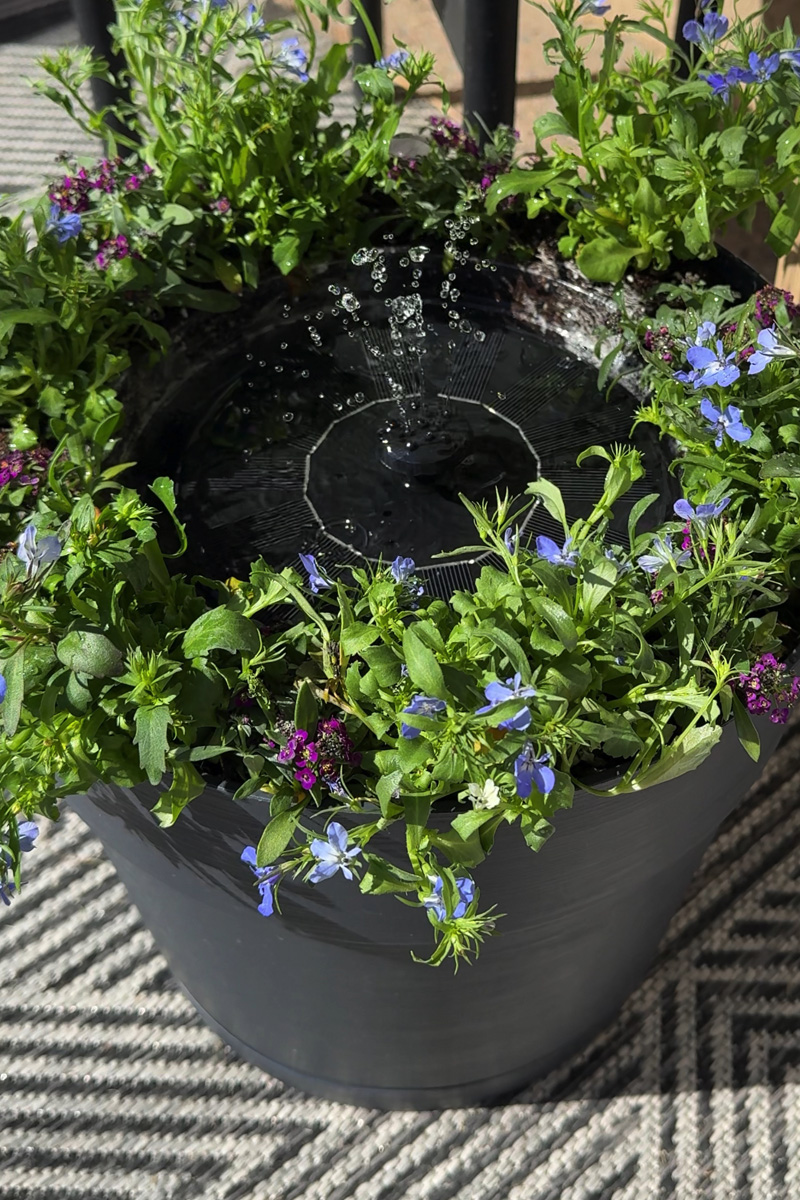
Here is my lovely flower pot / water fountain in action! It was such fun to be able to have it over by our outdoor seating area and then later we moved it closer to another hang out space in our yard.
No matter where you put your solar fountain, it will bring you hours of enjoyment!

I did notice if it was in FULL sun, the splash over and the natural evaporation made the water amount last about 3-4 hours… which felt like plenty of time for me. If we wanted more water fountain time, I just easily refilled it.
Check out a few other cool ways to use an outdoor solar fountain –
5 Creative DIY Solar Fountain Ideas
Check out these creative DIY Solar Fountain ideas and be ready to get inspired. Budget friendly and so simple to make in an afternoon!
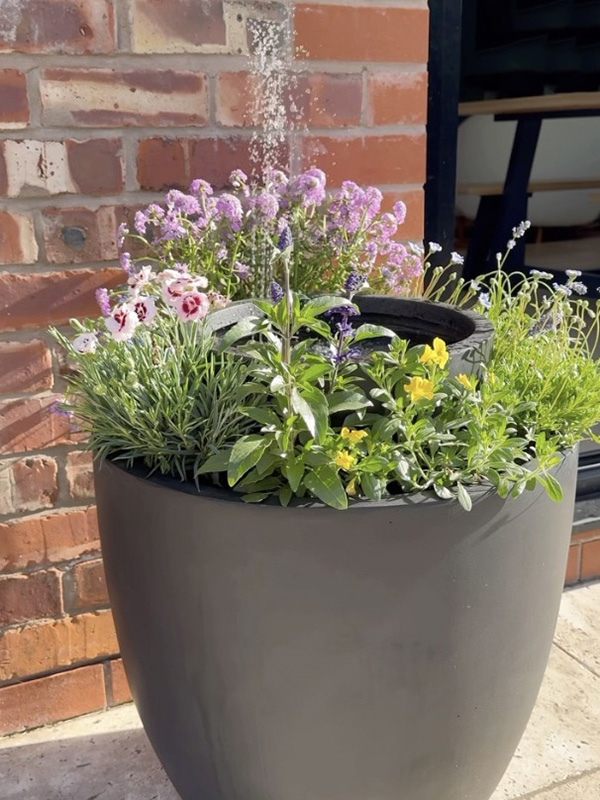
Fill your bottom pot with two bricks and stack your outdoor pots so there is height variation. Then add these lovely flowers for a Double Pot Solar Fountain idea! Love the color this fountain brings to a back patio.
Find a large wide pot and add rocks to the bottom. Fill your pot with water and add in a solar fountain. Done and done on this quick idea! The fountain arms help keep your solar fountain centered in the pot, too.
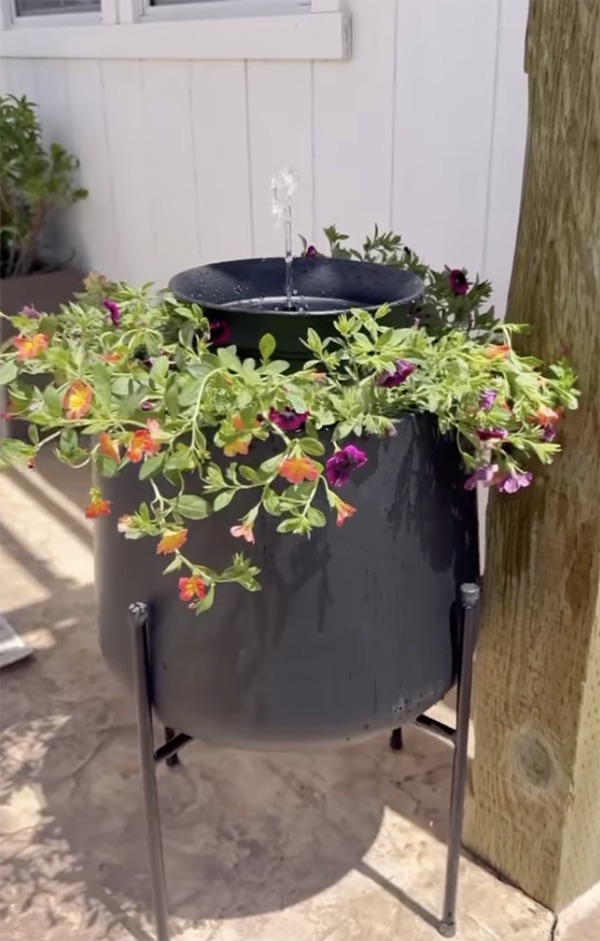
Another wonderful stacked fountain idea here! I love the height on the main planter and then adding in a smaller pot inside makes for a great spot to add petunia flowers. What a wonderful idea for this beautiful solar water fountain!
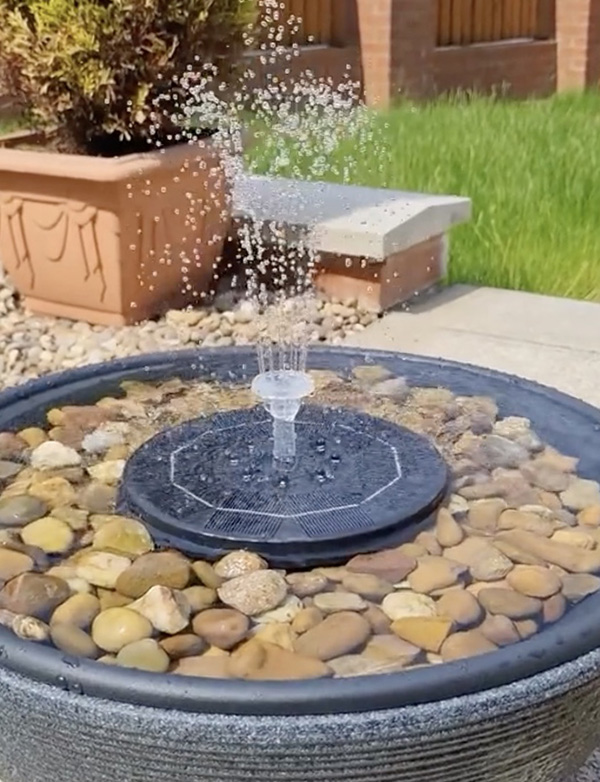
Ready for an instant zen moment in your backyard? Add beautiful tan colored rocks to a wide mouthed pot. Then fill the pot with water and your solar fountain is all ready to shine!
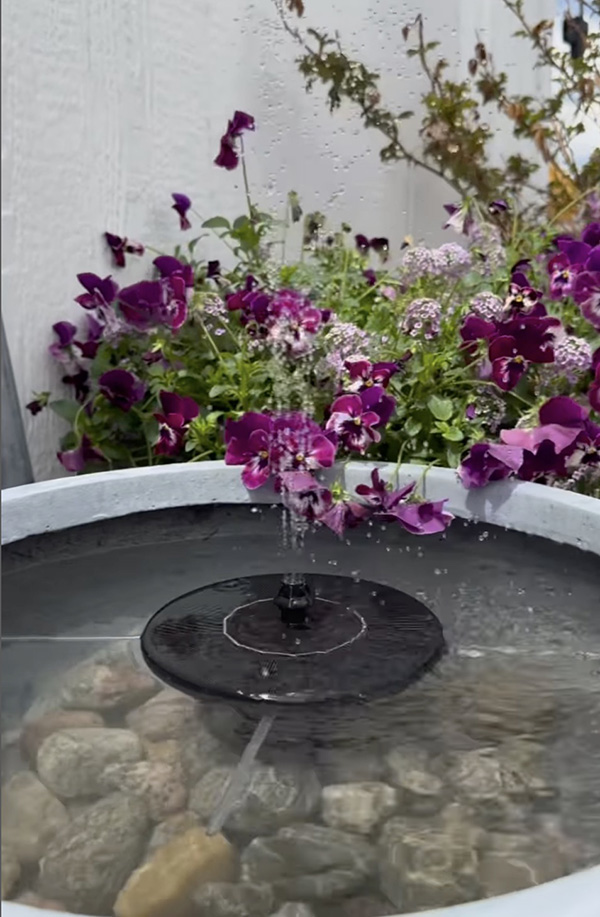
Two big white pots and a pack of cheerful Purple Pansy flowers makes this Solar Fountain such a great statement piece in your backyard!
If you are looking for other fun outdoor project ideas, you may like some of these…