DIY Back to School Soap
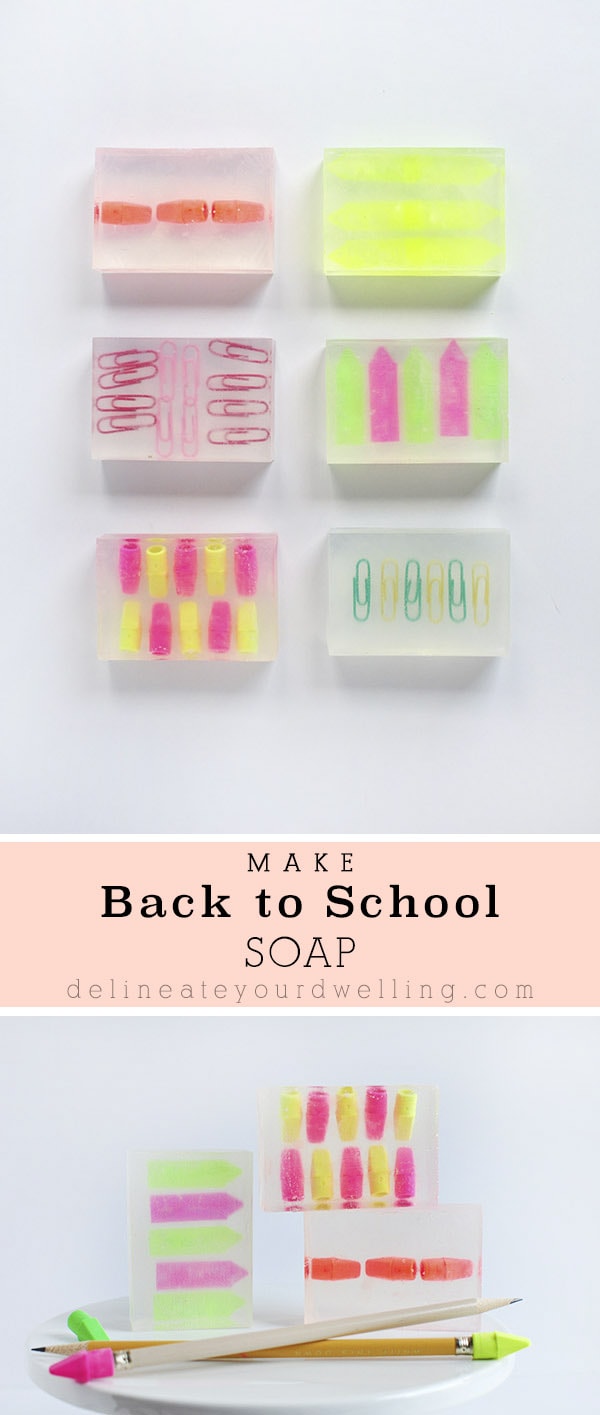
INSIDE : Create your very own whimsical DIY Back to School Soap with fun school supply items like paper clips, eraser tops and more. A great teacher gift idea, too.
This post may contain affiliate links. See full disclosure here.
This post has been updated from it’s original July 2016 publish date.
I have always loved school supplies and the bright cheerful colors of these Back to School soaps are a perfect touch!
Today I am back with another fun Back to School project! Call me crazy, but my eyes become glossed over with all the fun colors of new pencils, erasers and notebooks out there.
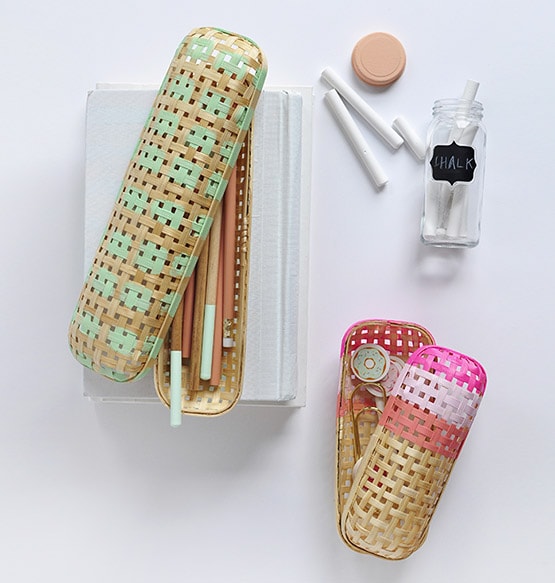
I just recently shared my ninth Back to School project, a Rattan Pencil Case. But, I think today’s craft might be my favorite yet! Keep reading below for the steps on creating your very own DIY Back to School Soap!
I have long had a desire to give soap making a try. I’ve probably pinned about 10 different soap DIYs on Pinterest, but it wasn’t until my friend, Kara from A Kailo Chic Life shared her gorgeous Succulent Soaps, that I decided it was time! And I’m glad I gave it a try, because it was so much easier than I expected.
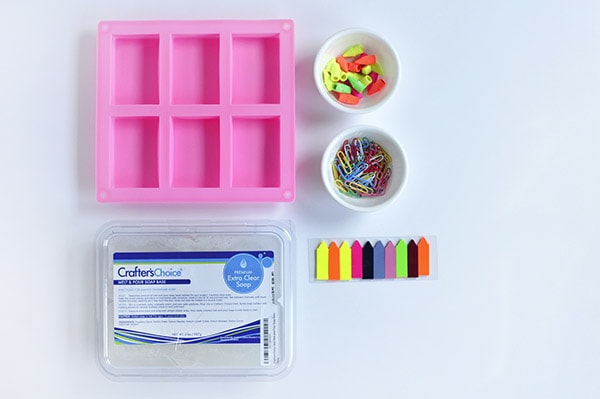
What supplies do I need for making Back to School Soap?
How to make DIY Back to School Supply Soap?
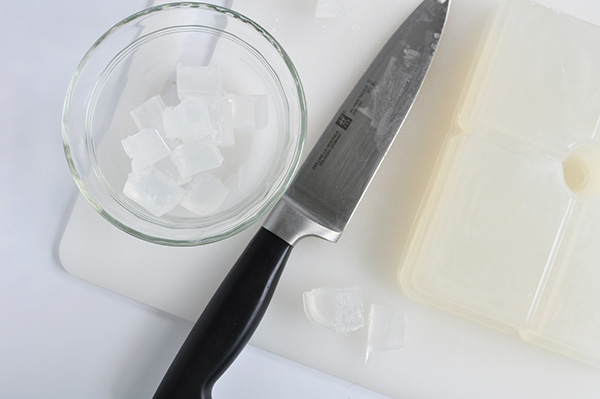
To make back to school supply hang soap, start by cutting your soap into 1″ cubes. This will help them melt more quickly and evenly.
Follow the directions per your particular soap variety for melting. Mine took just 30 seconds to melt in the microwave and I used a shallow glass bowl.
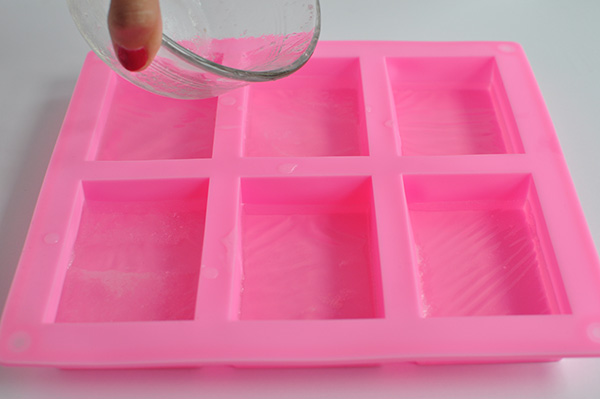
Once the soap was melted, I filled each of the silicone molds about a quarter of the way full. Allow for the soap to harden. I put mine in the freezer to help move the process along. It took maybe 10-15 minutes.
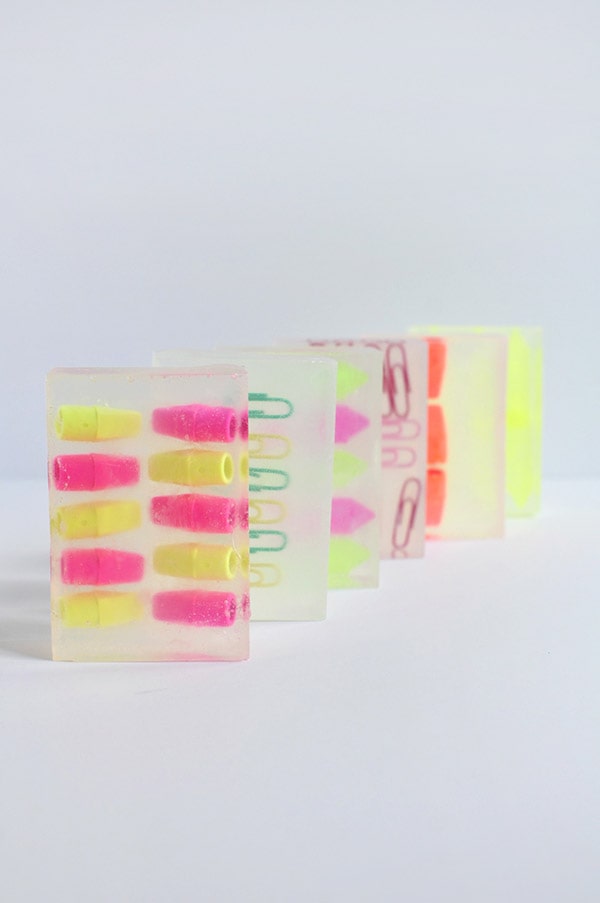
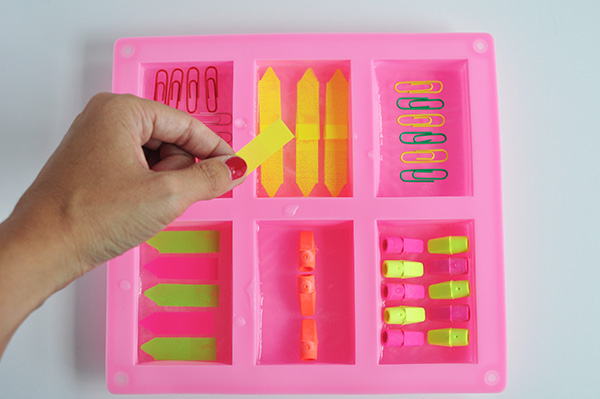
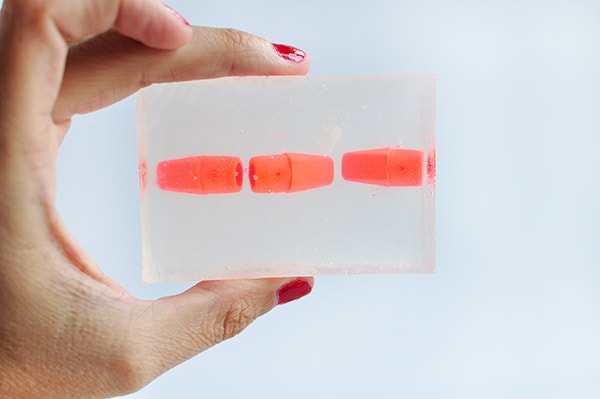
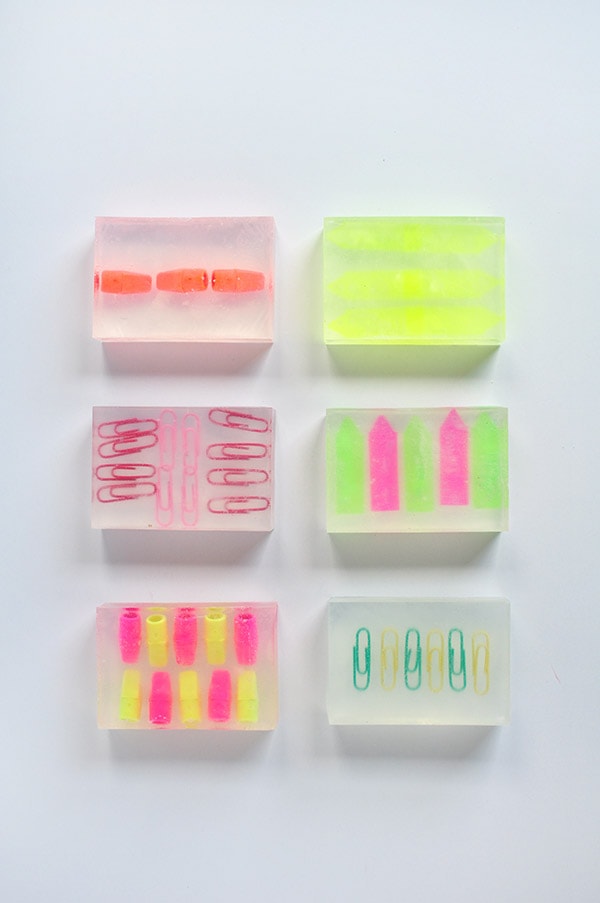
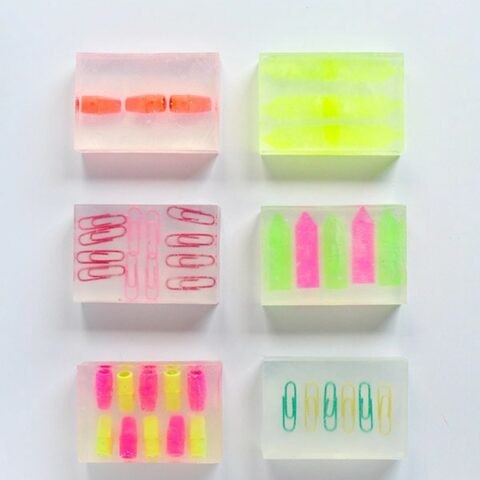
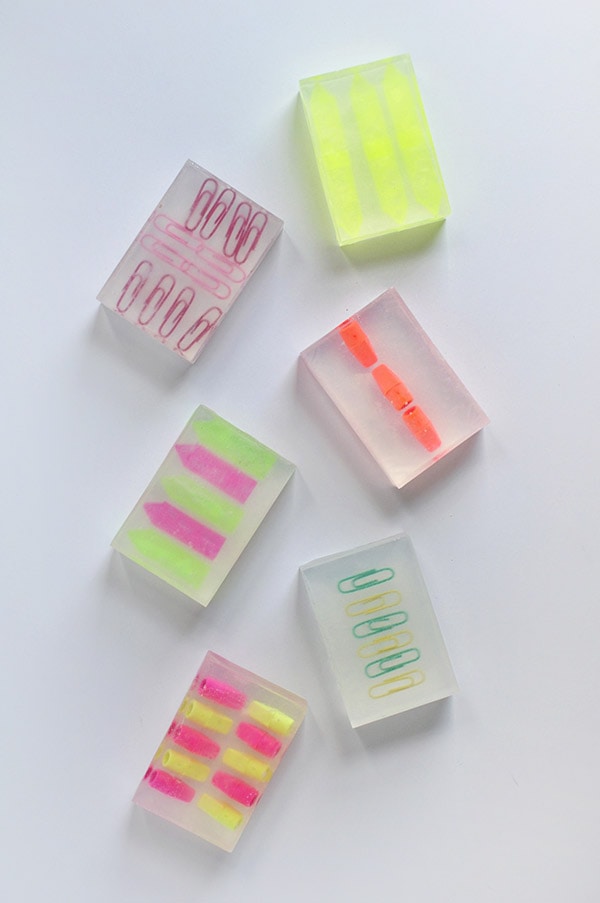
Next, fill each mold with your fun Back to School supplies! I used colored Colored Paper Clips, Index Tabs and pencil erasers tops.
IMPORTANT NOTE : Please be aware of the materials you use! Sharp objects could hurt while washing hands.
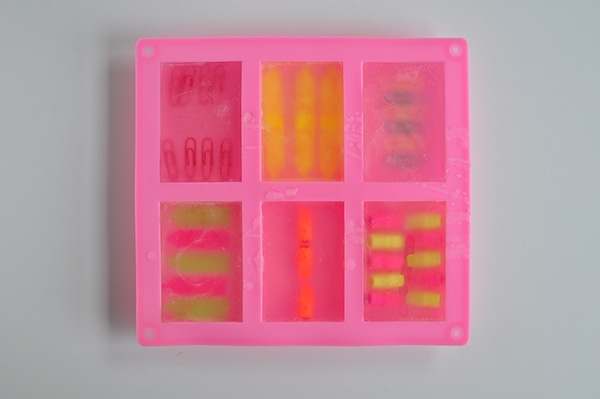
Once your supplies are set in place, melt additional soap cubes.
Since I wanted my supplies to be in very organized and geometric patterns, I tried to be careful that the melted soap did not move them all around.

I used a spoon and very gently poured the soap over each of the items.
Once there was a little soap covering all of the back to school items, I was able to fill the molds to the top.
And finally fully allow the soap to fully harden.
Then, you can simply pop the soaps out of the molds – and presto!
I was thrilled with the outcome, as were my children!
You could even add a few drops of essential oils to the melted soap mix if you wanted a fragrance to your hand soap.
DIY Bars of Soap
After seeing how easy these bars of soap were to make, there are just endless fun ideas of different types you could craft up!
DIY Back to School Supply Soap
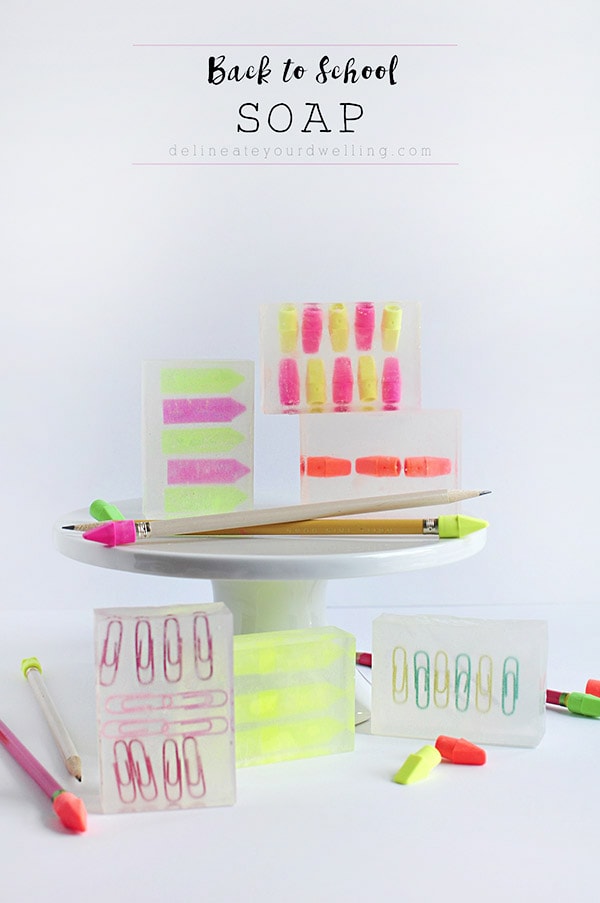
Create your very own whimsical DIY Back to School Soap with fun school supply items like paper clips, eraser tops and more. A great teacher gift idea, too.
Materials
- Silicone Soap Mold
- Clear Melt + Pour Soap
- Erasers
- Colored Paper Clips
- Index Tabs
Instructions
- Start by cutting your soap into 1″ cubes. This will help them melt more quickly and evenly.
- Follow the directions per your particular soap variety for melting. Mine took just 30 seconds to melt in the microwave and I used a shallow glass bowl.
- Once the soap was melted, I filled each of the silicone molds about a quarter of the way full. Allow for the soap to harden. I put mine in the freezer to help move the process along. It took maybe 10-15 minutes.
- Next, fill each mold with your fun Back to School supplies! I used colored Colored Paper Clips, Index Tabs and pencil erasers tops.
- Once your supplies are set in place, melt additional soap cubes.
- Since I wanted my supplies to be in very organized and geometric patterns, I tried to be careful that the melted soap did not move them all around.
- I used a spoon and very gently poured the soap over each of the items.
- Once there was a little soap covering all of the back to school items, I was able to fill the molds to the top.
- And finally fully allow the soap to fully harden.
- Then, you can simply pop the soaps out of the molds – and presto!
Notes
IMPORTANT NOTE : Please be aware of the materials you use! Sharp objects could hurt while washing hands.
It’s hard for me to pick, but I think my favorite soap is the yellow and pink erasers + the yellow and green paper clips.
These were honestly so fun to make and I can not wait to create more soaps in the future!
Check out these other fun back to school posts, below:
- DIY Rattan Pencil Case
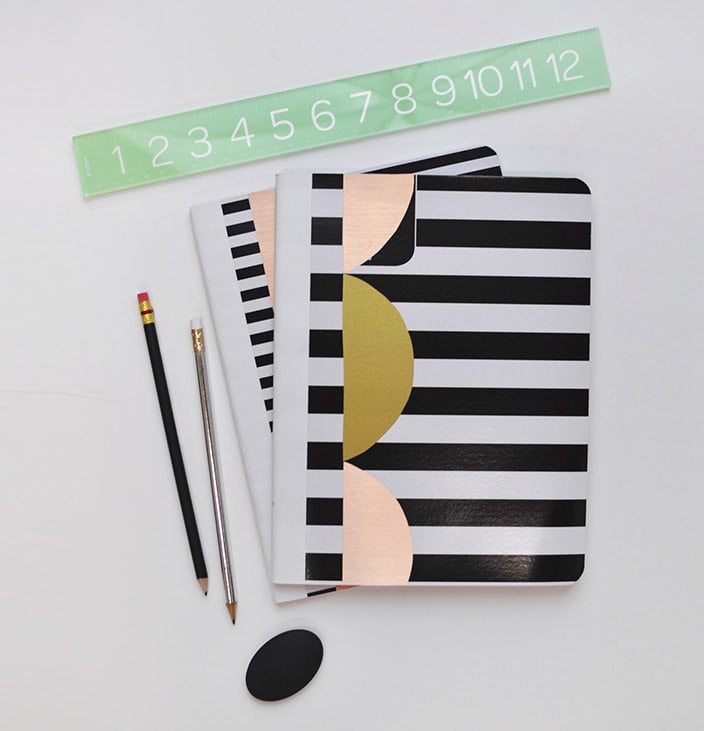
- Scallop Notebooks
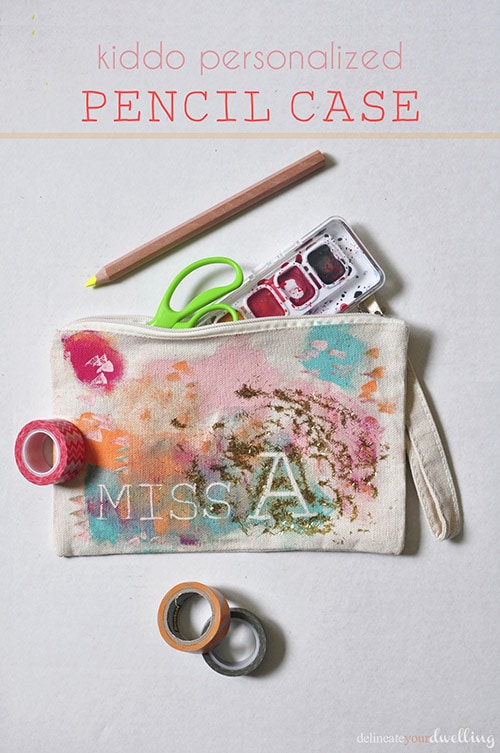
- Kiddo Pencil Case
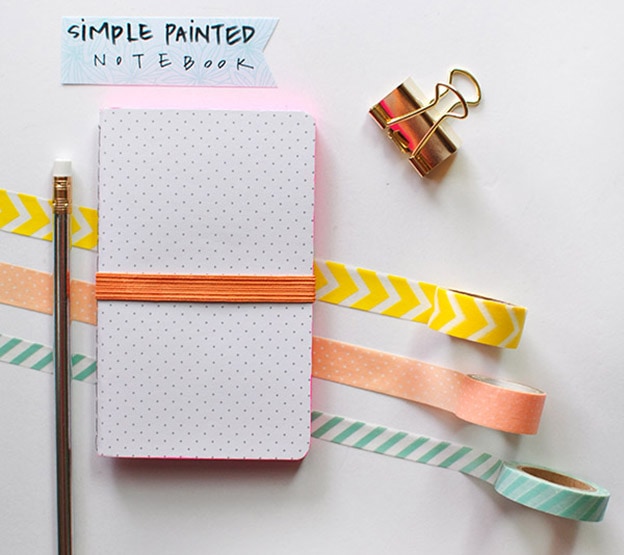
- Painted Notebook
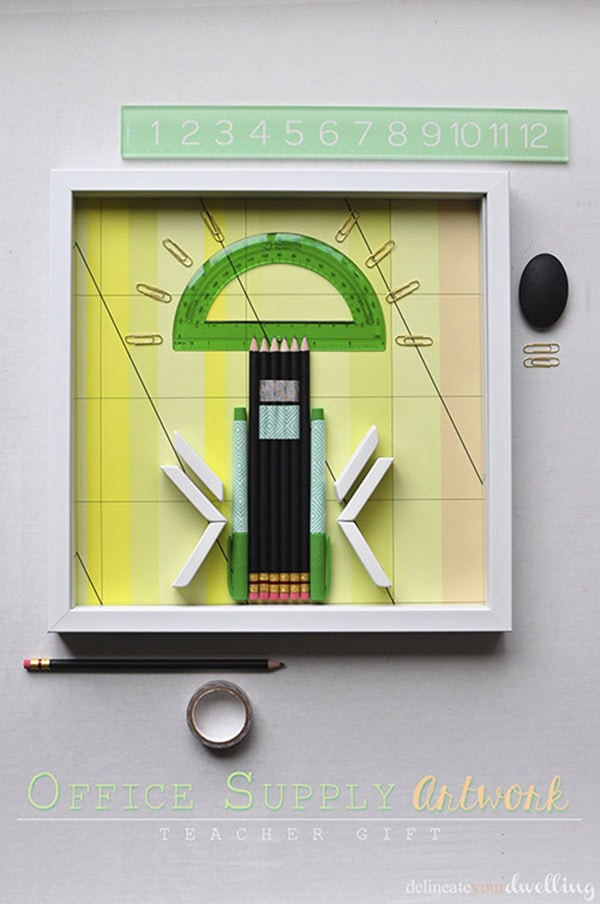
- Office Supply Artwork
- Custom Notebook
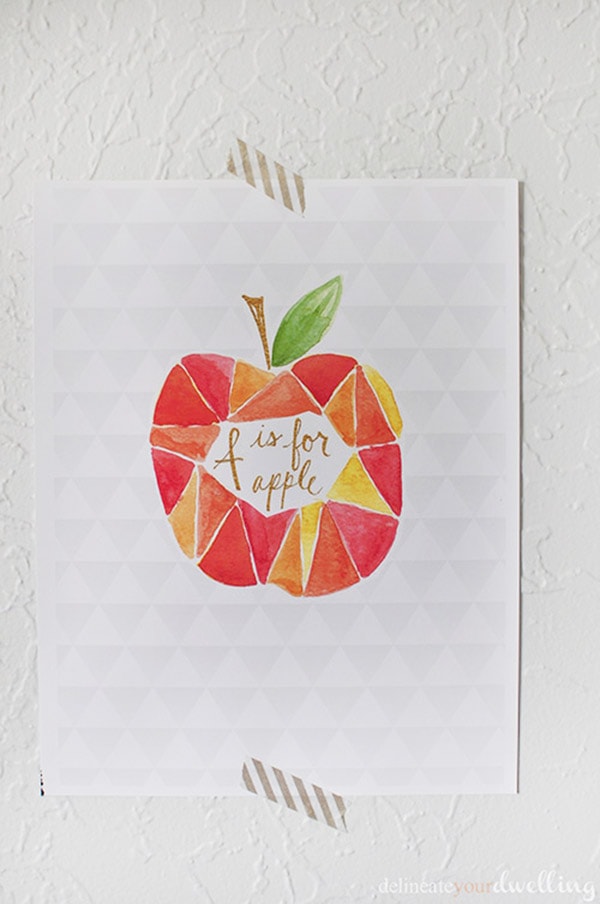
- Watercolor Apple
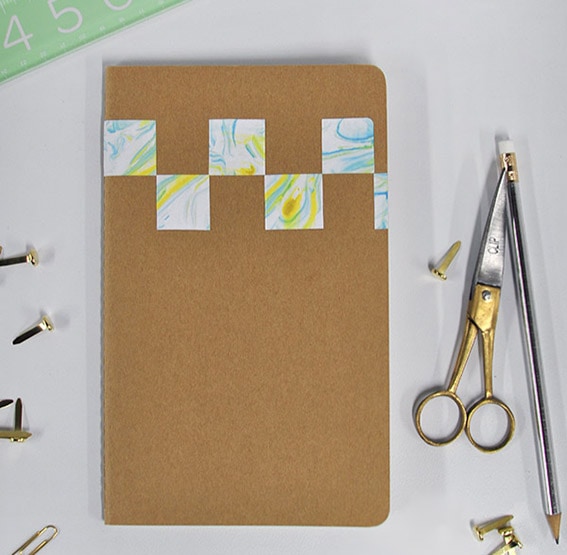
- Marbled Notebook
These are so cute and clever!! I absolutely love the idea of adding fun little objects to soap. I want to make them with plastic dinosaurs! 😀
This is so fun! What a great way to get kids excited about going back to school!
Thanks, Eden! I really had such fun creating these.
These would be so cute in a gift basket for a teacher to kick off the school year, too!
That’s such a good idea! I guess I could share two of my soaps with my kid’s new teachers! 😉
Amy – I think this is my favorite project of yours EVER! So adorable and fun! I absolutely have to make these. Thanks for such an awesome project. 🙂
Aw, thanks so much Bre!! I really had a ton of fun with these.
These are so cute Amy!!!
Thanks Sara!! I had SUCH fun making them!! 😉
These turned out adorable! I couldn’t figure out what you were doing from the Snaps…but oh, so good!
Hee hee, I purposely wasn’t super clear on the Snaps! Glad you like them, I’m kind of so in love!!