Printed Fan Ribbon Ornaments
This post is in collaboration with Brother International Corporation. All opinions are 100% mine.
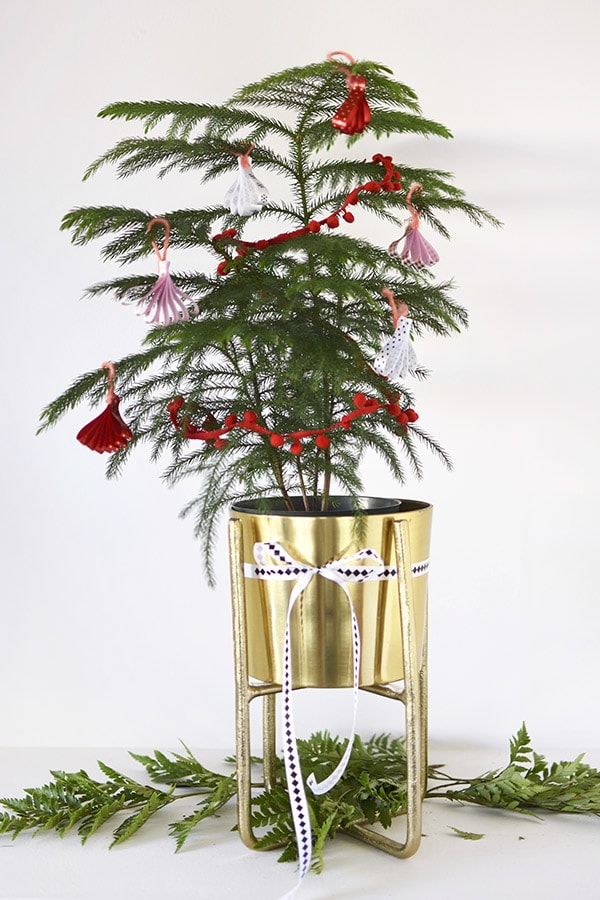
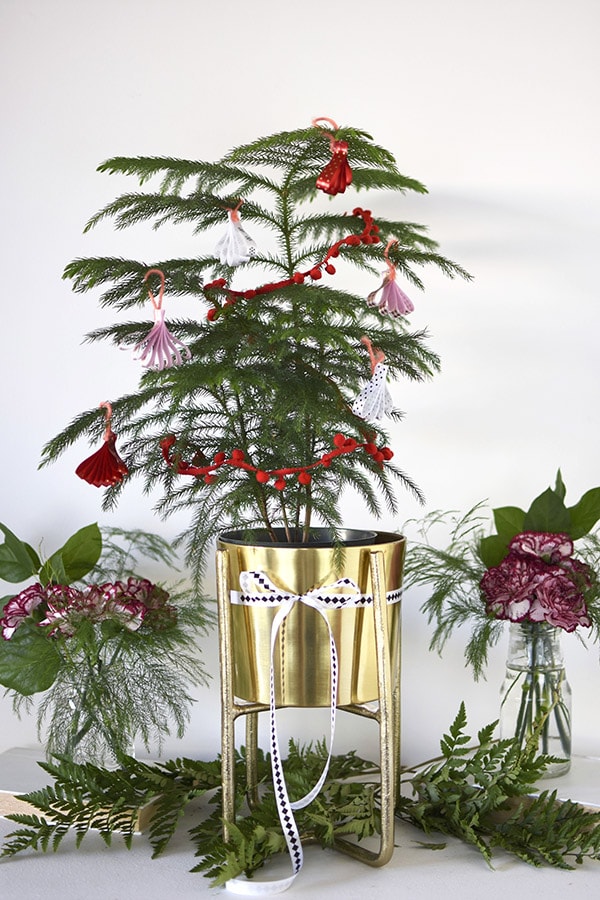
The holiday season is officially here and many of us are busy trimming the tree! I love being able to add new custom and unique ornaments to my tree each year. They mark different years of our life and it’s fun to look back overtime to see our homemade collection of ornaments grow! This year, we had such fun creating beautiful Printed Fan Ribbon Ornaments with my new P-touch Embellish. Check out how I made them, below.
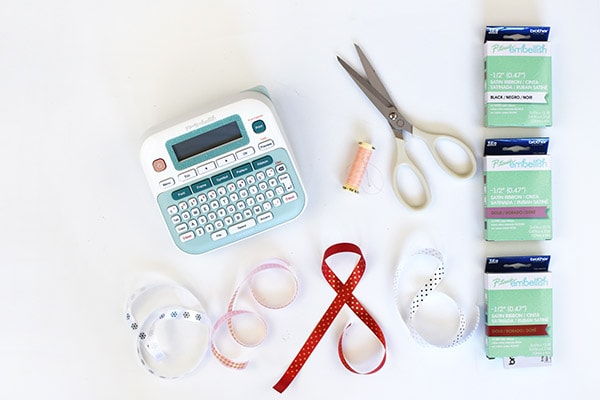
Supplies needed for Printed Fan Ribbon Ornaments:
P-touch Embellish | 3 Ribbon Cartridges | Thread + Needle | Scissors | Hot Glue | Yarn
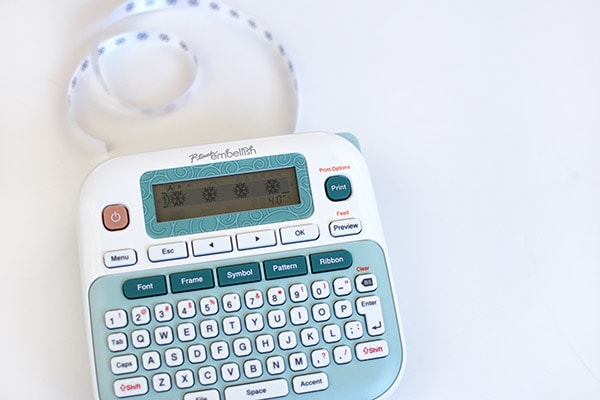
The first step to making these fun printed fan ornaments is getting to create awesome custom ribbons with the P-touch Embellish. It’s loaded with tons of easy features like one-touch keys and print preview. You can add decorative borders, add in seasonal images, change the fonts and size of lettering and so much more!
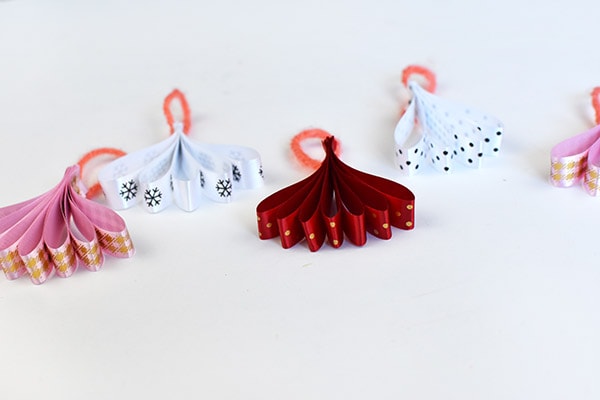
I used three different colored satin ribbons for my fan ornaments, white, red and pink. You can see below how I created the snowflake pattern on my white ribbon. And it takes so very little time, each ribbon takes 90 seconds or less to print out.
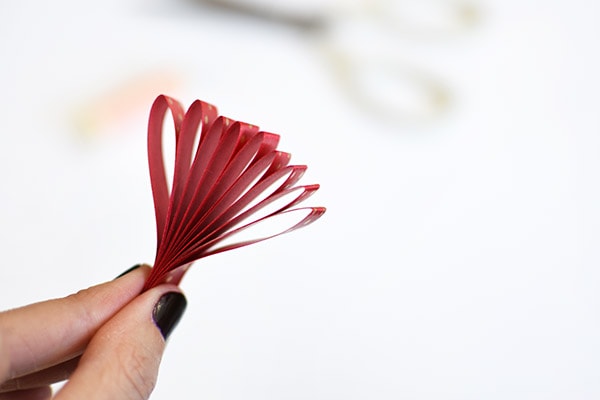
After I printed out about 18″ of the red ribbon with gold polka dots, it was time to start creating the fan shape. Be sure to have your thread, needle and scissors handy.
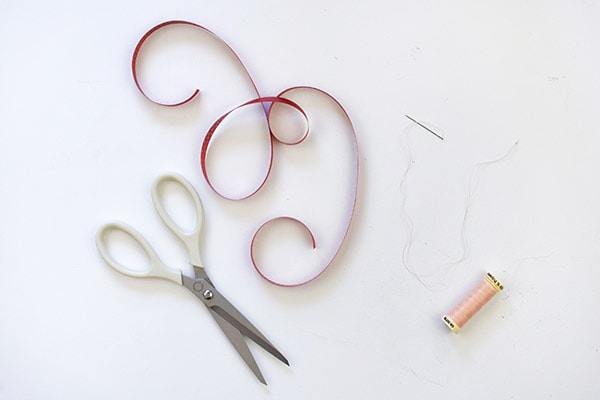
Take hold of the end of your ribbon and fold it over at about 1 1/2″ to 2″. Continue gathering the ribbon in this same pattern until you reach the end of the 18″. You will now have your basic fan shape.
I also noticed it was helpful to slightly crease the ribbon at the top, as I was gathering it. This helps keep the shape and not slip out of your grip as easily.
Next, using the needle and thread, push your needle through the ribbon at the base. I probably did this 3 or 4 times to make it nice and secure. Then knot your thread and cut off the excess.
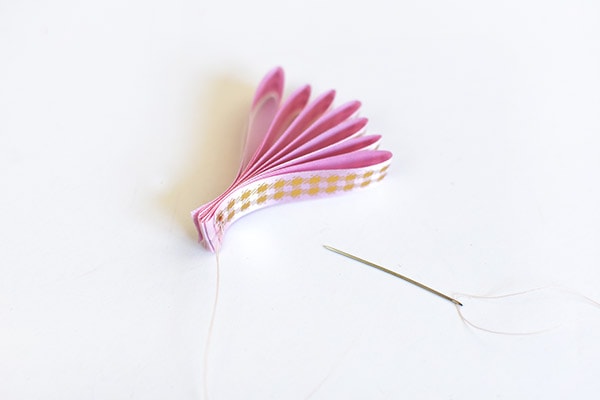
After you have cut your excess thread off, you can spread out the fan pattern a little bit with your fingers and even soften the creases you previously made. Add a small dot of hot glue to the base of the fan and secure a looped piece of yarn to hang your new ornaments!
With 14+ fonts, 90+ borders, 400+ symbols and 25 patterns to choose from, making personalized ribbon projects is a breeze with the P-touch Embellish! I loved how the pink gingham print turned out.
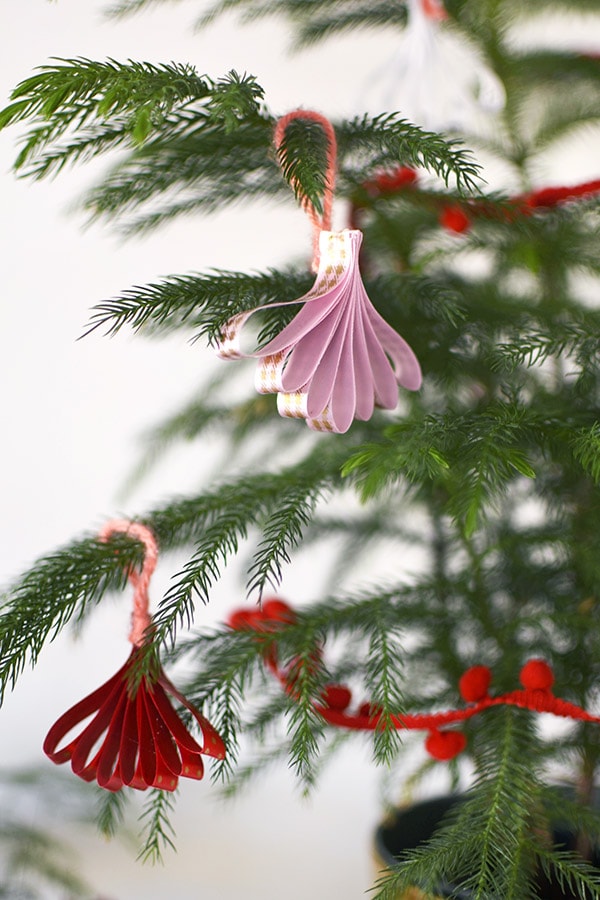
We hung our our Printed Fan Ornaments on our tabletop mini tree and LOVE the extra color and whimsy it brings to the room!

You can find the P-touch Embellish printer, ribbons, 9 patterned tapes and 3 pastel tapes at your local US Michaels stores or at Michaels.com.
Looking for more P-touch Embellish projects? You might like my Elegant Holiday Ribbon Candle DIY.