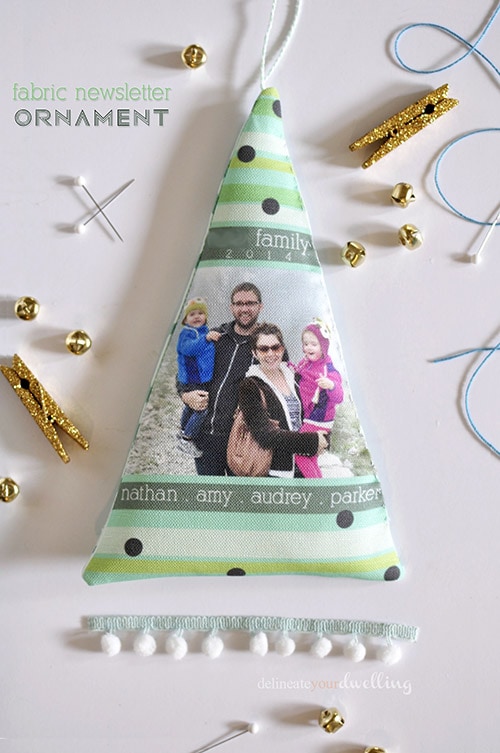
Fabric Newsletter Ornaments
INSIDE : Learn how to create these fun Homemade Fabric Christmas Ornaments with a simple pattern to hang on your tree or give out as gifts to your family!
I was compensated with free product from Spoonflower, but all comments are 100% from me.
Friends, I am really excited about today’s post. Do you know Spoonflower? I have followed them for a while now and have always been a huge fan. I was so thrilled after sharing my idea for this project with Spoonflower that they were as equally thrilled to work together.
How does Spoonflower work?
The way Spoonflower works is you download a design or photo to their site, pick your product and then they print, hand cut and send it off. Sounds cool right? You can also pick designs from their hundreds of independent artists, so basically you can get lost on their site with all the amazing options.
And listen to some of the products they now sell; fabric, bedding, every kind of dining item you could want (napkins, tablecloths, placemats, etc), pillows, curtains, wallpaper and gift wrap! So many amazing things!! And today I am sharing how I created these Fabric Newsletter Ornaments.
How do I add my picture to Spoonflower?
As I mentioned, you can upload your own designs, like the one I created in photoshop. You can also upload a photo to their website. They also have the option of pre-made designs you can select from.
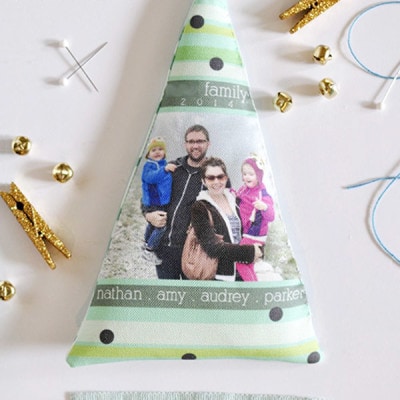
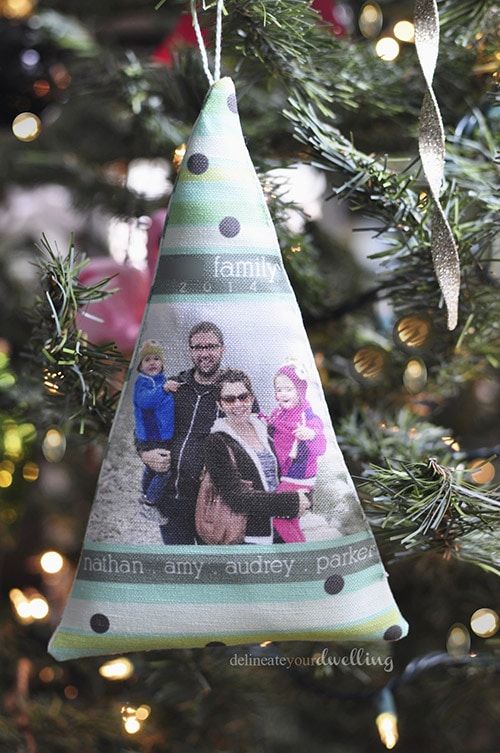
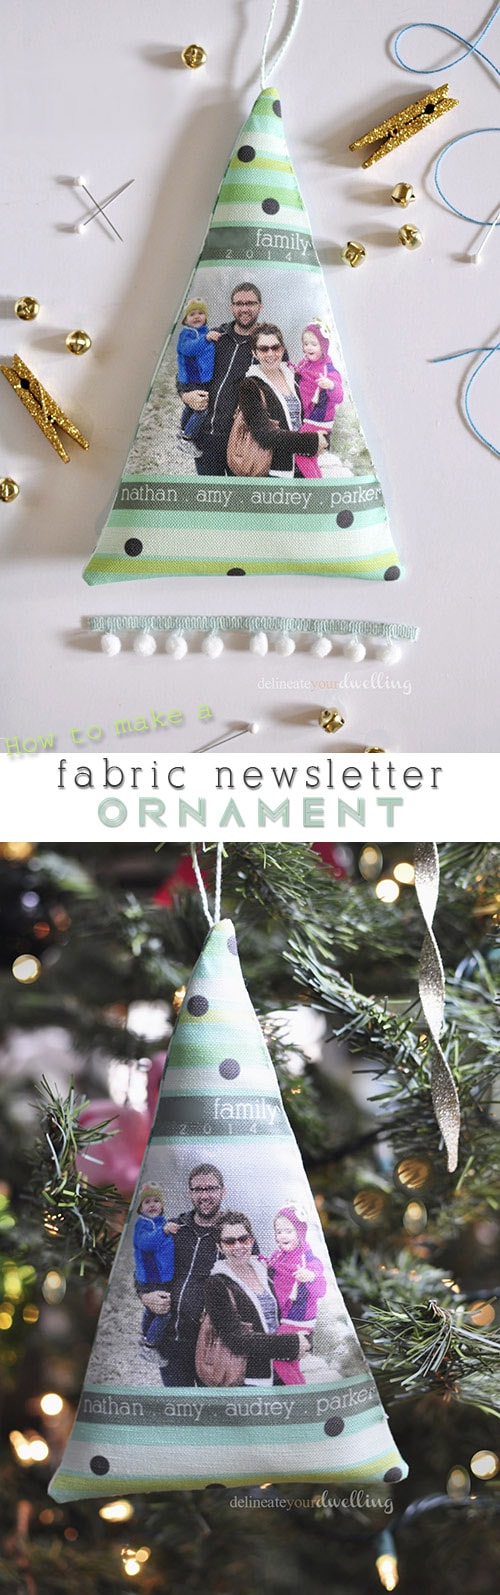
This year, instead of sending out Christmas cards or a photo card that people enjoy for a season and then typically throw away, I decided to create newsletter ornaments that family and close friends can hang on their tree!
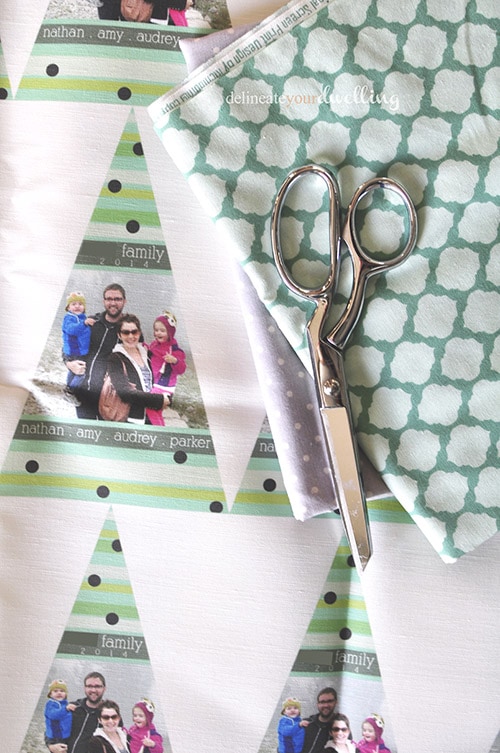
I ordered my designs on one yard of linen cotton canvas and was delighted with the quality when it arrived at my door.
How do I make a homemade fabric tree ornament?
Note: I am a fly by the seat of my pants kind of seamstress. When people start telling me things like 1/4″ inseams my eyes glaze over. This is definitely a beginners level sewing task.
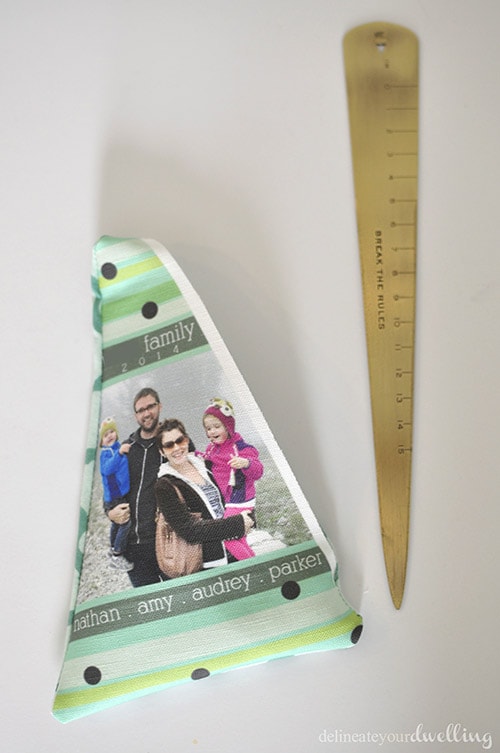
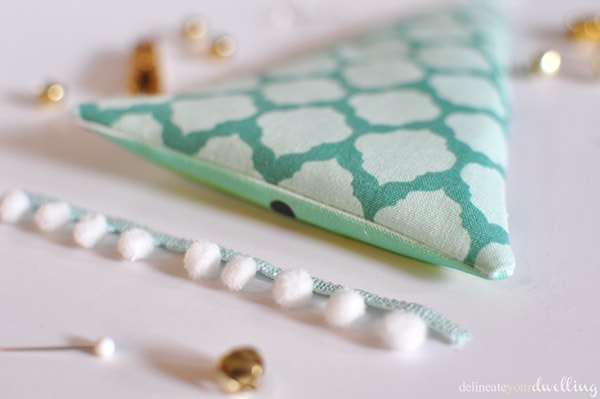
First, I cut out my tree shaped designs (fyi, I blurred out our last name) with a small amount of a white border. I then placed that triangle over the green fabric I already had on hand for the backs of the ornaments and cut to match.
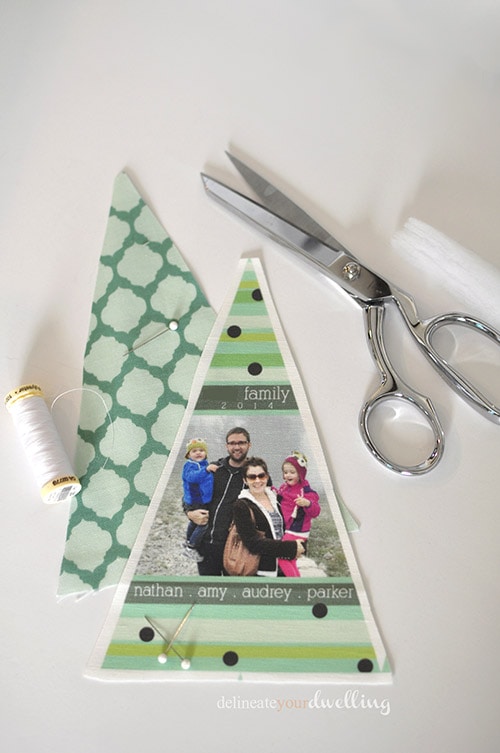
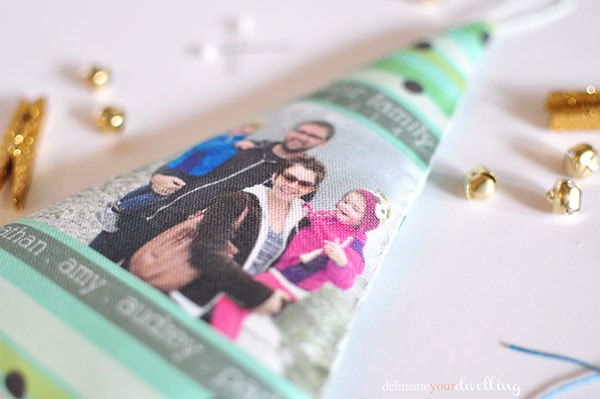
Facing both of the “good” sides of the fabrics together, I started at the top of the “tree” and sewed one long side and the bottom of the tree. I didn’t want to fill these trees full, but only wanted them to have a slight thickness to them.
With that goal in mind, I used batting instead of fill. I found it easier to achieve a cleaner look to insert the batting flat through a long side than a typical pillow fill, where you just jam it in through a small corner you left unsewn.

Use something with a skinny point to then push your ornament back into shape once it’s turned right side out. Really I just wanted to show you a picture of my adorable letter opener. One side says Break the Rules, the other side says Follow the Rules. I digress.
Once the fabric ornament was sewn and the batting was inserted, I did a simple hand stitch to close it up and added a mint green baker’s twine loop at the top to hang.
These turned out better than I could have dreamed! I already loved Spoonflower and now I’m a fan for life! I can tell already, the grandparents are going to be swooning for these beauties.
There are so many potential uses for this concept, baby shower gifts, graduation blankets, throw pillows, etc! And the wheels are already turning for some wall paper ideas.
If you are interested in getting fabric made before Christmas, Spoonflower has posted their holiday order deadlines and you’ll need to be speedy. Otherwise, be sure to check out their site and be prepared to let your creative freedom run wild!
This is awesome!!! Thanks so much for sharing this fun and unique way to use Spoonflower!
I’m a huge Spoonflower supporter! Thanks for your kind words.