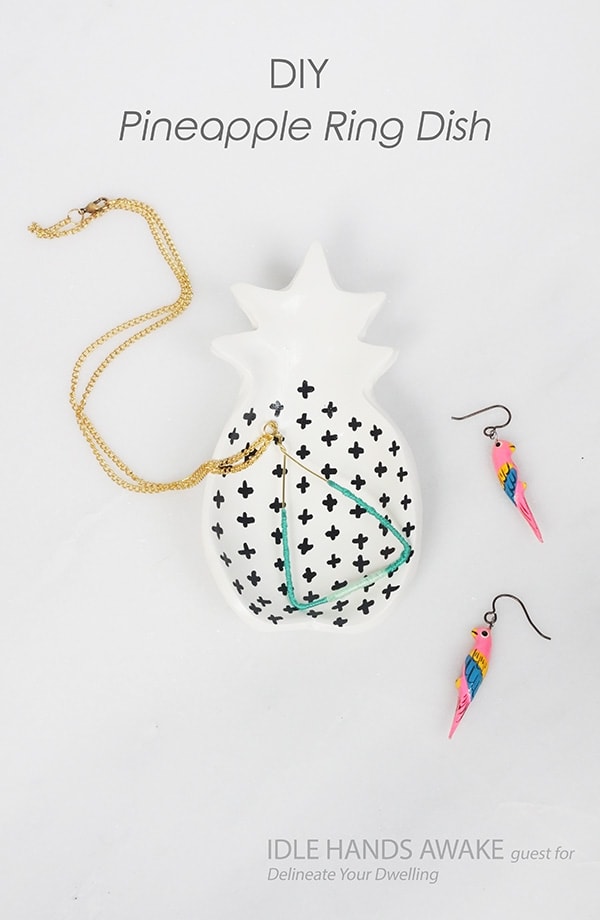
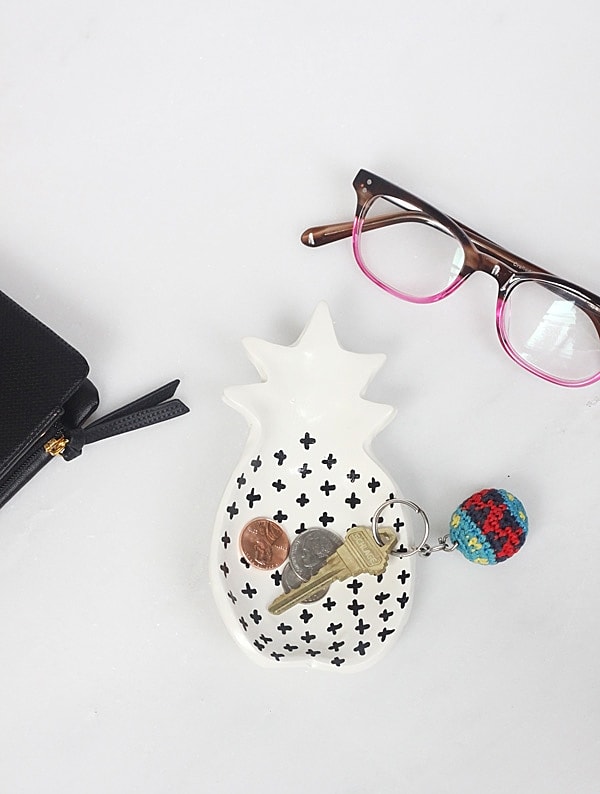
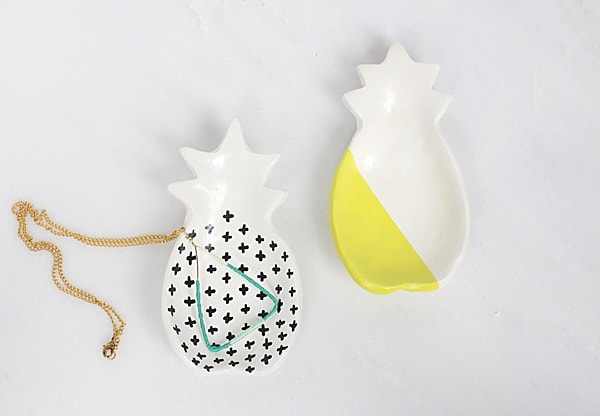
Clay Pineapple Ring Dish
Today marks the 2nd of a six series of guest posts from some of my favorite makers. My family is moving from the Midwest to the Southwest THIS week, phew. While I am slightly distracted with all that, I’m thrilled to share these ladies with you. This week I am sharing the sweetest lady, Marlene from Idle Hands Awake and her gorgeous Clay Pineapple Ring Dish!
Idle Hands Awake is a gorgeous DIY blog for people who don’t DIY. Marlene has the most stunning simple modern style and is such an encourager for those who might get Pinterest-paralysis. Her motto is Creativity is a skill that takes practice, like any other. I whole heartedly agree with her on this one!
Friends, let me introduce you to Marlene…
For the full supply list for this fun project, please head to Idle Hands Awake.
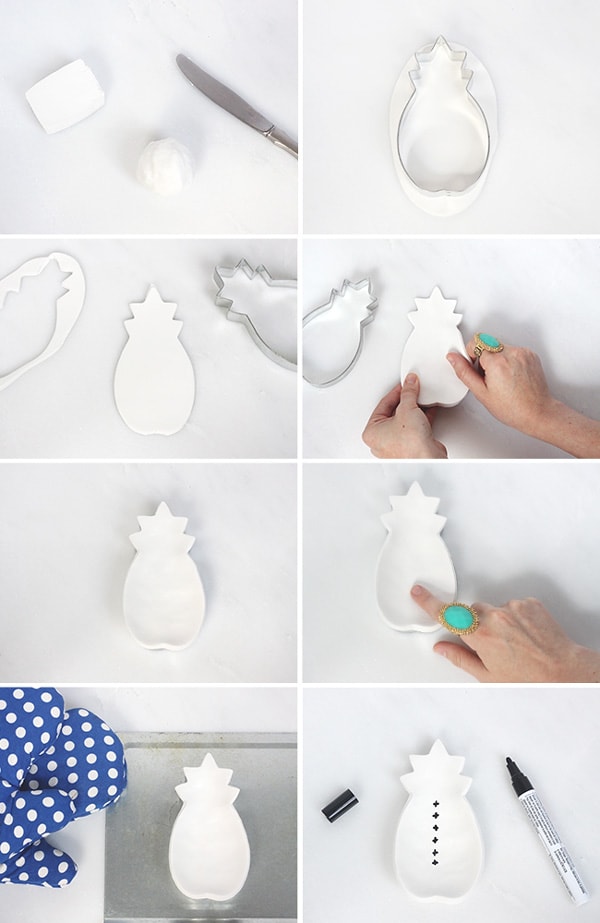
1. Cut off a chunk of clay and make a ball between the size of a plum and a tennis ball. Warm the clay in your hands and roll it around so it becomes easier to work with.
2. Flatten the ball of clay into a pancake, then roll it out until it’s a little bigger than the cookie cutter.
3. Cut out the pineapple shape with the cookie cutter. Keep the clay scraps and any leftover clay sealed in a baggie to stay useable for up to a year. Go ahead and preheat your oven to the temperature on the clay package.
4. Gently use your fingers to widen the clay pineapple enough so it will sit on top of the cookie cutter (the cookie cutter will be the “mold” for the bowl). The best way to do this is to start in the middle and pull the clay out towards the sides, being careful not to let it get too thin.
5. Place the clay pineapple on top of the cookie cutter. Form a bowl or dish shape by pushing the middle down and molding the edges over the sides of the cookie cutter, so that the clay kind of hangs there and stays in place. You can make the bowl as deep or as shallow as you want.
6. Dip your finger in the cup of water and gently smooth out any bumps and fingerprints. Take your time with this step, as it’s much harder to remove them after the clay has been baked. But don’t go crazy either, perfection is overrated.
7. Bake the whole thing, cookie cutter and all, according to package directions (usually 15 minutes for every 1/4″ of thickness). If you have a toaster oven, this is the perfect time to use it! Once baked, remove from the oven and allow to cool. It will still feel a little soft when it’s warm, but will harden during cooling.
**Note: After being baked and cooled, the polymer clay will still be a wee bit flexible. Not enough that you could reshape it without breaking it, but just don’t be alarmed if it feels a little “bendy,” it’s supposed to be that way!
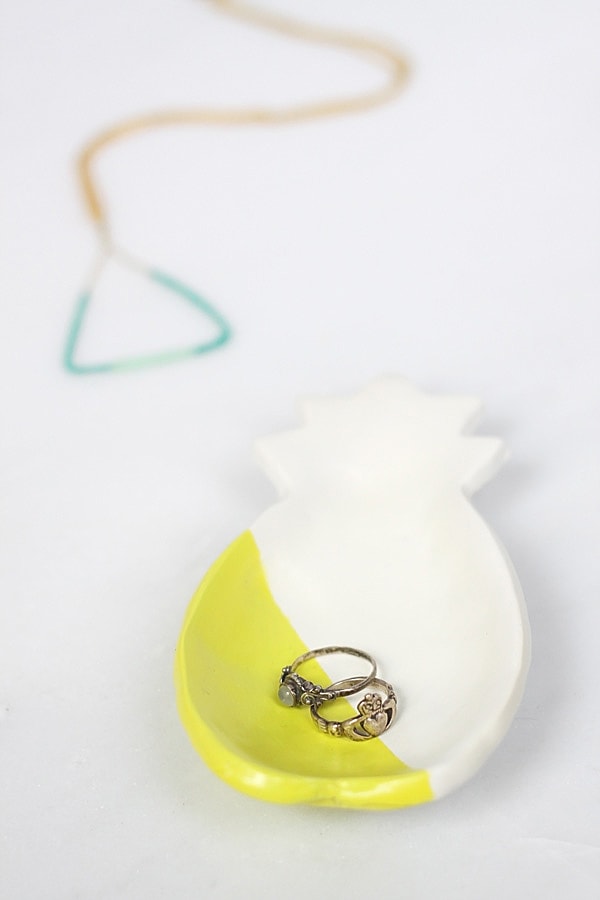
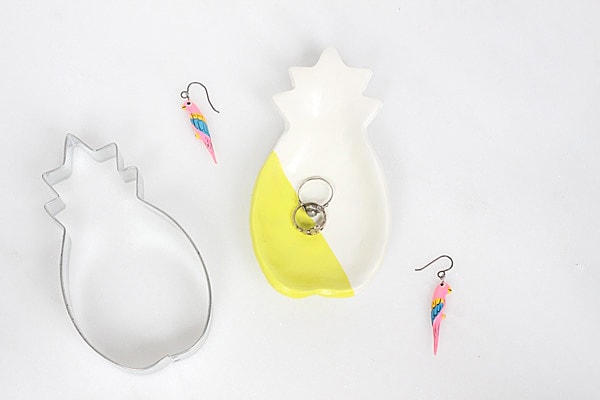
8. Decorate! I used spray paint and a paint pen to embellish my pineapples, then finished with a clear satin spray to give them a nice sheen. And how could I resist another chance to color-block something?
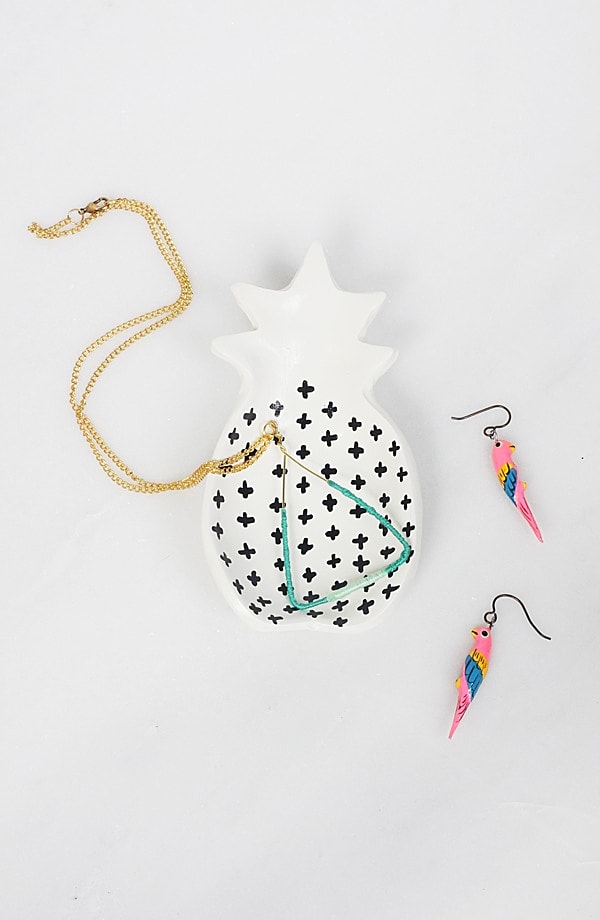
Thank you again, Idle Hands Awake! I love these Pineapples so much. Be sure to head over to Marlene’s site and give her some Delineate Your Dwelling love!
You can also follow along with her here!
Blog | Instagram | Pinterest | Facebook | Twitter

Marlene makes the cutest projects — love this!
So good. And I DO get Pinterest-paralysis!!
Pinterest paralysis, is such a real thing!