Scandinavian Wood Plank Christmas Sign
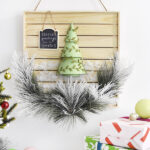
INSIDE : Create a simple Scandinavian Wood Plank Christmas Sign for the holidays. You can hang this sign on your front door or inside your home to welcome and greet guests. The horizontal slats are a beautiful Mid Century Modern touch, too!
This post may contain affiliate links. See my full disclosure.
This post has been updated since it’s original publish date of November 2019.
I did a design style quiz once by Emily Henderson that said my style was Scandinavian Modern Bohemian and as bizarre as those three words combined together – I never felt more understood in my home decor style!
I love simple design with clean modern lines and then if I can bring in ALL the plants and some slight hippie bohemian vibes it’s like a match made in heave to my heart.
Did you see my simple Evergreen Hanging Hoop?
I incorporated many of those design styles in this fun Scandi Wood Plank Christmas Sign. Let’s get into how to make one below!
You can check out the full tutorial and the supply list at Oriental Trading’s FUN365 site.
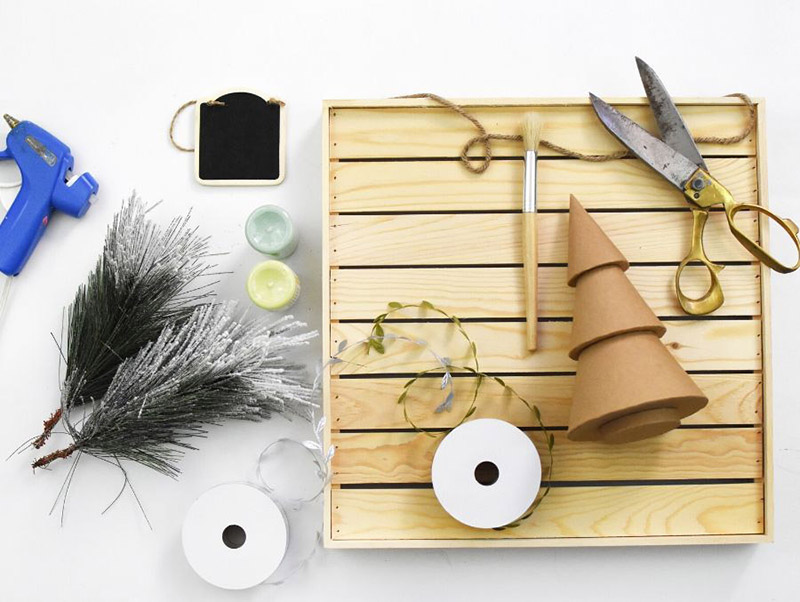
What supplies do you need for a Scandinavian Holiday Sign?
- Unfinished Wood Plank Sign (mine was 14″)
- Mini Chalkboard Signs
- Craft Snow
- Papier-Mâché Christmas Tree
- Green Leaf Ribbon
- Snowy Pine Picks
- Mod Podge Matte
- Acrylic Paint + Brush
- Mini Glue Gun
- Scissors
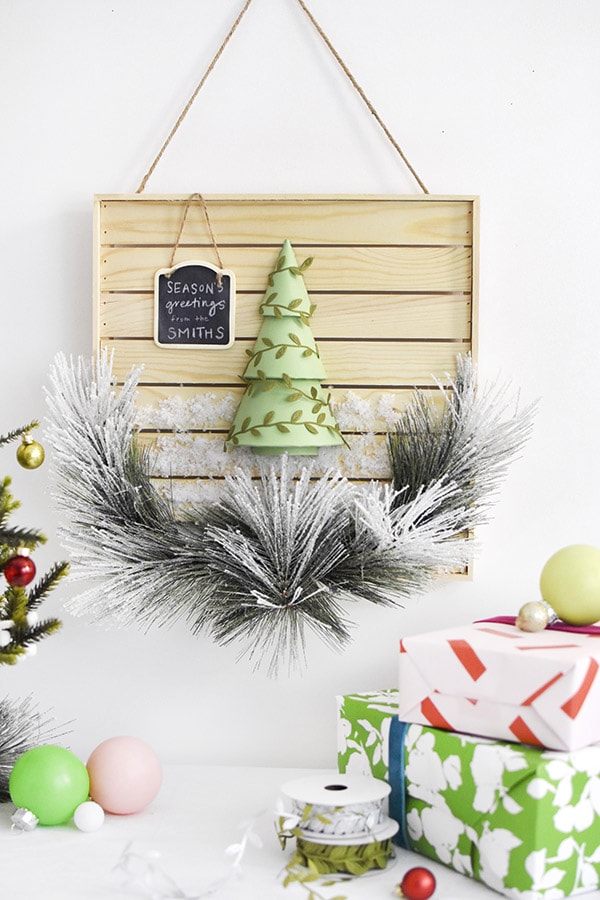
How to make a DIY Christmas Wooden Sign
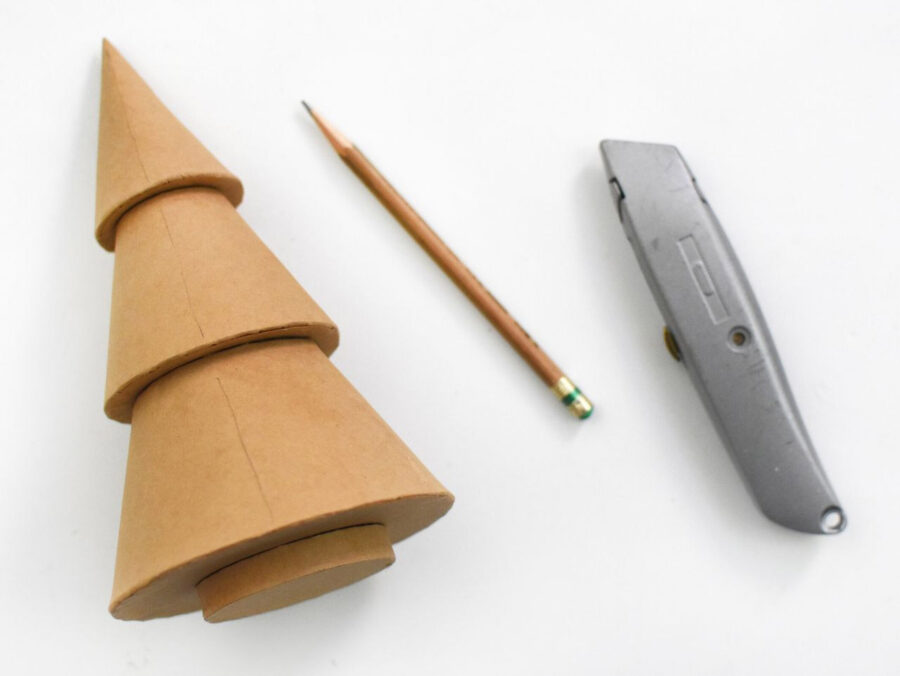
Start this project by cutting your Paper Maché Christmas Tree in half.
I found it helpful to use a pencil and draw a line around the entire tree at the halfway point. Then, using a utility knife or a small saw, follow along that line to cut the tree.
NOTE : Please go slowly.
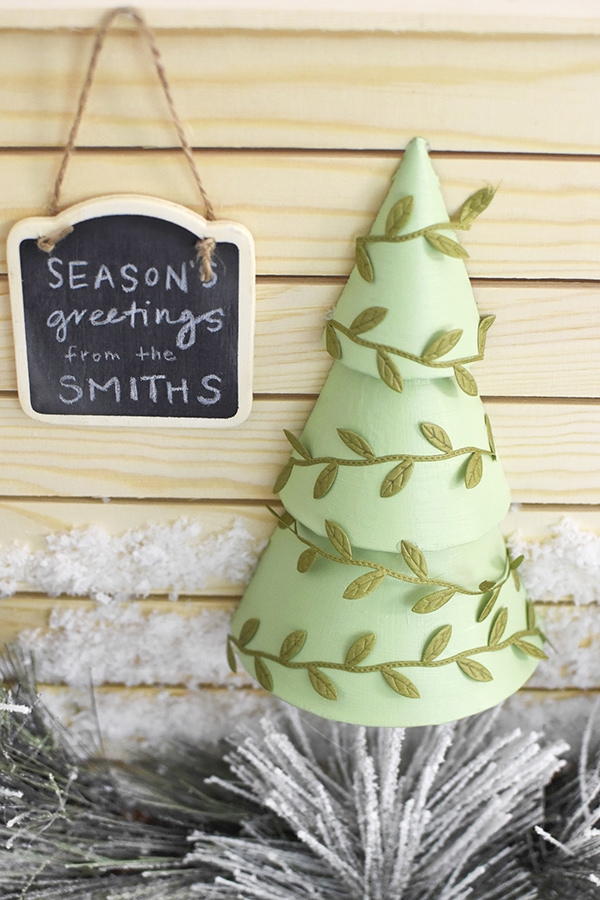
Once your tree is cut, you can add color. I used a lovely shade of mint green to paint my tree. I mixed some green acrylic paint with white to achieve this color.

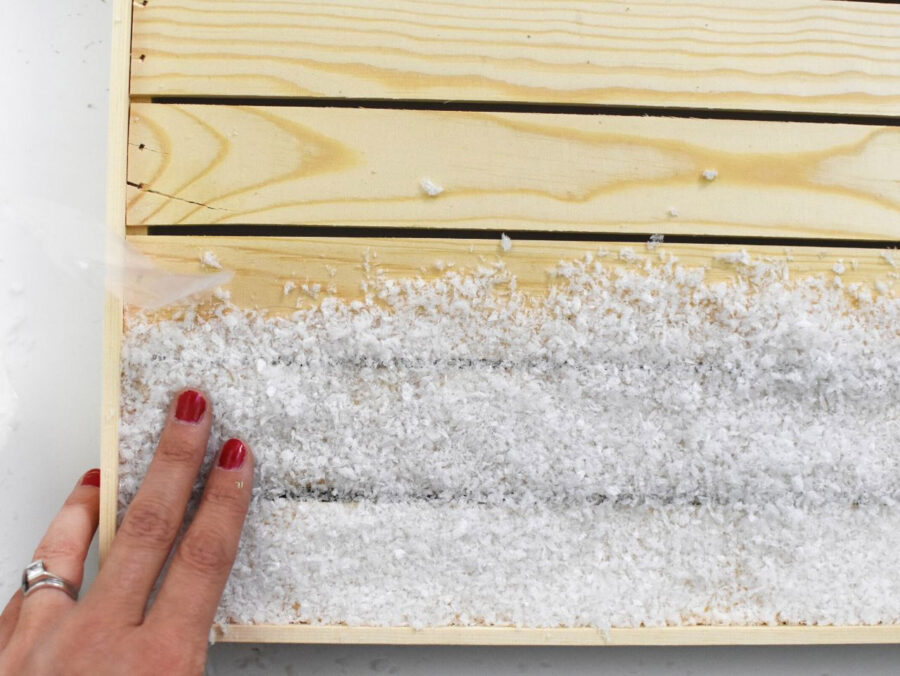
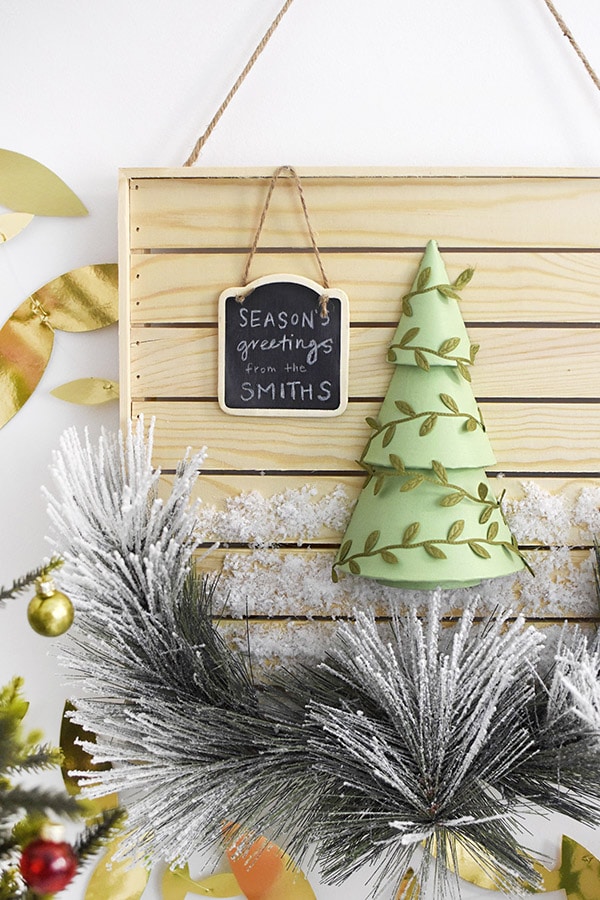
Next, I added winter snow to the wood planks.
Start by generously painting Mod Podge onto the planks. Then, sprinkle craft snow over top. Lightly press down and allow to fully dry. Then repeat this process until you have the perfect snowy look.
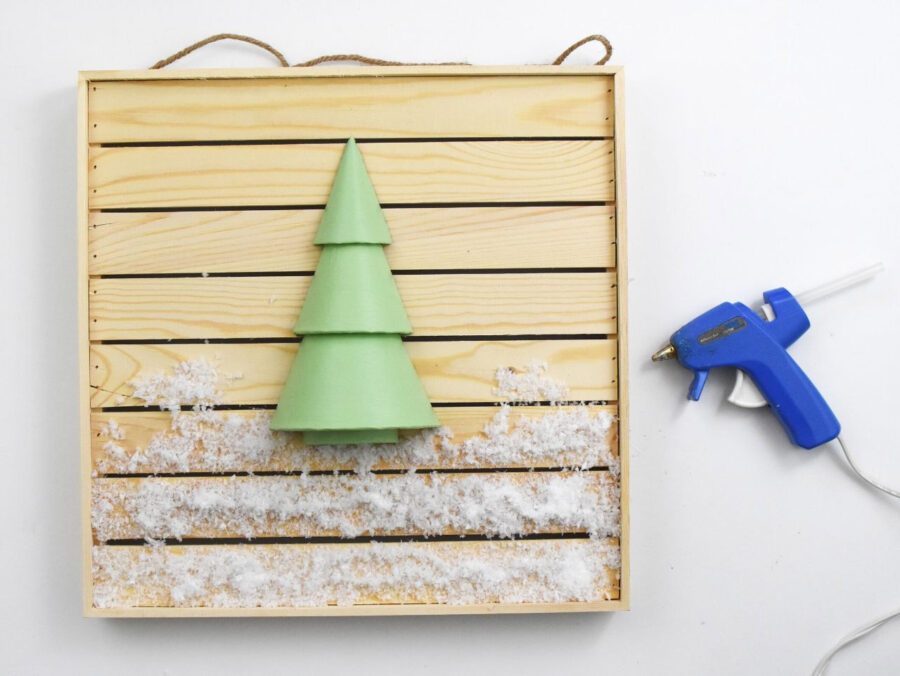
Add a craft tree to your sign
Once both the tree and the snow is dry, you can adhere the tree to the wood slat sign.
Decide the best height and use a hot glue to glue the tree to the sign.
Use at least three Evergreen picks and hot glue them to the edge of your wood plank sign to create an “forest frame” around the bottom portion of your sign. I bent mine to have a very gentle curve shape.
Then, fold one more evergreen pick in half and glue that to the center to finish the look and cover the ends of your other picks.
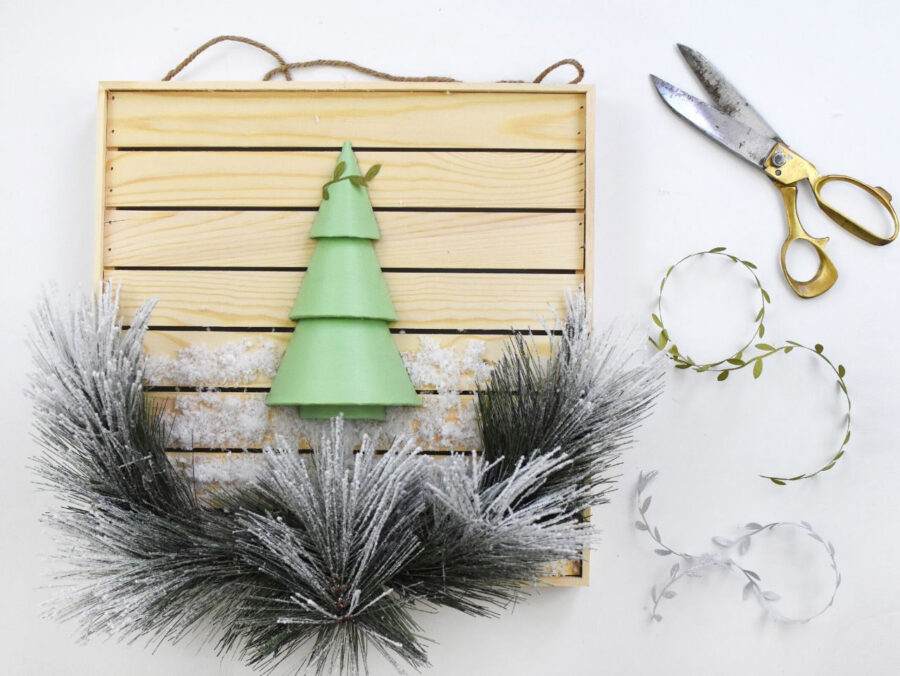
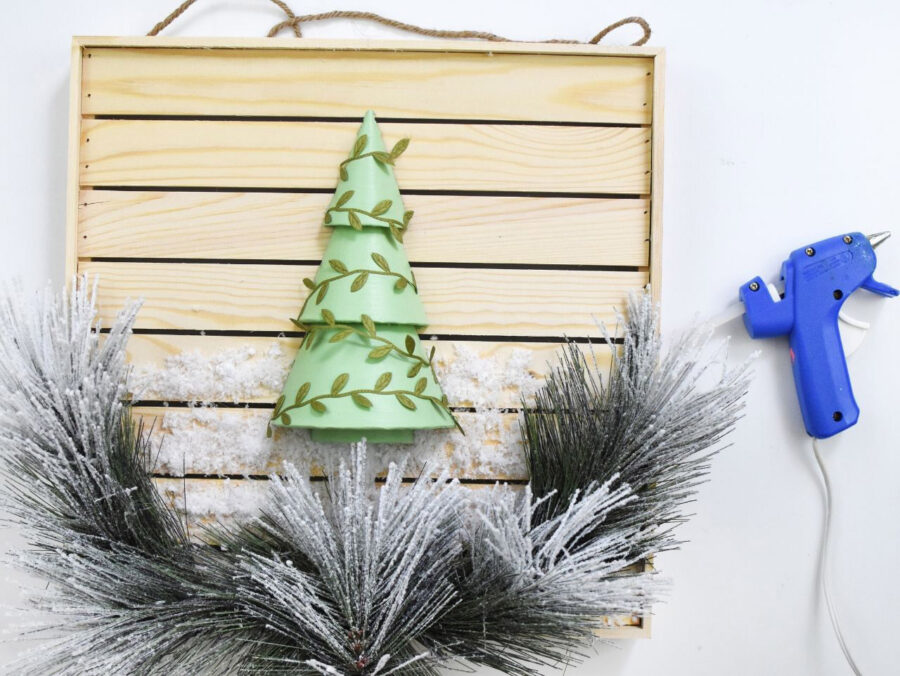
Using small sections of green leaf ribbon, “decorate” your tree and use hot glue to adhere it. This is such a fun add to this project.
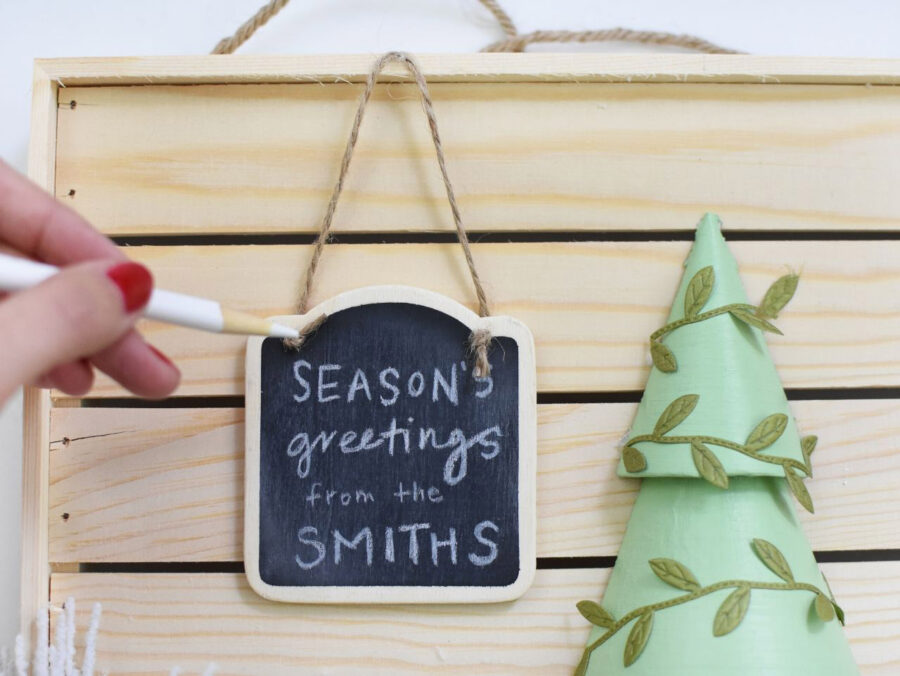
And for the final detail, use a piece of chalk or a white colored pencil and write out your family name or any message you would like!
Hot glue your mini chalkboard to the wood slat sign. SO CUTE!
What is my favorite part of this Scandi inspired holiday sign? Where do I start???! I adore the mint green tree. And the green leaf cut ribbon is the perfect simple addition.
Looking for some of my other fun Christmas projects? I have so may great ones like this DIY Holiday Wreath.
Also I really love those sweet little chalkboards.
My tip is using a sharp white colored pencil to write out your message. It makes a much cleaner line and you don’t have to worry about chalk rubbing off.
And lastly, I really loved the quality and style of the evergreen boughs that I added to the bottom of the sign. They were the perfect final touch!

Don’t forget to pin this project now and save it for your next crafting session before Christmas is here!

Curious to check out all my Oriental Trading projects (there are a ton), you can head over here!
Looking for some other fun Holiday craft projects?
Jingle Bell Tabletop Christmas Tree Pot

DIY Christmas Mushroom Centerpiece

Holiday Shopping List and Festive Christmas Prints