How to build a modern Board and Batten Accent Wall
INSIDE : See how to spruce up your hallway bathroom by learning how to build a modern board and batten accent wall treatment using the gorgeous teal hue of BEHR PREMIUM PLUS® Interior Paint in Dragonfly PPU12-03 from BEHR’s Color Trends.
This post has been sponsored by Behr Paint Company.
All thoughts and opinions are my own and may contain affiliate links. See full disclosure here.
Here is an image of my completed modern board and batten with my organic leaf wallpaper installation!

I have been wanting refresh our hallway bathroom for a long time. However, I wasn’t ready to completely renovate it just yet. So, I decided to partner with my favorite paint brand—Behr—and begin phase 1 of our bathroom refresh. I also completed my first-ever solo power-tool project and could not be more thrilled with the outcome!
Be sure to follow the entire guest bathroom process below!
Hallway Bathroom Plans
Removing your Sliding Glass Shower Doors
How to Build a Modern Board and Batten Accent Wall
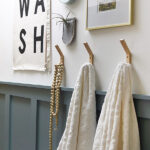
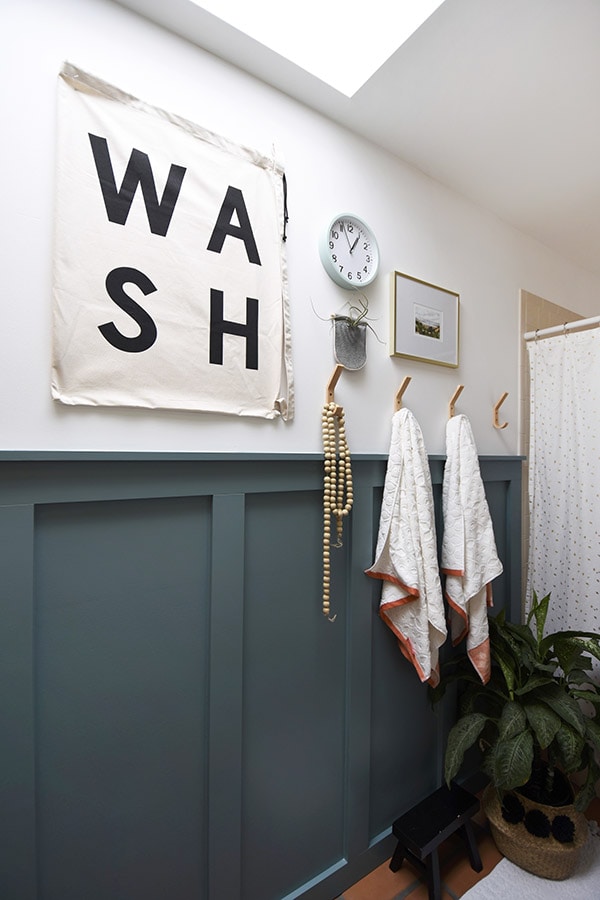
WASH Bathroom Artwork framed
Hallway Bathroom Reveal
How to pick a Bathroom Accent Wall Color:
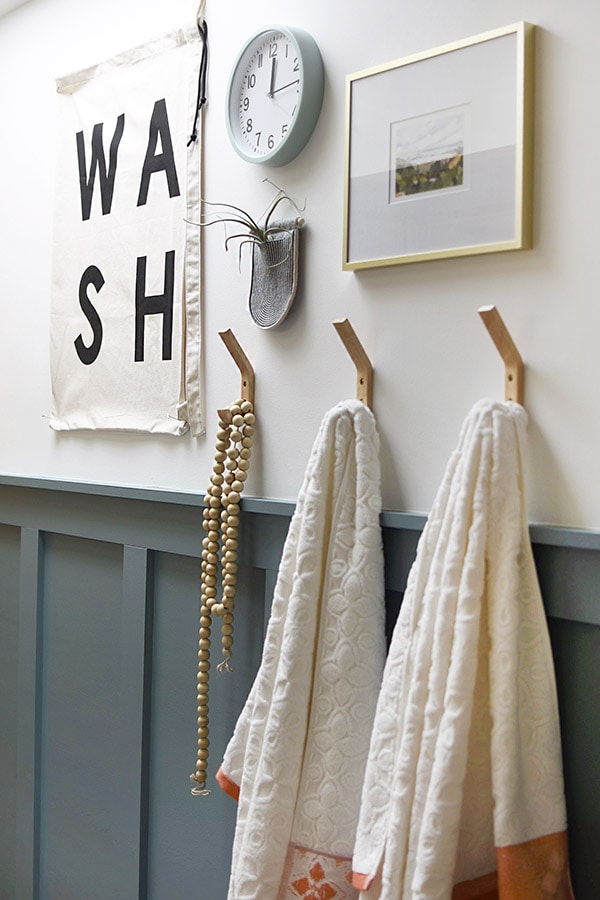
When picking my paint color, I knew I wanted something a little moody but still inviting. BEHR’s 2020 Color Trends color, Dragonfly PPU12-03 was just the color I was looking for.
I got a sample of the color and went home to give the paint a test on my walls. I fell in love the moment I opened the lid! The color was soft, but rich and it was just the perfect shade for our bathroom.
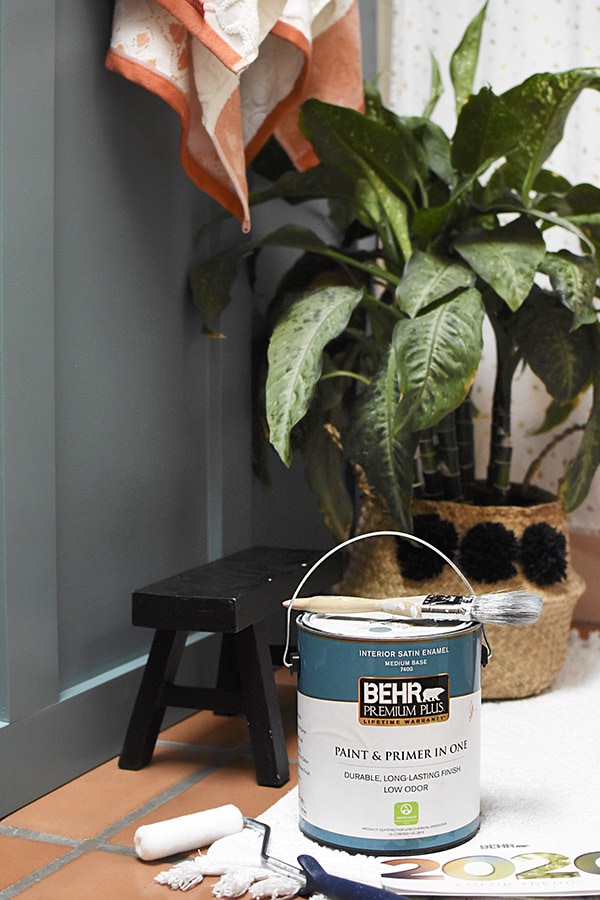
I stopped at the Home Depot store, picked up a gallon of BEHR PREMIUM PLUS PPU12-03 Dragonfly Interior Satin Enamel Paint and was ready to get started!
We ALWAYS use Behr Premium Plus paints in our home because we love that it is a durable paint & primer in one. Plus, using Satin Enamel Paint will be perfect for the bathroom with the added moisture from the shower.
And have you seen BEHR’s Color of the Year: Green Back to Nature S340-4?!! It’s a restorative and meadow-inspired green, I may just need to find a place to use that color soon.
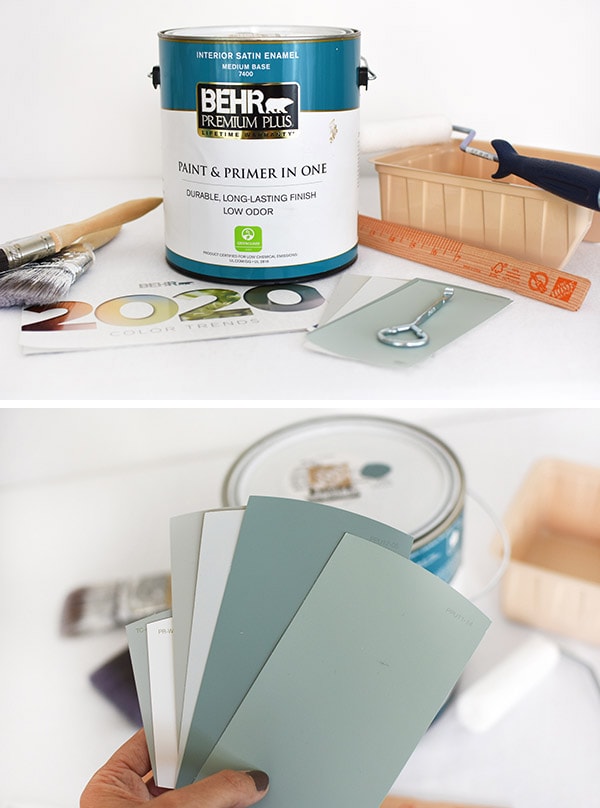
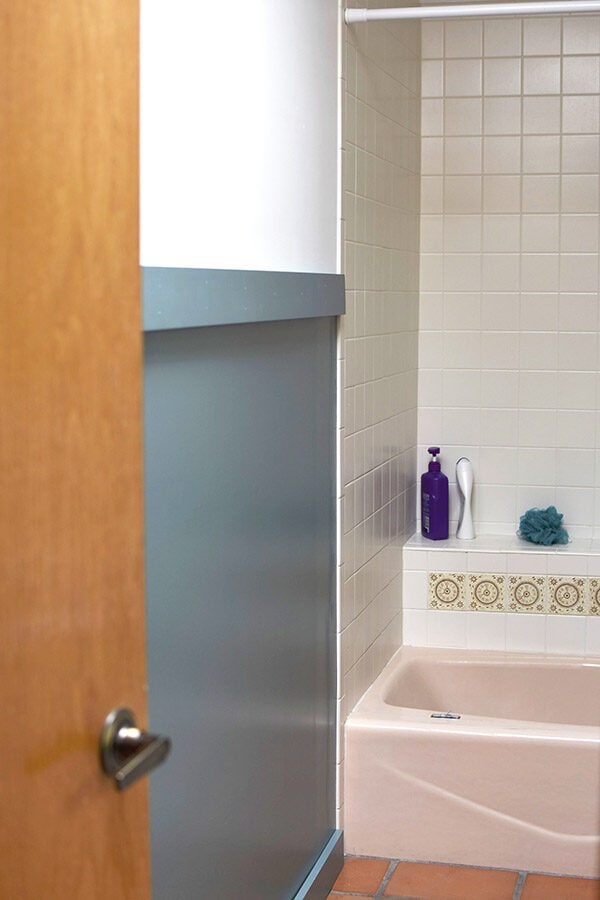
Bathroom Before :
Let’s take a quick peek at my “before” bathroom. We have a few must-stay items, namely our very Southwest saltillo tile (a burnt orange color) and our current blush pink fixtures (toilet, tub and sink). I thought the teal in Dragonfly PPU12-03 complemented the orange tones in the room.
Modern board and batten supply list
MATERIALS:
(5) 1x4x8 Pre-Primed MDF Boards
(1) 1x2x8 Pine Trim Board
1 1/4 brad nails
Paintable Caulk
Lightweight Spackle
BEHR PREMIUM PLUS Interior Satin Enamel Paint in Dragonfly PU12-03
TOOLS:
Paint Roller + Brush
Miter Saw
Pneumatic Nail Gun + Air Compressor
Nail Setter set
Hammer
Level
Stud Finder
Measuring tape
Sand Paper
Pencil
Utility Knife
Prybar
Check out my favorite DIY basic tools here…

Ready to check out 31 other creative Board and Batten Accent Wall ideas? Head on over!
How to make a modern board and batten wall?
Board and batten can take a few different looks. It originally has a bit of a farmhouse look to it, but I believe by using fresh bold paint colors and also by installing it taller than a typical chair rail height – you can create a much more modern look.
Let’s get into how to build yours, below.
Determine Board and Batten spacing
Prior to starting this project, I drew out and decided on my dimensions for each piece of my board and batten wood treatment.
I wanted my accent wall to be about 55″ in height and based on the width of the space I was working with, I decided to space my board and batten with 6 vertical boards roughly 19″ apart.
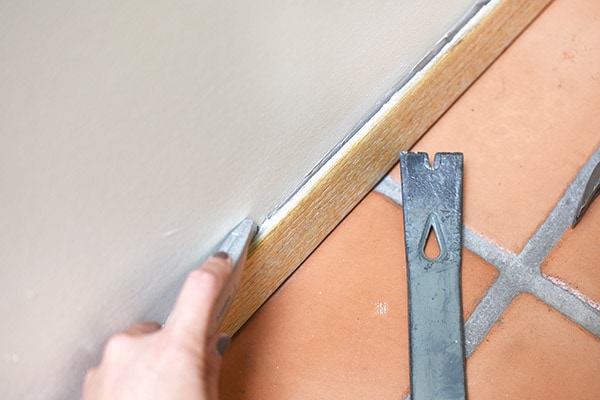
Remove baseboards
The first step to creating a modern board and batten accent is to remove the baseboard along the wall. I used a utility knife to score along the top caulked seam and a prybar to pop it all off.
Paint Wall and all Boards
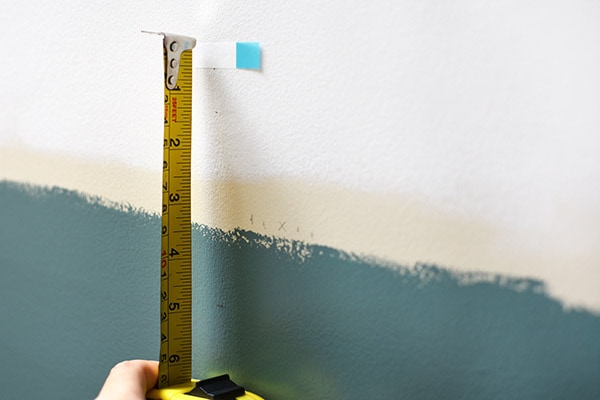
Based on the total height of your board and batten design (mine was 55″ tall in total), measure and mark 55″ with your pencil from the floor. You are marking the total height of your board and batten design so you know how high to paint the wall basically.
Using a paint roller, give your wall a first coat of paint. I was immediately smitten with the color! BEHR PREMIUM PLUS Interior Satin Enamel Paint in Dragonfly PU12-03 for the win.
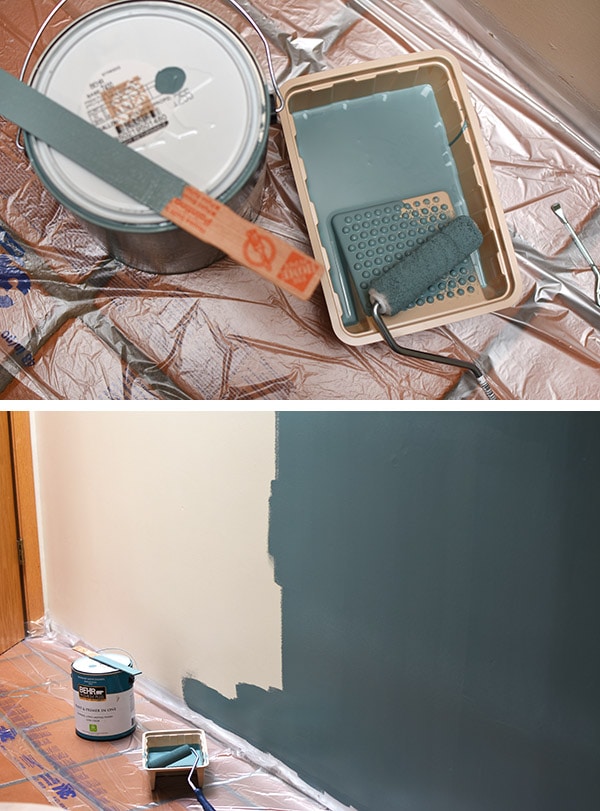
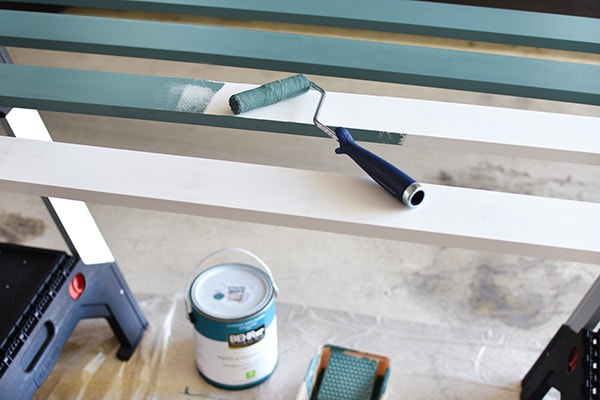
While the wall was drying, I painted all of my trim pieces. I had five 1x4x8 pre-primed MDF boards for the batten and one 1x2x8 pine board for the top trim. I love BEHR PREMIUM PLUS Interior Satin Enamel Paint for bathrooms because of its long-lasting finish and that it’s washable.
Also, I can’t stop with this color… it’s the perfect moody but cheery color. Behr Dragonfly for life.
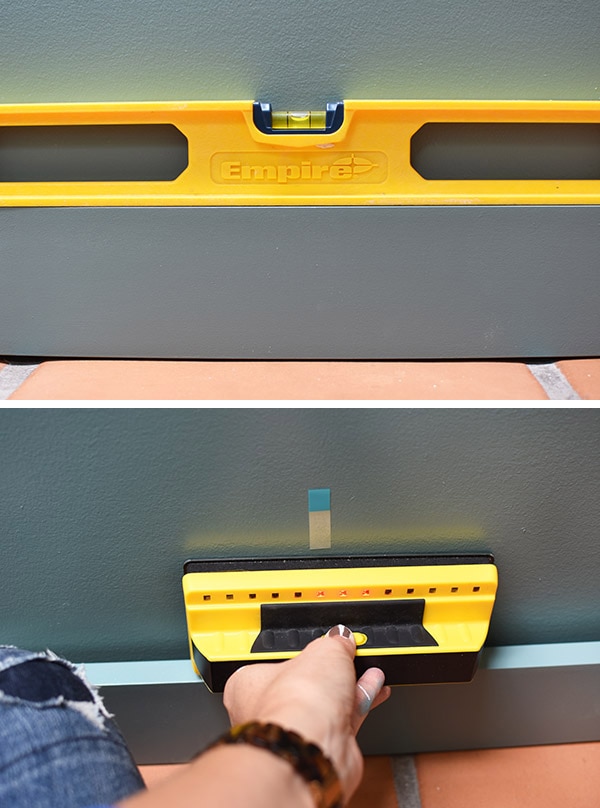
Once the trim pieces were dry, I placed my baseboard on the ground and made sure it was level. Then, using a stud finder, I marked all of my studs at 24″ on center. I also used a magnetic stud finder for certain parts – I honestly recommend having both types as I used them both nonstop on this project.
Remember, this was my first ever solo project using power tools. My husband gave me some basic direction that morning before he left for work but otherwise, I completed this project on my own.
Secure your bottom baseboard
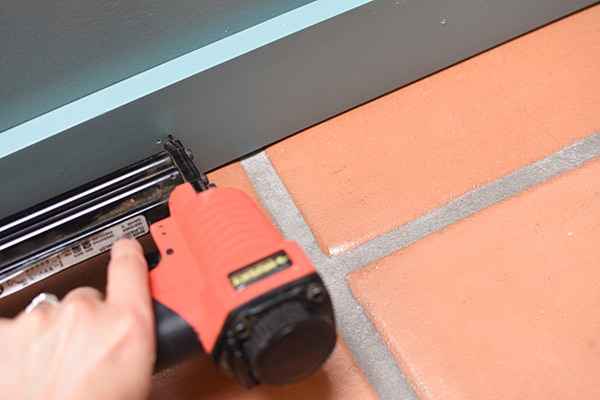
I then used a pneumatic nail gun to secure my bottom 1x4x8 board to the studs.
I ended up nailing every 8″ to make sure my board was flush against the wall. FYI our wall was exactly 96″ wide, so I didn’t have to cut the two main horizontal boards.
Measure, measure, measure
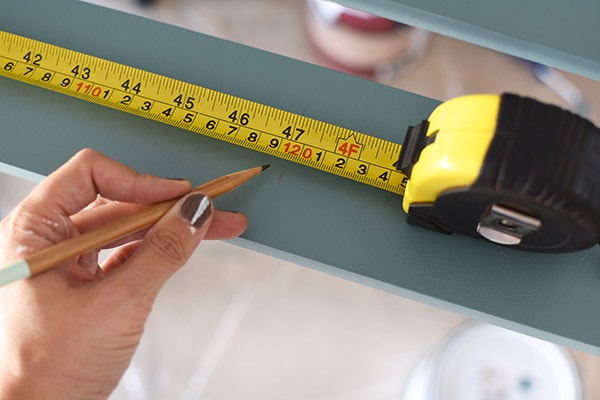
Once my bottom baseboard was secured, I measured from the top of that board to ensure that the remainder of my wood would stay level.
Since I wanted my entire height to be 55″ from the top of my baseboard, I marked at 45 1/2″, 49″, and 49 3/4″ along three different spots for the next installation steps.
I then installed the main top trim 1x4x8 board using the nail gun.
I had calculated that I would need six vertical boards in total. So, next I began measuring from the top of my bottom baseboard to the bottom of my top board to get the exact measurement each vertical would need to be cut. They were each 47″, give or take a little bit.
Cut vertical boards and secure to wall
Using a miter saw, I made each of those exact cuts and using the nail gun, secured them to the wall.
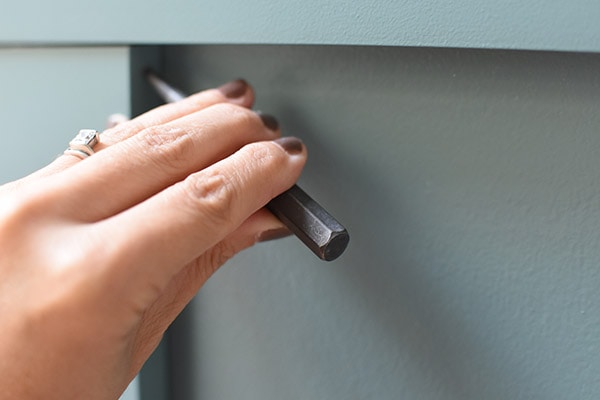
In addition, I also put a nail diagonally where each vertical board met the baseboard and top board for extra strength.

I made sure to tamp each of those diagonal nails in with a nail setter and hammer because it was difficult to get the nails flush in the wood with that tight space using with my nail gun.
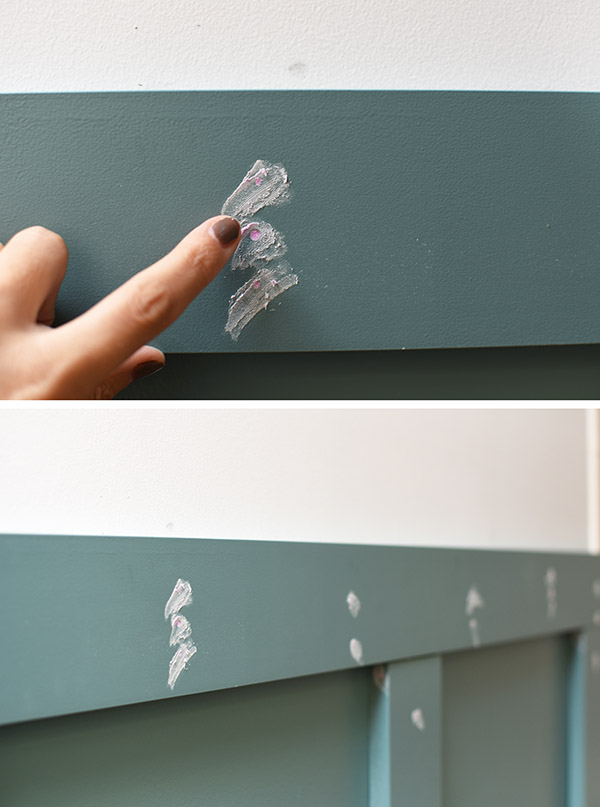
Spackle and Caulk
Next, I filled all the nail holes with spackling. I used my finger to put the spackle in all the holes. Once it was dry, I used a lightweight sandpaper to remove any excess spackling.
I applied paintable caulk on all the trim edges next. I was so worried the caulk would eliminate all my perfect straight lines, but once it was dry and I painted over it, it really made everything look perfect.
Add top ledge trim board
My final step was adding the last 1x2x8 pine top trim piece. One end of the pine trim hit our door jam, so I ended up having to hand-saw a small notch out of the board to make sure it fit properly.
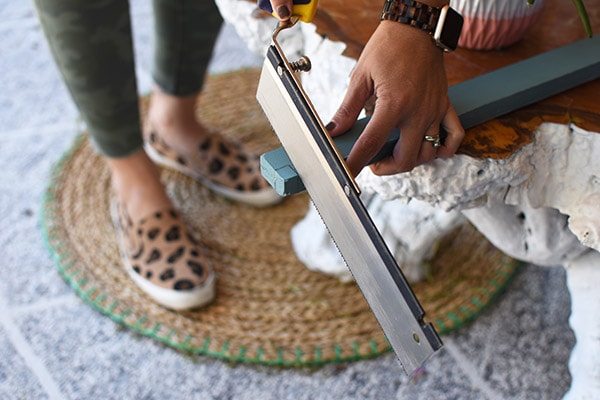
A few more nails to secure that piece, and the construction portion of this project was complete.
Check out the full supply list here :
Board and Batten Accent Wall
I gave all the trim pieces, caulked edges, and spackled nail holes one final coat of BEHR PREMIUM PLUS Interior Paint in Dragonfly PPU12-03 and my project was officially done!!
Interested in learning more about the Best Beginner DIY Tools? Check out this post!
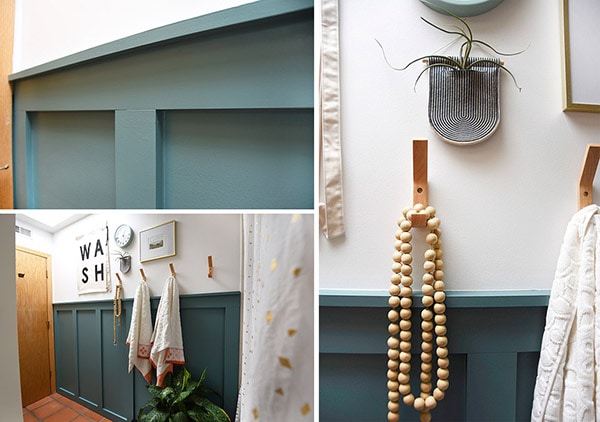
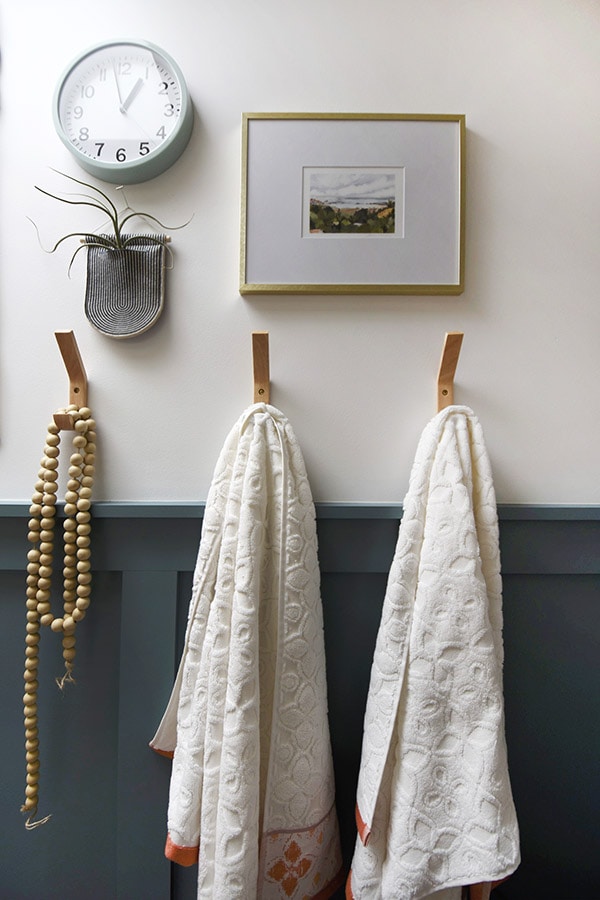
I installed four wooden hooks to hang our bath towels on.

I keep catching myself walking past this bathroom, and the Dragonfly PPU12-03 paint color makes me smile every time.
Not only does the entire family love how this DIY board and batten wall turned out but I feel so excited to try my hand at another wood project! It felt so scary to try all these new power tools, but it was thrilling to make something with my own two hands.
Board and Batten Accent Wall
This board and batten accent wall really is such a simple and affordable project that can totally change your room and add character!
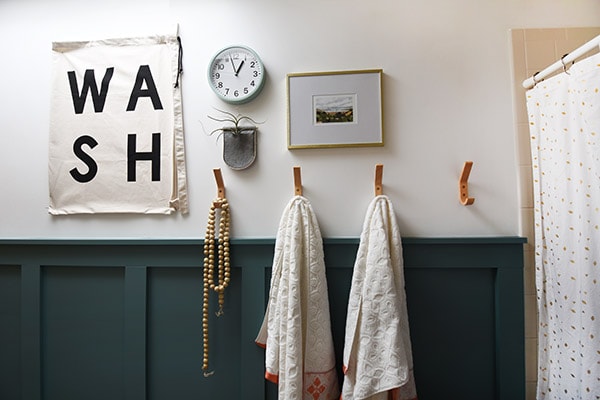
I added a few pieces of art, a wall clock, and a hanging air plant.
Next, I will be adding wallpaper above my board and batten, changing out the hardware on our vanity, and painting the rest of the room to complete the look.
Thank you to Behr for this gorgeous paint color!
Which colors go best with teal?
Painting Office Moody Teal Blue
Beautiful Teal Blue Paints for your Home
Be sure to follow the entire guest bathroom process!
Hallway Bathroom Plans
Removing your Sliding Glass Shower Doors
How to Build a Modern Board and Batten Accent Wall
WASH Bathroom Artwork framed
Hallway Bathroom Reveal
MY Home –> Want to check out my each room in my home?
I have inspiration, tips and inexpensive ways to make your home YOU.
How far apart did you place your vertical boards?
Mine were 24″ on center.
Beautiful!
Where did you get the WASH sign??
Thank you!! It’s a cloth hamper from HM, but I don’t think they sell it anymore, sadly.
Where did you get the wallpaper? Need it!
It’s from Etsy! https://rstyle.me/+Ppt8xGXC1_qJtxEcFCTbuw
I love it!! Could you tell me where you got the wood hooks
Thank you so much, Holly! Here is the post with all the items in our bathroom, https://www.delineateyourdwelling.com/myhome/
Your project turned out really beautiful! I love that you kept the terra cotta color as an accent to go with the floors. Where did you get the “WASH” sign? It definitely adds charisma to the look!
AMY!!! This is so good!! I’m super impressed and proud of you for taking it on-Can’t wait to see phase 2!
Ah, thank you Jess!! It was a big task but I am so thrilled with how it turned out. 😉
amy – i absolutely LOVE this!!! the color is so perfect to tie in what you needed to keep in the bathroom with a modern, clean, fresh look! it’s totally perfect and you did an awesome job with those tools! i’m definitely inspired to try something like this!!!
Thanks so much Rachel!! I’m excited to be wrapping up the space soon.
It looks amazing!! Love the color and LOVE LOVE LOVE that you did it by yourself!
Such a complement from the DIY queen! I really love the color and now I want to build all the things.
So good! Way to go being brave with power tools! It looks awesome!
Thaaaaaaanks lady! You can see it in person soon! 😉
Yay!!! Looks amazing. Love the color. Love the wood working skills!
Isn’t the color just gorgeous! It’s the perfect moody + soft combo.
Omg! It’s so good Amy! Congrats on your successful first stab at using power tools!
Thank you, Kara! I want to find some spare time and try another power tool project, ha!