Watercolor Emoji Monkeys

INSIDE : Learn how to make whimsical Watercolor Emoji Monkey prints. They will have you saying, Monkey Monkey Emoji all day long!
Today begins a six series of guest posts from some of my favorite makers. As my family prepares to move from the Midwest to the Southwest, I am so so excited to share these ladies with you. We are kicking it off today with whimsical Watercolor Emoji Monkeys from Ariel at PMQ for Two!
PMQ for Two is about bold, bright, colourful, and eclectic home decor and DIYs. Ariel knows how to bring color to a space like no one I know. Her spunky personality comes through in everything she does and I love that about her.
Friends, let me introduce you to Ariel of PMQ for Two…
I am so pleased to be guest posting on Amy’s site today, my name is Ariel, and I’m the voice behind PMQ for two. Our friendship began last summer on Instagram and over the last year has developed into one of those professional maker friendships that I cherish. So when she asked me if I wanted to guest post while she prepped for her move I said sure!
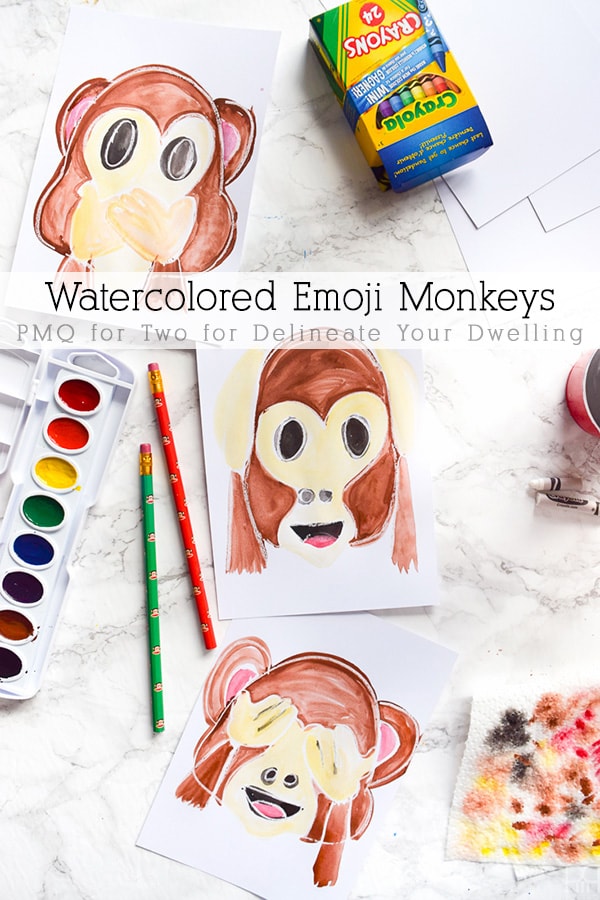
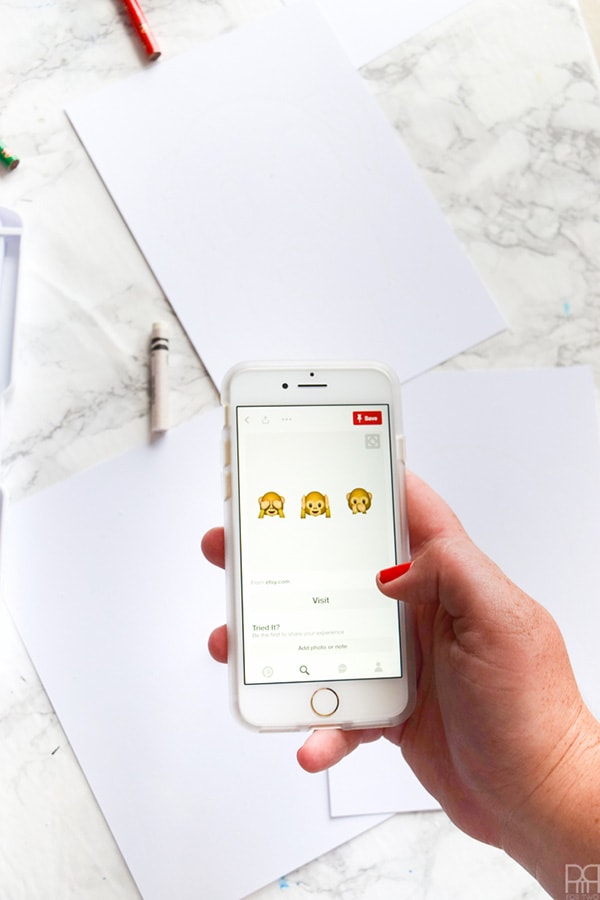
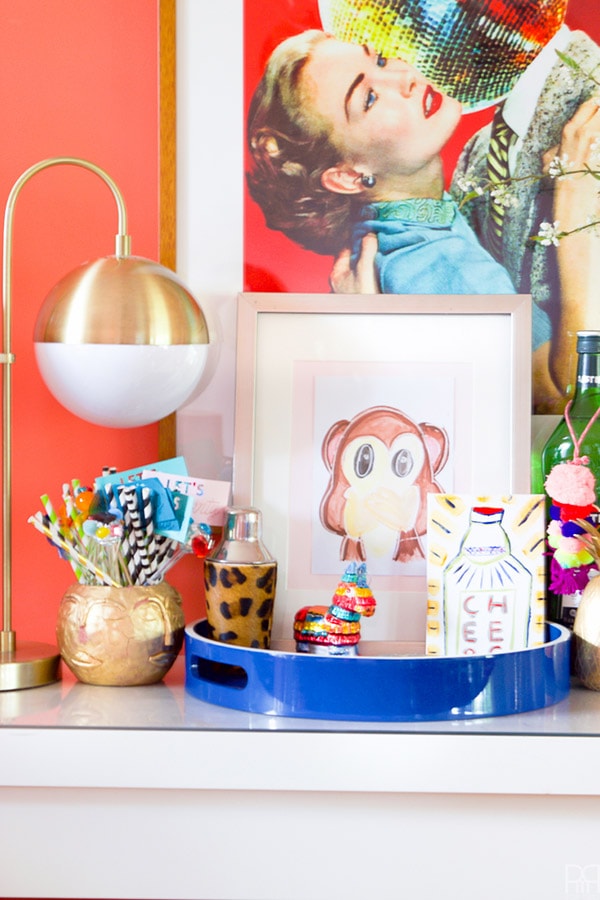
While Amy uses the most lovely colours in her work, I tend to use every colour under the rainbow, and you can see more of my work in my project gallery // here //. I create bold, bright, colourful & eclectic home decor and DIYs that fill my home with a certain je ne sais quoi. For my guest post I thought I’d share some fun watercolour pieces I did, my monkey emoji art! The “hear no evil, see no evil, speak no evil” trio are a decor staple and the cutest emojis. This is my take on them.
What supplies do I need to make Watercolor Monkey Emoji prints?
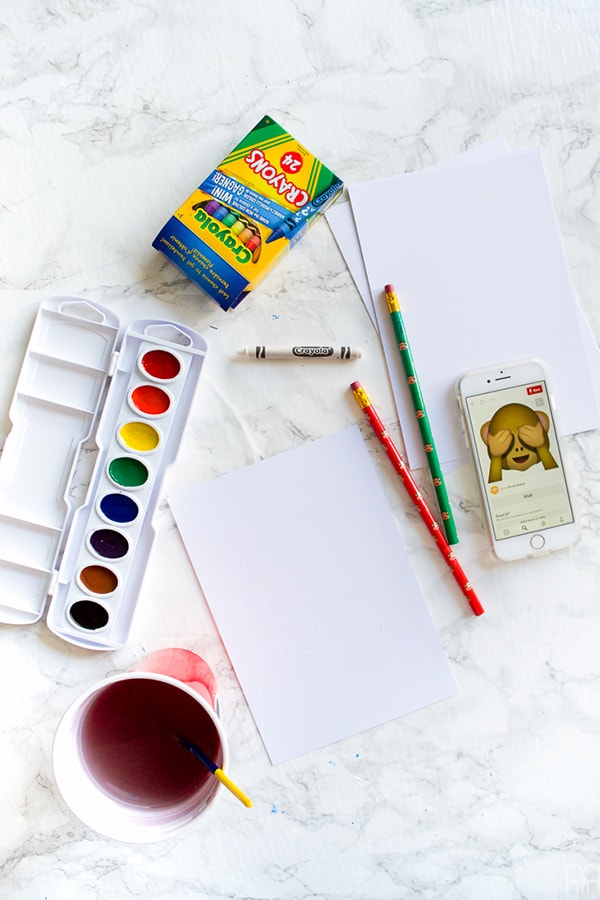
- White crayon – I bought a pack and just used the white one
- 5 x 7 ” white cardstcok
- Basic water color palette & brush
- inspiration – I found larger jpeg’s of the emojis on Pinterest

How do I make Watercolor Monkey Emoji prints?
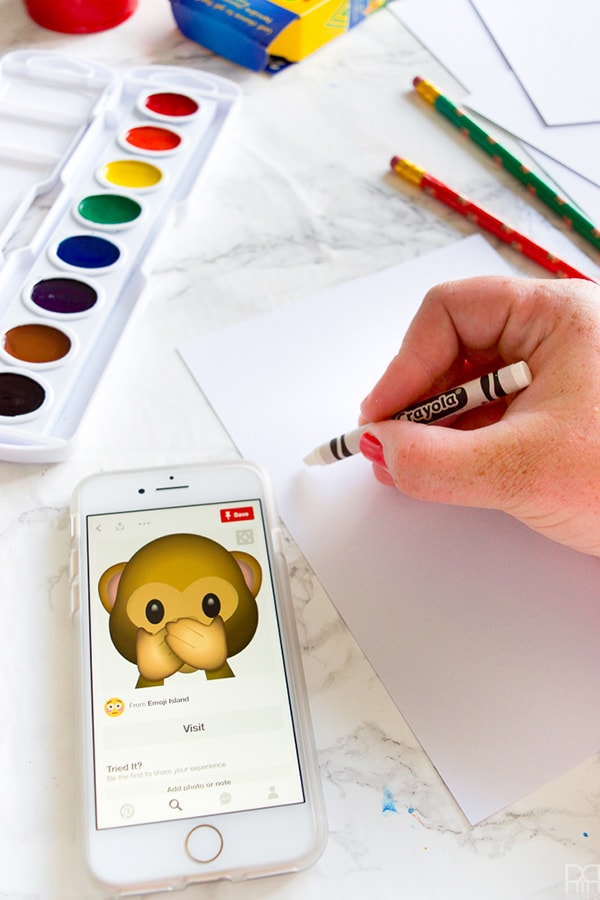
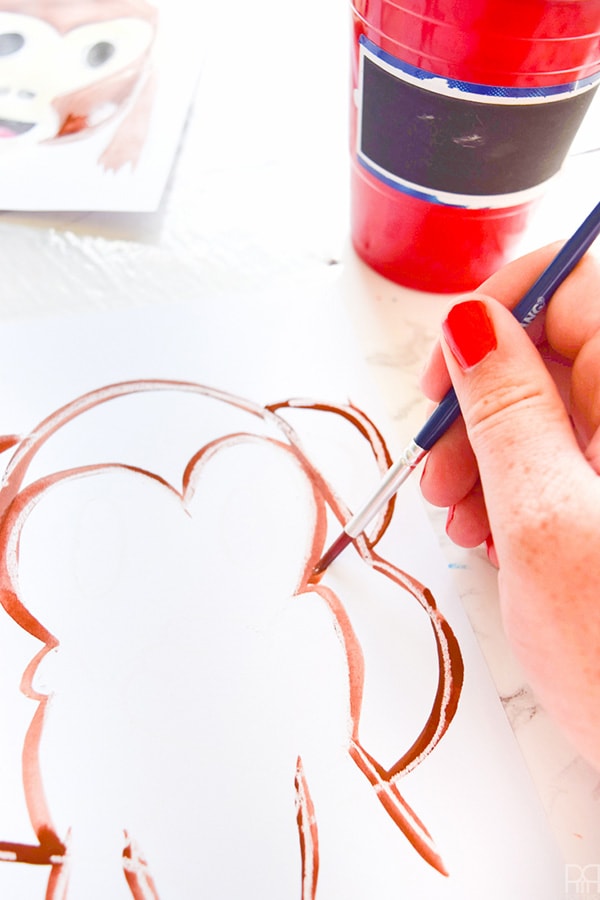
Step 1: Draw the outline of your monkey (or other emoji) using a white crayon.
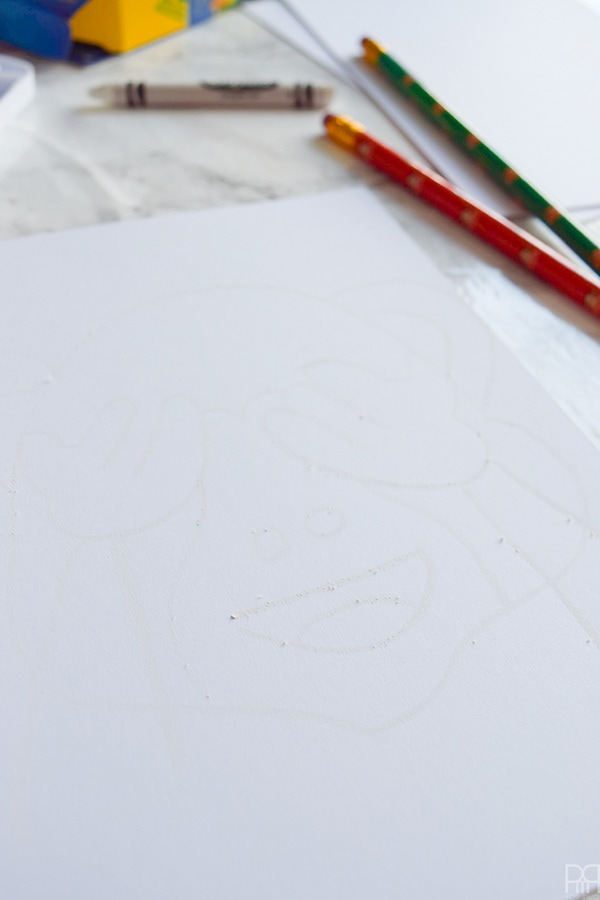
I’ve got a progress shot, but I’m not sure you can tell that I’ve drawn! I left this shot un-touched when I was editing so that you could see the outline of the white on white.
Step 2: Repeat this for all three monkeys. It may take a while to get it all right and just-so, but you can add dimension and depth with the paint later, so don’t worry about getting more than the outline up there.
Step 3: Start painting! Watercolour paints can be tricky [feel free to link to any other watercolours you’ve done], so I start by tracing the outlines in the right colours first. This will also give me depth in colour.
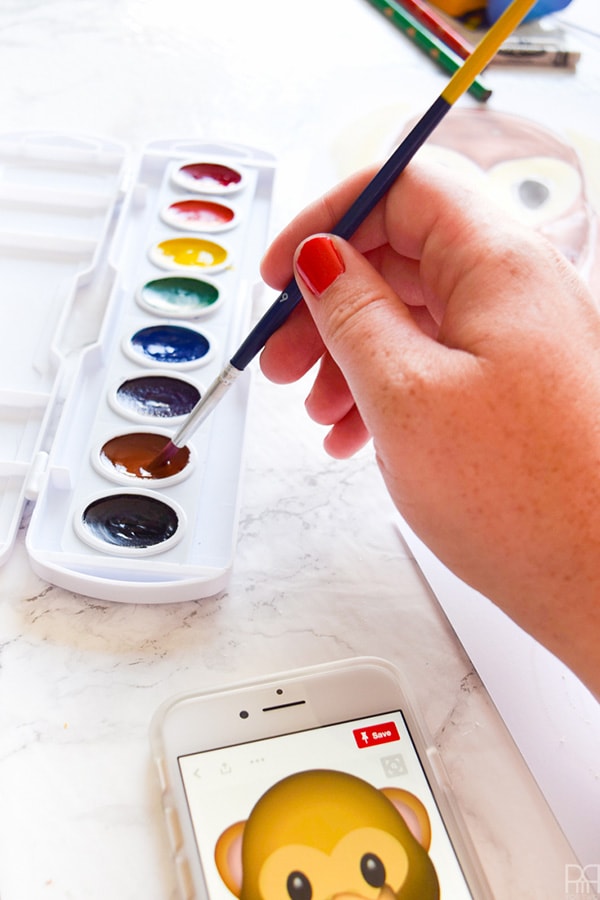
Don’t forget that you just keep adding water to make it a lighter colour, and that you can go over existing brushstrokes with just water to help dilute the colour and shade.
Step 4: Once you’re happy with how the shading looks, start filling-in the rest.
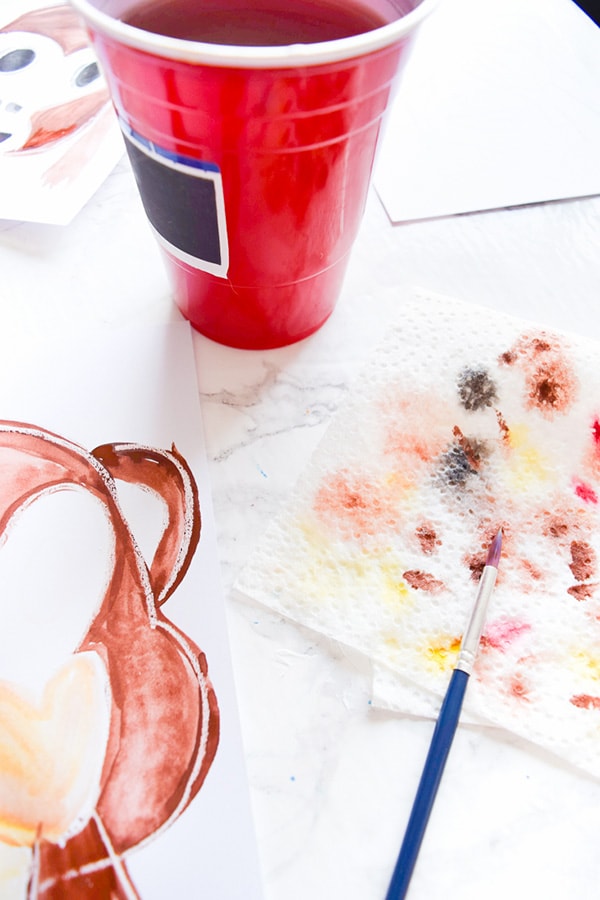
Step 5: Finishing touches! add more colours or water to shade and add the amount of details you’d want.

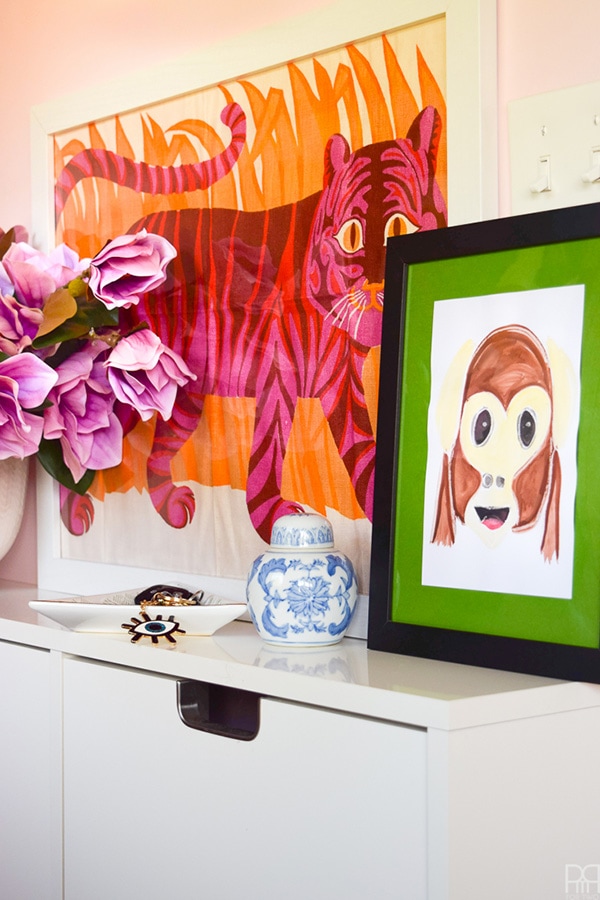
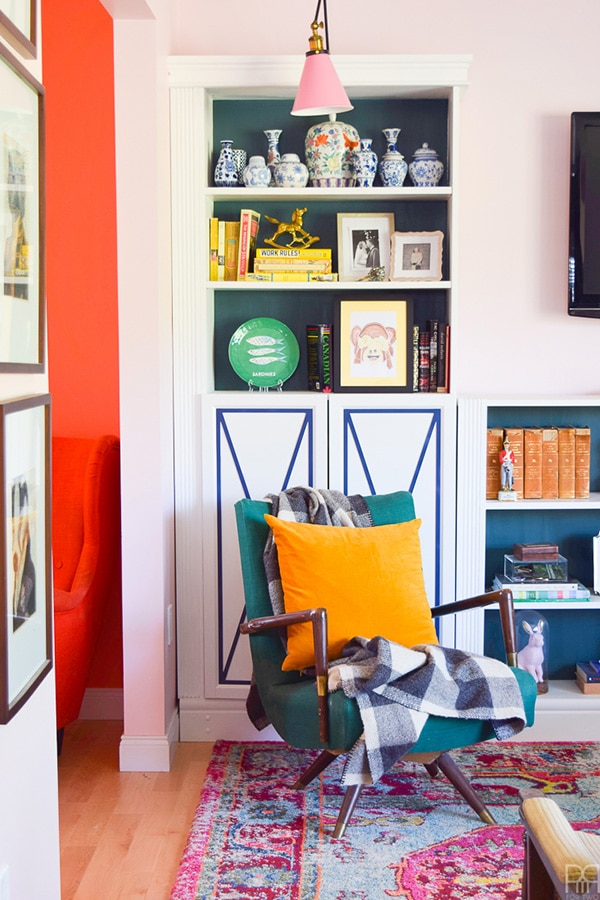
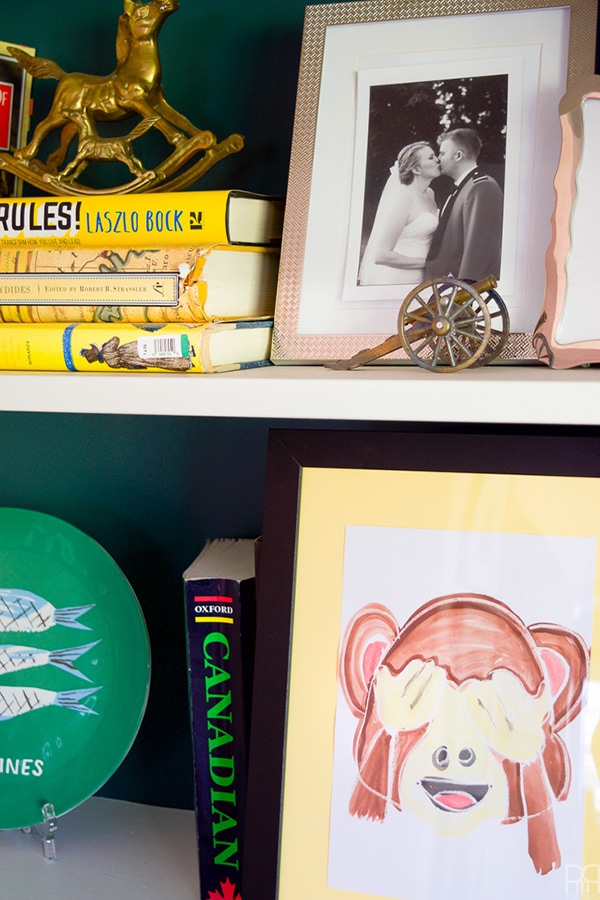
Step 6: Frame them and then hang them! I’ve chosen to scatter mine throughout the house in our entryway, the built-ins in our living room, and the sideboard in our dining room.
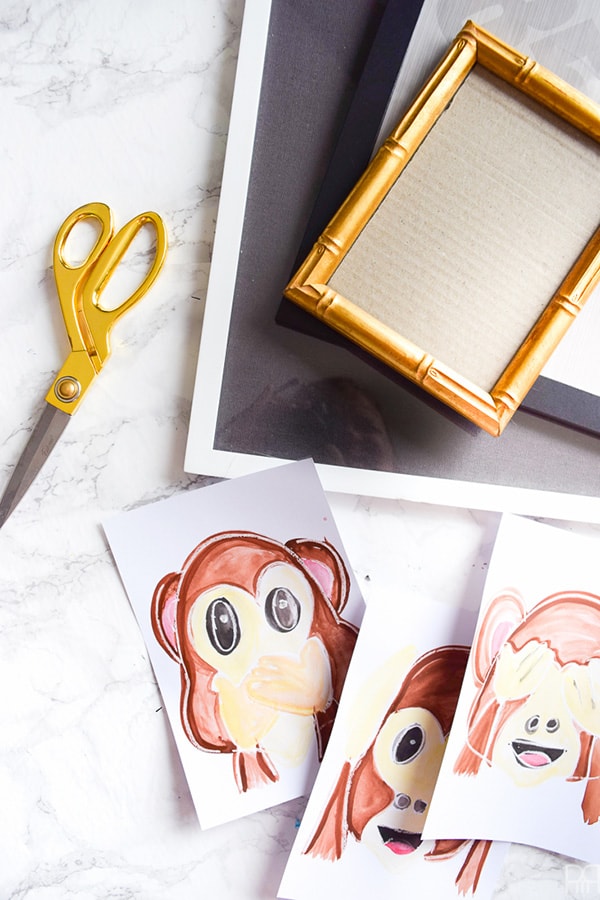
I chose to mix and match frames since the set were going to be scattered throughout the house anyways, but you ould just as easily match them all. I’ll be circulating them around the house as the seasons change, but one thing’s for sure – they’re too cute! And they’ve got me thinking about what other emojis I might paint 😉
Thank you again, PMQ for Two! I love the whimsy of these fun Watercolor Emoji prints. Be sure to head over to Ariel’s site and give her some Delineate Your Dwelling love!
You can also follow along with her here!
Blog | Instagram | Pinterest | Facebook | Twitter

These are so cute! Good luck with your move!
Thanks so much, Kathy! You are probably a moving pro. 😉
These are so cute! The monkey emojis are definitely some of my faves
I’ve never used watercolors! What a helpful tutorial!
Watercolors can be tricky but this tutorial definitely makes it easier!!