DIY Fringed Tissue Paper Banner
INSIDE : Learn how to make a Tissue Paper Banner as a fun DIY party decor item! See the quick steps to help add festive wonder to your next party while using tissue paper.
This post may contain affiliate links. See full disclosure here.
This post has been updated since it’s original June 2016 publish date.
Parties, I love dreaming up party ideas. I love creating and I love executing them. And when I can do all of that on a budget, it’s even better!!
I’ve also loved hosting these parties…
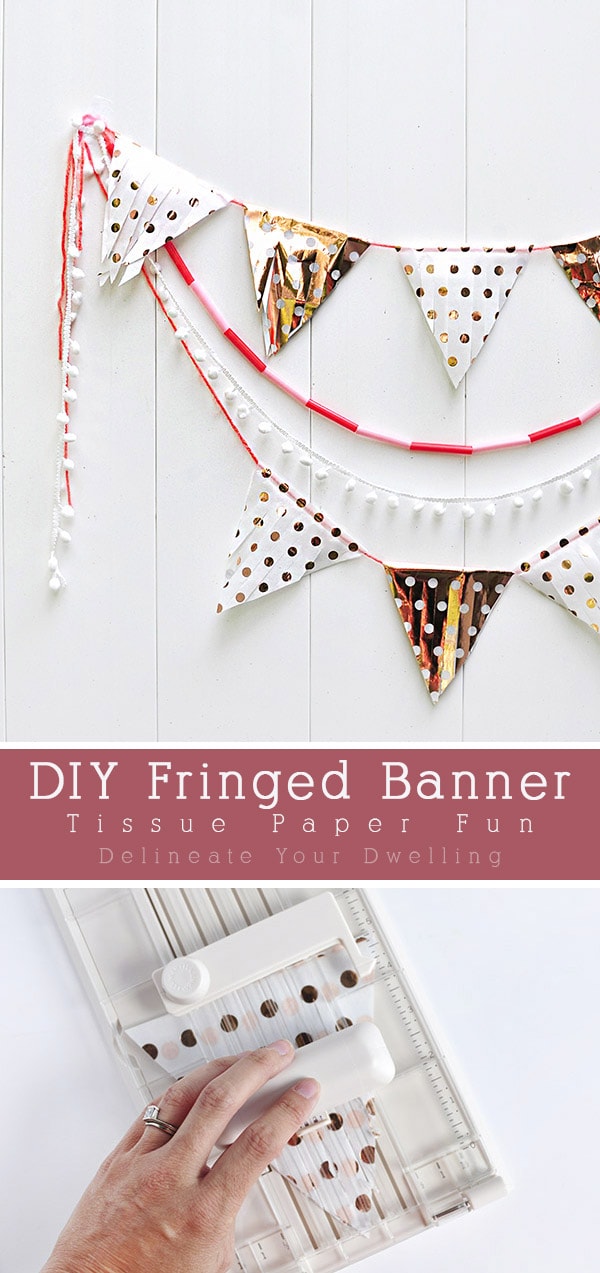
Today, I am sharing my next 12MonthsofMartha post on how to create the cutest DIY Fringed Tissue Paper Banner in practically no time at all!
How much does a DIY Paper Banner cost to make?
Adding all of this fun texture and color are the perfect party touch! And making your own DIY banner is so cost effective. Most of the materials I used for this project were from my home, so this little fringed tissue paper banner cost me under $16!
However, if you don’t already have all these supplies here is the breakdown.
- Polka Dot Tissue Paper $11
- Martha Stewart Fringe Cutting Tool $8
- Plastic IKEA Straws $8
Looking for more creative Martha Stewart projects? Check out the 20+ crafts I've made using her amazing supplies!
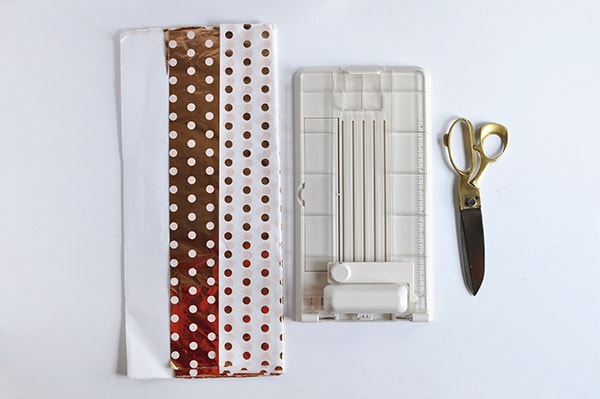
What supplies do you need to make a Paper Banner DIY?
Polka Dot Tissue Paper
Martha Stewart Fringe Cutting Tool
Gold Scissors
Yarn
Plastic IKEA Straws
Scotch Tape
How to make a Banner out of tissue paper
To make a paper banner, first off determine the total length you want and/or need for your Tissue Paper Banner.
Next, fold the Tissue Paper in half – leaving the top where the fold is “as is”. Then, cut out triangle shapes.
Once you have all your folded tissue paper triangle shapes cut out (see image below), insert 4-6 sheets of tissue paper into your Martha Stewart Fringe Cutting Tool.
Read directions on changing the fringe dimension. The fringe cutting tool is very simple to use and now I am ready to fringe everything in sight! You can also use fringe scissors for this task.
Fringe your tissue paper accordingly, but make sure to leave the top 2″ at the fold, “un-fringed”.
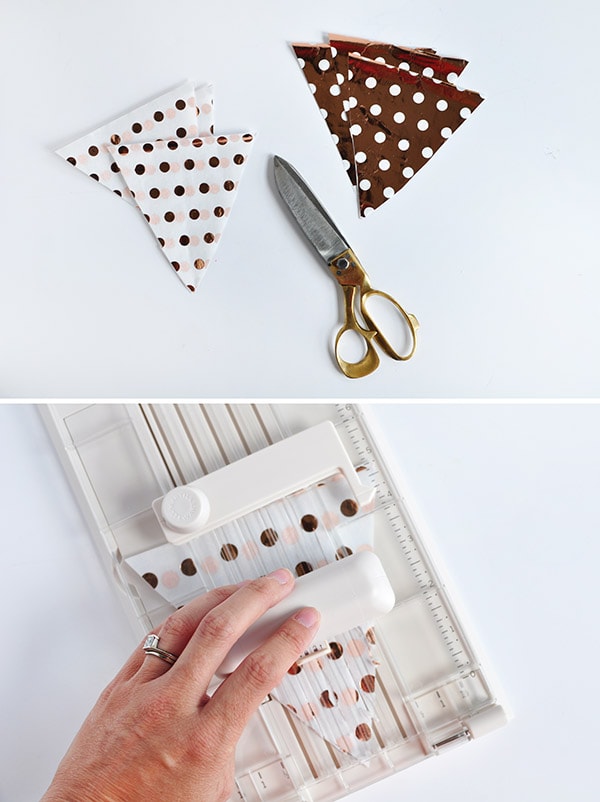
Tissue Paper Triangles
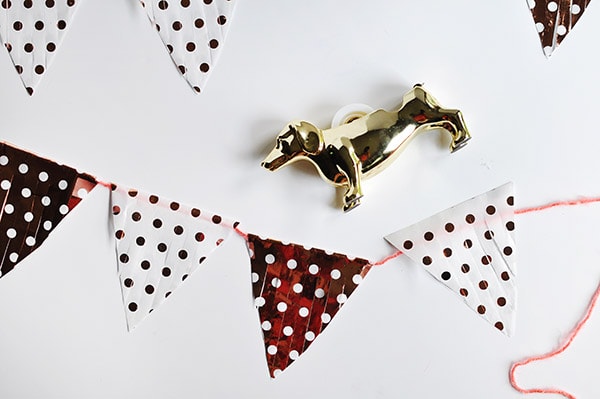
You are now left with lovely little fringed folded triangles, so it’s time to get on making that banner!
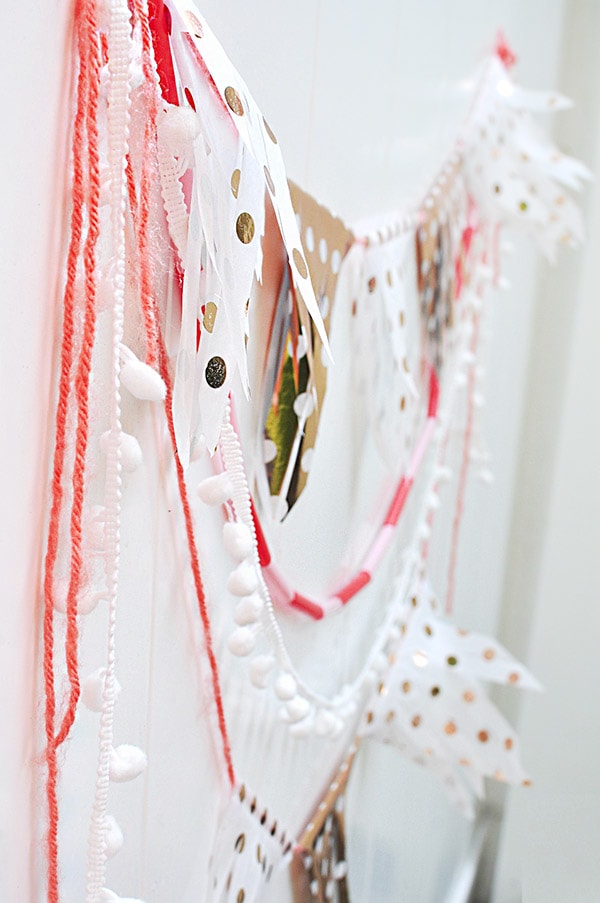
I wanted the yarn and embellishments to be the main pop of color, so I choose a pretty coral pink colored yarn for the banner string.
Simply open your tissue paper triangles and tape the yarn inside and fold the triangles back over.
DIY Banner
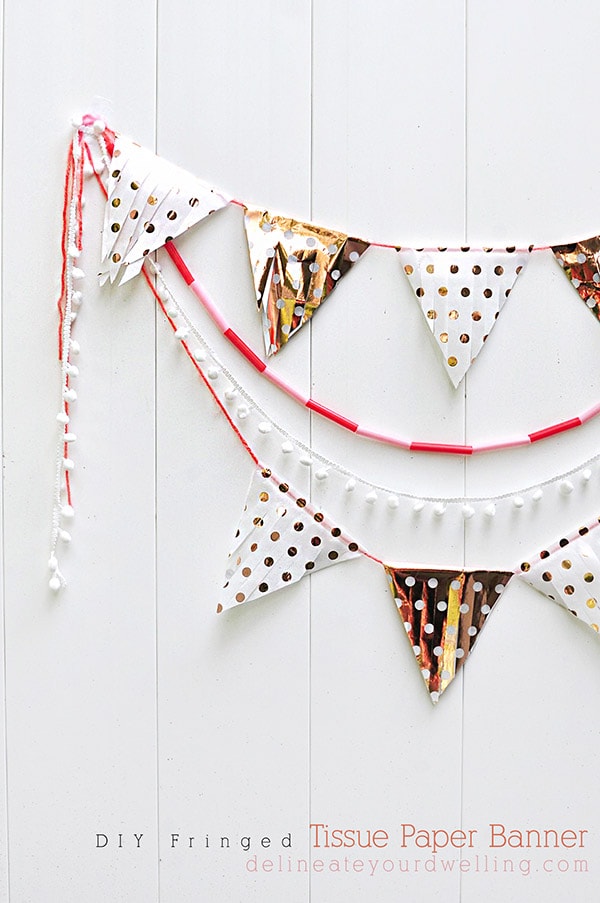
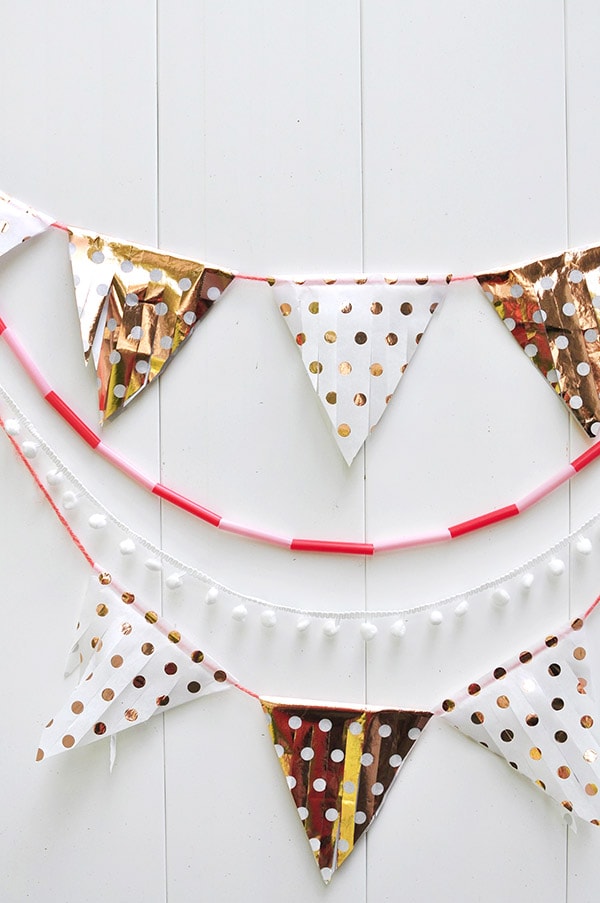
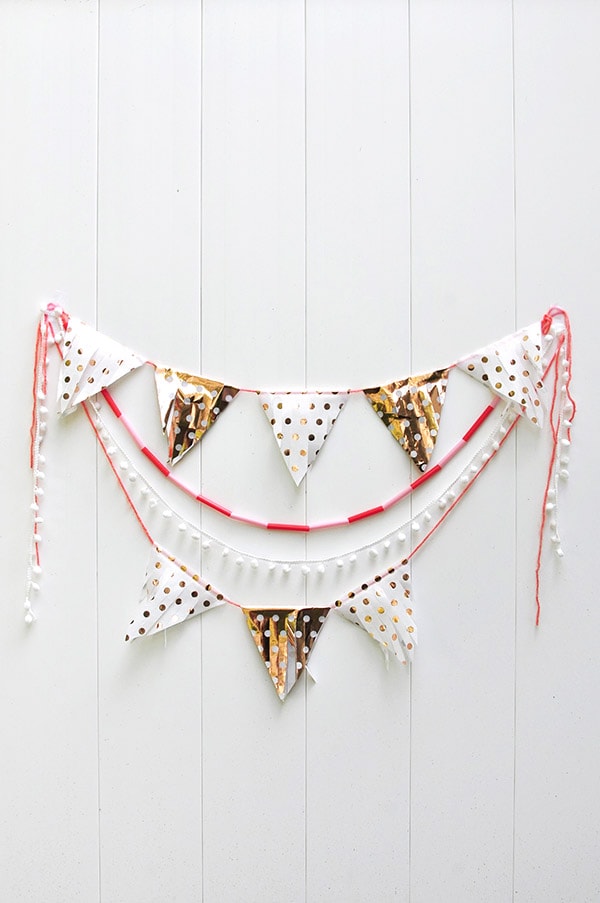
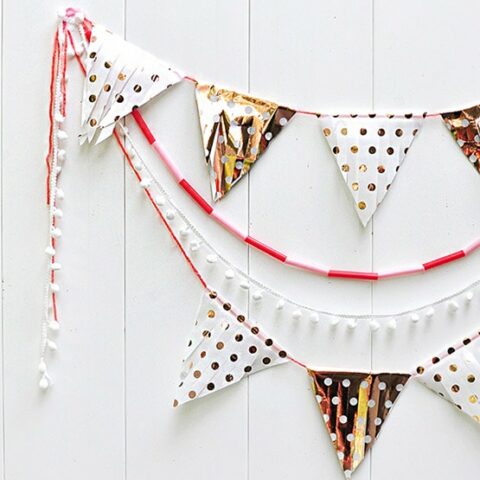
Your diy banner is now completed! I love the look of layering a few different styles of banners, so I made two paper banner strands and hung them at different heights.
Then I added in pink and red straws that I strung together on yarn for another very simple diy banner. And lastly, I added in a white pom pom string from Target’s dollar section for the final party touch.
DIY Fringed Tissue Paper Banner
Learn how to make a Tissue Paper Banner as a fun DIY party decor item! See the quick steps to help add festive wonder to your next party while using tissue paper.
Materials
- Polka Dot Tissue Paper
- Fringe Cutting Tool
- Gold Scissors
- Yarn
- Plastic IKEA Straws
- Scotch Tape
Instructions
- Begin by determining the total length you need for your Tissue Paper Banner. Fold the Polka Dot Tissue Paper in half, leaving the top where the fold is as is, cut out triangle shapes.
- Once you have all your folded tissue paper triangle shapes cut out, insert 4-6 sheets of tissue paper into your Fringe Cutting Tool.
- Read the directions on changing the fringe dimension. The cutting tool is very simple to use and think I am ready to fringe everything in sight now! Fringe your tissue paper accordingly but leave the top 2″ at the fold, un-fringed.
- I made two banner strands by taping the folded triangles together over some cheerful yarn. Then, hang them at different heights.
- Then add in pink and red straws that I strung together. And lastly, added in a white pom pom string from Target’s dollar section.
Interested in the other 12 Months of Martha projects I’ve done?
Thank you to Martha Stewart for supplying the craft materials used on this project. From the brushes to the paints, as you can imagine, Martha sells only the highest quality products and I love them!
Very cute banner. Love the addition of the straw and pom poms! Visiting from Create It Thursday party.
Thanks Victoria! I love easy layering for parties… it always makes the decorations seem more fancy when really they aren’t! 😉
I just love all this texture!
So pretty and love the touch of the pom-pom trim! Did you have any issue with your tissue paper ripping? I’ve had trouble using mine with tissue paper but it works great with cardstock and mylar. I read if you sandwich the tissue paper between two pieces of copy paper and then put it in the fringe too. I tried it and it helps!
I did notice some small ripping when I only used a few sheets of tissue paper. I’m excited to try it using a heavy paper now! =)
This is just oh so perfect, Amy! That fringe cutter looks really neat. So much easier than cutting them with scissors!
I can’t wait to try a little thicker paper next time! But yes, this fringe cutter was a cinch to use!