Chalkboard Headboard
INSIDE : Create a one of a kind Chalkboard Headboard to greet your guests and add a little interest to your guest room! This simple craft project is sure to wow all who enjoy it.
This post contains affiliate links. See my full disclosure.
This post has been updated since it’s original publish date of September 2014.
Today’s post is a continuation of my Office + Guest Room makeover. I already have shared the plan for the room. There have been so many smaller DIYs and crafts within the space that each week I am sharing a new project. This week’s project is my DIY Guest Room Chalkboard Headboard.
As I mentioned in previous posts, I had dreamt up huge plans for the wall behind our guest bed. While I am the dreamer/creator, my hubs is the thinking/analyzer. We make a good team in the end, sometimes it just takes a while to get there.
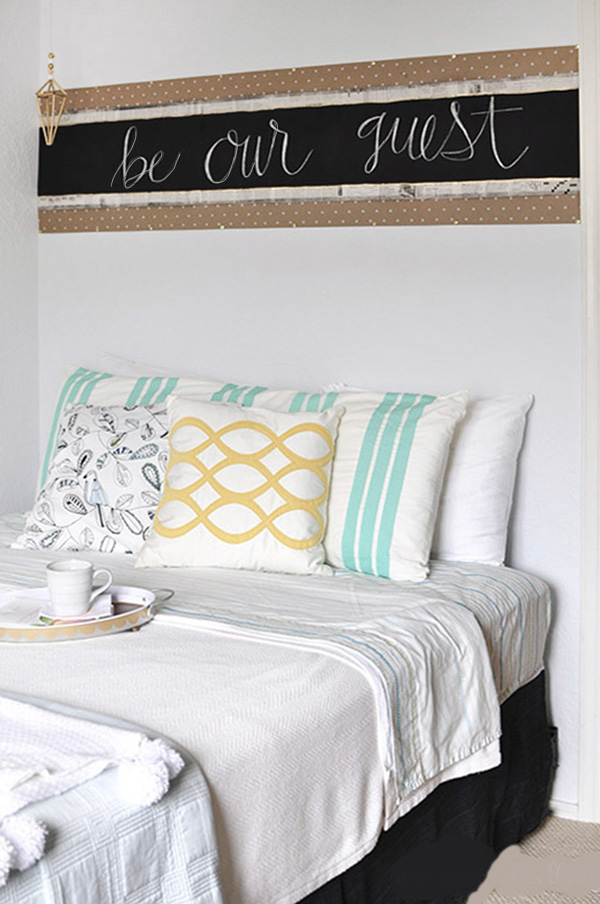
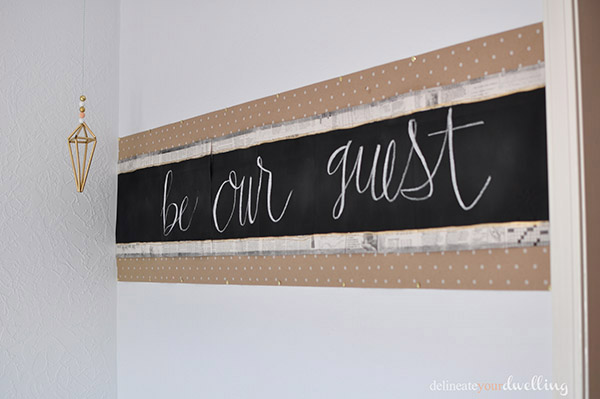
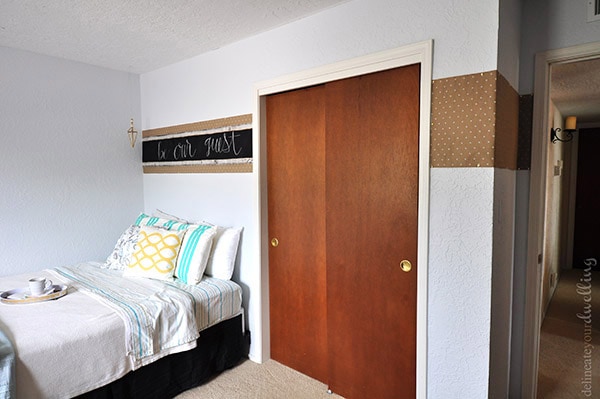
He is all about resale value and didn’t think a wall of mint green shingles or an entire chalkboard bedroom wall was a great idea. So, I decided on an easily removable but very fun layered chalkboard “headboard” of sorts.
Check out all the projects that have happened thus far…
GUEST ROOM + OFFICE UPDATES
What supplies do I need to create a DIY Chalkboard Guest Room Headboard?
The materials for making this chalkboard headboard were simple.
- Newspaper
- a background Brown Craft paper
- chalkboard spray paint
- frog Painters tape
- stapler
- gold foil paint pen
- gold thumbtacks
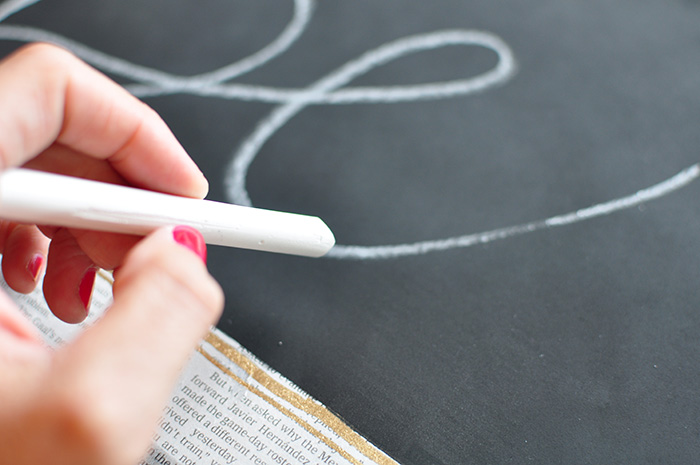
- White chalk
How to make a DIY Signage Headboard
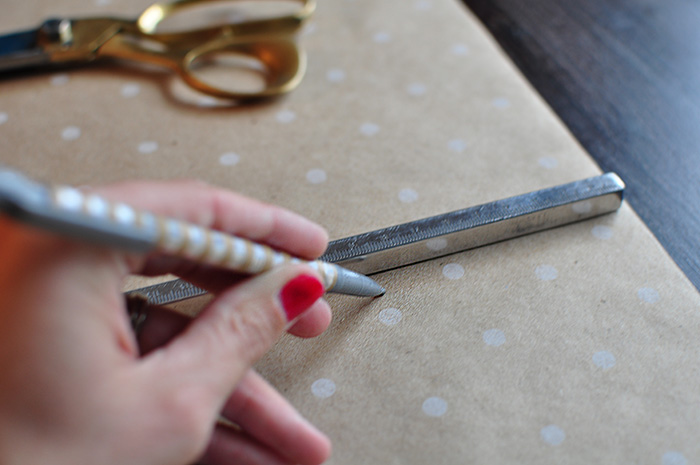
I bought my background craft paper at Target in the wrapping paper section. Start off by measuring the length you need and cutting it to size.
Next sort through your newspaper to find the perfect “non threatening” newspaper articles. No guests wants to lay in bed at night with the latest DUI arrests shown above them, yikes.
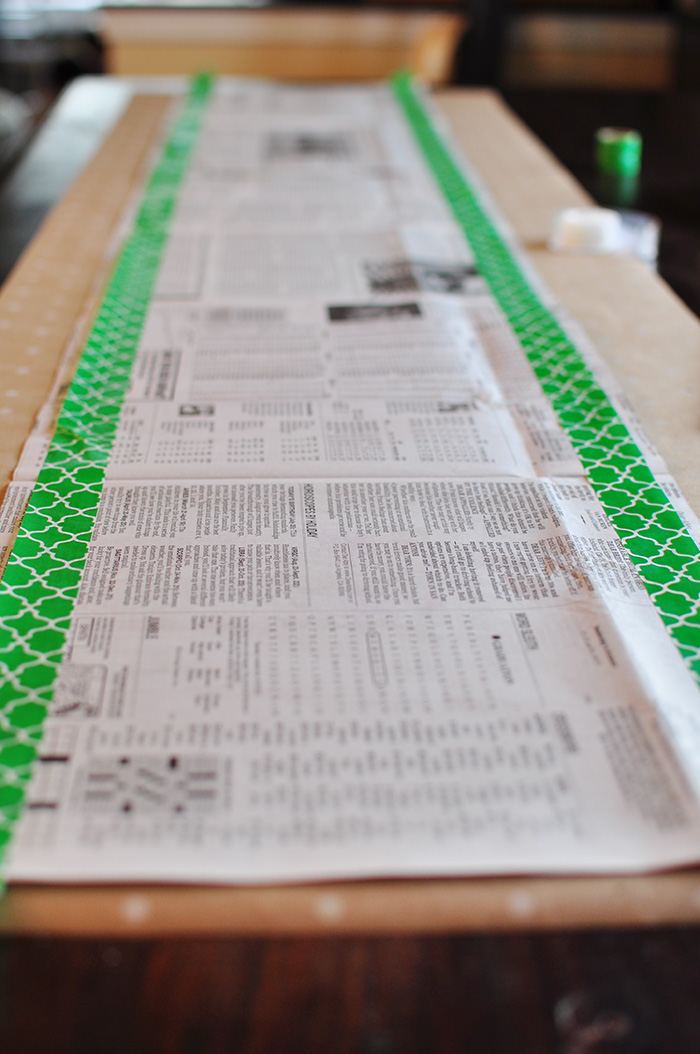
I marked where I wanted the newspaper to go, cut it down to size and staple all the sheets together in a single line.
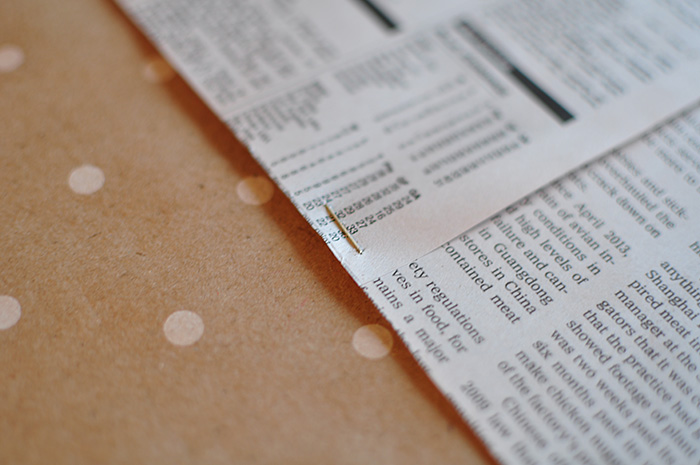
Using double sided tape for securing the center of the newspaper to the background paper worked great. On the top and bottom edges I used staples again just to be safe.

Then with a VERY light touch I applied painter’s tape to mark off where I wanted the chalkboard to stay within.
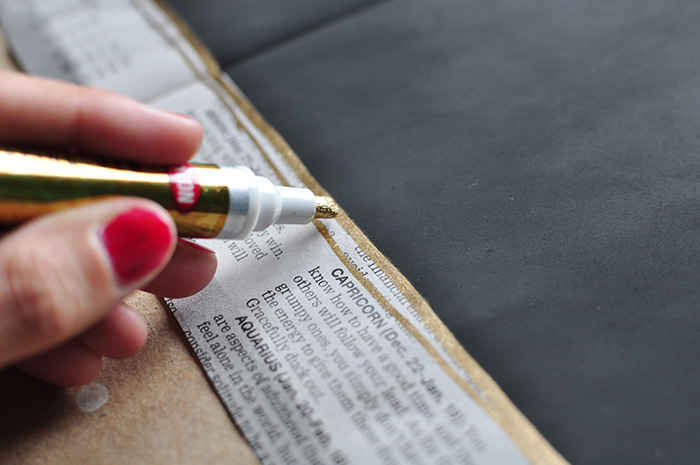
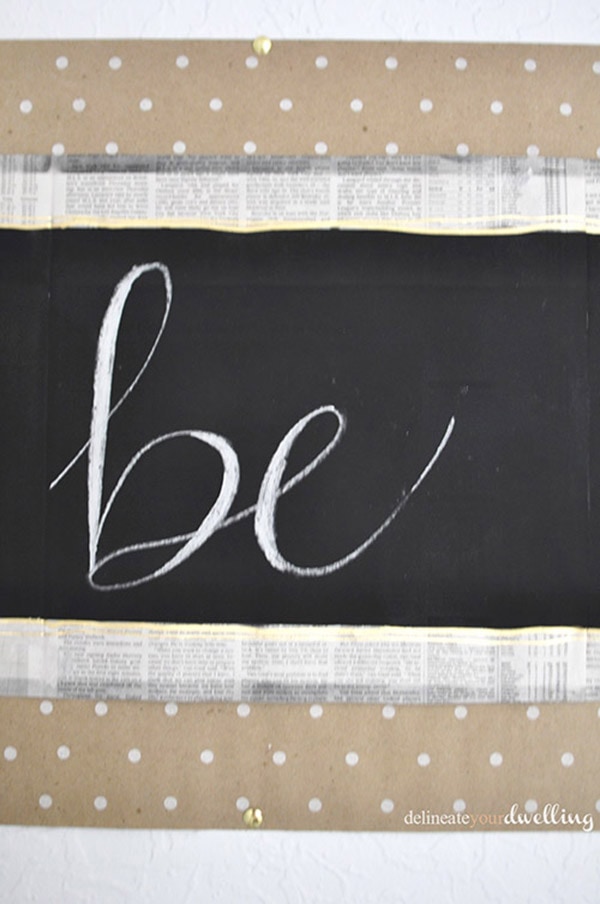
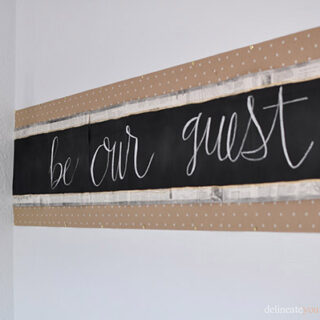
Using my ever handy gold foil paint pen, I outlined the chalkboard once it had dried for some extra gold shimmer.
Then I practiced about a million times what I wanted my handwriting to look like and with chalk in hand, I went to town with my “be my guest” phrase!
Hanging your chalkboard headboard on the wall
Once everything was dried and chalked, it was time to hang it on the wall.
Placement was important because I wanted it to have the appearance of a headboard, but it definitely needed to be high enough that if someone were sitting up in bed, their head would not actually rub off the chalk. This was a two person job.
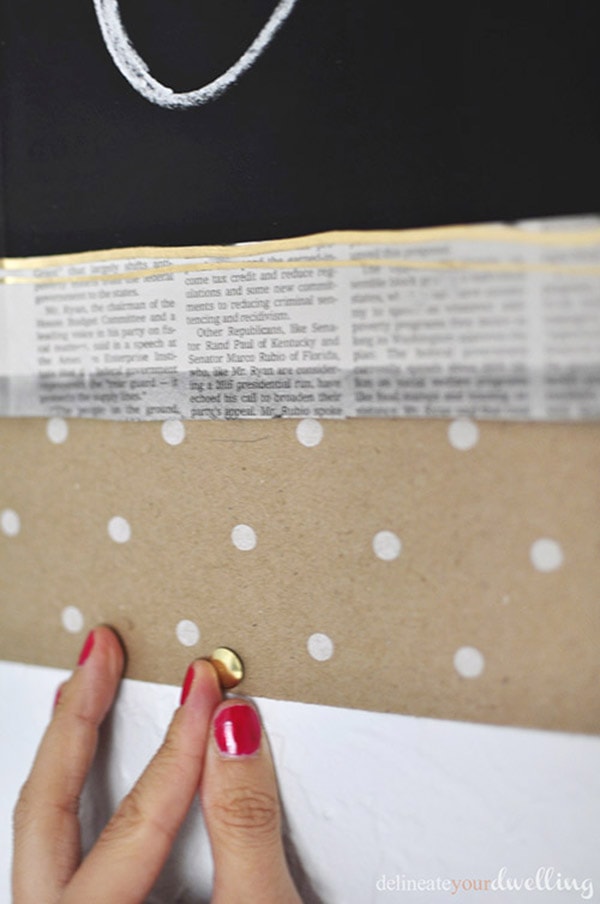
Gold thumbtacks along the top and bottom at about 8″ spacing is what is holding the headboard to the wall. Temporary yet secure (and pretty).
My paper loving self was doing a happy dance when it all came together.
I hung my Prisma Wall Hemmili wall decor right above the chalkboard. Just the perfect touch!
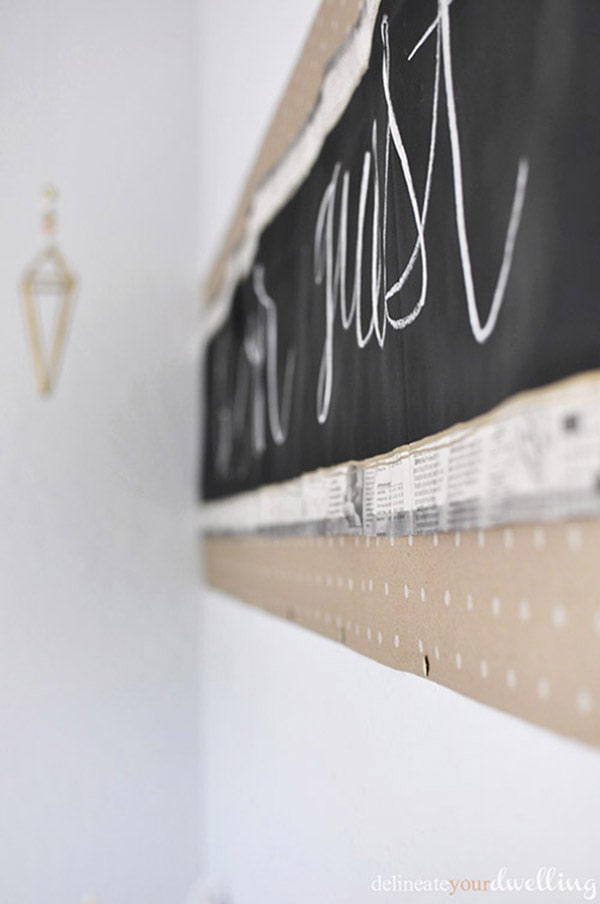
The final detail to this project was my continuation of the background paper across the not so pretty closet doors and around the corner. As I always say, it’s all in the little details!
DIY Chalkboard Headboard
Create a one of a kind Chalkboard Headboard to greet your guests and add a little interest to your guest room! This simple craft project is sure to wow all who enjoy it.
Materials
- Newspaper
- a background Brown Craft paper
- chalkboard spray paint
- frog Painters tape
- stapler
- gold foil paint pen
- gold thumbtacks
- White chalk
Instructions
- Start by measuring the length you need to create a headboard for your bed size and cut your main craft paper to size.
- Next sort through your newspaper to find the perfect “non threatening” newspaper articles to create the chalkboard section.
- Staple all the newspaper sheets together in a single line.
- Using double sided tape, secure the center of the newspaper to the background paper. On the top and bottom edges I used staples again just to be safe.
- With a VERY light touch, apply painter’s tape to mark off where you want to keep the chalkboard paint.
- Using a gold foil paint pen, outline the chalkboard area once it has dried for some extra gold shimmer.
- Once everything was dried, write out your chalk message.
- Placement on the wall is important because you want it to have the appearance of a headboard, but it needs to be high enough that if someone were sitting up in bed, their head would not actually rub off the chalk. Hanging is a two person job.
- Place gold thumbtacks along the top and bottom at about 8″ spacing to secure.
- Step back and enjoy!
DIY Be our Guest headboard
I’m thrilled with how this turned out.
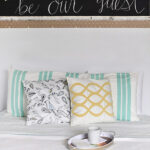
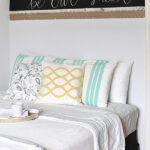
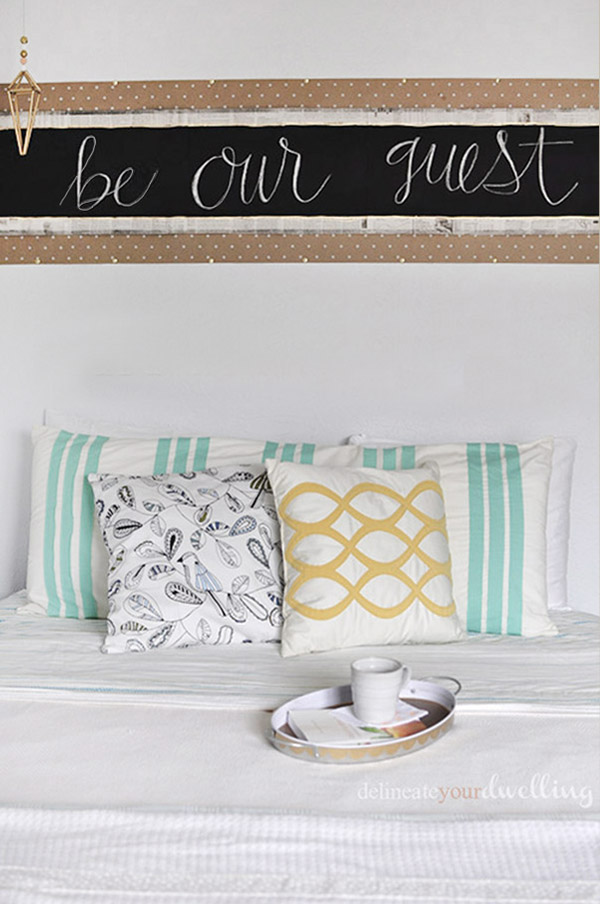
Then I made the bed with simple white bedding and a touch of mint green, black, white and yellow throw pillows for the final look!
Want to see some of the creative crafts I used in this room?
- Pom Pom Throw Blanket
- How to paint a Gold and White Striped Trunk
- Geometric Thread Box
- How to wrap an open light fixture cord
- Desk Lamp revival
- Cassette Case turned Memory Box
- How to update an Old Fan
- Colorful Clay Animal Heads
- Pineapple Washi Tape Print
- Painted Mason jars
- Today Be Happy Banner
- Painted Geometric Blocks
- Stop Pinning Start Making Chair Update
- Mini Copper Shelves
- Geometric Clay Jar
- Tree Stump Chalkboard